Clean and Simple Christmas Joy

by Joanne James20. November 2016 09:00

It's Sunday and time for a new challenge over at The Paper Players! It's the turn of my sweet friend Claire to host this week and she has a fun clean and simple challenge for you to work with:


I was inspired by a few other challenges too for my cards today - yes, not one, not two but three cards to share with you! The challenge over at Fusion has a great inspiration photo (you can see it below as the card that I am entering for this challenge is further down the post) that led me to use the 'Joyful Nativity' Christmas set from the annual catalogue and with the Addicted to CAS challenge codeword is ombre and CAS Colours and Sketches calling for monochromatic blues, I dug out my Marina Mist, Dapper Denim and Night of Navy ink pads and set to work.

The genre of 'clean and simple' tends to be rather subjective and whilst my general style is definitely 'clean' it tends toward 'clean and layered' rather than 'clean and simple'. So today I decided to take the same basic idea and create both a clean and simple and a clean and layered card to illustrate the difference! So here's my first card, a simple one layer affair stamped on extra thick Whisper White cardstock:


I stamped the angel in the centre of my 'o', brushed the stamped areas with my clear Wink of Stella brush and added a metallic shape to the star to finish my card. Super clean and simple! I also made a second version of this card, this time adding in the secondary sentiment, stamped in Night of Navy:


For my final card, I created a clean yet layered card, using this week's sketch over at the Global Design Project:


I used a cardbase of Marina Mist and switched out the angel for the Bethlehem skyline, added a piece of in-colour envelope paper for my background layer and heat embossed my sentiment in silver onto a strip of Night of Navy cardstock:


All three of the cards have a beautiful shimmer as a result of the careful brushing with my Clear Wink of Stella which adds a gorgeous subtle sparkle in real life. So which one do you prefer? Do leave me a comment below - I'd love to hear your thoughts!

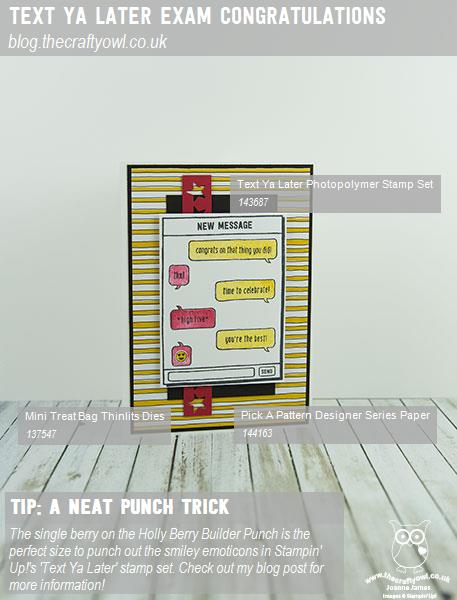
Here is the visual summary of the key products used on today's project for you to pin for easy reference:
 

You can see all of my 'How To' summaries on my 'How To - Tips and Techniques' Pinterest board in case you've missed any. 

Before you reach for your ink and papers, check out what our amazing team has created to inspire you this week:

The Paper Players Design Team
 
 
Here's a quick recap of our challenge rules:
 
1.  Create a new paper project
2.  Upload your creation to your blog with a link back to us and provide a direct link to the post featuring your challenge submission.
3.  Please link your card to no more than four challenges, TOTAL.
4.  Have FUN! 


I look forward to seeing your clean and simple cards this week. We are off for our usual Sunday morning of sport assuming the hockey pitch hasn't frozen with the sub-zero temperatures we've been having for the last couple of days, followed by lunch, some baking for a school bake sale this week and then a birthday party to attend for the youngest of the James Juniors, so another full-on Sunday!

Enjoy the rest of your weekend as it will be over all too quickly; I'll be back tomorrow with another project and news of an exciting new promotion for next week only; until then, happy stampin'!


Stampin' Up! Supplies Used:

Table built using Product Table Builder by The Crafty Owl - Independent Stampin' Up! Demonstrator.

Pretty Pines Christmas Home Decor Frame

by Joanne James13. November 2016 09:00

It's Sunday and time for a new challenge over at The Paper Players! It's my turn to host this week and I have a colour challenge for you to work with:


I have another Pretty Pines project for you today, but a 3D project for a change as opposed to a card. I made this home decor frame to showcase these fabulous dies - and adorn my home during the festive season of course! Take a look:


Here's the low-down on today's project:

Pretty Pines - I love these dies and they are perfect to create festive embellishments for cards, gift packaging or a home decor project such as this one. I focused on the pine needles, berries and mistletoe pieces to make my wreath - not a pinecone in sight - as I wanted to stick to my red, green and white colour scheme. Using the Big Shot Precision Base Plate and the die brush also made light work of removing the pieces from the framelits. I added a bow in Real Red stitched edge ribbon as a finishing touch:

A Joyful Christmas and a Wonderful Year - I chose the Joyful Christmas sentiment from the 'Wonderful Year' stamp set as the focal point for my frame. This is the perfect sentiment for this frame, which I am intending to display in my hallway to welcome guests over the festive season.

Ombre, Ombre - I stamped my focal sentiment in Emerald Envy using the ombre stamping pad for added interest. I love the gradation of colour you get with these stamp pads and they really are so easy to use.

Here is the visual summary of the key products used on today's project for you to pin for easy reference:
 

You can see all of my 'How To' summaries on my 'How To - Tips and Techniques' Pinterest board in case you've missed any. 

Before you reach for your ink and papers, check out what our amazing team has created to inspire you this week:

The Paper Players Design Team
 
 
Here's a quick recap of our challenge rules:
 
1.  Create a new paper project
2.  Upload your creation to your blog with a link back to us and provide a direct link to the post featuring your challenge submission.
3.  Please link your card to no more than four challenges, TOTAL.
4.  Have FUN! 

I look forward to seeing what you create with my colour choices this week. We are doing something a little different in terms of sporting pursuits today: Ben is off for his usual session of basketball, however Rebecca is going to be at the swimming pool bright and early as she is participating in a sponsored swim in aid of For Zachary, a charity set up in memory of a little boy who lived for only 69 days before dying from a rare neonatal lung disease. The swimmers are aiming to cover a distance of 69km in total, one kilometre for each day of young Zachary's life - and Rebecca is aiming to swim just over 3km herself. That will be no mean feat! She is still collecting sponsorship, so if you're reading this and you would like to sponsor her, here is the event's JustGiving page - many thanks and I''l let you know how she gets on.

Enjoy the rest of your weekend as it will be over all too quickly; I'll be back tomorrow with another project; until then, happy stampin'!


Stampin' Up! Supplies Used:
Table built using Product Table Builder by The Crafty Owl - Independent Stampin' Up! Demonstrator.

Petals and Paisleys Thankful Card

by Joanne James6. November 2016 09:00

It's Sunday and time for a new challenge over at The Paper Players! It's the turn of the lovely Laurie to host this week and she has a timely theme challenge for you to work with:


 Ultra clean and layered today (no surprise there then!) - I chose to showcase a wonderful sentiment and some fabulous paper on my card today - here it is:


Here's the low-down on today's card:

Petals and Paisleys - I chose to use one of the 'busy' papers from the Petals and Paisleys Specialty Designer Series Paper on my card today - a bold colour scheme with lots going on, so definitely a paper that needs to be allowed to shine on its own. 

I Am Blessed - Some lovely paisley stamps in the Paisleys and Posies stamp set, however it also contains great sentiments and this one is perfect to make a statement of thankfulness. I cropped mine with the Layered Ovals Framelits and backed with a scalloped oval, and a simple folded ribbon detail to tie the whole thing together.

A Rich Autumnal Colour Combination - There are so many wonderful colours in these papers - I focused in on Delightful Dijon, Night of Navy and the addition of Rich Razzleberry to emphasise the rich colours of the season. Feel free to save this combination if it appeals to you too:


Here is the visual summary of the key products used on today's project for you to pin for easy reference:


You can see all of my 'How To' summaries on my 'How To - Tips and Techniques' Pinterest board in case you've missed any. 

Before you reach for your ink and papers, check out what our amazing team has created to inspire you this week:

The Paper Players Design Team
 
 
Here's a quick recap of our challenge rules:
 
1.  Create a new paper project
2.  Upload your creation to your blog with a link back to us and provide a direct link to the post featuring your challenge submission.
3.  Please link your card to no more than four challenges, TOTAL.
4.  Have FUN! 


I look forward to seeing what you create with this week's theme. As you read this I will be travelling back from a few days away at our regional Stampin' Up! Onstage event in Telford, no doubt bursting with ideas for the Spring and Summer season. Don't worry - I won't be sharing on my blog here for a while, I still have so many Christmas projects to share!

Enjoy the rest of your weekend as it will be over all too quickly; I'll be back tomorrow with another project as my normal blogging schedule will resume; until then, happy stampin'!


Stampin' Up! Supplies Used:

Table built using Product Table Builder by The Crafty Owl - Independent Stampin' Up! Demonstrator.

Oh What Fun Meets Warmth and Cheer

by Joanne James23. October 2016 09:00

It's Sunday and time for a new challenge over at The Paper Players! It's the turn of the lovely Jaydee to host this week and she has a great sketch for you to work with:


I decided to combine my card with the challenge over at Merry Monday and use some of the lovely plaids featured in the Warmth and Cheer designer series paper stack. I actually made two cards for today's challenge and couldn't decide which one I liked best, so thought I'd share them both! Here's my first card:


Here's the low-down on today's card:

Warmth and Cheer - Both of my warm plaids are from the Warmth and Cheer designer series paper pack, which is choc full of great plaid patterns that work for both autumnal and Christmas cards. Here I've combined two of the plaid patterns, each featuring Cherry Cobbler, for my vertical panel and mat. 

Oh What Fun - I was prompted to use this sentiment from the 'Oh What Fun' set following a conversation with one of my team members this week. This set is choc-full of great sentiments and having featured in last year's seasonal catalogue this year has made the transition to the annual catalogue. It was perfect for my card today, allowing me to ink up each half with Delightful Dijon and Cherry Cobbler markers on a 1 3/4" punched circle and separated by a fussy cut Cherry Cobbler banner. 

Dijon Doily - To finish I added a 2015-17 In-Color Doily in Delightful Dijon behind my circle sentiment. I often forget to use doilies yet I like the added detail it adds to my circle here without being overly fussy, clean and simple person that I am! 

Here's the second card that I made - this one has a few less layers and features only one piece of plaid, along with a couple of metallic sequins:


Lastly, here is the visual summary of the key products used on today's project for you to pin for easy reference:


You can see all of my 'How To' summaries on my 'How To - Tips and Techniques' Pinterest board in case you've missed any. 

So which one of today's cards do you prefer? Do leave me a comment below with your thoughts - I love reading them!

Before you reach for your ink and papers, check out what our amazing team has created to inspire you this week:

The Paper Players Design Team
 
 
Here's a quick recap of our challenge rules:
 
1.  Create a new paper project
2.  Upload your creation to your blog with a link back to us and provide a direct link to the post featuring your challenge submission.
3.  Please link your card to no more than four challenges, TOTAL.
4.  Have FUN! 


I look forward to seeing what you create with this week's sketch.

Back tomorrow with another project; until then, happy stampin'!


Stampin' Up! Supplies Used:

Table built using Product Table Builder by The Crafty Owl - Independent Stampin' Up! Demonstrator.

Halloween Scenes in Orange and Green

by Joanne James9. October 2016 10:00

It's Sunday and time for a new challenge over at The Paper Players! It's the turn of the super-talented Sandy to host this week and she has a great fall/Halloween-inspired colour palette for you to work with:

    TWO WEEK - Paper Craft Crew Sketch 214!    You are invited to play along with this weeks sketch.  Open to ANY products.  www.papercraftcrew.com

Having missed Claire's Halloween themed challenge last week, I decided to take Sandy's colours and use them for a fun Halloween card this week; take a look:


I also used this week's sketch over at The Paper Craft Crew's Challenge for my layout. Here's the low-down on today's card:

A Halloween Scene - I used my Spooky Fun stamp set and co-ordinating Halloween Scenes Edgelits Dies to create the spooky scene on my card. I used my Layered Circle Framelits to cut a Whisper White circle for my oversize moon, then used the spooky tree and witch framelits to give my scene structure. I just love that tree - it reminds me of the whomping willow in the Harry Potter books!

A Wicked Witch - I decided to use the green on my card for the sentiment banner and the witch - after all, aren't all wicked witches green?! I stamped it in black on to Wild Wasabi cardstock and then coloured in some of the detail with my black Stampin' Write marker.

Background Detail - I used the wash stamp in the Perpetual Calendar stamp set for the orange detail on my card base beneath my strip of Halloween Nights designer series paper and added in a couple of spooky fun bats, some sequins and silver metallic thread to complete my card.

Here is the visual summary of the key products used on today's project for you to pin for easy reference:


You can see all of my 'How To' summaries on my 'How To - Tips and Techniques' Pinterest board in case you've missed any. 

Before you reach for your ink and papers, check out what our amazing team has created to inspire you this week:

The Paper Players Design Team
 
 
Here's a quick recap of our challenge rules:
 
1.  Create a new paper project
2.  Upload your creation to your blog with a link back to us and provide a direct link to the post featuring your challenge submission.
3.  Please link your card to no more than four challenges, TOTAL.
4.  Have FUN! 


I look forward to seeing what you create with this week's colours. 

Back tomorrow with another project; until then, happy stampin'!


Stampin' Up! Supplies Used:

Table built using Product Table Builder by The Crafty Owl - Independent Stampin' Up! Demonstrator.

Merry Mice Fancy Frost Carol Singer

by Joanne James27. September 2016 07:00

As promised on Sunday, I have another mouse card today using the same stamp set and layout that I used yesterday, based on my sketch this week over at The Paper Players but using an alternative colour scheme and feature paper:


You can see yesterday's card here. Now for today's card:


Here's the low-down on today's card:

Merry Mouse - Once again I featured the carol-singing mouse from the 'Merry Mice' set on my panel. This time I stamped him on Extra thick Whisper White in Archival grey ink and coloured him with inks and my aquapainter. I added a liberal does of clear Wink of Stella and stamped my sentiment directly onto the panel just below.

Fancy Frost - For my background panel, I used a piece of the new Fancy Frost Specialty Designer Series Paper. Over the past several years, Stampin’ Up! has released several white-on-white specialty papers that come with a clear, heat-embossed pattern.  This paper is different – this paper is dry-embossed (the paper is pressed from one side to create a design you can easily run you finger over).  The patterns are quite beautiful and whether you add ink or leave it as-is as I've done on my card today, this paper is going to be a firm favourite; check out this zoom in on the detail of that gorgeous pattern:


Cool Colours - Unlike yesterday's bold colours, I chose to use cooler colours on my card today, with Whisper White for my card and base panel, along with some silver glimmer paper and some clear Wink of Stella with my Smoky Slate mouse. Feel free to save this colour combination if it appeals to you too:


Here is the visual summary of the key products used on today's project for you to pin for easy reference:


You can see all of my 'How To' summaries on my 'How To - Tips and Techniques' Pinterest board in case you've missed any. 

I must confess I prefer today's card to yesterday's; it was my original choice for the challenge, but I was struggling to photograph the detail of the Fancy Frost Specialty paper and without it the card looked rather plain, whereas in real life it has a real 'wow'. Which of the two cards when compared do you prefer? Do leave me a comment below and share your thoughts.

I'll be back tomorrow with another project; until then, happy stampin'!


Stampin' Up! Supplies Used:

Table built using Product Table Builder by The Crafty Owl - Independent Stampin' Up! Demonstrator.

Tags: , , , , , , , , ,

Merry Mice Christmas Carol Singer

by Joanne James25. September 2016 10:00

It's Sunday and time for a new challenge over at The Paper Players! It's my turn to host this week and I have a great sketch for you to work with:


This is one of my 'go to' layouts; I used it most recently on this card here. It works for so many designs. I decided today to use one of the cute little mice from the 'Merry Mice' set. Here's my card:


Here's the low-down on today's card:

Merry Mouse - I featured the carol-singing mouse from the 'Merry Mice' set on my panel. I stamped him on Very Vanilla in Archival black ink and coloured him with inks and my aquapainter. I added a few pearl snowflakes and stamped my sentiment directly onto the panel just below.

Music This Christmas - For my background panel, I used the music paper from the This Christmas Specialty Designer Series Paper. This is one of the great reverse patterns in this pack, that works for Christmas but will also come in handy for other cards too. This is the perfect background to compliment my festive carol singer.

Primary Colours - I chose to use Pacific Point for my card and panel base today, along with some Real Red baker's twine and a little Emerald Envy green too with my Tip Top Taupe mouse. The blue is not a colour that I normally use on a Christmas card, but I think it works. Feel free to save this colour combination if it appeals to you too:

Here is the visual summary of the key products used on today's project for you to pin for easy reference:


You can see all of my 'How To' summaries on my 'How To - Tips and Techniques' Pinterest board in case you've missed any. 

This is one of those sweet little cards that you could stamp a whole bunch of then colour in at your leisure - produce a whole bunch of Christmas cards and get some relaxation therapy into the bargain! I actually created a second version of this card too which is quite different that I will share with you tomorrow.

Before you reach for your ink and papers, check out what our amazing team has created to inspire you this week - their cards are varied and awesome:

The Paper Players Design Team
 
 
Here's a quick recap of our challenge rules:
 
1.  Create a new paper project
2.  Upload your creation to your blog with a link back to us and provide a direct link to the post featuring your challenge submission.
3.  Please link your card to no more than four challenges, TOTAL.
4.  Have FUN! 


I look forward to seeing what you create with this week's sketch. We are off to basketball today and have plans for an otherwise restful day before the busy week ahead. Enjoy your Sunday - I'll be back tomorrow with another project; until then, happy stampin'!


Stampin' Up! Supplies Used:

Table built using Product Table Builder by The Crafty Owl - Independent Stampin' Up! Demonstrator.

Fall Treats With The Halloween Night Suite

by Joanne James18. September 2016 10:00

It's Sunday and time for a new challenge over at The Paper Players! It's the turn of the lovely Laurie to host this week and she has a great clean and simple theme for you to work with:

    ppa-318-sep15

I toyed with some time about my card this week: pumpkins, apples, acorns - what to choose? I browsed through my new goodies and when I happened across this pumpkin patterned DSP hidden away in the Halloween Night Specialty pack, I knew what I wanted to do. I also used this week's sketch over at Pals Paper Arts for my layout today. Here's what I came up with:


Here's the low-down on today's card:

Not Just for Halloween - Whilst many of the papers in the Halloween Night Specialty Designer Series Paper Pack are overtly Halloween-inspired, this pattern of watercoloured pumpkins can also be used on more general Fall projects, as can the spotted paper I used for my banner and the stripes and checked patterns in the pack. This paper became the starting point for my card.

Spooky Pumpkin Fun - My layered square was the perfect place for my sentiment from the 'Spooky Fun' stamp set, along with a popped up trio of pumpkins, coloured with my Pumpkin Pie ink and a blender pen and cut out with the co-ordinating Halloween Scenes Edgelits Dies.

Festive Fall Colours - The colour scheme for today's card comes straight from the Halloween Night DSP: the warm orange tones of Pumpkin Pie, contrasted with Basic Black, Whisper White and Smoky Slate. More Halloween than Fall granted, but by emphasising the warmth of the orange, I think it works. Feel free to save this colour combination if it's one you'd like to try:

Here is the visual summary of the key products used on today's project for you to pin for easy reference:


You can see all of my 'How To' summaries on my 'How To - Tips and Techniques' Pinterest board in case you've missed any. 

Before you reach for your ink and papers, check out what our amazing team has created to inspire you this week:

The Paper Players Design Team
 
 
Here's a quick recap of our challenge rules:
 
1.  Create a new paper project
2.  Upload your creation to your blog with a link back to us and provide a direct link to the post featuring your challenge submission.
3.  Please link your card to no more than four challenges, TOTAL.
4.  Have FUN! 


I look forward to seeing what you create with this week's CAS challenge. We have a day of sport and birthday parties today - we are most certainly back into the swing of things as far as the new school term is concerned!

Back tomorrow with another project; until then, happy stampin'!


Stampin' Up! Supplies Used:

Table built using Product Table Builder by The Crafty Owl - Independent Stampin' Up! Demonstrator.

Thoughtful Branches Autumn Leaf Trio

by Joanne James11. September 2016 10:00

It's Sunday and time for a new challenge over at The Paper Players! It's the turn of my good friend LeAnne to host this week and she has a great set of colours for you to work with:


I used the sketch over at TGIF Challenges for the layout of my card today. These colours screamed 'autumn' to me and I immediately reached for all my leaf sets! This is what I ended up with:  - take a look:


Here's the low-down on today's card:

Thoughtful Branches - I decided to use the leaf from the Thoughtful Branches stamp set as the focal point for my card today, stamped in Crushed Curry and with a little Cajun Craze added with a sponge dauber to create the variegated effect. I cut these leaves out with the co-ordinating Beautiful Branches thinlits dies and also cut out a few of the double-leafed stem in Pear Pizzazz, and snipped off a single leaf from each to place behind my stamped one. I love the pop of colour this diecut leaf adds, along with the addition of texture. Each of my leaf duos was backed with a 1 3/8" punched circle. Don't forget the Thoughtful Branches bundle is still available while stocks last - snap up yours if you haven't already before it's too late!

Petals and Paisleys Houndtooth - The centre panel of my card features another of the Petals and Paisleys Specialty Designer Series Paper designs, this time a Cajun Craze and Very Vanilla houndstooth pattern. This paper exudes warmth and adds interest without detracting from the leaves as the focal point.

Sentiment-Free - Today's card is one of those few that is sentiment-free, on the outside at least. I debated whether or not to run a horizontal sentiment banner across the front of the leaves instead of adding the burlap ribbon behind, or stamping one onto the base frame of the card, but in the end decided against it. I didn't want to disturb the symmetry or form of my leaves so kept with a clean, uncluttered front. This also means that I can add a sentiment of my choice when I come to send my card.

Here is the visual summary of the key products used on today's project for you to pin for easy reference:


You can see all of my 'How To' summaries on my 'How To - Tips and Techniques' Pinterest board in case you've missed any. 

Before you reach for your ink and papers, check out what our amazing team has created to inspire you this week:

The Paper Players Design Team
 
 
Here's a quick recap of our challenge rules:
 
1.  Create a new paper project
2.  Upload your creation to your blog with a link back to us and provide a direct link to the post featuring your challenge submission.
3.  Please link your card to no more than four challenges, TOTAL.
4.  Have FUN! 


I look forward to seeing what you create with this week's colours. I'm hoping for better weather today as I have some gardening jobs to see to - yesterday was so miserable, although it didn't dampen the spirits of Ben and his fellow classmates who played in their first rugby match of the season. They managed a 4-4 draw too, so were feeling rather chuffed as they strolled in to their post-match tea! Today also heralds the start of the hockey season an a return to basketball, so sporting weekends are once again about to become the James family norm!

Back tomorrow with another project; until then, happy stampin'!


Stampin' Up! Supplies Used:

Table built using Product Table Builder by The Crafty Owl - Independent Stampin' Up! Demonstrator.

Wondrous Wreath Circular Christmas Card

by Joanne James4. September 2016 10:00

It's Sunday and time for a new challenge over at The Paper Players! It's the turn of the lovely Jaydee to host this week and she has a great theme for you to work with:


What a great theme this week - so many possibilities! I rarely make a circular card, so decided today I would give it a go! I have been on a roll with Christmas cards lately and a circular theme works perfectly for another one - take a look:


Here's the low-down on today's card:

An Oldie But Goodie - The Wondrous Wreath stamp set is a returning seasonal set that is in the current catalogue and is perfect for the theme of this week's challenge. I stamped both layers of leaves in Cucumber Crush, stamping off the base layer once first to achieve the two-tone green. I added some pearls coloured with a red Sharpie for my berries. I used my retired circle framelits to create my card base, using the largest circle. I knew there was a good reason to keep hold of these!

Pinecone Embellishment - My sweet wreath embellishment is made from the new Cherry Cobbler Silky Taffeta Ribbon and some mini pinecone embellishments, tied on with linen thread. I love it when we get a new catalogue - there are always fun new trinkets and charms that are perfect for dressing up projects!

Merry and Bright - My banner is from the new 'Stitched With Cheer' stamp set. I stamped it in Versamark and heat embossed in Copper - I just can't get enough of it! This stamp set is another that co-ordinates with the existing Bunch of Banners framelits dies - always good to get more mileage from existing items you own :-)

Such a fun card! I made a bright green envelope to co-ordinate too using my Envelope Punch Board so this card is officially good to go - another one for my stash.

Here is the visual summary of the key products used on today's project for you to pin for easy reference:


You can see all of my 'How To' summaries on my 'How To - Tips and Techniques' Pinterest board in case you've missed any. 

Before you reach for your ink and papers, check out what our amazing team has created to inspire you this week:

The Paper Players Design Team
 
 
Here's a quick recap of our challenge rules:
 
1.  Create a new paper project
2.  Upload your creation to your blog with a link back to us and provide a direct link to the post featuring your challenge submission.
3.  Please link your card to no more than four challenges, TOTAL.
4.  Have FUN! 


I look forward to seeing what you create with this week's theme.

Back tomorrow with another project; until then, happy stampin'!


Stampin' Up! Supplies Used:

Table built using Product Table Builder by The Crafty Owl - Independent Stampin' Up! Demonstrator.

New Online Exclusives

There are new products available exclusively in the online store from 5 November - check them out here.

Latest Kits!

Stampin Cut and Emboss

The Layered Landscapes Kit and Nature's Paintings Kit are the latest kits in the online store - get yours here!

Shop Online

Access my online shop 24 x 7, 365 days of the year:

Current November hostess code:

9NKXDTTR

Shop Online

Mini Catalogue

BROWSE THE CATALOGUE

'Tis The Season - the new Stampin' Up! Mini Catalogue is here! For more details and to download your copy click here

Scrapbooking

Stampin' Up! has introduced a new range of 12x12" scrapbooking product and kit - the full range is now available to purchase online. To download a copy of the new digital Scrapbooking Catalogue click here.

2024-25 Annual Catalogue

BROWSE THE CATALOGUE

Click on the image to download your copy of the 2024-25 annual catalogue. For a full list of current SU! supplies, go to my online store. If you would like any help or advice, please drop me a line at joanne@thecraftyowl.co.uk or give me a call on 07773 421446 - I'd be happy to help.

Join My Team

It's always a great time to join Stampin’ Up! During October you can get even more in your starter kit! New team members can get £160 worth of products for only £99 + free business supplies + free shipping + all the fun being a part of Stampin’ Up! Stampin' Up! has something for everyone: join my growing team and benefit from my support to enjoy Stampin' Up! however you choose.

If you're interested, call me for a chat to understand how I can help you realise your goals. Alternatively, if you have already decided to sign up and you just can't wait, please click here for the link to the online form where you can sign up and order your starter kit right away! 

About Me

Hi I'm Joanne and live in Northampton and when I'm not looking after my husband and two beautiful children, am an avid crafter with a passion for all things Stampin' Up!

I must confess that I have never been a big rubber stamper - until I discovered Stampin' Up! that is. I love the fact that I can get such great results with co-ordinating stamps, inks, papers and punches - the possibilities are endless! Join me on my stamping journey as I share the things I love and be inspired to create amazing things yourself!

Follow Me

Monthly Newsletter

Box Builder

Click the button above to use Box Buster to create your custom box design using the Envelope Punch Board!

Kits Collection Now Available!

Stampin Cut and Emboss

The new Kits Collection from Stampin' Up! is now available!

Click here to see the current kits available and order yours online today.

I Design For


Stampin' Up Stuff

This is my personal blog and is not endorsed by Stampin’ Up! I hope you find it a plentiful source of ideas and personal inspiration but please don't copy my designs for contest submission or use for classes, publication or sale without express permission.