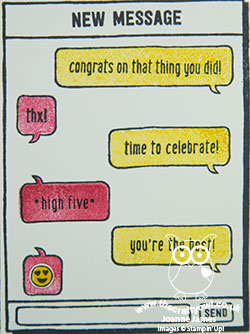
Text Ya Later Exam Congratulations Card

by Joanne James2. July 2017 09:00

It's Sunday and time for this week's new challenge over at The Paper Players! I am the hostess this week and I have a timely theme for you to work with:


We are almost at the end of the academic year here in the UK and so it's the perfect time for teacher thank you cards. It's also the start of exam results season: everything from Common Entrance Exams, to the 11 Plus, graduate degrees and next month GCSE and A Level results. Since our challenge is an international one and all countries have these things happening at different times, I thought I would broaden this week's theme to encapsulate all of these things. So whether it's a thank you for your favourite teacher or a message of congratulations, we would love to see them all in the gallery this week.

I've made my teacher thank yous already, however I know a number of children that sat GCSE exams this year and so will be requiring a few more congratulations cards than usual. I used today's challenge as an opportunity to get started! This week's sketch over at Freshly Made Sketches inspired my layout  - I turned it through 90 degrees - and created a few cards using the same design; take a look:
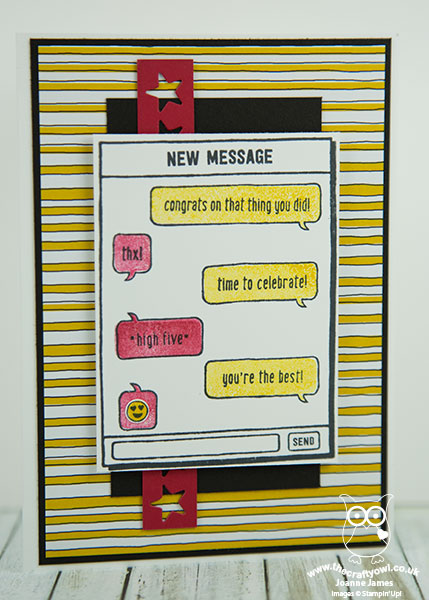
 

Here's the low-down on today's card:

Text Ya Later - This set was one of the first on my wish list; perfect for those tricky teenager cards, this on-trend stamp set, with it's text-speak and humorous emoticons works for children and adults alike. How many of us are in family message groups that span generations and often result in some hilarious texting faux-pas? There is so much fun to be had with these stamps, with the ability to tailor the messages to a number of different occasions. There are also some great background stamps that enable you to infill the speech bubbles with colour with ease.

Stars In Their Eyes - For the strip detail, I cut a row of stars out of coloured cardstock using one of the thinlits in the Mini Treat Bag Thinlits set, to add to the celebratory feel.

A Neat Little Trick - If you look really closely at my card, you will see that the smiley face emoticon has been punched out and added to my coloured speech bubbles. Want to know how I did it? I discovered that the single berry on the Holly Berry Builder Punch i just the right size to punch out these emoticons - handy, right?
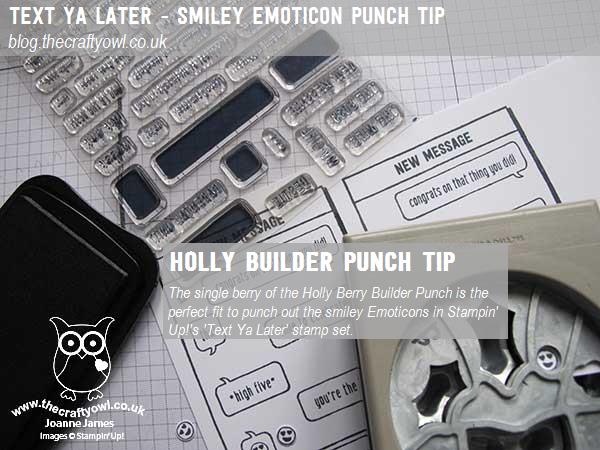
 

Here is the visual summary of the key products used on today's project for you to pin for easy reference:
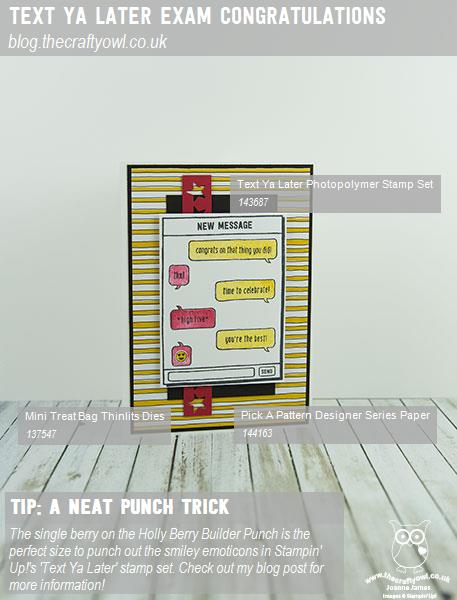
 

You can see all of my Product and 'How To' summaries on my 'How To - Tips and Techniques' Pinterest board in case you've missed any. 

Before you reach for your ink and papers, check out what our amazing team has created to inspire you this week:

The Paper Players Design Team
 
 
Here's a quick recap of our challenge rules:
 
1.  Create a new paper project
2.  Upload your creation to your blog with a link back to us and provide a direct link to the post featuring your challenge submission.
3.  Please link your card to no more than four challenges, TOTAL.
4.  Have FUN! 

Before I go, I also have another card that I made at the same time using the same sketch and stamp set whilst everything was out on my desk that uses this week's colours over at The Global Design Project:

Rebecca saw my congratulations cards and immediately requested a fun card for one of her friends whose birthday it is this week:
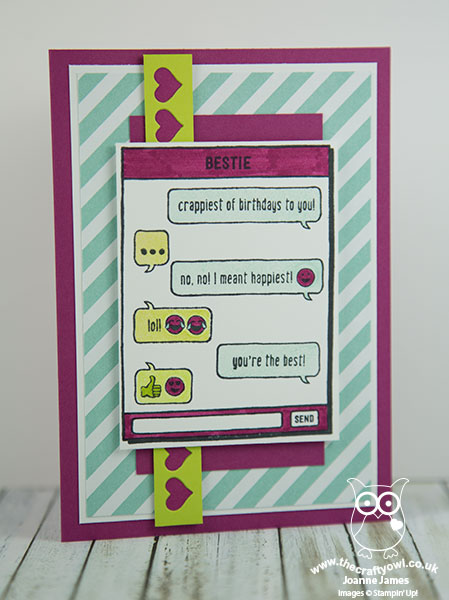
 

Those words just crack me up every time I read them - gotta love predictive text right? I just know this set is going to get a lot of use this year!

Here is the visual summary of the key products used on today's project for you to pin for easy reference:
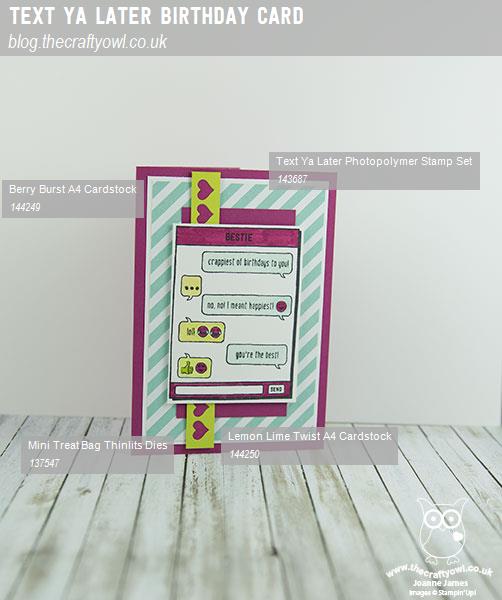
 

You can see all of my Product and 'How To' summaries on my 'How To - Tips and Techniques' Pinterest board in case you've missed any. 

I look forward to seeing what you create with this week's theme. Enjoy the rest of your weekend as it will be over all too quickly; we are having the a relatively quiet day today since having had a very busy week it's the first day in over a week that the entire family will be at home together - how crazy is that?!  

I'll be back tomorrow with another project; until then, happy stampin'!


Stampin' Up! Supplies Used: 
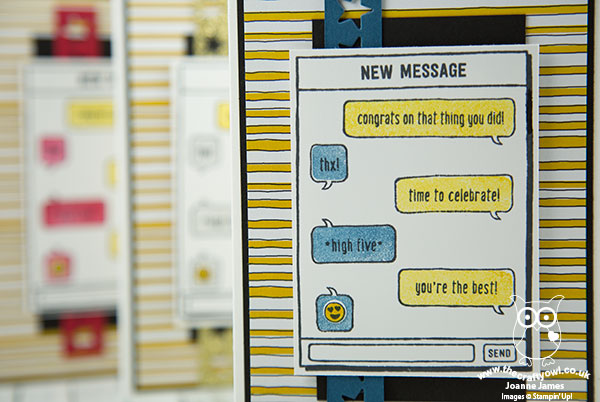
Table built using Product Table Builder by The Crafty Owl - Independent Stampin' Up! Demonstrator.


Layering Love New Baby Card

by Joanne James30. May 2017 19:00

Counting down now - only 2 days to go until the new 2017-18 Annual Stampin' Up! catalogue launches!


I have sent out copies to everyone on my catalogue mailing list who has purchased from me in the last 6 months - if you're not on this list but would like to receive one, then do give me a call on 07773 421446 or drop me an email and I will pop one in the post to you.

We are on the home straight for purchases from the current annual and spring-summer catalogue; there will be a full reminder of everything that is closing tomorrow, however meanwhile if you still have an order to place this month, don't forget to use the current online hostess code DXFJQZPN to receive a little thank you from me. This code will close tomorrow afternoon at 2pm, so be sure to have placed your orders online before this to benefit. If you are local to me and wish to save on postage, please ensure you have your order to me by midday tomorrow to be included on this order.

Today I'm sharing a card for this week's challenge over at CAS(E) This Sketch:

This sketch was perfect for an idea I've had in my head for a while using a stamp set from the annual catalogue - take a look:


Here's the low-down on today's card:

Layering Love - A new catalogue often means much less current stock in the stamp room, as old makes way for new and new consists of some select pre-order items. This has its advantages though - it encourages a look through those stamp sets that are carrying over from one annual catalogue to the next with fresh eyes - and in some instances, as with today's card, results in a set that has been languishing to be inked up for the first time (yay!) I bought the set some time ago because I love the big, bold feature sentiments it contains. The one I've used on today's card was the clincher though - not only is this a sweet sentiment for a new baby card, but is perfect for memory keeping and scrapbook pages or even a framed piece of wall art. I just had to have it - shame it's taken me so long to ink it up! The sentiment stamps are also designed to fit perfectly inside the various layering shapes framelits - bonus!

Sneak Peeks Times Two - I've mixed the old with the new on my card today too: I used the heart from a new set called 'Wood Words' to create a tone-on-tone border along the bottom part of my card using my trusty stamp-a-ma-jig to get my hearts neatly lined up and for my embellishment I added a sweet bunny that I fussy cut from the new Pick-A-Pattern Designer Series Paper. Full of eclectic hand-drawn images and quirky animals - I love this paper!

A Modern Colour Combo - I was tempted to go pink all the way with my card today, but decided to introduce black to tie in with my fussy-cut outlined bunny and I think it makes for a fresh and modern colour combination and tempers the brightness of Flirty Flamingo - feel free to save it if you would like to try it out on your projects:


Here is the visual summary of the key products used on today's project for you to pin for easy reference:


You can see all of my 'How To' summaries on my 'How To - Tips and Techniques' Pinterest board in case you've missed any. 

I'm a little later than anticipated posting today; the joys of having the James Juniors home for the half-term holiday! We spent the day running errands, posting and delivering catalogues and purchasing some things ready for one of them to embark on a Geography field trip next week. I'll be back tomorrow with another project, hopefully posted before our day begins. Until then, happy stampin'!


Stampin' Up! Supplies Used:

Table built using Product Table Builder by The Crafty Owl - Independent Stampin' Up! Demonstrator.

Sunburst Sayings and Thinlits Shine It's Your Day

by Joanne James6. March 2016 09:00

Firstly, happy Mothering Sunday to all UK mothers reading this - today is most certainly our day! It's also Sunday and time for a new challenge over at The Paper Players! It's the turn of the talented Sandy to host our challenge this week and she has a great theme for you to play along with:

    PPA-290-Mar03

I was all set to make a rainy day card for today's challenge but I couldn't get the idea in my head to work on paper - so some other time for that card! Instead I decided to use my Sunburst Thinlits and create a bright sunshine card which came together much more like my vision:


I used this week's sketch over at Pals Paper Arts for my layout and created a fun fold card, where the second part of my sentiment acted as a clasp to hold the left-hand panel closed. I used a panel of Daffodil Delight spotted Schoolhouse Designer Series Paper on the right-hand panel and on the left I stamped some sunshines in Versamark and heat embossed them with clear embossing powder. This sunshine is from one of the early limited edition Sale-A-Bration sets, 'Hello' and the good news is that availability of this stamp set has been extended while stocks last. You've still time to snap it up, but you'd better be quick!

For my main square, I used a background of Tempting Turquoise to which I added a Daffodil Delight sunburst, edged with Tangelo Twist. For my sunshine centre, I stamped 'Shine' from the 'Sunburst Sayings' stamp set onto some Daffodil Delight cardstock and fussy cut the outer elements of the sentiment before cutting the remainder with a circle framelit, which allowed my sentiment to overhang. I backed this circle with a mat cut from a 1 3/4" scalloped circle punch, that I punched once then rotated and punched again to create the starburst effect - this is a neat little trick and perfect for this kind of design. It's also a great way to get a second shape from one punch. I then framed the whole square with a Tangelo Twist frame cut using my square framelits. The second part of my sentiment was cut with the washi tape thinlit from the Mini Treat Bag Thinlits set and I adhered this with a dimensional to the right so that it could serve to hold the fold shut. I just love the bright sunshine colours of today's card and the layering of all the elements within the focal square - this will certainly brighten someone's day. The 'Sunburst Sayings' stamp set and Sunburst Thinlit die are another of the great 'bundle and save' offers in the current seasonal catalogue, giving you a saving of 15% when you purchase them together - bonus!

Here's today's visual summary for easy reference:


Thank you to everyone who has left me a sweet comment or feedback on these new graphics, which have been very well received; they make great Pins too!

Before you reach for your ink and papers, check out what our amazing team has created to inspire you this week:

The Paper Players Design Team
 
 
Here's a quick recap of our challenge rules:
 
1.  Create a new paper project
2.  Upload your creation to your blog with a link back to us and provide a direct link to the post featuring your challenge submission.
3.  Please link your card to no more than four challenges, TOTAL.
4.  Have FUN! 

I look forward to seeing what you create with our theme this week. We are off to basketball this morning with time for a special Mother's Day lunch before venturing out to a birthday party this afternoon. Not quite the restful Mother's Day I had in mind, but life goes on today as always and as my family frequently tell me "Every day is Mother's Day in the James Household!". I have been treated to cards, flowers and gifts today so I am feeling perhaps a little more loved than usual :-) 

I hope you all have an enjoyable Mothering Sunday, whether you are celebrating or are focused on other things today. Back tomorrow with another project; until then, happy stampin'!


Stampin' Up! Supplies Used:

Table built using Product Table Builder by The Crafty Owl - Independent Stampin' Up! Demonstrator.

Nutcracker Christmas Greetings

by Joanne James4. December 2015 22:59

It's Friday and mine has been a busy one! I have another Christmas card for you today, this time using the sketch over at Mojo Monday where it's 'tall and skinny' week:

   SIP Any Challenge 25 800

I'm also linking up with the peeps over at Stamps, Ink and Paper since my card today uses a stamp from my current favourite set - Sparkly Season. Take a look:


I used the striped Home for Christmas designer series paper as the inspiration for the colour scheme for my card and chose Pacific Point blue as the dominant colour; an unusual Christmas colour, but combining it with red and a touch of green definitely makes it worthy. I coloured my little scene with my Stampin' Write markers and finished my framed image with a cute bow cut using my Big Shot from the Mini Treat Bag Thinlits set. I heat embossed my minimalist sentiment in black on one of my two banners and added a Mossy Meadow enamel dot to finish. 

My finished card measures 4" x 8 1/4" so of course needed a custom envelope, easily achieved with a sheet of red envelope paper, my trusty Envelope Punch Board and my Envelope Expert tool - a winner every time! If you haven't yet tried it or my Box Buster tool you should check them out - custom envelopes and boxes with perfect results every time!

I'll be back tomorrow with another project; until then, happy stampin'!


Stampin' Up! Supplies Used:

Table built using Product Table Builder by The Crafty Owl - Independent Stampin' Up! Demonstrator.


New Wednesday Weekly Deals!

by Joanne James30. September 2015 08:05

It's Wednesday and you know what that means: a new collection of Wednesday Weekly Deals! These offers are valid for one week only. As always, a new collection of deals will be announced next Wednesday.

If you want to take advantage of any of the deals on offer, you can support my business by placing your order online by clicking here or using the link to my store on the right hand side of my blog page where it says 'Shop Online' or with me in person. Don't forget to add the new Hostess Code for September HJQSKSW6 if your order is under £150 and be sure to make sure that you don't check the 'no contact' box if you'd like to be kept updated with the progress of you order and receive a little thank you in the post from me. 

Here's a summary of this week's one-week only Wednesday deals - click on each item to go to the online store to purchase:

Table built using Product Table Builder by The Crafty Owl - Independent Stampin' Up! Demonstrator.

Lots of lovelies again this week! The washi tape is perfect for adding to cards and parcels for a quick dash of pattern/colour but my favourite deal this week has to be the Mini Treat Bag Thinlits Dies - these are perfect for packaging little treats or small gifts and make light work of mass production - and at only £27 they really are a bargain! 

Back later with today's creative project; until then, happy shopping!

Masculine Mini Treat Bag Thinlit Card and Self-Closing Gift Bag Punch Board Bag

by Joanne James7. June 2015 10:00

Yay it's Sunday and time for a new challenge over at The Paper Players - and this week I'm the hostess! With Father's Day approaching, I thought that masculine cards would make a great theme this week and it would at least encourage me to be organised!

I have lots of photos to share with you today, as I made not just one but two projects: a fun card using the mini treat bag thinlits and a matching gift bag using my new Gift Bag Punch Board - oh how I love this!

So first to my card: I've seen a few of these fun cards on Pinterest using the Mini Treat Bag Thinlits Die to create a fancy shirt with a sliding insert (one of my favourites is this one by Julie Kettlewell) and have been wanting to have a go at creating my own version for a while. Here it is: 

I have used the now retired Adventure Bound DSP for my card - this paper is just so fabulous for masculine cards and I hope you all stocked up before it retired! The Mini Treat Bag Thinlits are great for making simple slider cards as well as treat bags; I added silver buttons, a pocket punched with my hexagon punch and with a snippet of Island Indigo chevron ribbon in for a handkerchief. For my insert, I cut it taller than my pocket, then snipped in a third of the way each side to create my turned down collar and added my bow tie. The picture below shows the insert with my stamped sentiment from the 'Guy Greetings' stamp set and a pair of shoes to finish off this dapper outfit:

Pleased as I was with this cute little card, I couldn't stop there; I had to create a matching gift bag using my new Gift Bag Punch Board. I think this is going to be one of my new favourite tools - it is so easy to use and offers so many creative possibilities that go beyond the constraints of the board. Here is my bag:

I made my bag using the 'L' measurements on the board and used a sheet of Whisper White cardstock measuring 9 1/2" x 12". Once I'd punched the bottom according to the board instructions, I flipped it around and did the same on the other end, cutting away all except the long flap on the back of the bag, which I then also punched in the middle to create my collar. I then used the collar as the close mechanism for my bag, by tucking it underneath the bow tie - the photo below of the open bag illustrates that more clearly:

I then added two pieces of DSP with co-ordinating lapels and a large silver button threaded with a piece of white jute ribbon trim to finish my bag. Here are both items together:

I'm really pleased with this project duo; the gift bag is large enough for a couple of pairs of socks, some toiletries, a sweet treat (or two!) - pretty much anything that might be on a Dad's wish list. I hope you like them too and they inspire you to create some fun masculine projects this week! Before you reach for your ink and papers, check out what our amazing team has created to inspire you this week, including our three new guest designers:

The Paper Players Design Team
 
 
Here's a quick recap of our challenge rules:
 
1.  Create a new paper project
2.  Upload your creation to your blog with a link back to us and provide a direct link to the post featuring your challenge submission.
3.  Please link your card to no more than three challenges, TOTAL.
4.  Have FUN! 

I look forward to seeing your masculine creations in the gallery this week. I'm off to finish preparations for this week's technique classes and tackle my mountain of ironing. How does the saying go - no rest for the wicked?!

Back tomorrow with another project; until then, happy stampin'!


Stampin' Up! Supplies Used:

Table built using Product Table Builder by The Crafty Owl - Independent Stampin' Up! Demonstrator.


Sale-A-Bration Ends Today - Mini Treat Bags Thinlits Dies

by Joanne James31. March 2015 22:16

Well, what a Sale-A-Bration this has been! I have enjoyed it immensely - some of the best free products we've seen as part of this promotion and I would like to thank everyone who has shopped with me, hosted a party or joined my team during the last 3 months. Today I wanted to share some little packages I made last month for my recent Stampers Six Club customers and new recruits using the Mini Treat Bag Thinlits Dies. I've had to make quite a few of these so I was glad to be able to make good use of some of the fabulous Best Year Ever paper I earned free during Sale-A-Bration:

These treat bags are so easy to make and come with a range of fun thinlit pieces that can be used to decorate them or embellish cards or other projects. I kept these quite simple, with a layered panel on the front in co-ordinating cardstock and added some Calypso Coral pompom trim to the decoration with a mini peg to hold the bags shut - here's a close-up:

Whilst the paper may no longer be available, the Mini Treat Bag Thinlits Dies are in the seasonal catalogue and still available until 2nd June and there are a whole bunch of other DSPs available that would look just as good. These bags really are so cute and it's easy to make lots of these in no time at all; they would make great party bag favours too. 

That's me done for today; back tomorrow with a fun card and news of a new set of Wednesday Weekly Deals. Until then, happy stampin'!


Stampin' Up! Supplies Used:

Table built using Product Table Builder by The Crafty Owl - Independent Stampin' Up! Demonstrator.


'I Do Love You' Valentine's Card

by Joanne James8. February 2015 08:00

Good morning lovely blog readers! Today it's Sunday and time for a new challenge over at The Paper Players, where this week the lovely Nance has this great colour combination for us:


I also used this week's sketch over at Mojo Monday for the layout of today's card. I was tempted to use the florals in the inspiration photo as the starting point for my card - isn't the badge great? Nance creates all our blog challenge badges and does such a fantastic job, thank you Nance! - but in the end the lure of my 'Stacked with Love' DSP paper stack was too strong and I decided to make another Valentine's card! Come and take a look:


I used one of the large sentiments from the 'Big on You' stamp set as the focal point for my card and stamped it in Versamark on blackboard paper and heat embossed in white. I rubbed a little white kraft ink around the edges to add to the chalkboard look and feel of this panel. The large sentiment allowed me to use a number of the other DSP patterns for the background layers to my card. Red and black are clearly taking centre stage on my card, but there are a couple of pops of Calypso Coral - both the flag banner behind the strip of punched hearts and in the popped-up heart, finished with a Real Red bow cut with one of the Mini Treat Bag Thinlit accessory dies and a rhinestone. I haven't made a card using these papers for over a week and I was clearly getting withdrawal symptoms; having got them back out on the desk I've been creating with them again and I have a few more cards to share that feature them this week, so stay tuned!

Before you reach for your ink pads, do visit the other design team members to see what interesting ideas they've had this week:

The Paper Players Design Team
 
Here's a quick recap of our challenge rules:
 
1.  Create a new paper project
2.  Upload your creation to your blog with a link back to us and provide a direct link to the post featuring your challenge submission.
3.  Please link your card to no more than three challenges, TOTAL.
4.  Have FUN! 

I look forward to seeing your projects in the gallery this week. I'm off to hockey this morning and looking forward to an afternoon with a spot of crafting and some fun with the rest of the family before the new week starts again in earnest.

Back tomorrow with another project; until then, happy stampin'!


Stampin' Up! Supplies Used:

Table built using Product Table Builder by The Crafty Owl - Independent Stampin' Up! Demonstrator.


Current Promotions

Stampin Cut and Emboss

Save up to 30% off on all your favourite kits from 1 to 31 October! 

Click here to see the current kits available and order yours online today.

Join My Team

It's always a great time to join Stampin’ Up! During October you can get even more in your starter kit! New team members can get £160 worth of products for only £99 + free business supplies + free shipping + all the fun being a part of Stampin’ Up! Stampin' Up! has something for everyone: join my growing team and benefit from my support to enjoy Stampin' Up! however you choose.

If you're interested, call me for a chat to understand how I can help you realise your goals. Alternatively, if you have already decided to sign up and you just can't wait, please click here for the link to the online form where you can sign up and order your starter kit right away! 

Shop Online

Access my online shop 24 x 7, 365 days of the year:

Current October hostess code:

4XPEYCB9

Shop Online

Scrapbooking

Stampin' Up! has introduced a new range of 12x12" scrapbooking product and kit - the full range is now available to purchase online. To download a copy of the new digital Scrapbooking Catalogue click here.

Mini Catalogue

BROWSE THE CATALOGUE

'Tis The Season - the new Stampin' Up! Mini Catalogue is here! For more details and to download your copy click here

2024-25 Annual Catalogue

BROWSE THE CATALOGUE

Click on the image to download your copy of the 2024-25 annual catalogue. For a full list of current SU! supplies, go to my online store. If you would like any help or advice, please drop me a line at joanne@thecraftyowl.co.uk or give me a call on 07773 421446 - I'd be happy to help.

Latest Kits!

Stampin Cut and Emboss

The Christmas Ornaments Kit and Card Keeper Kit are the latest kits in the online store - get yours here!

New Online Exclusives

There are new products available exclusively in the online store from 5 November - check them out here.

About Me

Hi I'm Joanne and live in Northampton and when I'm not looking after my husband and two beautiful children, am an avid crafter with a passion for all things Stampin' Up!

I must confess that I have never been a big rubber stamper - until I discovered Stampin' Up! that is. I love the fact that I can get such great results with co-ordinating stamps, inks, papers and punches - the possibilities are endless! Join me on my stamping journey as I share the things I love and be inspired to create amazing things yourself!

Follow Me

Monthly Newsletter

Box Builder

Click the button above to use Box Buster to create your custom box design using the Envelope Punch Board!

Kits Collection Now Available!

Stampin Cut and Emboss

The new Kits Collection from Stampin' Up! is now available!

Click here to see the current kits available and order yours online today.

I Design For


Stampin' Up Stuff

This is my personal blog and is not endorsed by Stampin’ Up! I hope you find it a plentiful source of ideas and personal inspiration but please don't copy my designs for contest submission or use for classes, publication or sale without express permission.