by Joanne James16. July 2015 08:00It's Thursday and time for a new challenge over at Create With Connie and Mary, where this week we have a colour challenge for you:
I also used this week's sketch over at Mojo Monday as the inspiration for the layout of today's card, which features my first outing of my new Watercolour Wings stamp set:
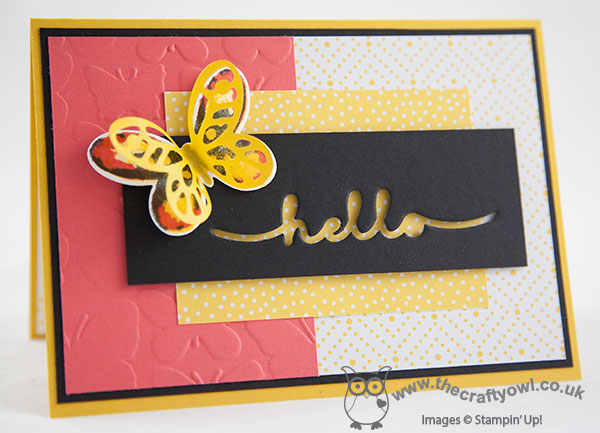
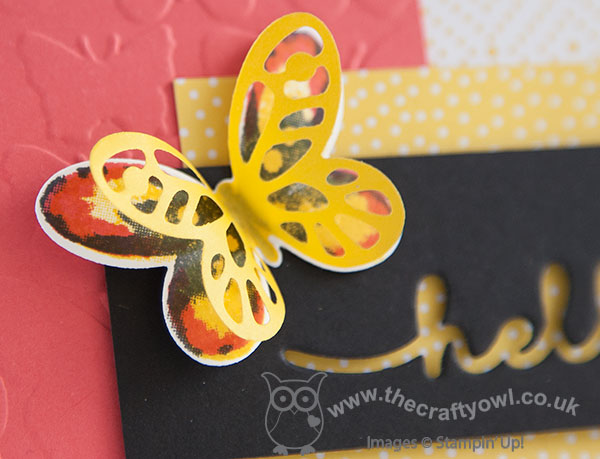
I used a base of Crushed Curry and a mat of Basic Black, combined with two co-ordinating papers from the Cherry on Top DSP stack. I embossed a solid panel of Watermelon Wonder using the new Flutterings embossing folder and added this on the left and chose to use the negative space of the Greetings Thinlit die cut for my top layer. I added my butterfly, on which I stamped each of the layers with one of the challenge colours - photopolymer really makes easy work of this kind of triple stamping. The Watermelon Wonder looked slightly orange over the yellow, so I decided to add a small diecut butterfly, cut with the smallest of the Bold Butterfly framelits out of some of the new Cotton Paper in Crushed Curry. This paper is so soft and delicate and perfect for this kind of layering, as well as for flowers and more besides. Here's a close up of the layered butterfly:
So very pretty - I can't wait to stamp this in lots of other colourways too. I hope you like today's card and those of the other Design Team members - we look forward to seeing what you do with this colour palette this week!
Back tomorrow with another project; until then, happy stampin'!
Stampin' Up! Supplies Used:
- Greetings Thinlits Dies
- Big Shot
- Cherry On Top Designer Series Paper Stack
- Fluttering Textured Impressions Embossing Folder
- Butterflies Thinlits Dies
- Bold Butterfly Framelits Dies
- Basic Black A4 Cardstock
- Crushed Curry Classic Stampin' Pad
- Crushed Curry A4 Cardstock
- Watermelon Wonder Classic Stampin' Pad
- Watermelon Wonder A4 Cardstock
- Whisper White A4 Cardstock
- Cherry On Top Cotton Paper Assortment
a80ecd95-9c1d-4f62-9609-335c81ec3d93|0|.0|96d5b379-7e1d-4dac-a6ba-1e50db561b04
Tags: Watercolour Wings, Bold Butterfly Framelits, Big Shot, Greetings Thinlits, Cotton Paper, Create With Connie And Mary, Cherry on Top, Shop online, Shop Stampin' Up online, Stampin' Up, Stampin' Up Card, Stampin' Up Card ideas, Stampin' Up SuppliesCircles Framelits, Stampin' Up Supplies
Cards | Stamping
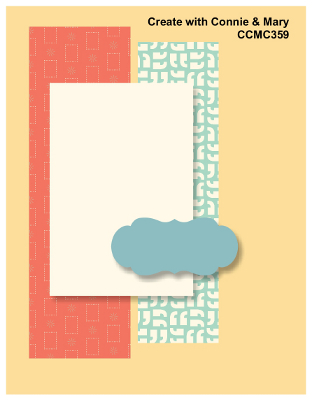
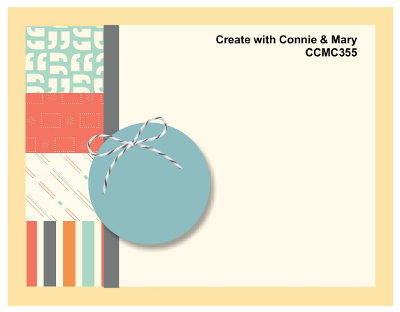
by Joanne James9. July 2015 08:00It's Thursday and time for a new challenge over at Create With Connie and Mary! This week we have a great sketch challenge for you:
This was one of those sketches that the minute I saw it, I knew exactly what I was going to do with those 'flowers' - to me, they looked just like the donuts with a bit taken out that feature on both one of the Cherry on Top DSP stack patterns and the Sprinkles on Top stamp set on page 7 of the annual catalogue. I don't have the latter but am definitely in love with the former, so that's where I was headed for my card this week:

I stayed with the square shape for my card and used a base of Pool Party with mats in Whisper White and Bermuda Bay. I then used another of the patterns from the Cherry on top DSP stack as my top layer and stamped my sentiment from the 'Bravo' stamp set in Watermelon Wonder directly onto the DSP. I then used a long, slim panel of Bermuda Bay, with one corner rounded t echo the shape of the base card, then adhered four little donuts, punched out of the DSP using my 3/4" circle punch, onto the panel using dimensionals. I finished with a double loop of Whisper White baker's twine to complete my card.
So what do think - is this card sweet to you? Do check out how the other design team members have interpreted this week's sketch as we've all taken a different approach. As for me, I'll be back tomorrow with another project to share. Until then, happy stampin'!
Stampin' Up! Supplies Used:
- Bravo Photopolymer Stamp Set
- Cherry On Top Designer Series Paper Stack
- Whisper White Baker's Twine
- Watermelon Wonder Classic Stampin' Pad
- Bermuda Bay A4 Cardstock
- Pool Party A4 Cardstock
- Punch Corner Project Life
- Whisper White A4 Cardstock
- 3/4" Circle Punch
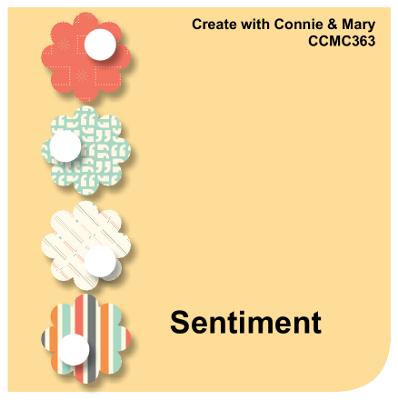
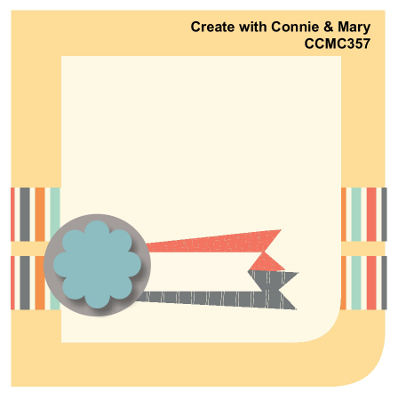
by Joanne James2. July 2015 08:05Good morning everyone! It's Thursday and time for a new challenge at Create with Connie and Mary where we have a great colour challenge for you this week:

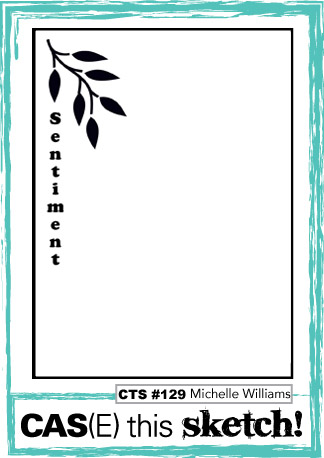
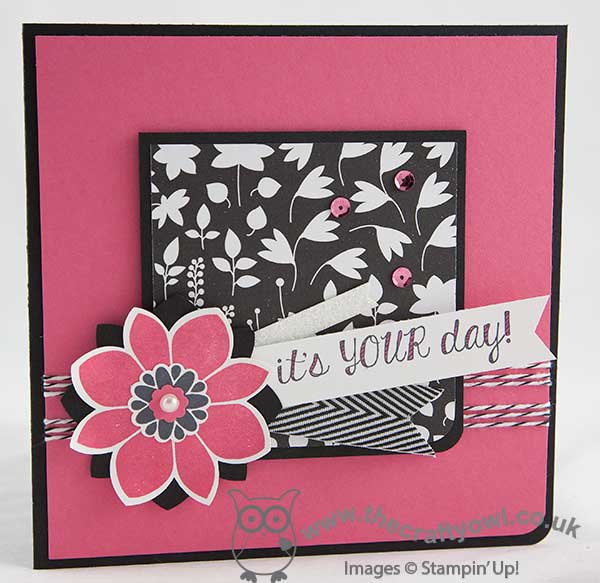
I chose to use this week's layout over at CAS(E) This Sketch for my card this week and went for some bold pops of colour against my neutral background:
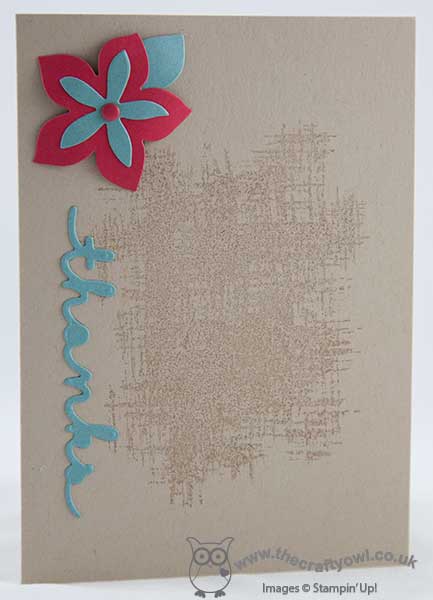
I used Crumb Cake for my card base, and instead of leaving it completely plain, I stamped the hatched background stamp from 'You've Got This' in Crumb Cake to add a little interest to the main body of the panel. This is such a useful stamp and can be used in so many ways, not just with the flower in the set with it. I then added a layered flower cut with the Flower Fair framelits and finished with a Real Red candy dot (I get through these faster than any other colour!) and my die cut sentiment. Super simple and very easy to recreate and would work in lots of other colourways too.
Short and sweet from me today - do check out what the rest of the DT have been up to and I look forward to visiting your gallery creations this week. I'll be back tomorrow with another project; until then, happy stampin'!
Stampin' Up! Supplies Used:
- Greetings Thinlits Dies
- Flower Fair Framelits Dies
- You've Got This Stamp Set
- Crumb Cake A4 Cardstock
- Real Red A4 Cardstock
- Lost Lagoon A4 Cardstock
- Crumb Cake Classic Stampin' Pad
- Brights Candy Dots
by Joanne James25. June 2015 08:00It's Thursday and you know what that means: time for a new challenge over at Create With Connie and Mary! This week we have a sketch challenge for you:
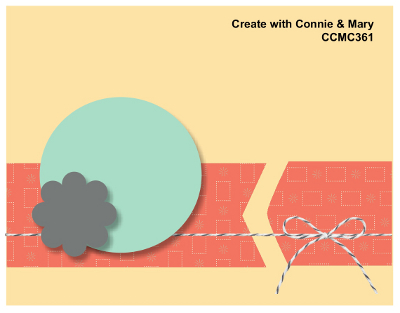
I decided to go with another card featuring the Pretty Petals DSP; this time, one of the really bold patterns in the stack:
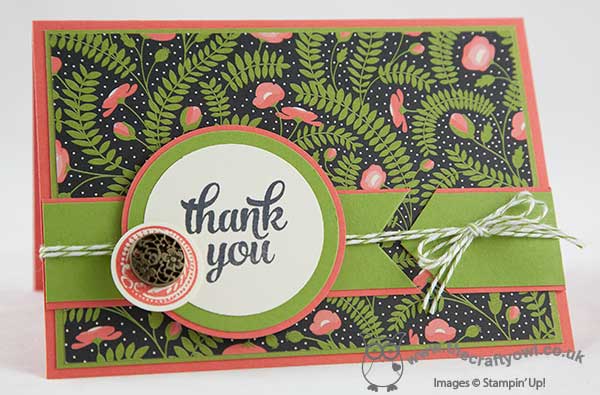
I used Calypso Coral and Old Olive for my mat and base layer and the band across the front of the card, then used the bold patterned DSP to cover my card front. After adhering the band, I tied two lengths of Old Olive baker's twine around the front of my card before adhering my layered circle. Given how busy the pattern of the paper is, I decided to leave my focal point 'clean' and stamped the thank you sentiment from the 'Tin Of Cards' stamp set onto a circle of Very Vanilla. For my embellishment, I stamped the round stamp from the 'Awesomely Artistic' stamp set in Calypso Coral onto Very Vanilla and punched it out with my 1" circle punch. I added an antique brad (deliberately offset) before adhering to my card.
This paper is quite different to the one I used on yesterday's card, but equally lovely I think. I can see me getting through this stack quite quickly!
That's all from me today; do check out the other DT member cards and we look forward to seeing you in the gallery this week.
I'll be back tomorrow with another project; until then, happy stampin!
Stampin' Up! Supplies Used:
- Pretty Petals Designer Series Paper Stack
- Tin Of Cards Photopolymer Stamp Set
- Awesomely Artistic Clear-Mount Stamp Set
- Calypso Coral A4 Cardstock
- Old Olive A4 Cardstock
- Stampin' Dimensionals
- Big Shot
- Magnetic Platform
- Circles Collection Framelits Dies
- 1-3/4" Circle Punch
- 2" Circle Punch
- Antique Brads
- Tuxedo Black Memento Ink Pad
- Old Olive Baker's Twine
- Calypso Coral Classic Stampin' Pad
- 1" Circle Punch
by Joanne James18. June 2015 08:00It's Thursday and time for this week's new challenge over at Create With Connie and Mary. This week we have a colour challenge for you:
I found this quite a difficult colour combo to work with (I think it was the brown and grey together that did it for me), although the brown and grey duo did remind me of Canadian geese, so in the end I went with a rather safe masculine card using my Wetlands set:
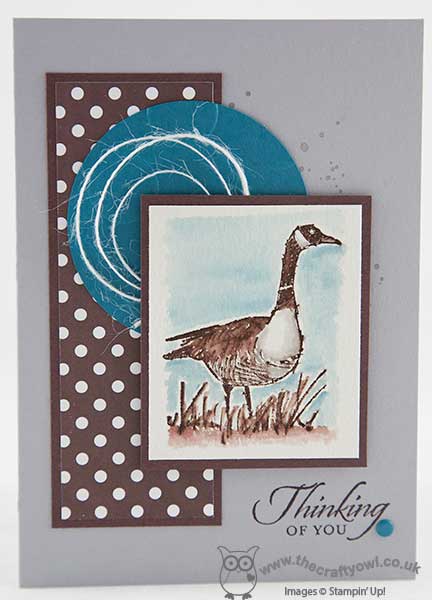
I combined this trusted favourite, which I stamped in Chocolate Chip on watercolour paper and coloured in all three inks using my Aquapainter, with some of the new Chocolate Chip Neutrals DSP Stack with the polka dot pattern. My Island Indigo circle is also embossed with the Large Polka Dots embossing folder, although it is difficult to see in the photo. A little background Gorgeous Grunge, some threads of jute ribbon and a candy dot finish my card.
Do pop over and see what the other designers have come up with - there are some great examples of how this trio can be combined on your cards! Don't forget to check out the challenge rules too before entering :-)
I'll be back tomorrow with a bright and colourful birthday card; until then, happy stampin'!
Stampin' Up! Supplies Used:
- Big Shot
- Magnetic Platform
- Wetlands Clear Stamp Set
- 2" Circle Punch
- Watercolor Paper
- Aqua Painters
- White 1-1/4" (3.2 Cm) Jute Ribbon
- Gorgeous Grunge Clear-Mount Stamp Set
- Polka Dot Textured Impressions Embossing Folder
- Island Indigo Classic Stampin' Pad
- Island Indigo A4 Cardstock
- Chocolate Chip Classic Stampin' Pad
- Chocolate Chip A4 Cardstock
- Smoky Slate Classic Stampin' Pad
- Smoky Slate A4 Cardstock
- Regals Candy Dots
912593bc-da8a-4614-b021-7ff3ecdebea3|0|.0|96d5b379-7e1d-4dac-a6ba-1e50db561b04
Tags: Big Shot, Create With Connie And Mary, Large Polka Dot TIEF, Watercolouring, Wetlands, Shop online, Shop Stampin' Up online, Stampin' Up, Stampin' Up Card, Stampin' Up Card ideas, Stampin' Up Supplies
Cards | Stamping
by Joanne James11. June 2015 08:00It's Thursday and time for a new challenge over at Create With Connie and Mary. Today we have a new sketch challenge for you:
When I made this card I was still waiting for my box of new catalogue goodies to arrive, so was rather restricted in terms of supplies - I was actually missing having a selection of DSP for all those layers! I decided to go with a rather loose interpretation of the sketch and build the layers using stamps; here's my card:
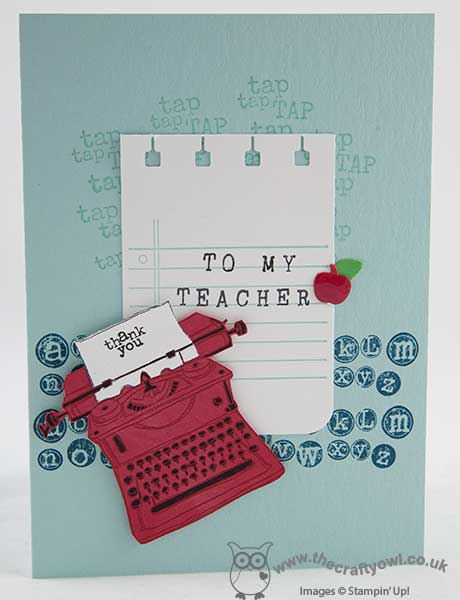
I decided to rotate the sketch through 90 degrees, although I stuck with the vertical shape, and use the 'tap tap tap' stamp set and create a teacher thank you card. I stamped the first two panels onto my Pool party base with the alphabet stamp in Island Indigo and the tap tap in Pool Party. I used a piece of Whisper White stamped with the notepaper stamp in Pool Party for my central panel, rounding the corners with my Project Life corner rounder. I also punched the top with my now retired spiral border punch, but you could just as easy leave this edge straight. I stamped 'TO MY TEACHER' using my Rotary Alphabet stamp - so useful for bespoke messages and sentiments - and added a bright Real Red typewriter that I stamped in Versamark then heat embossed in clear, then coloured the keys in with my black Stampin' Write marker.
There are two fun elements to my card that you might be wondering where they came from: the red apple and leaf is punched using my new Tree Builder punch and painted with Crystal Effects for added shine and secondly, the thank you sentiment on my paper pieced paper in the typewriter. This isn't one of the sentiments that comes with this set - I created it by using my stamp-a-ma-jig and inking a combination of parts of the other sentiments in the set to spell 'thank you'. The 'a' is from the word 'tap' - and I love how it stands out slightly from the others, it looks like a proper old typewriter font.
If you would like to see a more literal interpretation of this week's sketch, I also used it for yesterday's card which you can see here. Looking forward to seeing what you do with our sketch this week. As for me, I have a team meeting planned today and a bunch of household chores. I'll be back tomorrow with more creative inspiration for you. Until then, happy stampin'!
Stampin' Up! Supplies Used:
- Tap Tap Tap Clear-Mount Stamp Set
- Punch Corner Project Life
- Tree Builder Punch
- Clear Stampin' Emboss Powder
- Embossing Buddy
- Heat Tool (Uk)
- Versamark Pad
- Crystal Effects
- Island Indigo Classic Stampin' Pad
- Pool Party Classic Stampin' Pad
- Pool Party A4 Cardstock
- Real Red A4 Cardstock
- Basic Black Stampin' Write Marker
- Whisper White A4 Cardstock
- Alphabet Rotary Stamp
- Tuxedo Black Memento Ink Pad
by Joanne James4. June 2015 08:00It's Thursday and time for a new challenge over at Create With Connie and Mary and this week we have a colour challenge for you:

I decided to do a little watercolouring with one of my favourite sets from the new catalogue - a hostess set called 'Best Thoughts':
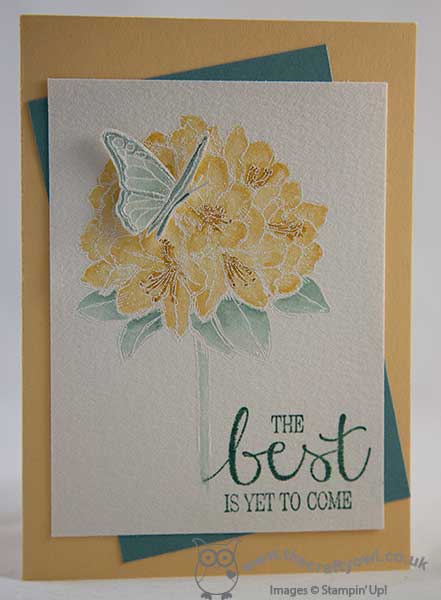
I went for a simple layout using a base of So Saffron and an offset panel of Lost Lagoon, then stamped the flower image in Versamark and heat embossed it in white. I stamped the sentiment directly in Lost Lagoon, then used my aquapainter and all three colours to ink my flower. I did the same with the butterfly on a separate piece of watercolour paper and when dry, applied some Dazzling Diamonds to his wings using my two-way glue pen then fussy cut him out and popped him up on a dimensional so it looks as if he has landed on the flower.
I wasn't sure if these colours would work for this card, as you don't really see yellow hydrangeas, however I think this flower looks great in any colour and this colour combination, whilst unusual, is really effective. This is such a beautiful set and is exclusive to customers who host a party (or place an individual order of £150 or more). If you would like to host a Stampin' Up! party and earn this set for free, please do get in touch - I would love to share the loveliness of the new catalogue with you and your friends. Or perhaps you would be interested in joining my Stampers 6 Club - I am just about to start another round so if you would like to get on board, this is perfect timing.
I do hope you like today's card; the rest of the team have used these colours in so many different ways, so do pop by their blogs for even more inspiration. I look forward to seeing your work in our gallery this week. I have another busy day today with a couple of functions to attend; back tomorrow with another project. until then, happy stampin'!
Stampin' Up! Supplies Used:
- Best Thoughts Clear-Mount Stamp Set
- Watercolor Paper
- Embossing Buddy
- Versamark Pad
- White Stampin' Emboss Powder
- Heat Tool (Uk)
- Aqua Painters
- Lost Lagoon Classic Stampin' Pad
- Hello Honey Classic Stampin' Pad
- Lost Lagoon A4 Cardstock
- So Saffron Classic Stampin' Pad
- So Saffron A4 Cardstock
9f2f0cdb-9b51-4614-b644-becef5660478|1|5.0|96d5b379-7e1d-4dac-a6ba-1e50db561b04
Tags: Best Thoughts, Earn Free Product, Earn Free Products, Host a Party, Watercolouring, Stampin' Up Supplies, Stampin' Up Card ideas, Stampin' Up Card, Stampin' Up, Stampers 6 Club, Shop online, Create With Connie And Mary
Cards | Host a Party | Stamping
by Joanne James28. May 2015 08:00We are on the 'home run' towards the weekend and as it's Thursday that means time for a new challenge over at Create with Connie and Mary. This week we have a great sketch for you:
So many possibilities with this one! I decided to use up yet more of my hoarded DSP and showcase a whole host of retiring product on my card this week:
I've used both 'Back To Black' DSP along with a retiring in-colour, Strawberry Slush, and the Petal Potpourri stamp set and co-ordinating Flower Medallion punch, in colour sequins and Black chevron ribbon - all of which are either retiring or not carrying over into the new annual catalogue next week. Not so though for my sentiment stamp, which comes from the 'Fabulous Four' stamp set (I stamped it in black and coloured it in with my Strawberry Slush marker pen), the dazzling diamonds glimmer paper or the black bakers twine - these at least will still be available!
I'm not generally a fan of black and white on a card in vast quantities, but when paired with a bright colour such as Strawberry Slush I think it really works - you could try this combo with lots of other colours and I am sure it would look great with some of the new in-colours!
I'm looking forward to seeing what you create with the sketch this week - do check out the cards made by the rest of the Design Team, there's a great variety as always!
I'm off to spend the day outdoors with friends today as we make the most of the milder weather that we've been experiencing this week; a picnic and some tree climbing is on the agenda - well, the latter for the youngsters at least!
Back tomorrow with another project; until then, happy stampin'!
5cfb1c7d-c375-45e0-b5e4-e46fb77ff123|0|.0|96d5b379-7e1d-4dac-a6ba-1e50db561b04
Tags: Create With Connie And Mary, Flower Medallion Punch, Back To Black, Fabulous Four, Petal Potpourri, Shop Stampin' Up online, Shop online, Stampin' Up, Stampin' Up Card, Stampin' Up Card ideas, Stampin' Up Supplies
Cards | Stamping
by Joanne James21. May 2015 08:00It's Thursday and time for a new challenge over at Create With Connie and Mary and this week we have a colour challenge for you:
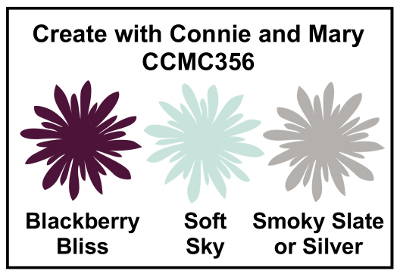
I also have a sneak peek for you today as I made my card with a new set from the 2015-16 Annual Catalogue called 'You've Got This' - take a look:
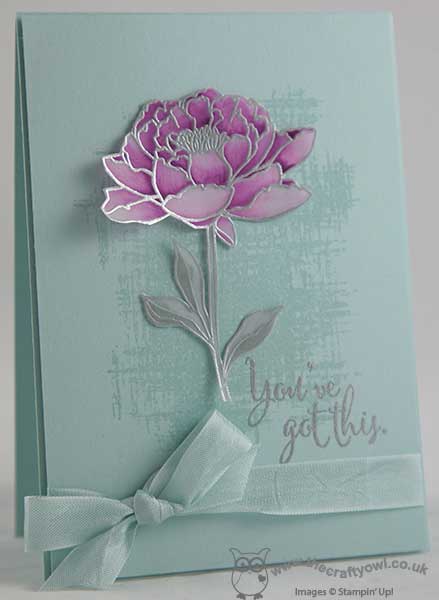
This gorgeous stamp comes in two parts with a very useful hatched pattern background stamp that I stamped in Soft Sky on my Soft Sky panel, a few sentiments and beautiful large flower bloom. I stamped my flower in Versamark on vellum and heat embossed it in silver then I coloured the stem with Smoky Slate and the petals with Blackberry Bliss ink and used a blender pen to achieve the detail. I then fussy cut my flower and adhered it to my card front using glue dots, allowing the edges to lift away from the card. The sentiment was also heat embossed in silver directly to the card front and I finished my card with a piece of Soft Sky seam binding ribbon tied in a bow.
I just love this flower stamp and know that this is one I will be getting lots of use out of, so you can definitely expect to see more of it. I'm looking forward to seeing what you do with this colour combination this week - do check out how the other designers have used this colour combination too, as there are some great and varied cards to inspire you.
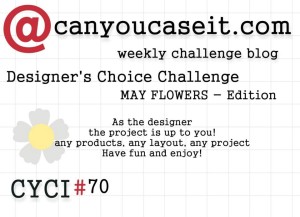
I'm also linking today's card up with this week's challenge over at Can You Case It? where their theme is 'May Flowers' - I think my card certainly qualifies as one of those!
I'll be back tomorrow with another sneak peek project, so stay tuned for that. Unitl then, happy stampin'!
Stampin' Up! Supplies Used:
- Embossing Buddy
- Versamark Pad
- Silver Stampin' Emboss Powder
- Heat Tool - Uk Plug
- Soft Sky 1/2" Seam Binding Ribbon
- Soft Sky Classic Stampin' Pad
- Card Stock A4 Soft Sky
- Blackberry Bliss Classic Stampin' Pad
- Smoky Slate Classic Stampin' Pad
- Blender Pens
- White Vellum A4 Card Stock
by Joanne James14. May 2015 08:05It's Thursday and time for a new challenge over at Create With Connie And Mary and this week we have a sketch challenge for you - my favourite!
This is a great card for using up scraps of DSP so I set to work with my Birthday Bash Speciality DSP and Birthday Bash Stamp set to create today's card:
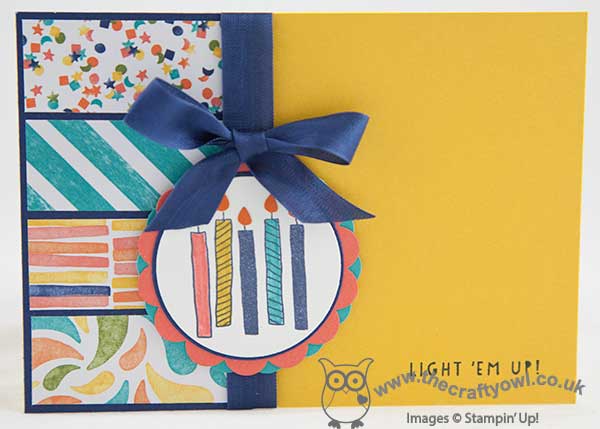
I let the DSP drive the colour scheme for my card so used a Crushed Curry base with a panel of Night Of Navy down the left hand side, which I then overlaid with four co-ordinating rectangles of patterned paper. I then added a piece of Night of Navy seam binding ribbon to cover the join and for my focal point stamped the candles from the 'light 'em up' stamp in the Birthday Bash set in navy on Whisper White, having masked off the words first. I coloured this with my Calypso Coral, Bermuda Bay and Crushed Curry Stampin' Write markers and layered this circle onto another of Night of Navy and two scalloped circles, one each in Bermuda Bay and Calypso Coral. I also punched the candle flames out of Tangerine Tango using my owl builder punch - a small touch, but looks so much better than navy ones! To finish, I stamped the sentiment, this time masking off the candles, in navy in the right hand corner.
I made this card with the ladies in my Stamp-A-Stack class last week and they loved it, so I hope you like it too. Don't forget if 'Birthday Bash' is on your wishlist, it will be retiring on 2nd June so don't leave it too late to place your order.
That's all from me today - I look forward to seeing your takes on this week's sketch in the gallery.
Back tomorrow with another project; until then, happy stampin'!
Stampin' Up! Supplies Used:
- Birthday Bash Specialty Designer Series Paper
- Balloon Bash Photopolymer Stamp Set
- Night Of Navy Classic Stampin' Pad
- Night Of Navy A4 Card Stock
- Card Stock A4 Crushed Curry
- Calypso Coral A4 Card Stock
- Card Stock A4 Bermuda Bay
- Card Stock A4 Tangerine Tango
- Night Of Navy 1/2" Seam Binding Ribbon
- Whisper White A4 Card Stock
- 2-3/8 Inch Scallop Circle Punch
- 2" Circle Punch
- Big Shot Die-Cut Machine
- Circles Collection Framelits Dies
- Big Shot Magnetic Platform
- Owl Builder Punch