by Joanne James24. September 2015 08:05
Today it's time for a new challenge over at Create With Connie and Mary and this week we have a great colour challenge for you:
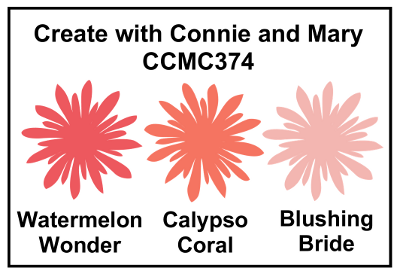
These colours have a real ombre feel to them and I decided to go with something pretty and floral today using the 'Garden in Bloom' stamp set. Here's my card:
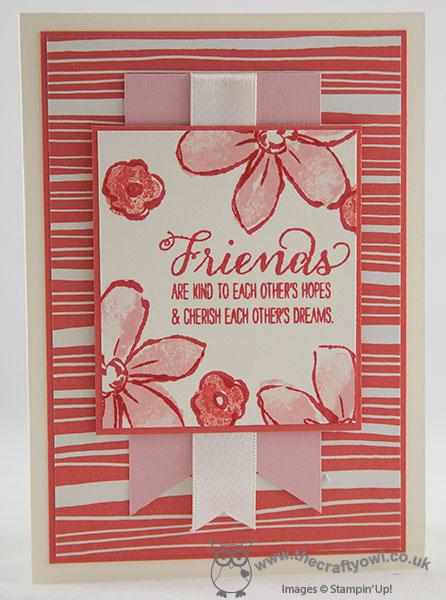
I used a Very Vanilla base and a mat of Calypso Coral to set off my Pretty Petals striped DSP. I punched a 2" wide banner of Blushing Bride with my Triple Banner Punch and overlaid this with a piece of Very Vanilla satin ribbon, then for my focal panel I stamped the sentiment and flower outlines in Watermelon Wonder and 'coloured' them in with the other two challenge colours. I love this stamp set and in photopolymer, it makes light work of two-step stamping for sure!
Do visit the other Design Team members to see how they used this week's challenge colours; there's lots of inspiration over on their blogs too!
Enjoy your day and I'll be back tomorrow with another project; until then, happy stampin'!
Stampin' Up! Supplies Used:
- Very Vanilla A4 Cardstock
- Garden In Bloom Photopolymer Stamp Set
- Pretty Petals Designer Series Paper Stack
- Banner Triple Punch
- Watermelon Wonder Classic Stampin' Pad
- Blushing Bride Classic Stampin' Pad
- Blushing Bride A4 Cardstock
- Calypso Coral Classic Stampin' Pad
- Calypso Coral A4 Cardstock
- Very Vanilla 5/8" Satin Ribbon
by Joanne James17. September 2015 08:05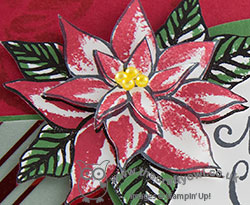
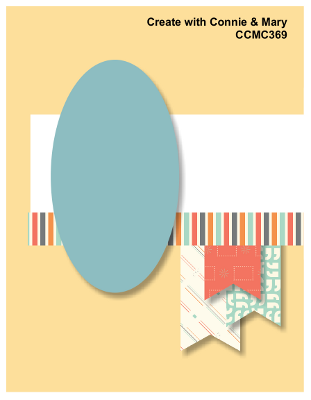
Today it's time for a new challenge over at Create With Connie and Mary and this week we have a great sketch challenge for you:
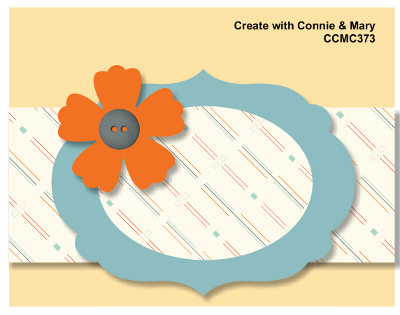
I decided to use the lovely 'Reason For The Season' stamp set on my card again today. Here's my card:

I decided to use the tone on tone stamping on my Real Red card base as it was so popular on my earlier card here. I used a band of Garden Green and a Garden Green mat for my Whisper White oval, cut with my Big Shot and Oval Framelits, and added a band of Real Red striped Holiday Fancy Foil Designer Vellum to the central band to add a little shine. I stamped my sentiment in black and then for my embellishment, I stamped the poinsettia three times on Whisper White and fussy cut each one, creating different layers of petals as I did so, so that when they were adhered on top of each other they have a real 3D effect. I also coloured some pearls with a yellow Sharpie and added those to the centre of my flower. Here's a closeup of the detail:
I love the effect you get with some good old fashioned fussy cutting and layering and for this card, no punch required. This set really is so versatile!
Do visit the other Design Team members to see how they used this week's challenge sketch; there's lots of inspiration over on their blogs too!
Enjoy your day and I'll be back tomorrow with another project; until then, happy stampin'!
Stampin' Up! Supplies Used:
- Reason For The Season Photopolymer Stamp Set
- Holidays Fancy Foil Designer Vellum
- Ovals Collection Framelits Dies
- Big Shot
- Whisper White A4 Cardstock
- Real Red Classic Stampin' Pad
- Real Red A4 Cardstock
- Garden Green Classic Stampin' Pad
- Garden Green A4 Cardstock
- Pearl Basic Jewels
by Joanne James10. September 2015 08:05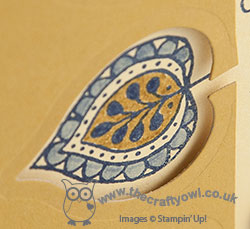
Today it's time for a new challenge over at Create With Connie and Mary and this week we have a great colour challenge for you:
Delightful Dijon is probably the most under-utilised of my current in-colours, so today's card was a good opportunity to redress the balance a little. I thought these colours would work well for an Autumn/Fall card, so that's where I went with this combination. Here's my card:
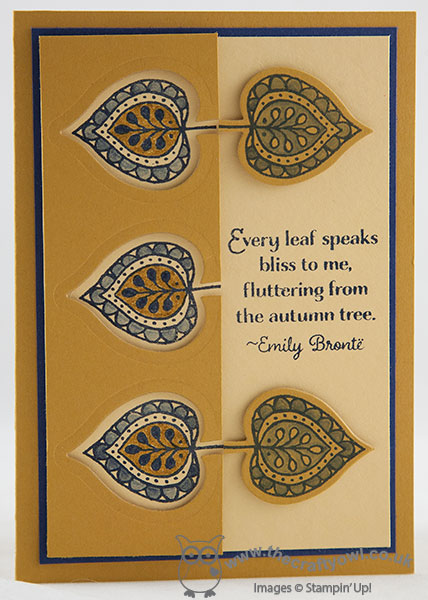
I am loving the new Lighthearted Leaves set, so perfect for colouring, and a doddle to cut out with the co-ordinating Leaflets Framelits! I was inspired to create a card with a rather geometric yet zentangle feel having been browsing on Pinterest (as you do ;-). For today's card, I used a Delightful Dijon base with a mat of Night of Navy then a further layer of So Saffron. I cut a strip of Delightful Dijon lengthways at half the width, then stamped three leaves in Night of Navy and cut them out using the Leaflets framelits. I coloured a couple of these with my blender pen and Night of Navy ink, then having positioned the negative die cut on top of the So Saffron layer, I stamped three additional leaves in Navy onto the So Saffron layer in the spaces. I coloured these leaves using a blender pen and my Night of Navy and Delightful Dijon markers.
To complete the design, I adhered the negative die cut to my card base using dimensionals, then aligned two of the cut-out leaves to the right side top and bottom, again using dimensionals, then stamped the sentiment in navy directly onto the So Saffron layer in the centre of the card.
Do visit the other Design Team members to see how they used this week's challenge colours; there's lots of inspiration over on their blogs too!
Enjoy your day and I'll be back tomorrow with another project; until then, happy stampin'!
Stampin' Up! Supplies Used:
- Lighthearted Leaves Photopolymer Stamp Set
- Leaflets Framelits Dies
- So Saffron A4 Cardstock
- Night Of Navy Classic Stampin' Pad
- Night Of Navy A4 Cardstock
- Delightful Dijon A4 Cardstock
- 2015-2017 In Color Stampin' Write Markers
- Blender Pens
- Big Shot
- Magnetic Platform
by Joanne James3. September 2015 08:05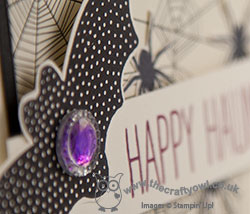
Today it's time for a new challenge over at Create With Connie and Mary and this week we have a great sketch challenge for you:


I'm linking up with the talented peeps over at Stamps Ink Paper (I'm hoping they are going to allow Vanilla as my white!) and I decided to go with a Halloween theme today and as today's blog title suggests, if your arachnophobic you should look away now - there are lots of spiders! Here's my card:
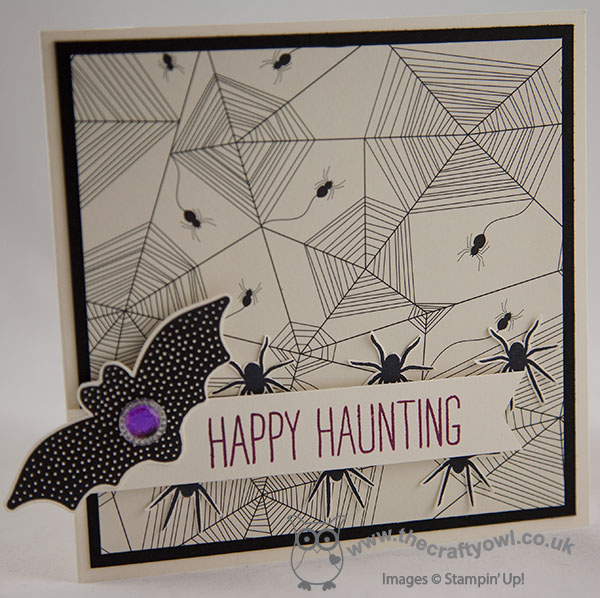
This card is a total showcase of this fabby spiderweb patterned paper from the Happy Haunting designer series paper pack - like I said, not one for those that are not a fan of the creepy crawlies, but at least they are on paper and not in the bathtub!
I stamped s bunch of extra spiders from the Cheer All Year set and fussy cut them, before adhering beneath my sentiment banner. I like how they are mostly obscured, but look like they are crawling out from underneath! They took a while to cut out, but so worth it as they are quite realistic-looking I think. To add just a splash of colour to my rather monochromatic card, I stamped my sentiment in Rich Razzleberry onto a banner, having flagged the end with my hexagon punch. I added a fussy-cut bat also from the Cheer All Year set which I allowed to overhang my card and finished him with one of the lovely new Iced Rhinestone embellishments, the centre of which I coloured with a purple Sharpie to add another spot of colour.
I hope you like today's card. Do visit the other Design Team members to see how they used this week's challenge sketch; there's lots of inspiration over on their blogs too!
Enjoy your day; my Juniors are at Granny's house today, so you can be sure my day will be a jam-packed one, full of chores and errands. You know what they say - no rest for the wicked! Back tomorrow with another project; until then, happy stampin'!
Stampin' Up! Supplies Used:
- Happy Haunting Designer Series Paper
- Cheer All Year Photopolymer Stamp Set
- Iced Rhinestone Embellishments
- Very Vanilla A4 Cardstock
- Basic Black A4 Cardstock
- Rich Razzlebberry Classic Stampin' Pad
- Hexagon Punch
by Joanne James27. August 2015 08:05
Today it's time for a new challenge over at Create With Connie and Mary and this week we have a great colour challenge for you:
Here's my card:
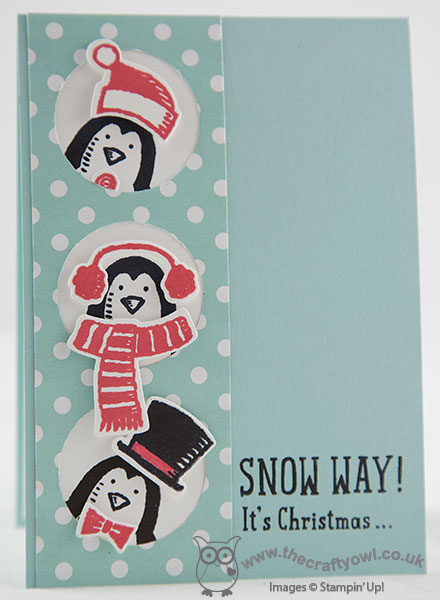
I am loving these cute little penguins (and the snowmen!) in the 'Snowplace' stamp set and the co-ordinating framelits make cutting them and their accessories out a cinch! For today's card, I used a Pool party base with a strip of Whisper White, onto which I stamped my penguins directly using the new Basic Black Archival ink. Each of them is peeking out of a hole punched with my 1 1/2" circle punch into a strip of School House DSP and their accessories stamped in a combination of Basic Black and Watermelon Wonder, which are popped up on dimensionals for a little added lift. I customised the sentiment as it wouldn't fit as per the stamp onto my card front; I continued the remainder inside, where I also added a few festive snowflakes to pretty things up a bit:

Isn't that fun? I have used this set so much already and I just know that I will get lots more use from it - it's already a favourite with my daughter!
Do visit the other Design Team members to see how they used this week's challenge colours; there's lots of inspiration over on their blogs too!
Enjoy your day and I'll be back tomorrow with another project; until then, happy stampin'!
Stampin' Up! Supplies Used:
* Snow Place - available September 1st
* Snow Friends Framelits - available September 1st
- Big Shot
- Magnetic Platform
- 1-1/2" Circle Punch
- Schoolhouse Designer Series Paper
- Pool Party A4 Cardstock
- Pool Party Classic Stampin' Pad
- Watermelon Wonder Classic Stampin' Pad
- Whisper White A4 Cardstock
by Joanne James20. August 2015 08:05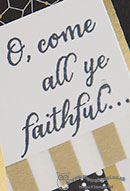 Today it's time for a new challenge over at Create With Connie and Mary and this week we have a great sketch challenge for you:
As I'm still excited to be working may way through my box of seasonal preorder goodies, I have another Christmas card to share with you today using the All Ye Faithful stamp set and Winter Wonderland Specialty Designer Sseries Paper and washi tape. Here's my card:
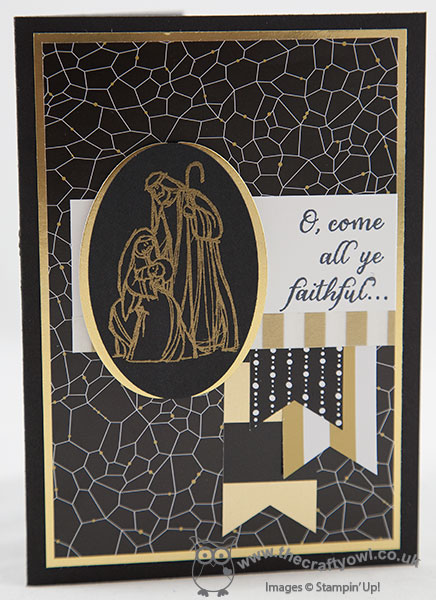
My colour scheme today was inspired by the Winter Wonderland product suite - a mix of black, white and gold, with foil accents and real sparkle. Using Basic Black for my base with a mat of gold foil, then used a piece of Winter Wonderland DSP with a crackle-glaze pattern for the front of my card. I edged a piece of Whisper White with gold striped washi tape, then stamped my sentiment in Memento Black on the right hand edge. This sentiment does actually come on one line, so in order to make it work for my card and the sketch I carefully masked off parts of it to enable me to stamp it in three separate sections. For the oval, I stamped Mary and Joseph in Versamark onto Basic Black card and heat embossed it in gold. I backed this with an oval that was cut to the same size using my Big Shot and Ovals Framelits, then cut in half vertically; this then creates a frame that enables the oval to stand out, but isn't too wide, as it would have been if I'd used the next size framelit up. To finish, I added a trio of flags punched using my Tripe Banner Punch, featuring more of the patterns in the Winter Wonderland DSP suite.
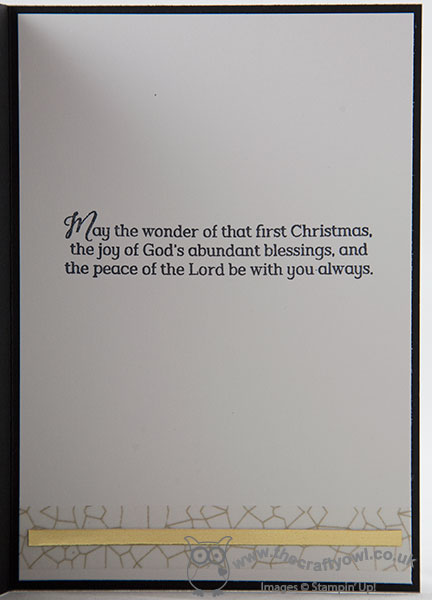
Whilst this isn't a colourway I would necessarily have been drawn to of my own accord, it is very on-trend and I do love the way the entire suite of products make co-ordination so easy - good old Stampin' Up! I love the All Ye Faithful stamp set too - one of my favourite religious sets in the new catalogue, it comes with two other feature stamps and a verse sentiment too that I used on the inside of my card:
I hope you like today's card. Do visit the other Design Team members to see how they used this week's challenge sketch; there's lots of inspiration over on their blogs too!
Enjoy your day and I'll be back tomorrow with another sneak-peek project, one for Halloween this time. Until then, happy stampin'!
Stampin' Up! Supplies Used:
* All Ye Faithful - available September 1st
* Winter Wonderland Specialty Designer Series Paper - available September 1st
*Winter Wonderland Washi Tape - available September 1st
- Big Shot
- Magnetic Platform
- Ovals Collection Framelits Dies
- Banner Triple Punch
- Gold Foil Sheets
- Whisper White A4 Cardstock
- Embossing Buddy
- Versamark Pad
- Gold Stampin' Emboss Powder
- Heat Tool (Uk)
- Basic Black A4 Cardstock
- Tuxedo Black Memento Ink Pad
ce7c5f2c-dfb8-4703-91c7-b6bb6f392bfe|0|.0|96d5b379-7e1d-4dac-a6ba-1e50db561b04
Tags: Create With Connie And Mary, Stampin' Up, Stampin' Up Card, Stampin' Up Card ideas, Stampin' Up Supplies, All ye Faithful, Winter Wonderland, Christmas, Ovals Framelits, Magnetic Platform, Big Shot, Triple Banner Punch
Cards | Shop Online | Stamping
by Joanne James13. August 2015 08:05Today it's time for a new challenge over at Create With Connie and Mary and this week we have a great colour challenge for you:
I actually have two cards for you today. I saw this colour combination and immediately thought of cacti and deserts - yes, really! Here's the first card - can you guess what stamp I used to create my cactus plant?
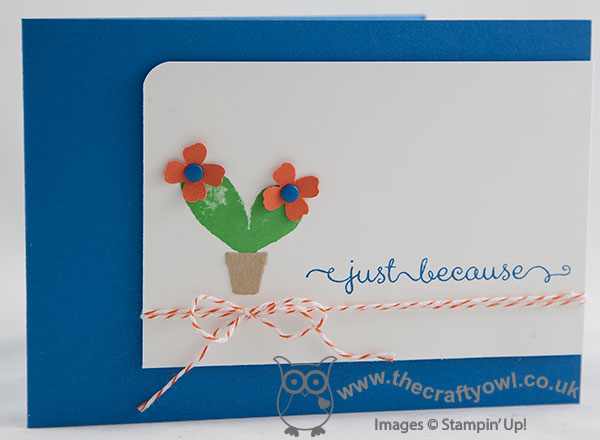
To create my cacti I used a neat little trick that I saw on Becky Cowley's blog here - using one of the Watercolour Wings butterflies to stamp the cactus shape - isn't that clever?!
I placed my cactus in a flowerpot cut out of kraft cardstock with the Handpicked Framelits and topped it with flowers punched from the Itty Bitty Accents punch, with candy dot centres. To finish my card, I added some Tangerine Tango bakers twine that I had leftover from an old Tag-a-Bag accessory kit (you could use white as an alternative). I'm not sure my cactus on this card is quite as convincing as Becky's version, but I love the idea all the same. It's great when a stamp set offers the flexibility to do more with it than intended - and this one certainly does!
This colour combination appealed to me more than I first thought it would, so having created the above card I then created another - still with my cactus theme, although this card uses the cactus from the 'Yee Haw' set which I understand is now sold out (boo hoo - I love this set!):
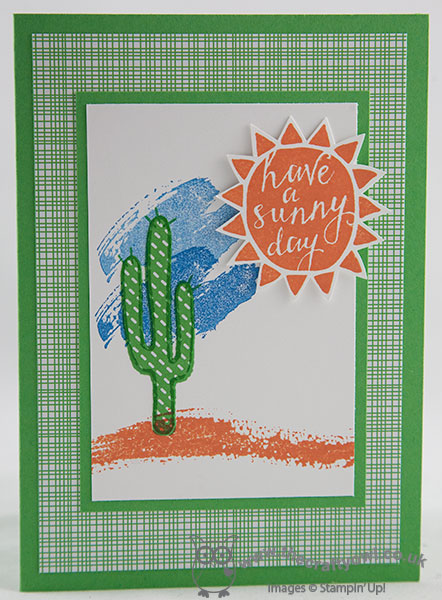
I used Cucumber Crush for my base and two of the co-ordinating DSP patterns in the Cherry on Top stack on my card - one for the mat and the other for my paper-pieced cactus, which is stamped using the 'Yee Haw' stamp set. My sky is stamped using 'Work of Art' in Pacific Point, with the sand in Tangerine Tango using one of the stamps in the Sheltering Tree set. To finish I fussy-cut my bright orange sun from the lovely hostess set, Silhouettes and Script, and popped it up on dimensionals.
Do visit the other Design Team members to see how they used this week's challenge colours; there's lots of inspiration over on their blogs too!
Enjoy your day and I'll be back tomorrow with another project; until then, happy stampin'!
Stampin' Up! Supplies Used:
- Cherry On Top Designer Series Paper Stack
- Cucumber Crush Classic Stampin' Pad
- Cucumber Crush A4 Cardstock
- Pacific Point Classic Stampin' Pad
- Tangerine Tango Classic Stampin' Pad
- Silhouettes & Script Wood-Mount Stamp
- Whisper White A4 Cardstock
- Sheltering Tree Photopolymer Stamp Set
- Work Of Art Clear-Mount Stamp Set
- A Dozen Thoughts Clear-Mount Stamp Set
- Watercolor Wings Photopolymer Stamp Set
- Punch Corner Project Life
- Pacific Point A4 Cardstock
- Handpicked Framelits Dies
- Kraft 12" X 12" Cardstock
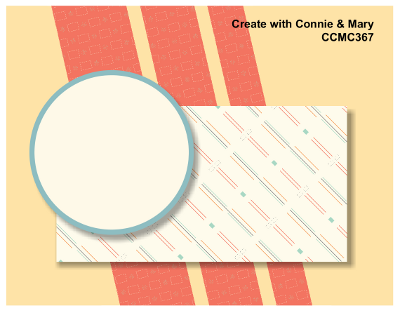
by Joanne James6. August 2015 08:05Today it's time for a new challenge over at Create With Connie and Mary and this week we have a great sketch challenge for you:
Having placed my pre-order for items from the forthcoming Autumn-Winter seasonal catalogue this week, I am totally in the Christmas groove. My new goodies haven't arrived yet, but luckily for me the annual catalogue now has a Christmas section again, so that's where I went for some supplies for today's card. Here's my card:
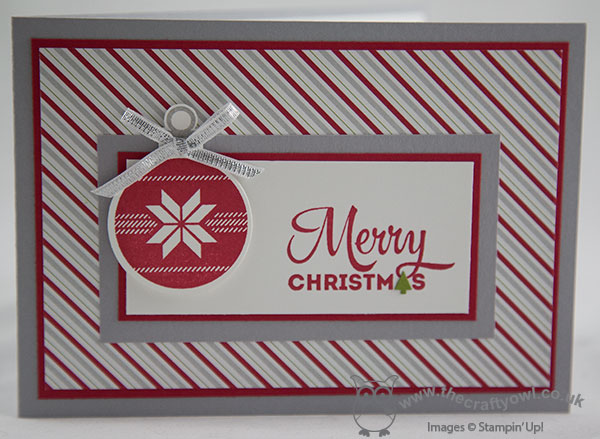
I used the new set 'Lots of Joy' and combined this with the lovely 'Merry Moments' DSP. I took the three diagonal stripes as inspiration for my card rather than literally - this paper has a lovely stripe pattern of varying thicknesses, so I think it works quite well. I stamped my bauble twice, once in Real Red and once in Smoky Slate, then cut the bauble top from the Smoky Slate one and adhered it behind my red bauble, before adding a silver ribbon bow. I stamped my sentiment in Real Red, then decided to paper-piece the little Christmas tree over the top in Old Olive - here's a close up photo so that you can see it in more detail:

This was quite easy to do - I simply stamped the sentiment again on a scrap of green cardstock, snipped out the tree and reversed it before adhering to my card. The pencil-thin stripe in the DSP is Old Olive and this was a great way to bring a little green into my predominantly red and grey coloured card. I hope you like today's card - I have another Christmas card using the same set to share with you tomorrow! Do visit the other Design Team members to see how they used this week's sketch; there's lots of inspiration over on their blogs too!
Enjoy your day and I'll be back tomorrow with another Christmas project; until then, happy stampin'!
Stampin' Up! Supplies Used:
- Lots Of Joy Wood-Mount Stamp Set
- Merry Moments Designer Series Paper
- 1" Circle Punch
- Silver 1/8" Ribbon
- Real Red Classic Stampin' Pad
- Real Red A4 Cardstock
- Smoky Slate Classic Stampin' Pad
- Smoky Slate A4 Cardstock
- Whisper White A4 Cardstock
- Old Olive A4 Cardstock
by Joanne James30. July 2015 08:00Today it's time for a new challenge over at Create With Connie and Mary and this week we have a great colour combination for you:

As soon as I saw these colours I knew they would be another great combination for work with my Awesomely Artistic stamp set, this time with the fabby new Brick Wall embossing folder:

I used Mint Macaron for my base with a mat of Perfect Plum, then on a piece of Whisper White I stamped the flower spray in Mint Macaron and a few grunge splatters in Perfect Plum, before running it through my Big Shot with the Brick Wall embossing folder in order to create my cottage garden effect. It's important you stamp before running this piece through the embossing folder rather than the other way around, otherwise you will be unable to achieve an even stamp on account of the cement grooves (I hope that makes sense!) I then sponged the whole of my card front with Sahara Sand ink to emphasise the brick shapes and texture of the wall. I wrapped a piece of Blackberry Bliss Striped Cotton Ribbon around my card front (the colour is sufficiently muted on the cotton that it is a good match for Perfect Plum) before adhering to the base, then tucked in the circle embellishment behind it before adding my sentiment, which I heat embossed in white onto Mint Macaron, and the beautiful dragonfly, which I stamped in Perfect Plum and Versamark then sprinkled liberally with Iridescent Ice to add a lovely sparkle. A last minute sprinkle of pearls finishes my card.
I love the versatility of this set. On account of working ahead this card was made a couple of weeks ago, however I wanted to give a little 'shout out' to a fellow Stampin' Up! demonstrator friend of mine, Julie Kettlewell, who blogged something quite similar last week (I am abroad and sans stamping supplies, so have had no opportunity to work up something substantially different!). Julie has made some lovely cards using the Awesomely Artistic stamp set, so if this is a set that appeals to you, I recommend you check out her Pinterest board for more inspiration. Also, do visit the other Design Team members to see how they used this week's challenge colours; there's lots of inspiration over on their blogs too!
Right, I'm off to top up my tan! Enjoy your day and I'll be back tomorrow with another project; until then, happy stampin'!
Stampin' Up! Supplies Used:
- Awesomely Artistic Clear-Mount Stamp Set
- Big Shot
- Brick Wall Textured Impressions Embossing Folder
- Project Life Cards & Labels Framelits Dies
- Mint Macaron Classic Stampin' Pad
- Mint Macaron A4 Cardstock
- Perfect Plum Classic Stampin' Pad
- Perfect Plum A4 Cardstock
- Sahara Sand Classic Stampin' Pad
- Sahara Sand A4 Cardstock
- Whisper White A4 Cardstock
- Blackberry Bliss 5/8" Striped Cotton Ribbon
- Pearl Basic Jewels
- 3/4" Circle Punch
- Sponge Daubers
- Embossing Buddy
- Heat Tool (Uk)
- White Stampin' Emboss Powder
- Iridescent Ice Stampin' Emboss Powder
- Versamark Pad
by Joanne James23. July 2015 08:00Today it's time for a new challenge over at Create With Connie and Mary and this week we have a great sketch for you:
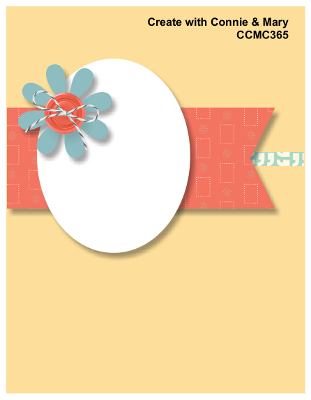
This is such a versatile sketch with so many possibilities, in the end though I settled for something that is a little unusual for me - take a look at today's card:
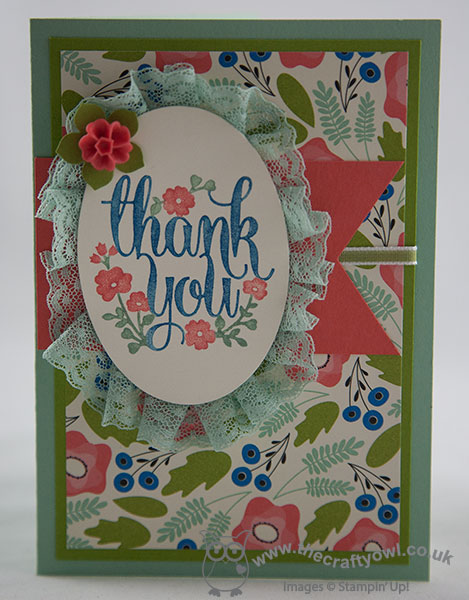
I was keen to use another of the papers on the Pretty Petals DSP stack as my background layer, so matted this on a base of Old Olive and Mint Macaron. I used Calypso Coral for my banner, effortlessly punched with my Triple Banner Punch (how did I ever manage without this in my life?!) and tucking a sliver of retired Old Olive ribbon beneath it (there is not a single ribbon in this colour in the current catalogue - let's hope that the Winter seasonal brings us something here in this staple colour!) I coloured my sentiment, from the 'A Whole Lot Of Lovely' hostess set (chat to me about booking a party or joining my next hostess club if you would like to own this set too!) in Pacific Point, Mint Macaron and Calypso Coral Stampin' Write markers and stamped onto Very Vanilla cardstock, that I cut out with my Big Shot and Oval Framelits.
Then for the bit that really isn't my usual style - I covered the back of the oval with Tear and Tape (how great is this product?! No more static red peel to stick to you!)and ruched some Mint Macaron lace trim all the way around the edge before adhering to my card front. I really love this pale green colour however was finding myself not really using is much in my card making, unlike it's counterparts Watermelon Wonder and Cucumber Crush (how did I ever live without these in my stamping cupboard?!) so this card is the first that seeks to rectify that. To finish, I added an Old Olive flower punched with the Petite Petals punch as leaves for the base of my Watermelon Wonder blossom accent - whilst not Calypso Coral, it is sufficiently close to compliment the coral elsewhere on my card.
So definitely more frilly than usual and this card would work just as well without the lace trim (and be more post-service friendly) but nice for a change I think! Do visit the other Design Team members to checkout their interpretations of this week's challenge sketch; and if you didn't read my Weekly Deals post yesterday, do check it out here - it contains a special offer exclusive to my customers!
Right, I'm off to top up my tan! Enjoy your day and I'll be back tomorrow with another project; until then, happy stampin'!
Stampin' Up! Supplies Used:
- A Whole Lot Of Lovely Clear-Mount Stamp Set
- Pretty Petals Designer Series Paper Stack
- Big Shot
- Ovals Collection Framelits Dies
- Mint Macaron A4 Cardstock
- Mint Macaron 1" Dotted Lace Trim
- 2015-2017 In Color Stampin' Write Markers
- 2015-2017 In Color Blossom Accents
- Old Olive A4 Cardstock
- Calypso Coral Stampin' Write Marker
- Calypso Coral A4 Cardstock
- Brights Stampin' Write Markers
- Very Vanilla A4 Cardstock
- Petite Petals Punch
- Banner Triple Punch
2869fbc5-7eb8-4234-85e8-0ba74f07d9a8|0|.0|96d5b379-7e1d-4dac-a6ba-1e50db561b04
Tags: A Whole Lot of Lovely, Big Shot, Create With Connie And Mary, Ovals Framelits, Triple Banner Punch, Pretty Petals, Shop Stampin' Up online, Shop online, Stampin' Up, Stampin' Up Card, Stampin' Up Card ideas, Stampin' Up Supplies, Host a Party
Cards | Host a Party | hosting | Stamping