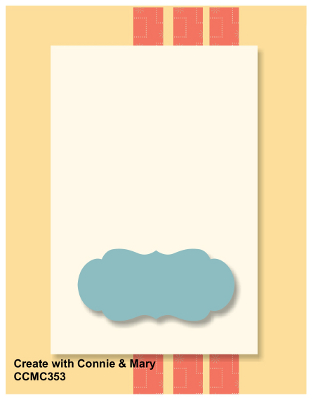
by Joanne James30. April 2015 08:05It's Thursday and time for a new challenge over at Create With Connie And Mary and this week we have a great sketch challenge for you:
My post today is a treat for all my international readers, as I'm using one of the photopolymer sets that is available in the USA and unfortunately not for sale by Stampin' Up! in the UK. Whilst we are moving ever closer together in terms of catalogues, timesales and product ranges with our US colleagues, there are some things that remain USA-specific, such as the special issue sets, Paper Pumpkin and of course their clearance rack and shipping offers are country-specific. I absolutely love the Yee-Haw stamp set though and have been lucky enough to acquire one through one of my US stamping colleagues (thank you LeAnne!) and I decided it was perfect for today's sketch layout - take a look:
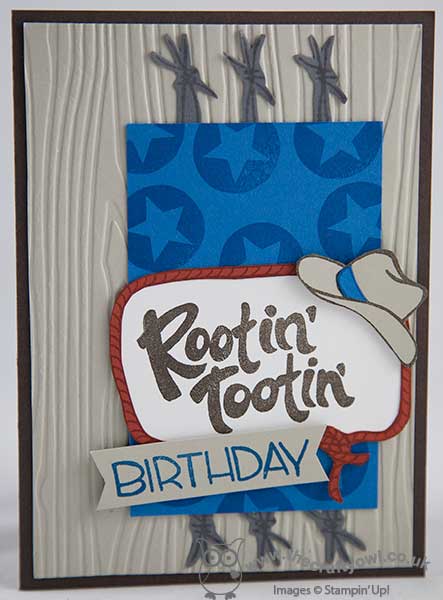
I took my colour palette directly from the Colour Coach (such a useful tool!) and on a base of Early Espresso, I matted a piece of Sahara Sand that I had run through my Woodgrain embossing folder and adhered flat side up. For the vertical lines of the sketch, I used three pieces of barbed wire - stamped in Basic Grey onto Basic Grey cardstock and fussy cut out - then topped this with a panel of Pacific Point, stamped in the circle star image in the set. I stamped my main sentiment in Early Espresso onto Whisper White, then topped this with the lasso rope stamped in Cajun Craze onto the same colour cardstock having cut out the middle and fussy cut around the edge. I finished with a 'birthday' banner and a paper-pieced cowboy hat. So lots of fussy cutting on my card today, but so worth it - what a fun card for a Rootin' Tootin' birthday boy!
I'm looking forward to seeing what you come up with using this week's sketch - do check out how the other members of the design team have used it for some great inspiration. I'll be back tomorrow with another project for Friday; until then, happy stampin'!
Stampin' Up! Supplies Used:
- Woodgrain Textured Impressions Embossing Folder
- Big Shot Die-Cut Machine
- Paper Snips
- Pacific Point Classic Stampin' Pad
- Pacific Point A4 Card Stock
- Cajun Craze Classic Stampin' Pad
- Cajun Craze A4 Card Stock
- Early Espresso Classic Stampin' Pad
- Early Espresso A4 Card Stock
- Sahara Sand A4 Card Stock
- Whisper White A4 Card Stock
- Basic Gray Classic Stampin' Pad
- Basic Gray A4 Card Stock
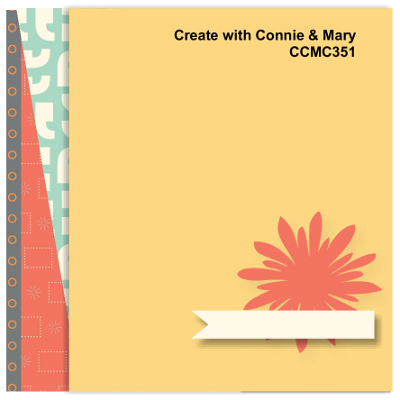
by Joanne James16. April 2015 08:05It's Thursday and time for another challenge over at Create With Connie and Mary, where this week we have a new sketch challenge for you:
I took quite an unusual approach with this card and decided to try out a new technique that was highlighted on a recent Splitcoast Stampers newsletter - paper tole, where you cut elements of your one layer card using a craft knife to create a raised almost 3D effect. Take a look at my card and then I'll share with you some tips:
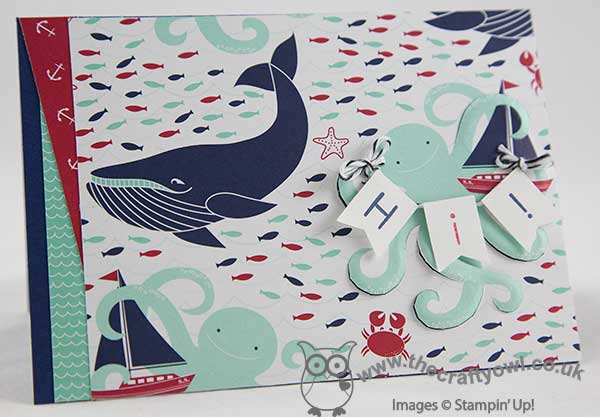
I decided to use a sheet of highly patterned Maritime Designer Series Paper for my card front; I haven't used this paper in a while and it is one of my favourites, so thought it opportune to give it some love again for a change! It also has lots of great co-ordinating patterns that made it easy to add my angled layers on the left hand side.
I decided to use the octopus as the focal point for my card, and based my cutting line around that. To create the paper tole effect, I cut some of the upper 'layers' of his legs and rubbed the reverse side with the rounded end of my pokey tool to create a raised cardfront, that is accentuated by placing dimensional behind the cut pieces. You can see that better in the photo below:
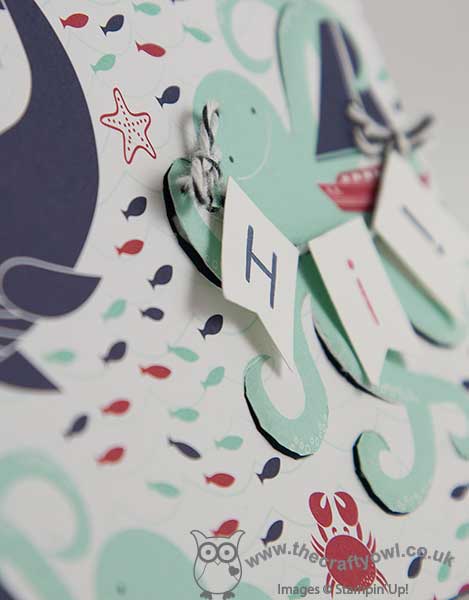
I wasn't sure this would work with DSP as the technique suits a thicker cardstock or watercolour paper, but it actually worked quite well and I'm pleased with the overall result. I included some minimal stamping, in the little banner that the octopus is holding, but otherwise, this card is all about the paper!
I was having an interesting discussion with one of my customers yesterday about sketch challenges and I thought I would just take the opportunity in my post to just mention a few of the things that we were talking about - if you've ever considered having a go at one, but were holding back because you weren't sure, you may find the following useful:
- The sketch is for inspiration - it should be used as a guide.
- You don't have to interpret the sketch literally, but your challenge card should bear a resemblance to it and share key elements. So for example, with the sketch above, I would expect to see a focal image, but it can usually be any shape and doesn't have to be exactly the same as the one in the sketch (I used the octopus) some form of flag/embellisment/sentiment banner (I used my Hi! banner garland) and some form of treatment on the left (I layered my DSP).
- The number of mats and layers isn't prescriptive; I did choose to go edge-to-edge with my DSP for this card, largely to fit everything in and because I didn't want a border to distract, however had I been using a punched image for my focal point, I might have created a bordered mat - that would have been ok too.
- You should take note of the challenge rules; all challenges are different, e.g. the Create With Connie and Mary Challenge requires you to use Stampin' Up! products only, others may restrict the number of challenge entries you can combine or have other guidelines to be adhered to.
You will notice that all of the design team have interpreted this week's sketch challenge differently, yet all of them bear a resemblance to the sketch - hence you get lots of additional creative inspiration on how to interpret the sketch and use your SU! products. So enough from me - go get your inks, stamps and paper and see what you can make of this week's sketch - we look forward to seeing your creations in the gallery.
That's all from me - back tomorrow with another project. Until then, happy stampin'!
Stampin' Up! Supplies Used:
- Maritime Designer Series Paper
- Back To Basics Alphabet Photopolymer Stamp Set
- Banner Punch
- Paper-Piercing Tool
- Stampin' Pierce Mat
- Basic Black Baker's Twine
- Night Of Navy Classic Stampin' Pad
- Night Of Navy A4 Card Stock
- Real Red Classic Stampin' Pad
- Whisper White A4 Card Stock
by Joanne James9. April 2015 08:05It's Thursday and time for another challenge over at Create With Connie and Mary, where this week we have a great colour combination for you:
This colour combination appears in the Birthday Bash DSP and I couldn't resist using a piece of it on a fun-fold card for a humorous birthday greeting:
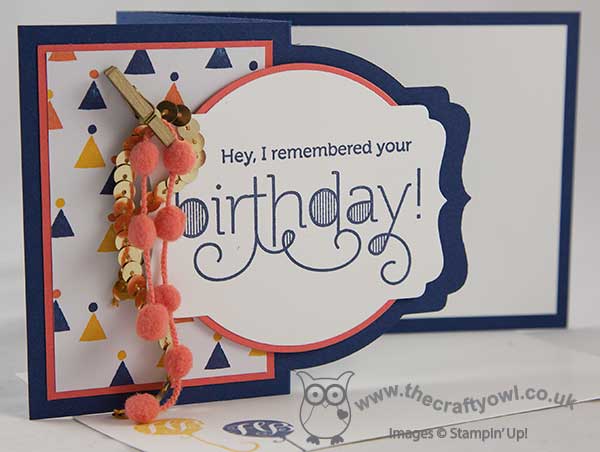
I used Night of Navy for my card base and created a fun-fold card using my Deco Labels framelits. I used Calypso Coral for my mats. I used a piece of the party hat paper for the front section beneath my main sentiment, a lovely curly script from the 'Age Awareness' stampset. I backed my sentiment panel with a circle cut with my circle framelits and popped this up on dimensionals, so that I could attach my Calypso Coral pompom trim and gold sequins to the front with a mini gold peg to add to the party feel. I continued the stamping inside my card, which today I remembered to photograph:

This card is for a good friend whose birthday I not only forgot last year, but worse still bumped into on the day and not even that triggered my extremely poor memory into remembering! Luckily the friend was gracious enough to forgive me, although he has ribbed me mercilessly about it ever since. Needless to say, his birthday isn't until next month but the card is ready and I will be making an extra effort this time around!
The Design Team has some amazing projects to share with you this week, with lots of great inspiration so do pop by their blogs and take a look. So grab your paper and inks and we look forward to seeing you in the gallery this week!
I'll be back tomorrow with another project hopefully; I have my monthly stamp-a-stack class in the morning and the Easter holidays mean I am getting a little less creative time than usual, but I'll do my best. until then, happy stampin'!
Stampin' Up! Supplies Used:
- Age Awareness Photopolymer Stamp Set
- Birthday Bash Specialty Designer Series Paper
- Calypso Coral Pompom Trim `
- Gold Sequin Trim
- Mini Metallic Clothespins
- Deco Labels Collection Framelits Dies
- Circles Collection Framelits Dies
- Big Shot Die-Cut Machine
- Whisper White A4 Card Stock
- Night Of Navy Classic Stampin' Pad
- Night Of Navy A4 Card Stock
- Calypso Coral A4 Card Stock
- Crushed Curry Classic Stampin' Pad
40d39189-44f7-4d94-a627-8d578aa3034d|1|4.0|96d5b379-7e1d-4dac-a6ba-1e50db561b04
Tags: Birthday Bash, Big Shot, Age Awareness, Deco Labels Framelits, Circles Framelits, Create With Connie And Mary, Fun Folds, Shop online, Stampin' Up, Stampin' Up Card, Stampin' Up Card ideas, Stampin' Up Supplies
Cards | Stamping
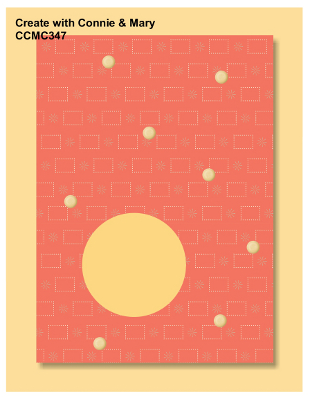
by Joanne James26. March 2015 08:05Today we have a new challenge over at Create With Connie and Mary and this week we are working with the following colour combination:
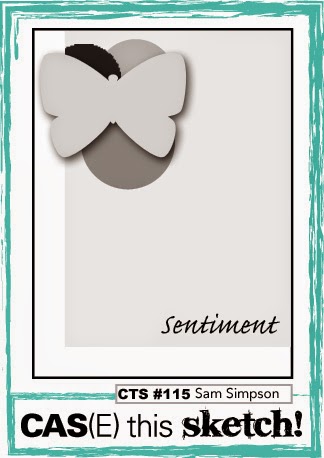
I decided these colours were perfect for another entry into this week's challenge over at The Card Concept, this time using the current CAS(E) This Sketch for my layout:
This week's colours all feature in the inspiration photo above, and I wanted to create a card with some whitewashed painted wood like the table in the photo - this is what I came up with:
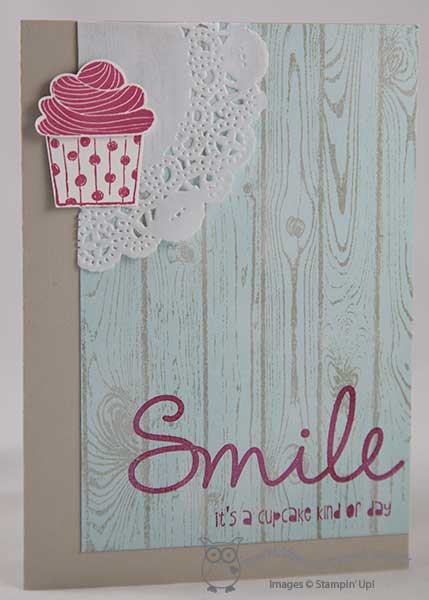
I stamped the Hardwood stamp in Sahara Sand onto a piece of Soft Sky, then 'aged' it by sponging over some Whisper White kraft ink and I really like the look. The combination of sentiments really work for me here too; this is the first time I've used the 'smile' from the 'So You' stamp set and I love it, especially paired with the cupcake one. I have something of a love-hate relationship with doilies (my regular followers will know I don't use them often and even then I'm not sure about them!) but here I felt one would be the perfect background for my cupcake, again, echoing the lace doily in the inspiration photo.
I hope you like today's card and that it inspires you to create something with this colour palette. Do check out the other Design Team member cards - we look forward to seeing you in the Create With Connie and Mary gallery this week.
Back tomorrow with another project; until then, happy stampin'!
Stampin' Up! Supplies Used:
- Hardwood Wood-Mount Stamp Set
- Cupcake Party Clear-Mount Stamp Set
- Cupcake Punch
- So You Photopolymer Stamp Set
- Whisper White Craft Stampin' Pad
- Tea Lace Paper Doilies
- Card Stock A4 Soft Sky
- Sahara Sand Classic Stampin' Pad
- Sahara Sand A4 Card Stock
- Rose Red Classic Stampin' Pad
by Joanne James19. March 2015 08:05It's time for a new Thursday challenge over at Create With Connie and Mary and this week we have a great sketch challenge for you:
I decided to turn the sketch through 180 degrees for my card - here's what I came up with:

That circle was just asking to be made into a balloon, don't you think? I used a piece of Tangelo Twist for my base, matted with a piece of Night of Navy and a piece of the lovely Balloon Bash DSP - the gold foil balloons in the pattern looked like the little dots on the sketch I thought. I stamped my balloon in Night of Navy on Whisper White and heat-embossed the 'birthday' in gold, cutting out using the co-ordinating framelits, adding a small gold foil bow and a string of gold sequins to finish it off and popping it up on dimensionals.
Such a simple card, yet the DSP really shines and the touches of gold make this card really special. Do check out how the rest of the Design Team have interpreted the sketch - there's some great inspiration to be found!
I'll be back tomorrow with another project; until then, happy stampin'!
by Joanne James12. March 2015 08:05Today it's time for a new challenge over at Create with Connie and Mary and this week we have a colour challenge for you:
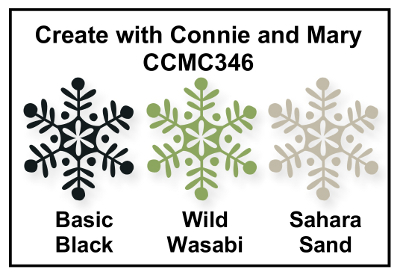
This week's card was a challenge for me in so many ways! I have no Irish connections so St Patrick's Day isn't a big thing for me, although I often make at least one project to celebrate and I thought these colours would be perfect. I decided on my design and really wanted to create a four leaf clover to tie in with a 'lucky' theme, however I couldn't make it work with my layout, so went with a three leaf clover and decided that for my card this would be just as lucky (cardmaker's prerogative ;-)). Here it is:
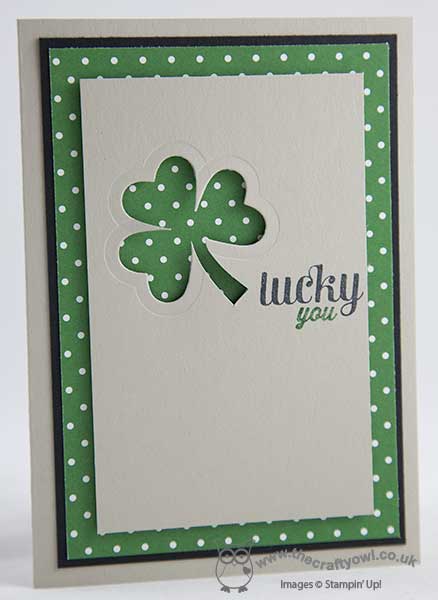
I made my simple clover leaf using the smallest heart from the Hearts Framelits set, and freehand cut the stem, then offset my sentiment, a combination of stamps using the 'lucky' from the Project Life sentiment set 'Remember This' and the 'you' from the Sale-A-Bration set 'Simply Wonderful'. One last confession from me - I actually used a sheet of Garden Green from the Regals DSP stack for my card - when I went to my folder, I had no Wild Wasabi - oops! The effect would be just the same with a Wild Wasabi polka dot paper though, so I went with it.
Do check out the gallery to see what the other members of the CCMC design team have come up with this week - we look forward to seeing your creations!
Back tomorrow with another project; until then, happy stampin'!
by Joanne James5. March 2015 08:05Today in addition to my card I have some exciting news for you! I was recently asked by the lovely Connie and Mary to join their Thursday Challenge Team so it's official - I am officially a Create With Connie and Mary Designer:

As my regular readers know, I often play along with the CCMC challenges, so I'm excited to be sharing my first card as designer with you for this week's new challenge, which is a sketch challenge using the following sketch as inspiration:
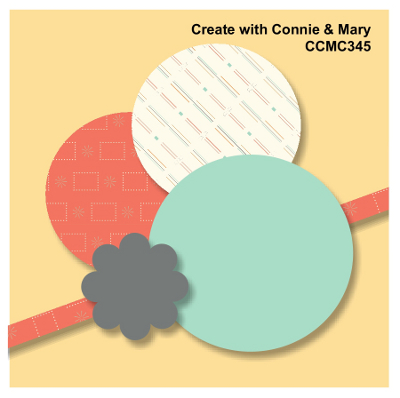
I decided with Spring on the way and since we are just about to officially embark on 'wedding season', I would break out my 'Something Borrowed' Designer Series Paper and create my first wedding card this year:
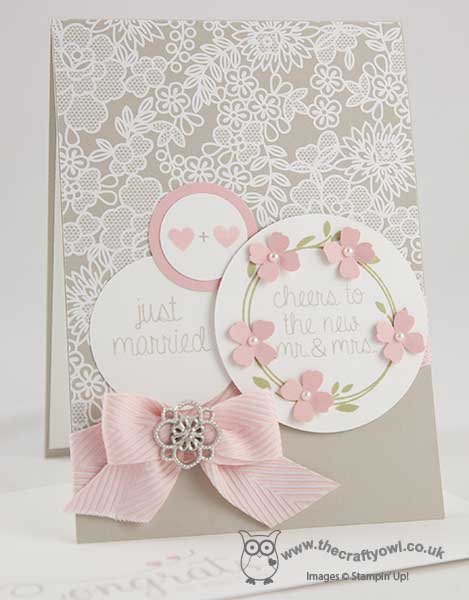
I used Sahara Sand for my card base and overlaid this with a piece of 'Something Borrowed' DSP which I cut at an angle, following the line of the sketch, and covered the join with a piece of Blushing Bride Chevron Ribbon. I punched the circles from Whisper White using a variety of circle punches, one of which I matted on circle of Blushing Bride, and I stamped a variety of stamps from the new 'Your Perfect Day' stamp set in Sahara Sand. I used a Blushing Bride marker to highlight the hearts on one of the circles and on the main circle, I also stamped the wreath shape in Pear Pizzazz around my sentiment in Sahara Sand, then added my Blushing Bride flowers punched out with the Itty Bitty Accents flower punch, finished with a pearl in the centre of each. To finish, I added a bow from Blushing Bride chevron ribbon and finished the centre of this with one of the gorgeous new Something Borrowed Embellishments - this really adds a touch of luxury to the finished card I think. I even stamped a co-ordinating envelope - of all the cards that I send, I like wedding cards to be special.
I hope you like today's card - do pop over to the Create With Connie And Mary website to check out the creations of the other members of the design team. There are a few other new designers joining the team too, so go take a look! we look forward to seeing your creations in the gallery this week.
I'll be back tomorrow with a new project; until then, happy stampin'!