by Joanne James8. September 2015 20:03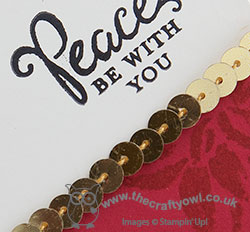 I held the second of my monthly technique classes today so I thought I would share with you one of our class cards. We have been using the 'Reason For The Season' stamp set this month and this is the first of our cards, our 'warm up' card:
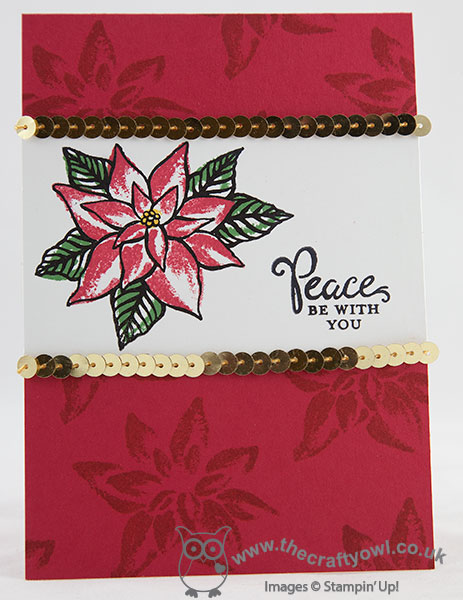
I created a lovely 'tone on tone' background, by stamping the petal flower image in Real Red onto Real Red cardstock. We then created a white panel to go across the front, where we stamped the complete flower in Real Red and Garden Green, including the outline. 'Reason For The Season' is a two-step stamp set, where you stamp the outline then infill the coloured areas with separate stamps for the petals, leaves and centres. This sounds much more difficult than it actually is, when the stamps are photopolymer like this one; because the stamps are transparent it makes aligning the images a breeze, with no stamp-a-ma-jig required.
The outline and sentiment were stamped in the new Basic Black archival ink, which gives a lovely crisp image. To finish, I added a row of gold sequins either side of the panel and some decoration to the inside of the card. This is a great stamp set with so many creative possibilities. Best of all, it has a co-ordinating punch and is one of the many fantastic bundle offers in the seasonal catalogue - buy both items and save 15%, can't get better than that!
If you live in or around Northampton and would like to attend one of my classes, please do check out my class schedule or contact me for more details. They are a great way to learn new crafting techniques and enjoy a pleasant few hours creating with like-minded individuals.
Back tomorrow with this week's Wednesday Weekly Deals and another creative project. Until then, happy stampin'!
Stampin' Up! Supplies Used:
by Joanne James1. August 2015 15:00Today I want to share one of the fabulous kits that was first introduced with the Spring Summer seasonal catalogue earlier this year and has since been carried over into the main catalogue: the Perpetual Birthday Calendar kit. Now I'm a big fan of kits for a number of reasons:
- I think they make great gifts, for crafters and non-crafters alike
- Combine with a stamp set, glue and an ink pad or two, they contain everything you need to complete your project - including step-by-step instructions
- They are great for travelling and 'crafting on the go'
- They are great for the time-strapped crafter - you can complete a whole project or significant number of cards in a short space of time
- For someone like me, who uses a lot of creative energy designing my own cards and classes for others, they can be truly relaxing - little thought required!
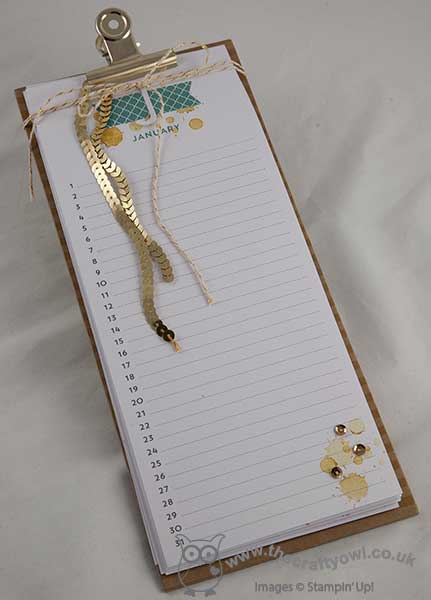
I spent a pleasurable afternoon with my good friend and downline Barbara recently and we made up our kits together. Here's a quick photograph of the front of my finished calendar:
And here are some great photos courtesy of Stampin' Up! that show firstly everything that you get in the box:

And secondly what some of the other months look like completed:

There are more than enough bits and pieces to make the kit (SU! kits are very generous and usually have plenty of spares leftover!) and the nice thing about this kit is that the box can be used as a giftbox, with ribbon to finish, so if you didnt want to gift the actual kit to someone to make, you could have all the fun of making it and then gift the finished article to someone - win, win! And who doesn't need a birthday calendar?? (Or are you all so much better at remembering birthdays than I am?!) The co-ordinating stamp set is also great for creating quick and easy cards and notelets too, either on its own of combined with other sets.
If you needed further convincing, watch this great little video from Stampin' Up! that demonstrates just what a great kit this is:
I really recommend you watch the video before commencing this project as the written instructions are quite small and it also gives lots of hints and tips about putting the project together. Alternatively, you can contact me to express an interest in attending my next project class for this calendar kit or arrange for to hold a private class for you in your home with a group of friends - I'll bring the ink, stamps, adhesives and kits and we can spend a fun few hours putting them together!
That's all from me today - back tomorrow with a new challenge over at The Paper Players. Until then, happy stampin'!
Stampin' Up! Supplies Used:
by Joanne James28. July 2015 08:00Good morning everyone! Today I have another of the cards from my July technique lass featuring the stamp set 'You've Got This':
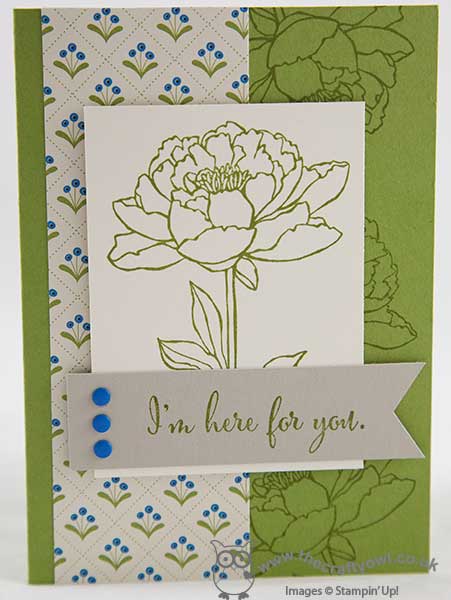
I was inspired by this card of Patsy Waggoner's and wanted to create a similar card showing how the focal flower could also be used as a background stamp to create an alternative effect. Of course I had to pair mine with my most favourite Pretty Petals DSP with that cute Pacific Point flower, which I then used in the candy dots of the same colour to bring focus to the sentiment banner - a cinch to create with my Triple Banner punch. Pacific Point and Old Olive seem an unlikely colour combo, yet the Pretty Petals DSP shows how they work so perfectly together, especially when teamed with Very Vanilla as the neutral.
This card was another success with the ladies at my technique class; combined with the third card (this one - the card that started it all!) which was the most complicated of the three, we managed to make three cards to be proud of.
Back tomorrow with a new set of Wednesday Weekly Deals - don't forget you still have one more day to take advantage of my Weekly Deals Giveaway this week - to remind yourself of the offer, please click here! Until tomorrow, happy stampin'!
Stampin' Up! Supplies Used:
by Joanne James27. July 2015 08:00It's the start of the working week (for some!) and today I'm sharing one of the cards I made at last month's technique classes featuring the stamp set 'You've Got This':
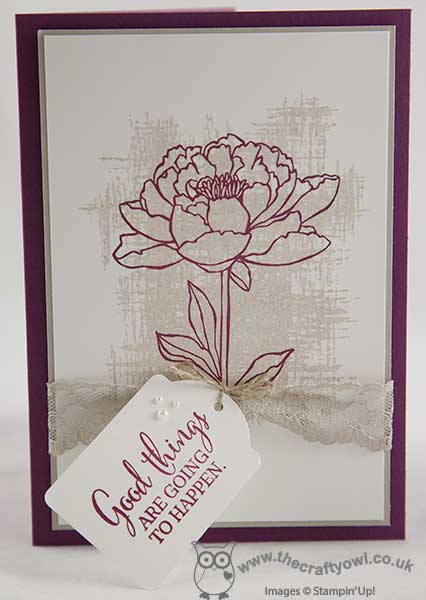
The layout for this card is inspired by the one in the annual catalogue that features this stamp set. For my card I chose a base of Rich Razzleberry and a mat of Sahara Sand, then stamped the hatched background stamp image onto a piece of Whisper White in Sahara Sand, having stamped off once first, and then overlaid this with the outline of the flower in Rich Razzleberry. This is a really versatile set - there is so much you can do with the flower stamp in terms of colouring (or not), fussy cutting (or not!) and the background stamp is one of those that will be useful for all kinds of projects. I wrapped a piece of Sahara Sand trim tightly around my layers before adhering to my base card and stamped my sentiment and punched it out with the note tag punch and tying it to the lace with some linen thread. I added a few pearls and my card was finished. The ladies in my class loved the simplicity of this card and how it could be recreated in lots of alternative colourways to achieve a different look.
My card was made with a specific friend of mine in mind. The lovely Pip Todman, of Queen Pip Cards, is a fellow SU! demonstrator who I presented with at Stampin' Up!'s European Convention in Brussels last October and has been working very hard to achieving some goals in her SU! business this year. She still has a little way to go but I wanted to send her this card to let her know I was thinking of her and send a few words of encouragement - I do believe 'good things are going to happen' for Pip this year and I am looking forward to celebrating with her when I see her in Brussels again in November. Do pop over to Pip's blog via the above link and leave her some Stampin' love, or better still if you live in or around Ash Vale or the surrounding Hampshire area, do check out Pip's classes - she would love to welcome you along!
On the other hand, if you live in or around Northampton or just across the border into Leicestershire or Buckinghamshire, I would love to see you at one of my papercraft classes sometime soon. I run a variety of classes, from technique-based, to stamp-a-stack, 3D home decor and project-based classes, as well as Project Life memory keeping. My current schedule of classes can be found here or sign up to my newsletter for reminders and other news and information. My next technique classes for August feature the RMHC Sprinkles of Life stamp set and will be held on Tuesday 4th and 11th August - do get in touch if you would like to join me.
That's all from me today; I have another of the class cards using this stamp set tomorrow, so do pop back to see another take on this gorgeous set. Until then, happy stampin'!
Stampin' Up! Supplies Used:
by Joanne James10. June 2015 19:52Having had a busy start to my week with two technique classes and my monthly Project Life Class, I am finally back with my blog today to share with you one of the cards we made in my technique class. The class featured the now retired set 'Painted Petals' from the Spring-Summer Seasonal catalogue; the ladies that attend my classes were so keen to have a class using this set that we decided we would carry it over into June. Here is one of the cards we made:
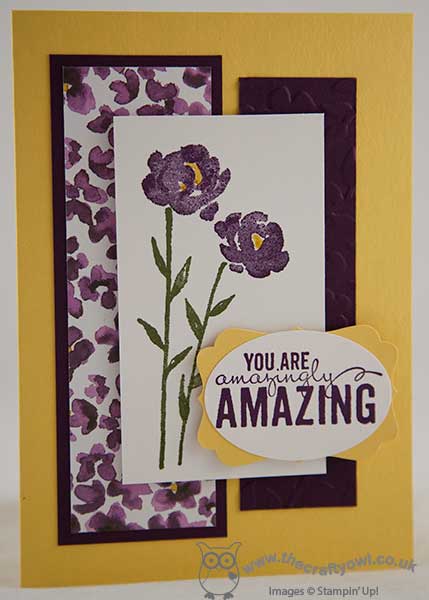
A beautifully bright and cheery card in Daffodil Delight and Blackberry Bliss. We used some retired All Abloom DSP matted on Blackberry Bliss, alongside a panel of Blackberry Bliss that we embossed with the Spring Flowers embossing folder (also retired), then mounted our panel of Whisper White stamped with the double flower image in Blackberry Bliss and Mossy Meadow (the yellow flower centres were added with a Crushed Curry Stampin' Write marker). To finish we added the sentiment, punched out with a large oval punch and mounted on a piece of yellow cut with the Decorative Label punch. This was our 'finishing up' card, having made a rather more complicated box card beforehand (one to share another day!).
Next month's technique class is featuring the gorgeous new stamp set 'You've Got This'. If you would like to join with me and two groups of the nicest people you could wish to know, do get in touch for more details and to book your place.
That's all from me today; back tomorrow with a card for our new challenge over at Create With Connie And Mary. Until then, happy stampin'!
Stampin' Up! Supplies Used:
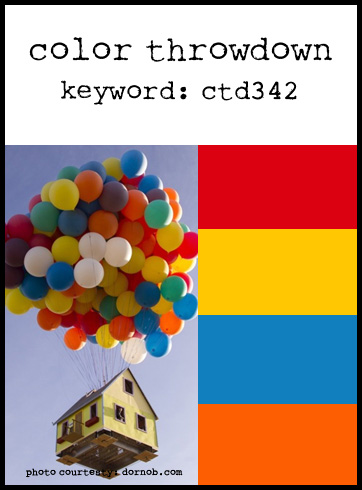
by Joanne James18. May 2015 11:03I am starting this week with a quick post to share a card that I made with my ladies at one of my recent Stamp-A-Stack classes which was all about punch art and fits perfectly not only for the colours but also the inspiration photo over at The Color Throwdown this week:
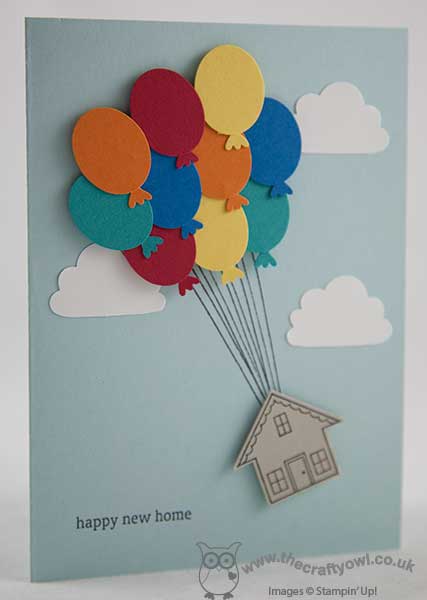
I had been wanting to make an 'Up!' style card for a while and had seen lots of versions on Pinterest - here's my take with the card I made with my ladies:
Quite simple, but it needed to be as everyone was making a few each - Stamp-A-Stack is all about creating lots of cards in a - relatively! - short time.
The base is a piece of Soft Sky, onto which I adhered a few Whisper White clouds and stamped a few straight lines using the balloon string from the 'Celebrate Today' stamp set. We then stamped the house from the now retired Sale-A-Bration set in Memento Black onto Crumb Cake and punched it out with the retiring 'What's Up?' arrow punch and popped it on a dimensional at the base of the strings. The cluster of balloons is a carefully layered group of balloons made with the small oval punch and a foot from the Owl Builder punch. The sentiment is taken from the also retired winter seasonal set 'Holiday Home'. These bright primary colours are perfect for this card and so remind me of the scene where the house takes off in the Disney movie 'Up!'; I'm a big Disney fan and this movie holds special memories as it was the movie I watched with my daughter the first time we visited the cinema.
That's not quite all from me today - I have a second post which is my-fill in post from Saturday when I was at the Stampin' Up! UK Regional training event in Telford, so scroll back to read that one if you want to hear about the fun I had!
Back tomorrow with another project; until then, happy stampin'!
Stampin' Up! Supplies Used:
e73d268a-5264-4619-838b-4faf68431aae|0|.0|96d5b379-7e1d-4dac-a6ba-1e50db561b04
Tags: Arrow Punch, small oval punch, Owl Punch, Cupcake Builder Punch, Punch Art, Shop Stampin' Up online, Shop online, Stampin' Up, Stampin' Up Card, Stampin' Up Card ideas, Stampin' Up Supplies, Classes, Stamp-A-Stack
Cards | Classes | Punch Art | Stamping
by Joanne James14. May 2015 08:05It's Thursday and time for a new challenge over at Create With Connie And Mary and this week we have a sketch challenge for you - my favourite!
This is a great card for using up scraps of DSP so I set to work with my Birthday Bash Speciality DSP and Birthday Bash Stamp set to create today's card:
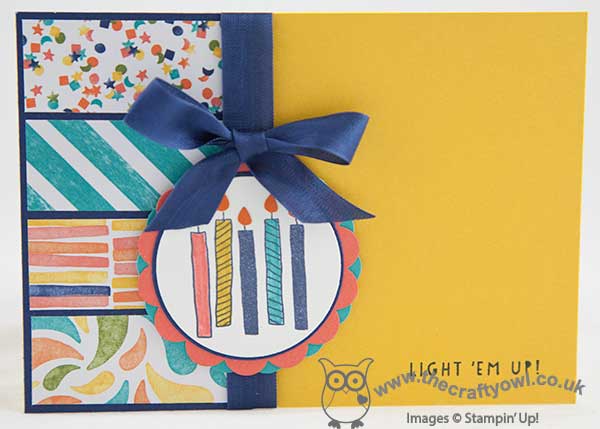
I let the DSP drive the colour scheme for my card so used a Crushed Curry base with a panel of Night Of Navy down the left hand side, which I then overlaid with four co-ordinating rectangles of patterned paper. I then added a piece of Night of Navy seam binding ribbon to cover the join and for my focal point stamped the candles from the 'light 'em up' stamp in the Birthday Bash set in navy on Whisper White, having masked off the words first. I coloured this with my Calypso Coral, Bermuda Bay and Crushed Curry Stampin' Write markers and layered this circle onto another of Night of Navy and two scalloped circles, one each in Bermuda Bay and Calypso Coral. I also punched the candle flames out of Tangerine Tango using my owl builder punch - a small touch, but looks so much better than navy ones! To finish, I stamped the sentiment, this time masking off the candles, in navy in the right hand corner.
I made this card with the ladies in my Stamp-A-Stack class last week and they loved it, so I hope you like it too. Don't forget if 'Birthday Bash' is on your wishlist, it will be retiring on 2nd June so don't leave it too late to place your order.
That's all from me today - I look forward to seeing your takes on this week's sketch in the gallery.
Back tomorrow with another project; until then, happy stampin'!
Stampin' Up! Supplies Used:
- Birthday Bash Specialty Designer Series Paper
- Balloon Bash Photopolymer Stamp Set
- Night Of Navy Classic Stampin' Pad
- Night Of Navy A4 Card Stock
- Card Stock A4 Crushed Curry
- Calypso Coral A4 Card Stock
- Card Stock A4 Bermuda Bay
- Card Stock A4 Tangerine Tango
- Night Of Navy 1/2" Seam Binding Ribbon
- Whisper White A4 Card Stock
- 2-3/8 Inch Scallop Circle Punch
- 2" Circle Punch
- Big Shot Die-Cut Machine
- Circles Collection Framelits Dies
- Big Shot Magnetic Platform
- Owl Builder Punch
by Joanne James14. February 2015 09:00I hope you all received lots of Valentine's cards today - I certainly sent plenty! Today I'm sharing a card that I made using the Butterfly Basics stamp set to share with the ladies that attended my technique class earlier this week. In addition to the cards that I design for us to make in the class, I produce a selection of alternative samples to provide further ideas and ways in which they can use the stamp set and practise the techniques that we have covered. There are times when one of these cards produces so many 'oohs' and 'aahs' that it makes me wonder if I should have included the card as the class card - this is one of those cards!! The ladies made me promise I would blog it share with all of you, so here it is:
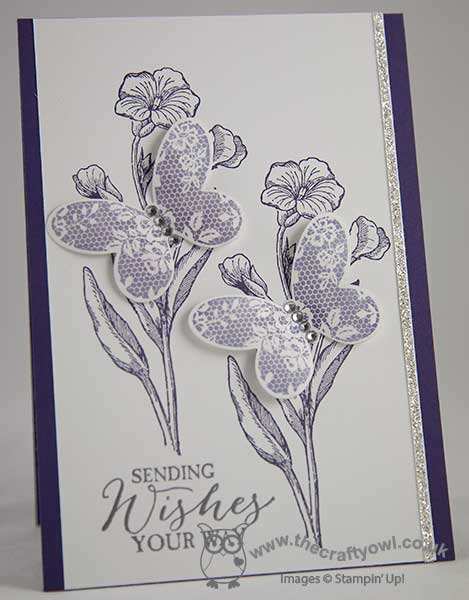
A monochromatic purple card on a base of Elegant Eggplant, featuring the lovely outlined bloom in the stamp set along with the lacy butterfly. There are lots of touches of sparkle on this card which in real life really add a touch of luxury: the thin strip of silver glimmer paper, the silver heat-embossed sentiment, the sparkling rhinetones and the vanilla smooch spritz sprayed onto the Wisteria Wonder butterflies that adds a subtle pearlescent finish.
I hope you like today's card; back tomorrow with this week's card for our new challenge over at The Paper Players - and it's my first one!
Until then, happy stampin'!
Stampin' Up! Supplies Used:
by Joanne James2. October 2014 21:02A quick post from me today with one of the cards we made at my card class earlier this week. This month's class featured the Festival of Trees stamp set and co-ordinating punch - without further ado, here's today's card:
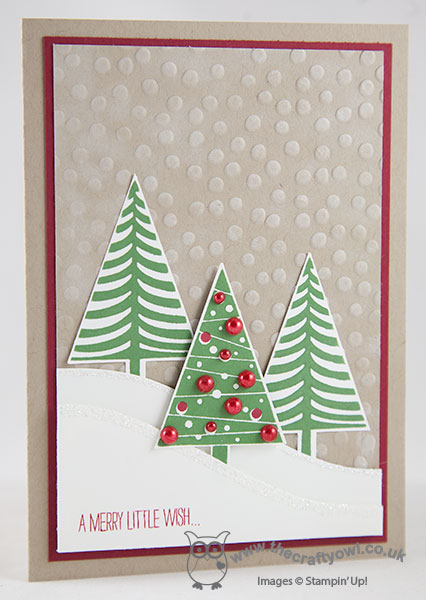
I started with a base of Crumb Cake with a mat of Cherry Cobbler, then an additional mat of Crumb Cake which was embossed with the Decorative Dots embossing folder and lightly sponged with white kraft ink to look like snow. I added two Whisper White snow drifts, edged with Dazzling Diamonds, and then stamped and punched three trees in Garden Green on Whisper White and interspersed them between the snow drifts. The tree at the front is also over-stamped with the bauble stamp in Cherry Cobbler and a few pearls coloured with Cherry Cobbler Blendabilities added to give extra dimension. A sentiment added inside and out, and finished!
All of the cards in this month's class were quite different as I was aiming to show my ladies just how versatile this stamp set and punch can be. If you live local to me in Northampton and would like to join me for a future class, do get in touch - newcomes, whether experienced or novice papercrafters, are always welcome!
That's all from me today; back tomorrow with another project. Until then, happy stampin'!
Stampin' Up! Supplies Used:
by Joanne James1. September 2014 19:59Happy Monday everyone! Mine has been a fun one; I had the first of my classes this month this afternoon and made Christmas cards for the first time - yay! This month's class featured the new 'Partridge & Pears' set from the seasonal autumn-winter catalogue as we also used it as an opportunity to get more practise using Stampin' Up! Blendabilities alcohol marker pens, following on for last month's class where we used them for the first time.
Today I'm sharing one of the cards I designed for the class, using a gatefold-type closure - here is the card:
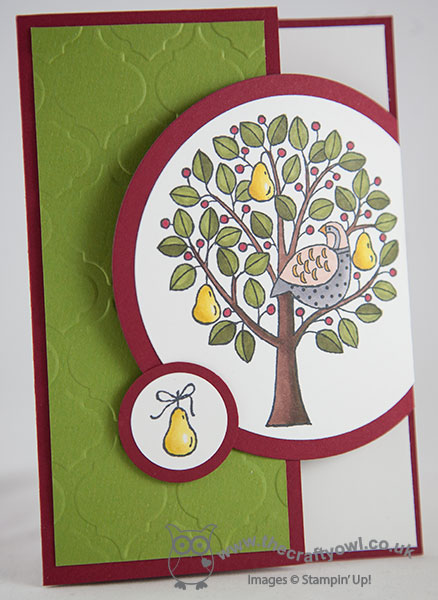
The tree is stamped in Momento Black ink on Whisper White and coloured with a combination of Old Olive, Daffodil Delight, Cherry Cobbler, Smoky Slate, Pumpkin Pie and Skin Tones Blendabilites then cut out with the Big Shot and Circle Framelits. It is mounted on a Cherry Cobbler circle cut with the next size framelit up and the completed circle is scored and folded and adhered between the base and liner layer. The other front section is covered with a piece of Old Olive that has been embossed with the Mosaic embossing folder. The closure for the fold is made by stamping the pear from the same set onto Whisper White and punching out with the 1" circle punch, which is matted on a piece of Cherry Cobbler cut with the 1 1/4" circle punch, and attaching with to the front of the card with a Stampin' dimensional, so that the main circle can 'hook' underneath it as in the picture above.
When the card is open, it looks like this:
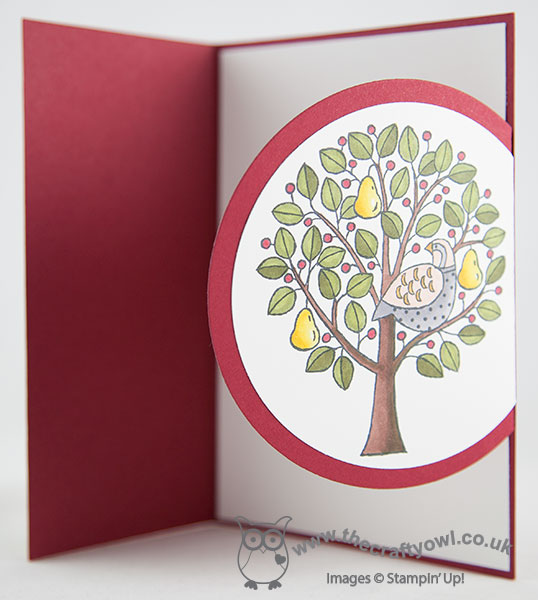
Lastly, a quick peek at the inside - there's still room for a sentiment over to the left, as it's hidden beneath the main front panel:

I hope you liked today's card; it's a little different and a fun way to ring the changes with a stamp like this. I'll share one or two more cards from my class later in the week. If you live in Northampton or the surrounding areas and would like to attend any of my classes, do drop me a line - all ages and abilities are welcome.
Back tomorrow with another project; until then, happy stampin'!
Stampin' Up! Supplies Used:
608748ef-6317-467c-92ba-b62f5bae9f25|0|.0|96d5b379-7e1d-4dac-a6ba-1e50db561b04
Tags: Christmas, Circles Framelits, circle punch, Mosaic Embossing Folder, Partridge & Pears, Classes, Shop online, Stampin' Up, Stampin' Up Card, Stampin' Up Card ideas, Stampin' Up Supplies
Cards | Stamping