This is my second post of today - if you missed the first one about the new Stitched Shapes Framelits you are going to want to check that out here. No blog post yesterday as I still have one of the James Juniors on half term this week and then my evening was spent trick or treating. Today I've had full day with back to back classes, one of which was my first technique class of the month featuring the Christmas/Pretty Pines bundle. I've made lots of projects with this bundle, although I've yet to blog them all (so many projects, so little time!) Click here to see one of the cards that I've shared previously using this set, that was also one of our makes in our class.
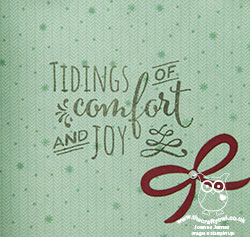
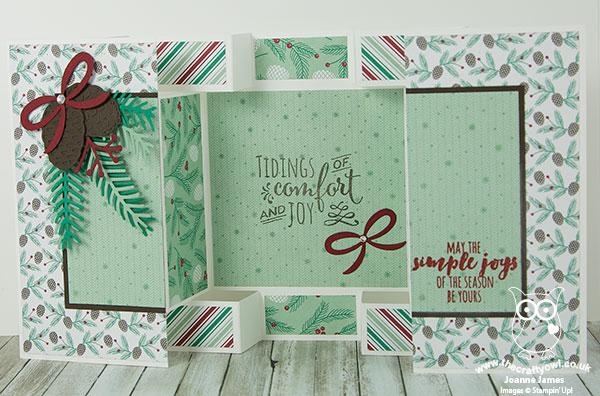
Today I want to share a card that I CASE'd from the lovely Amanda Bates over at The Craft Spa, who is for me the queen of fancy folds. She has made lots of versions of her Large Square Double Display Card but this one using the Presents and Pinecones Designer Series Paper and the Pretty Pines Thinlits Dies really caught my eye and I just had to have a go at re-creating it. Here's my card:

Here's the low-down on today's card:
Presents & Pinecones - What can I say, the Presents & Pinecones Designer Series Paper is definitely the star of this card. Four of the twelve designs in this pack are showcased here, such a great layout to really let these papers shine. What's more, they are the perfect pairing for the Christmas/Pretty Pines stamp set thinlits combo. The colours are traditional yet fresh and modern, with the addition of the mint and white to the red and Emerald Envy green.
Christmas Pines - Whilst it's rare that I advocate buying a stamp set or thinlit set without its counterpart when it's available as a bundle (and this is most definitely not one of those times!), it is easy to focus on the detail of the thinlits with this set and rather overlook the stamp set. This would be such a mistake though, as it's a set choc full of great scripted sentiments in a variety of sizes, along with some useful border stamps, a fancy frame and a snowy background stamp that will have tons of uses on so many Christmas cards. This card showcases two of the sentiments and the snowflake background stamp, which adds subtle interest and detail to the panels on the front and inside. This set is definitely worthy of a place on your shelf!
The 'How' - I made a few tweaks to Amanda's tutorial when I made this card, so thought I would share the details with measurements below. This card is measured in cm and is a metric template for standard A4 cardstock; if you would like to make one in inches or using 12" x 12" cardstock, do check out Amanda's blog via the above link where she has lots of useful tutorials to follow. Here goes:
To make this A4 metric large square double display card, you will need:
- Thick Whisper White A4 Cardstock 15x 29cm
- Whisper White Cardstock 15cm Square
- Early Espresso Cardstock 10 cm Square
- Presents & Pinecones Paper Mint Macaron Mini Chevron 9.5cm Square (x2)
- Presents & Pinecones Paper White Cones and Pines 4.5cm x 9.5cm (x2)
- Presents & Pinecones Paper White Cones and Pines 4.5cm x 2cm (x2)
- Presents & Pinecones Paper Stripes 4.5cm x 2cm (x4)
- Stamps & Dies – Christmas Pines Stamp Set and Pretty Pines Thinlits Dies Bundle
Instructions:
- PORTRAIT (short side):
- Line up at 2.5cm across the top ruler
- Cut from 2 to 12cm. LIFT. Cut from 17 to 27cm
- Turn 180 degrees and repeat both steps above.
- LANDSCAPE (long side):
- Score across whole width at 4.5cm and 9.5cm
- Score top and bottom sections only at 2cm and 12cm
- Turn 180 degrees and repeat both steps above.
- From the PORTRAIT end (short side):
- Fold the outer creases into a mountain, valley, mountain, valley set of folds
- Fold the centre section score lines into first a mountain fold then a valley fold
- This gives you the basic layout for the base of your card.
I just love this card - a little time and effort but well worth it for the end result. Thank you Amanda for the inspiration!
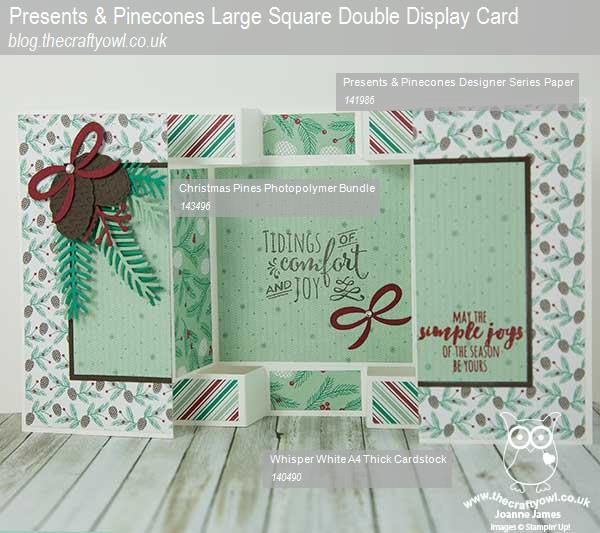
Here is the visual summary of the key products used on today's project for you to pin for easy reference:

You can see all of my 'How To' summaries on my 'How To - Tips and Techniques' Pinterest board in case you've missed any.
I'll be back tomorrow with another project. Until then, happy stampin'!
Stampin' Up! Supplies Used: