It's Tuesday and time for a new challenge over at CAS Colours & Sketches. Shannon is hosting this month and this week we have our second colour challenge of the month:

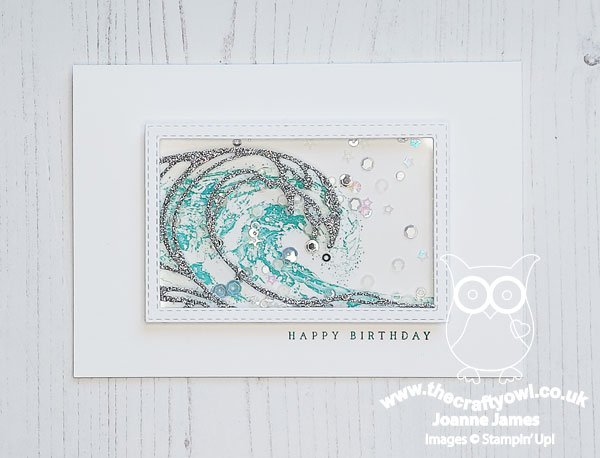
I love Shannon's fresh colour palette of aquas with a touch of silver this week! These colours immediately made me think of the sea so for my card today I had to make another card using the Waves of Inspiration bundle - take a look:
Here's the low-down on today's card:
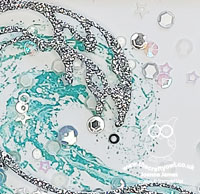
Waves of Inspiration - These beautiful sea greens were perfect to showcase another of those cresting waves from the Waves of Inspiration stamp set. Since this card is all about the clean and simple, I wanted to minimise the layers on my card and be sure to preserve my 'white space'. I masked off the centre of my card base so that only a portion of the wave would be visible, leaving me a wide unstamped border. The Stamparatus is a must for easily achieving this kind of stamping - masking paper would be easier, but this is how I did it using post-it notes:
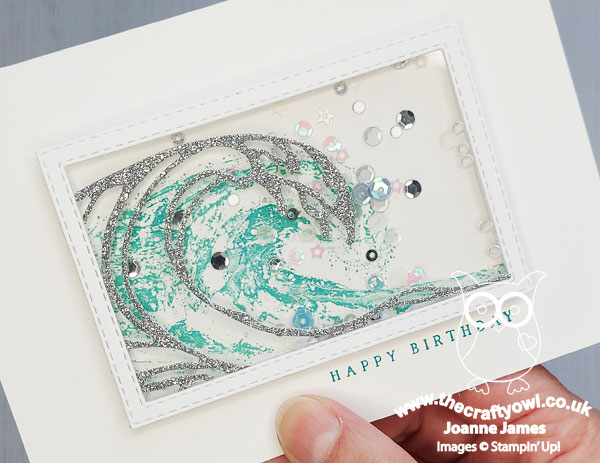
To Shake Or Not To Shake? - I decided to create a simple shaker card, using a mix of sparkle & shine sequins for a touch of silver along with a few odd Coastal Cabana coloured sequins from my stash, and a simple window frame in white made using my Stitched Rectangle Dies:
I debated with myself whether a shaker card could be considered clean and simple, but having consulted with my lovely teamies we agreed it could: this card meets our 'clean and simple' criteria of 'uncluttered, with white or open space and minimal layers and embellishments' - so I hope you like it!
Silver Surfer - I decided to add a touch more silver and cut out one of the wave dies from some retired metallic silver glimmer paper and added it to the front of my shaker window for some extra sparkle.
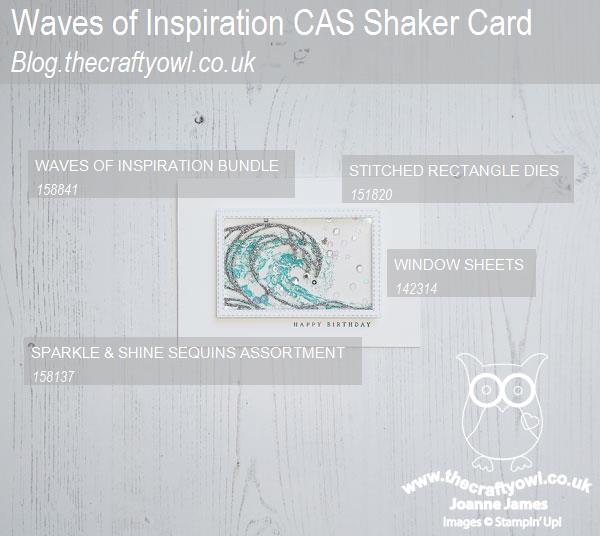
Here is the visual summary of the key products used on today's project for you to pin for easy reference:
You can see all of my 'How To' summaries on my 'How To - Tips and Techniques' Pinterest board in case you've missed any.
As a reminder, for our colour challenges, you must use all of the stated challenge colours. You may also use neutral colours; however, the challenge colours should be the most noticeable ones featured on your card. We use Stampin' Up! colour names for reference, but you are welcome to use any other companies' products as long as you match the challenge colours as closely as possible.
I'm also linking today's card up over at Paper Craft Crew where their 'shiny celebration' inspiration challenge closes today.

Enjoy your day and I'll be back tomorrow with another project. Until then, happy stampin'!
Stampin' Up! Supplies Used: