Today I have my card for the new challenge over at Festive Friday and this week we are celebrating something very special:
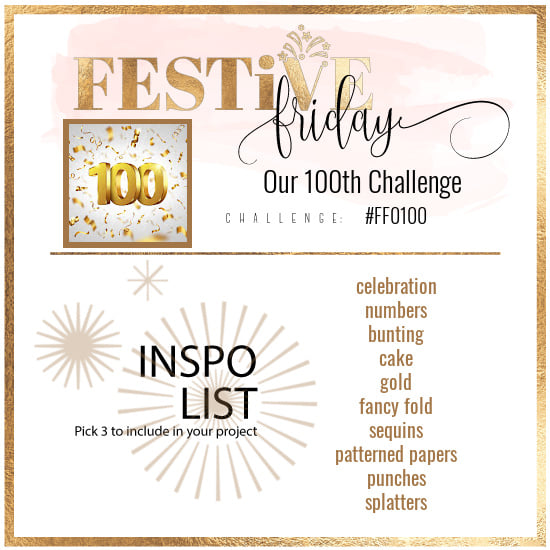
Our 100th challenge - woohoo! Whilst you do not need to actually celebrate the occasion to play along - your goal is to simply use three or more items from the inspiration list on your project - this week's list is sure to generate lots of celebratory cards! This week I really went to town with the inspo list; I used celebration, numbers, gold, sequins, patterned paper and splatters (I even included a cake on the inside!) and this is what I came up with:
Here's the low-down on today's card:
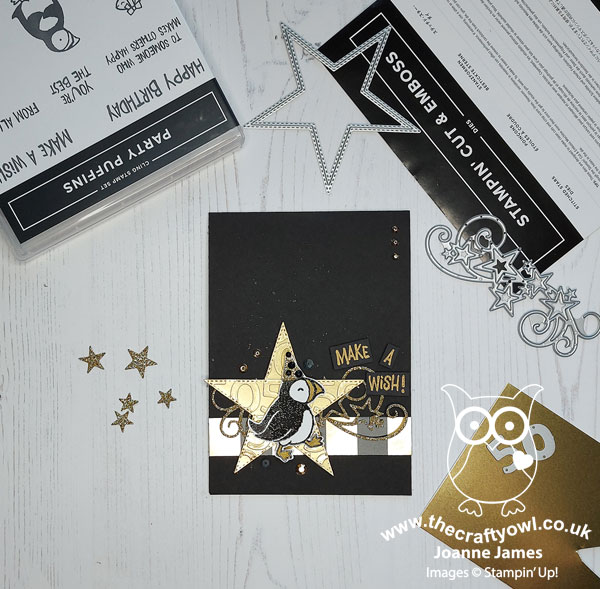
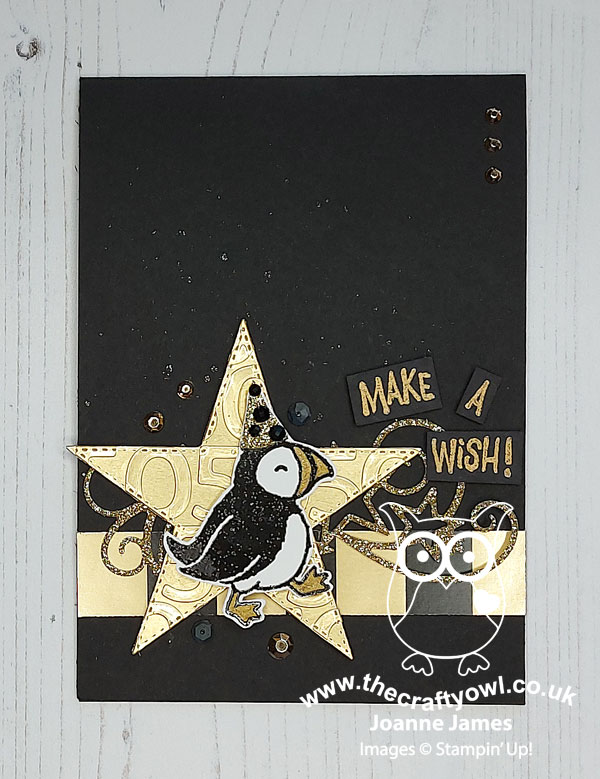
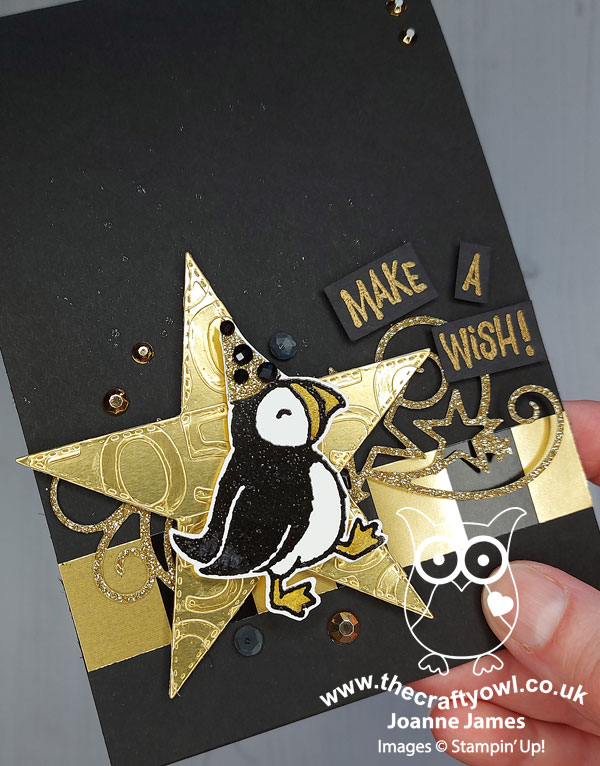
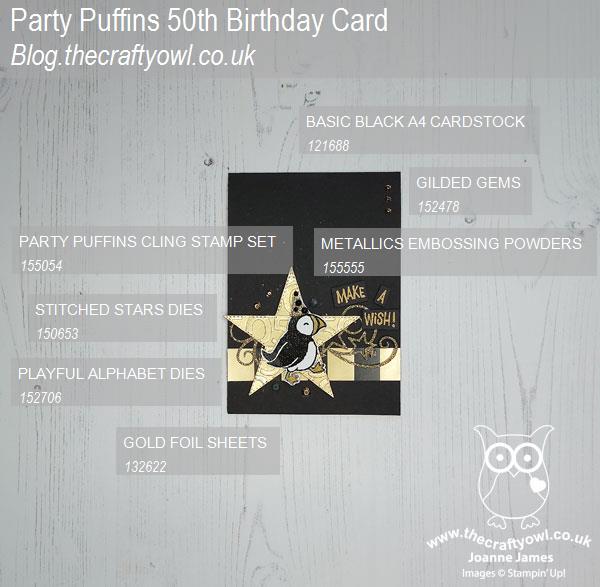
A Special Party Puffin - I decided to add a puffin from the 'Party Puffins' stamp set as the focal point for my card today, but a special celebration definitely requires a special puffin, so this one is dressed to impress! I heat embossed him in black, colouring his beak and feet with gold Wink of Stella and fussy cutting him a hat from gold glimmer paper with black jewels for added pizzazz! This little fella is so sparkly!
Two Reasons To Celebrate - You may be wondering why when we are celebrating our 100th challenge at Festive Friday, why my card has 50s on it. Well, later this year I will be celebrating a milestone birthday - my 50th, to be exact. I was the oldest in my year at school so will be the first of my school peers to reach this momentous occasion; what this means though is that starting in September I will be needing a large number of 50th birthday cards to send out during the 12 months thereafter, so I thought I'd start making now so that I was prepared! I created a fun faux-embossed star by cutting a bunch of 5s and 0s with my Playful Alphabet Dies and adhering them to gold foil, before cutting a star with my Stitched Star Dies to create a subtle nod to this birthday milestone:
I thought this would make a good masculine card design - what you do think?
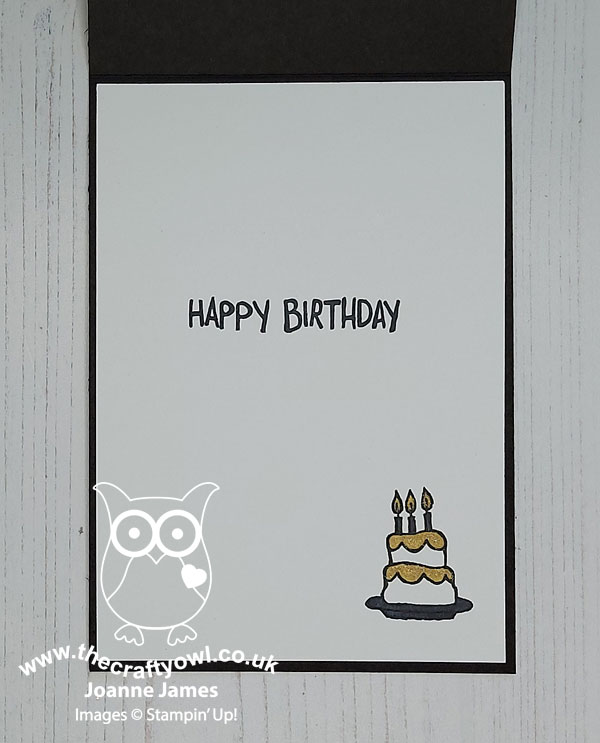
Gold, Gold and More Gold - With a solid black background, I majored on gold to give this card birthday bling: gold foil, gilded gems, gold glimmer paper and a touch of black and gold (retired) striped designer paper, along with some subtle gold Wink of Stella splatters on the base of my card (difficult to see on the photos, but so sparkly in real life!). I also added a gold-on-black heat-embossed sentiment; and along with a simple birthday greeting inside my card, a birthday cake topped with gold icing and sparkly candles:
So what do you think - a suitably glamourous sparkly birthday card to celebrate a milestone birthday alongside our milestone challenge this week? Do leave me a comment below - I'd love to hear your thoughts!
Here is the visual summary of the key products used on today's project for you to pin for easy reference:
You can see all of my 'How To' summaries on my 'How To - Tips and Techniques' Pinterest board in case you've missed any.
How does our board inspire you? I can’t wait to see what YOU create! For more inspiration, be sure to visit the rest of the Festive Friday Challenge Design team:
Ann Schach
Beth McCullough
Sharon Hashimoto Burkert
Melanie Hungerford
Helen Jennings
Stephanie Lanzalotto
Melva Peters
Jaydee
Diane Evans
Joanne James
I am also playing along with Color Throwdown (I used black, white and gold) and over at Try Stamping on Tuesday where they have a great sketch this week - and of course I'm playing with the optional theme of 'celebrate' too.

Enjoy your day and I'll be back tomorrow with another project. Until then, happy stampin'!
Stampin' Up! Supplies Used: