Happy Birthday To You Card and Gift Voucher Set AYSI221

by Joanne James13. March 2020 12:00

Today I'm sharing my design team card for our new challenge over at As you See It where it's time for a 'fill in the blank' challenge designed by me:
    

As a cardmaker I like to send all kinds of cards but my favourite type of card to send is a birthday card - I love to let people know I'm thinking of them on their special day. Here's one I made recently for a sweet friend of mine:
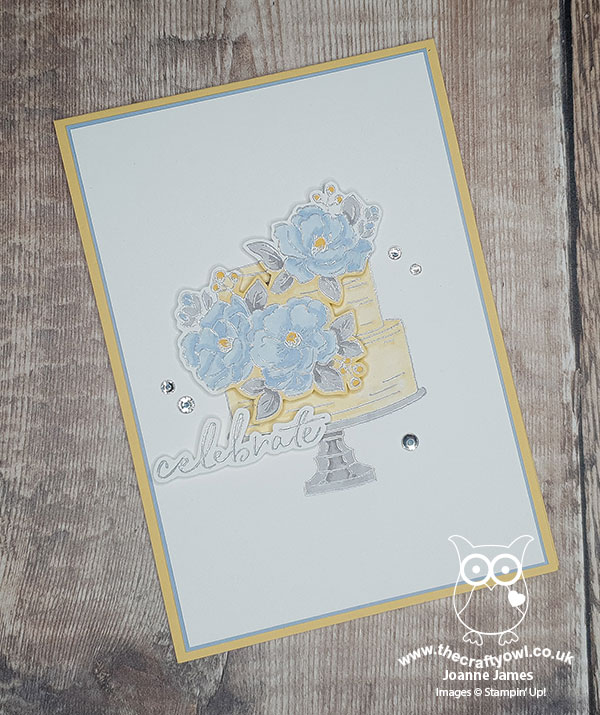
 

Here's the low-down on today's card:

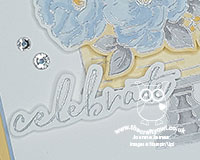
Celebrate with Sale-A-Bration - I used a single stamp set on today's card - the 'Happy Birthday To You' stamp set is one of the sets that can be yours free with a £45 purchase during Sale-A-Bration and is perfect for celebratory cards, including birthdays. It includes this gorgeous floral cake and a few sentiments and makes a great one-layer card - perfect for #SimpleStamping. I heat embossed my cake and sentiment in silver and coloured with my Blends markers in So Saffron and Seaside Spray - a little fussy cutting and some mats and layers in my feature colours, along with a few rhinestones for extra sparkle add a touch of glamour to this #SimpleStamping card and help to make it a real standout, yet it really is just stamps, ink and paper. 

Not Into Fussy Cutting? - I fussy cut the flowers and sentiment on my card today and it really was quite straight forward, but if fussy cutting isn't your thing, there is a set of co-ordinating Birthday Dies available as part of the Co-ordination Product Release (you can read more about that in my earlier post here)  that are useful for cutting out the cake and flowers. The dies would be especially useful if you wanted to make a batch in one go and save yourself some valuable time. 

Stampin' Up! Gift Vouchers - The Perfect Gift - My card was actually the second thing I created to share with you today. I designed it to co-ordinate with a gift voucher wallet, which is a replica of one I made recently for one of my lovely customers who was celebrating a milestone birthday. Did you know that I provide Stampin' Up! gift vouchers (for any amount) that you can purchase for yourself or a friend or loved one - there's nothing nicer to give a stamper as a gift!! When I have a request for gift vouchers, I love to create a fancy wallet for them - after all, they are a gift in themselves. The one below is a pared-down version of the one that I designed for the lovely Jane, as hers included big silver glimmer numbers too. I liked it so much I thought I would make another one - I find myself using gift wallets more and more, especially for my growing niece and nephew who appreciate money above most other things these days and it's nice to at least be able to make it look more like a gift than to just tuck a few bank notes into a card. For my gift wallet I fussy cut the cake too, and added the whole thing to a belly band of Seaside Spray DSP covered in some (retired) silver polka dot acetate and decorated with a ribbon bow, this time putting the 'Happy Birthday' sentiment front and centre:
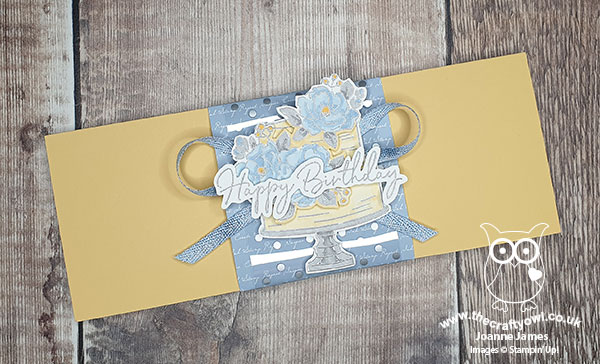
So pretty, even if I say so myself! Here's a photo of both the card and co-ordinating gift voucher together:
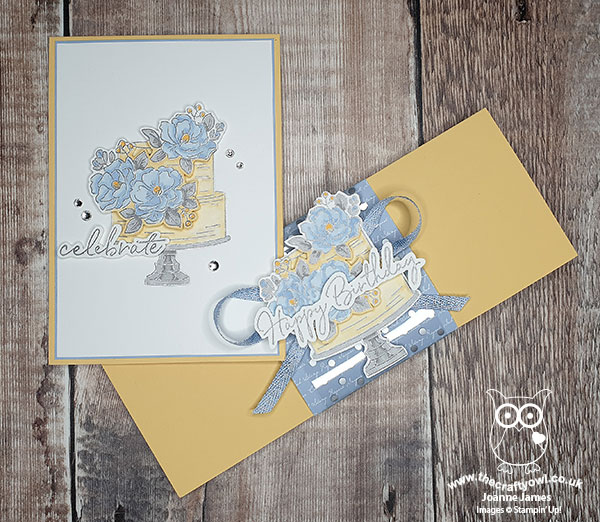
 

I, for one, would be thrilled to receive this little combo for my birthday - or Mother's Day ... or pretty much any day really!! I'm also linking today's card up with the peeps over at Time Out Challenges who are celebrating their 6th birthday - congratulations! - since my project is for birthdays and includes the option of fussy cutting. Here is the visual summary of the key products used on today's project for you to pin for easy reference:
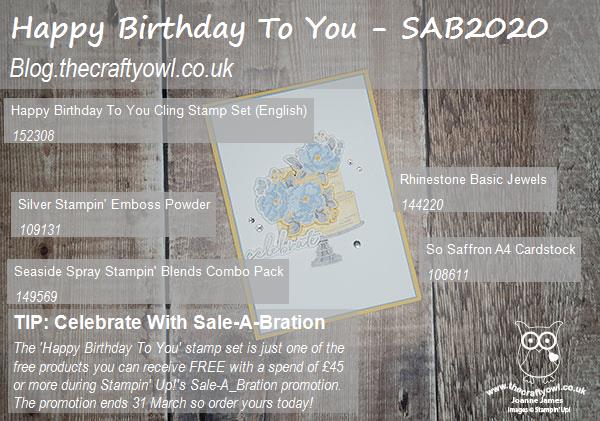
 

You can see all of my 'How To' summaries on my 'How To - Tips and Techniques' Pinterest board in case you've missed any. 

Before you put your creative thinking caps on, why not check out the blogs of the other As You See It team members:

Amy Jasper

Heather Cooper

Jan Clothier

Jane Knudsen

LeAnne Pugliese

Here's a summary of our challenge rules:

  • Create any card, scrapbooking page, 3D project or packaging project that fits the challenge.
  • Fill in the blanks with the words that are right for you and then create your project with those words in mind. Tell us, in your blog or on your site, what words you used.
  • Please include the challenge graphic and link back to the challenge in your blog post. Turn off word verification so we can leave you lots of lovely comments. Make sure you link the post not the whole blog to the Linky. Use #AYSIXXX when uploading to a public gallery.
  • If you’re unsure about ‘the rules’, check the details under the Challenge Guidelines tab on the As You See It Challenge homepage.
  • In a Fill in the Blank challenge, complete the sentence in the Challenge Banner with the phrase that is true for you and create your project using the words you used. Tell us what you said in your blog or on your site.

We look forward to seeing your creations in the AYSI gallery.

Enjoy your day and I'll be back tomorrow with another project and an update reading last weekend's successful craft retreat now that I'm (almost!) recovered! Until then, happy stampin'!


Stampin' Up! Supplies Used:


Table built using Product Table Builder by The Crafty Owl - Independent Stampin' Up! Demonstrator.

Flowerfull Heart Gift Card Holder

by Joanne James10. January 2014 19:45

Evening lovely blog readers! So big news of the day: my voice is (almost) back! Great news for me, not so great for my youngest when he announced he had lost his trainers following his PE lesson just 3 days into the new term - but that's a story for another time!

Today I'm going to share the last of this week's class projects: a gift card holder, once again made with the Envelope Punch Board. I've seen a few holders made in this way on the internet, but I adapted mine slightly to enable me to make it from half a sheet of A4, using metric measurements. So here is the finished gift card holder from the outside:

No apologies for once again using the Flowerfull Heart stamp (I still love it!), this time overlaid with 'love' cut from gold foil using the Expressions Thinlits die (don't forget these are only available to purchase until the 1st February). There's also another sneak peek of new product available in the Spring-Summer catalogue that launches on 28th January; did you spot it? Yes, it's the lovely gold washi tape which I paired here with Very Vanilla to make my pocket. There are lots of silver and gold items in the new catalogue, so if this is your thing, stay tuned - there will be more to come. The flap closure for the gift card holder is the bit you need the Envelope Punch Board for - it makes the two notches that enable the holder to stay closed and keep the gift card firmly in place.

When you unclasp the flap, this is what you see inside:

The insert is attached to the opening flap so that it slides out of the pocket as you open it and presents the gift card. I designed my gift card holder with a wedding or engagement gift in mind - vouchers or money seem very popular gifts these days, but you could easily adapt it for a birthday or other occasion. One thing is for sure - when it's as easy to make as this, there's really no excuse for a simply sticking a voucher in an envelope or worse still a carrier bag (believe me, it happens!!)

That's all the projects from my classes this week - I hope they've inspired you to go and be adventurous with your Envelope Punch Board. If you live local to me in Northampton and would like to attend any of my Stampin' Up! papercraft and card classes, you can find the current schedule of my card and project classes on my website here; please contact me for further information regarding location and any equipment you will need to bring. Classes must be booked at least 2 weeks in advance of the class date.

Back tomorrow with a Sale-A-Bration sneak peek; until then, happy stampin'!


Stampin' Up! Supplies Used:

Table built using Stampin' Up! Product Table Builder from The Crafty Owl.


Punch Art Underwear Gift Card

by Joanne James20. July 2013 21:14

I've been taking advantage of the cooler temperatures today and spending some time in my craft room working on some punch art cards. I'll share these with you in due course, but today wanted to share a punch art card I made to accompany a lingerie gift voucher I gifted a good friend of mine on her birthday a little while ago. So here is my card:

There are lots of examples of how to create this kind of card on the internet and this is my take on it. The colour combo was inspired by the gift voucher itself, which you can just see inside the card: Rich Razzleberry on Pool Party. I then used my scoreboard to add the patterned edges to my layer with some pearls to finish off.

I love the fun nature of this card, which was shared by its recipient. Above all, so much nicer than the plain card I received from the shop when I purchased the gift voucher!

Back tomorrow with another project. Until then, happy stampin'!


Stamps: Tea Shoppe (retired)

Cardstock: Rich Razzleberry, Pool Party, Blushing Bride, Brights DSP

Ink/Stampin' Write Markers: Rich Razzleberry, Pool Party

Tools: Heart Punch, Scallop Edge Border Punch, Simply Scored Borders Plate

Finishing Touches: Basics Pearls

Mini Catalogue

BROWSE THE CATALOGUE

The mini catalogue is now live! Read and download your copy here.

Shop Online

Access my online shop 24 x 7, 365 days of the year:

Current March hostess code:

S9F2XJJW

Shop Online

Join My Team

It's always a great time to join Stampin’ Up! New team members can get £130 worth of products for only £99 + free business supplies + free shipping + all the fun being a part of Stampin’ Up! Stampin' Up! has something for everyone: join my growing team and benefit from my support to enjoy Stampin' Up! however you choose.

If you're interested, call me for a chat to understand how I can help you realise your goals. Alternatively, if you have already decided to sign up and you just can't wait, please click here for the link to the online form where you can sign up and order your starter kit right away! 

Latest Kit!

Stampin Cut and Emboss

The Rock Legend Kit has all you need to make 8 cards with coordinating envelopes. Along with the new Panda Friends Kit, both are available from January 4th for just £14 each - get yours here!

2023-24 Annual Catalogue

BROWSE THE CATALOGUE

Click on the catalogue for a full list of current SU! supplies - if you would like to order any of the items featured, please drop me a line at [email protected] or give me a call on 07773 421446 - I'd be happy to help.

New Online Exclusives

There will be new products available exclusively in the online store from 5 March - check them out here.

About Me

Hi I'm Joanne and live in Northampton and when I'm not looking after my husband and two beautiful children, am an avid crafter with a passion for all things Stampin' Up!

I must confess that I have never been a big rubber stamper - until I discovered Stampin' Up! that is. I love the fact that I can get such great results with co-ordinating stamps, inks, papers and punches - the possibilities are endless! Join me on my stamping journey as I share the things I love and be inspired to create amazing things yourself!

Follow Me

Monthly Newsletter

Box Builder

Click the button above to use Box Buster to create your custom box design using the Envelope Punch Board!

Kits Collection Now Available!

Stampin Cut and Emboss

The new Kits Collection from Stampin' Up! is now available!

Click here to see the current kits available and order yours online today.

I Design For


Stampin' Up Stuff

This is my personal blog and is not endorsed by Stampin’ Up! I hope you find it a plentiful source of ideas and personal inspiration but please don't copy my designs for contest submission or use for classes, publication or sale without express permission.