by Joanne James1. March 2016 21:00
Firstly, Happy Saint David's Day to any fellow Welsh bloggers or blog readers! I have had a busy day of classes today, with the first of my technique classes this month this morning and my Project Life memory keeping class this afternoon. I'm not so organised that I had an early blog post for you; my card was made,I just fell asleep at my laptop yesterday evening before I could schedule it! Today's card is for the 300th challenge over at Just Add Ink where they have this sketch as inspiration this week:

I saw this sketch and knew it would be perfect for a card that I've had in mind for a while using my Sunburst Thinlits Die - take a look:
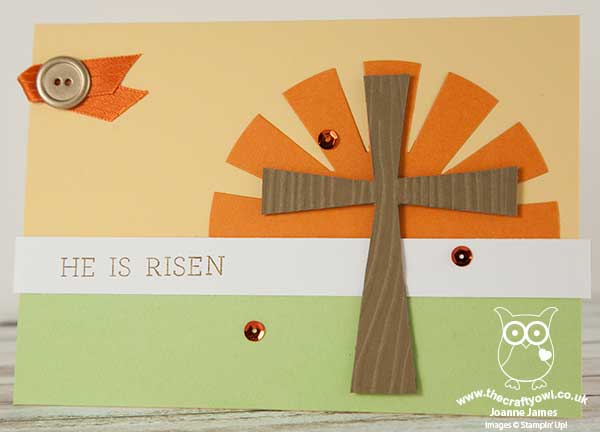
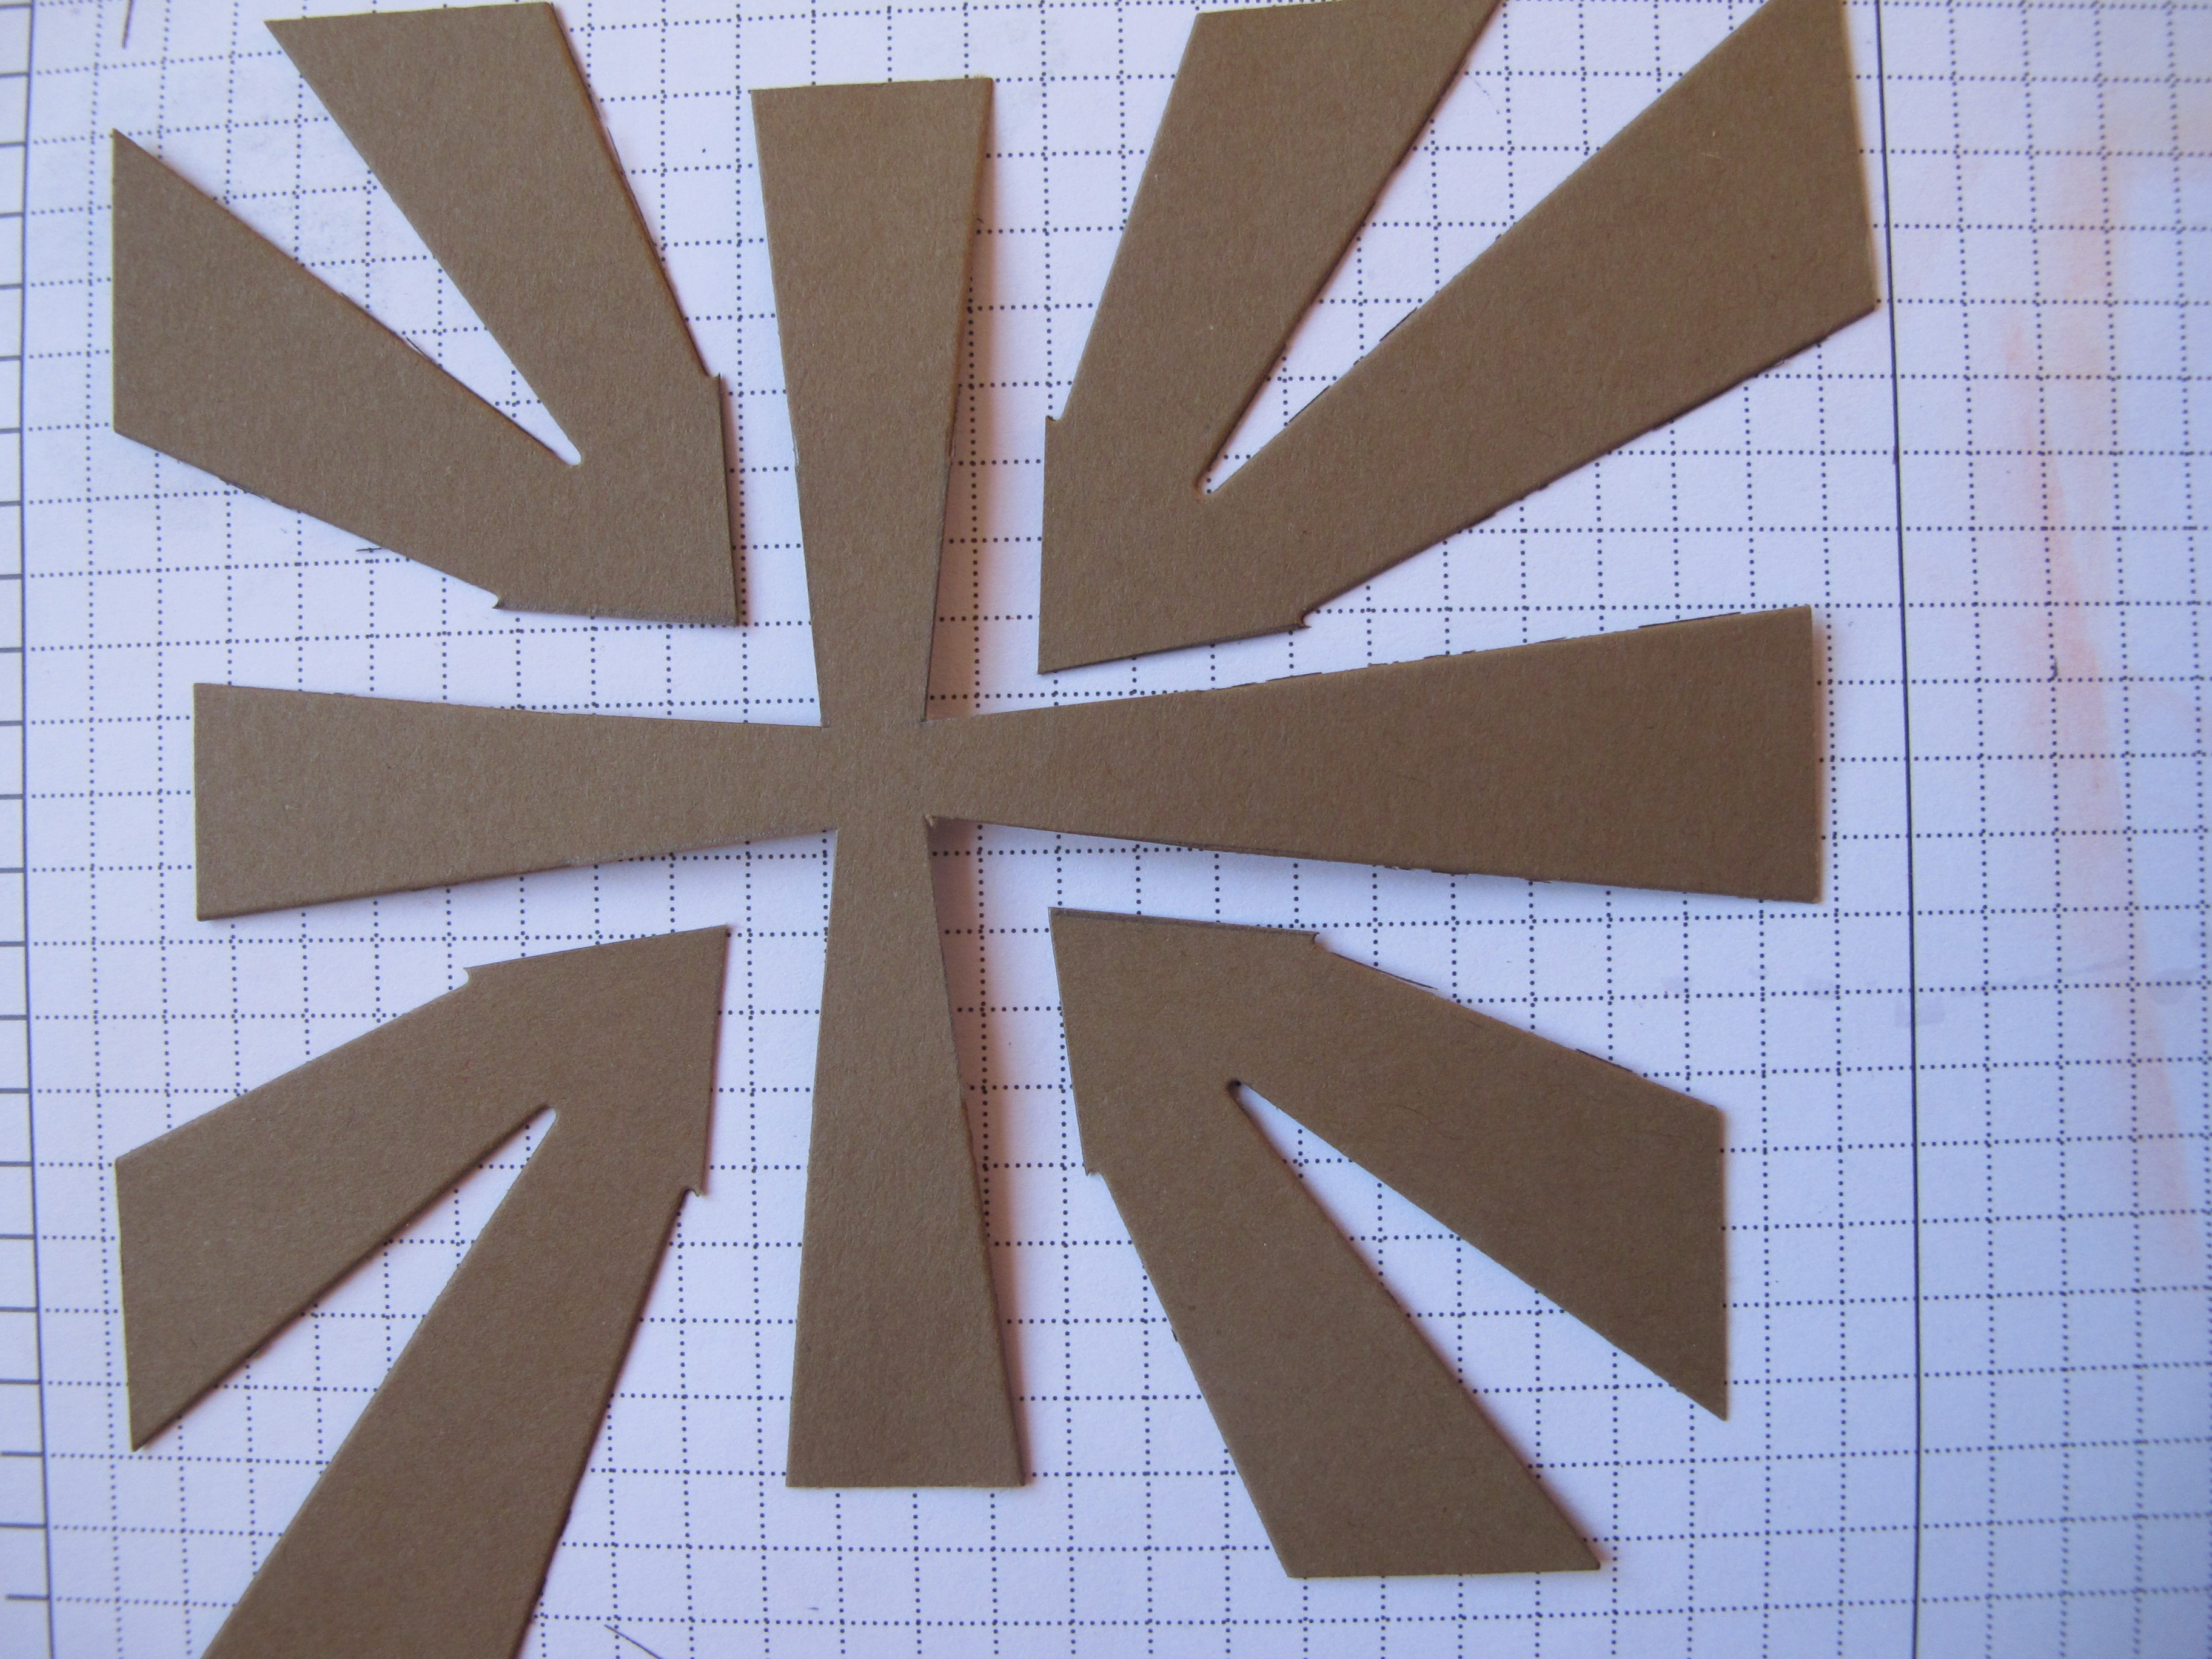
I wanted to create an Easter card with a sunburst behind a cross; how to make my cross though? I decided to try and make one using a sunburst, by squaring up the edges and cutting away the diagonal sections. Here's a work in progress picture that shows you how I cut it:
I hope that is helpful. I ran my cross through my Woodgrain embossing folder to add some texture and make it stand out against my super-CAS background of So Saffron and Pear Pizzazz. I allowed my sentiment strip to overhang the width of my paper slightly and made my own sentiment using the stamps in the 'Crazy For You' stamp set, masking off letters where not needed until I had my phrase. The Alphabet Rotary Stamp would also allow you to create something similar. I added a gold button, a twist of retired Tangelo Twist satin ribbon and a sprinkling of Pumpkin Pie sequins to finish my card. This is a great Easter card that can be made using entirely non Easter-specific supplies, which is always useful. What do you think of my cross idea? I'd love to know whether you think this works - do leave me a comment with your thoughts below.
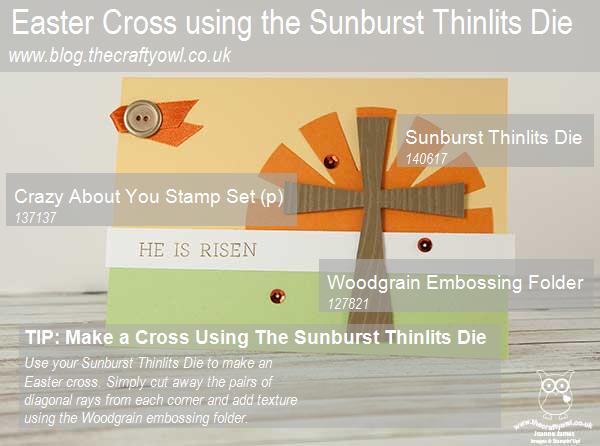
Here's today's visual summary for easy reference:
That's all from me today; I'll be back tomorrow with another project; until then, happy stampin'!
Stampin' Up! Supplies Used:
1f7c5de9-387a-4340-ad7d-9d45511238ec|0|.0|96d5b379-7e1d-4dac-a6ba-1e50db561b04
Tags: Big Shot, Easter, Shop online, Shop Stampin' Up online, Stampin' Up, Stampin' Up Card, Stampin' Up Card ideas, Stampin' Up Supplies, Sunburst Thinlit Dies, Crazy About You, Woodgrain, Woodgrain TIEF
Cards | Shop Online | Stamping
by Joanne James29. February 2016 09:00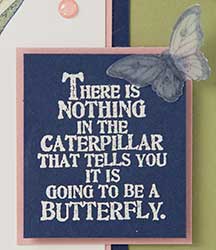
Another Monday, another week! I have a busy week in store and am looking forward to it already! Firstly, to all those celebrating a leap year birthday today - a very happy birthday to you! Today I am sharing a card using this week's sketch over at Freshly Made Sketches and the colours over at Pals Paper Arts:
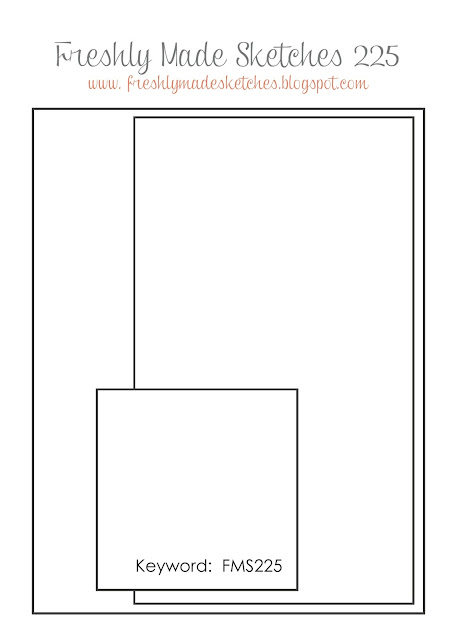

I knew immediately how I wanted today's card to look and had a clear picture in my mind. My card did turn out as I hoped, save for the need to flip the sketch to its mirror image - take a look:
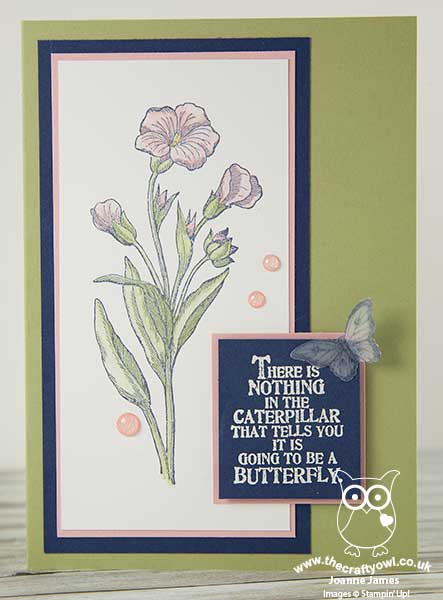
I turned to my 'Butterfly Basics' stamp set for my card today. I haven't used this set in ages and it's so easy to forget the great sets in the current annual catalogue when we have Sale-A-Bration and the current seasonal catalogue to keep us busy. I just knew that the long stemmed flower was going to be perfect for that long panel though. I stamped the image in Night Of Navy and coloured the flower with Blushing Bride and Pear Pizzazz inks and my blender pen. I matted this image on pink and navy, the reversed this matting for my sentiment, which I stamped in Versamark and heat embossed in white. I stamped my butterfly in Night of Navy on both sides of a piece of vellum and punched it out with my Itty Bitty Butterfly punch and adhered it to my sentiment panel. I also covered my butterfly liberally in Wink of Stella, which adds such a lovely sparkle in real life. I had to mirror-image the sketch because of the way the leaves fall on the stem - I'm hoping Jen isn't going to be too upset by this! Lastly, to finish I added a trio of Blushing Bride enamel dots from the Love Blossoms Embellishment kit. I just love these - they are so sparkly! This is one of those cards that makes great use of colour to accentuate the layers and by stamping the flower in Night of Navy instead of grey or black the whole thing really co-ordinates well.
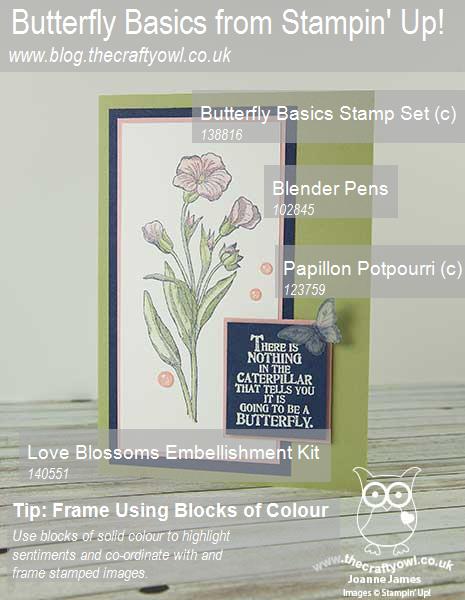
Here is today's visual summary for easy reference:
I have my piano lesson this morning then am off to London today for an appointment before returning in time for the school run. So a busy day in store! Back tomorrow with another project; until then, happy stampin'!
Stampin' Up! Supplies Used:
by Joanne James28. February 2016 21:17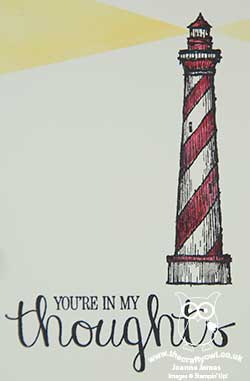
I'm popping in with an extra post today to make up for my lack of one yesterday; my card was all ready, however by the time I returned from the swimming gala that the James Juniors were attending yesterday evening, I was truly good for nothing! This card is made with this week's CAS(E) This Sketch and the challenge over at CASology in mind:


I took a rather less obvious approach to the cue word 'distress' and instead of focusing on a technique went with the emotion - here's my card:
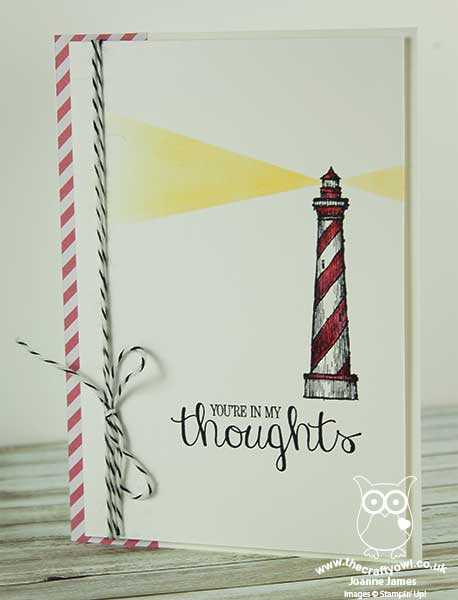
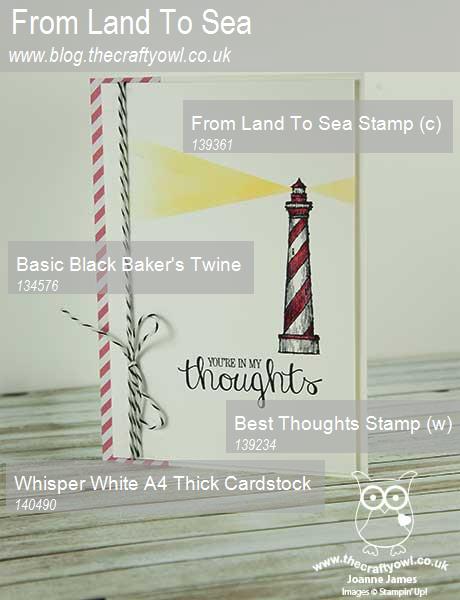
I went with a lighthouse - the beacon of safety for mariners in distress - from the 'From Land to Sea' stamp set as the focal image for my card and paired it with the sentiment from 'Best Thoughts', which seemed appropriate. I masked off a section of my card using post-it notes and using a sponge dauber and So Saffron ink, sponged in some light shining from the windows of the lighthouse too. I kept my card fairly monochromatic, apart from a splash of red on the lighthouse and a thin strip of retired patterned paper down the left side, and the beam of light. Some black and white baker's twine finishes my card.
Here's today's visual summary for easy reference:
That's all from me this evening; back tomorrow with another project. until then, happy stampin'!
Stampin' Up! Supplies Used:
by Joanne James28. February 2016 09:00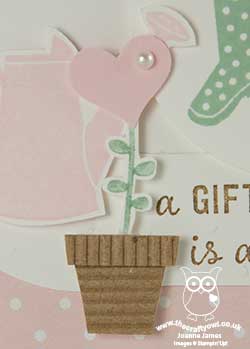
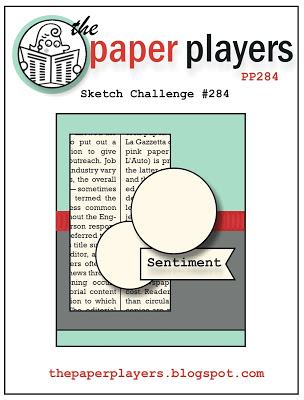
It's Sunday and time for a new challenge over at The Paper Players! It's the turn of my sweet friend Claire to host our challenge this week and she has a great sketch for you to play along with:
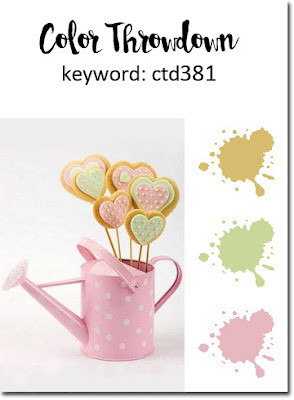
For my card this week I was inspired to use the 'Gift From The Garden' stamp set and the colours and watering can and polka dots over at Color Throwdown provided just the additional inspiration I needed:
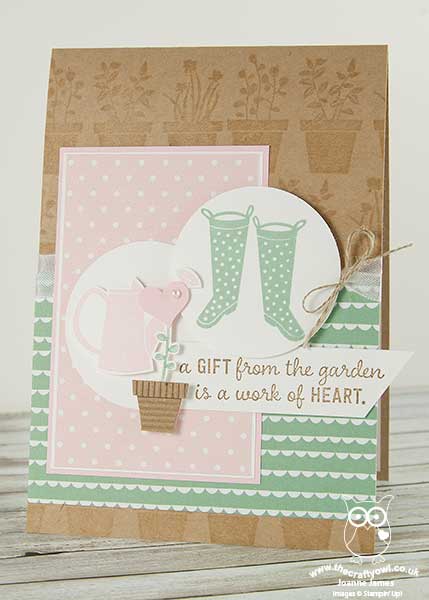
Claire's sketch has lots of layers so this gave plenty of opportunity to incorporate lots of elements. I used kraft cardstock for my base and stamped the flowerpot trio in Versamark all over the front to create a subtle tone on tone background design that was in keeping with the theme of my card. I then added a piece of Mint Macaron Birthday Bouquet designer series paper and strip of white seam binding ribbon and layered a piece of polka dot Pink Pirouette designer series paper from the Subtles stack before adding my stamped circles. I punched two circles of Whisper White and stamped a pair of Mint Macaron wellies on one and a Pink pirouette watering can on the other. I also stamped the watering can a second time on a piece of scrap so that I could fussy cut it out and overlap the spout when I layered the circles together. I stamped my sentiment in Soft Suede and then stamped the heart flower in a pot onto a piece of Whisper White, fussy cut it out then added a flowerpot cut from kraft coloured corrugated paper and a pink punched heart with added pearl. Lastly, I added a twine bow to my ribbon to finish my card.
I'm not sure that I would have chosen these pastel colours for a card using this set had I not seen the Color Throwdown photo, yet I think they make for a pretty card. The thing I love most about this card though is my custom patterned paper for my cardbase; it is subtle enough to not overpower and you don't even see that much of it, yet ties in so well with the theme of my card.I love the earthy tone of the kraft cardstock too - I really must use this more often I think! This card is headed to a wonderful green-fingered friend of mine; I'm not sure she owns a pink watering can or green wellies but I just know she will love this card.
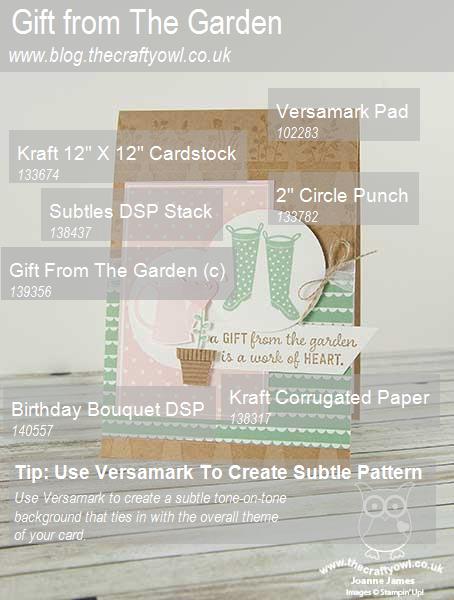
Here's today's visual summary for easy reference:
Before you reach for your ink and papers, check out what our amazing team has created to inspire you this week:
The Paper Players Design Team
Here's a quick recap of our challenge rules:
1. Create a new paper project
2. Upload your creation to your blog with a link back to us and provide a direct link to the post featuring your challenge submission.
3. Please link your card to no more than four challenges, TOTAL.
4. Have FUN!
I look forward to seeing what you create with our sketch this week. We are off to basketball today and Rebecca is playing in a hockey tournament too, so another day of sport in store.
Back tomorrow with another project; until then, happy stampin'!
Stampin' Up! Supplies Used:
by Joanne James26. February 2016 23:08Yay it's Friday! My day feels like it's been a long one and I am looking forward to the weekend for sure! Today I have a card for this week's challenge over at Retrosketches which also fits the bill for the new challenge over at As You See It:


I decided to make another Easter card, this time using some of my Sale-A-Bration Wildflower Fields designer series paper and the lovely Easter sentiment in the 'Suite Sayings' stamp set:
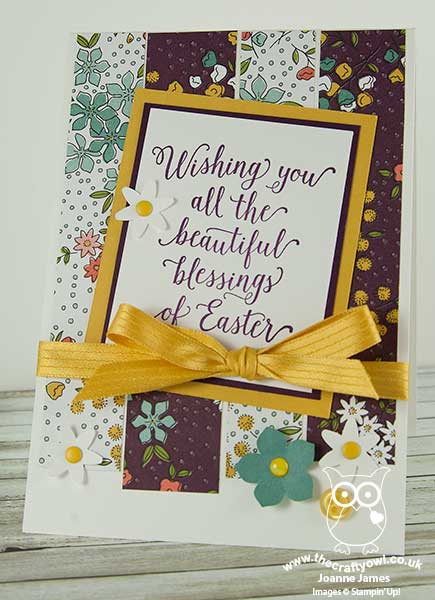
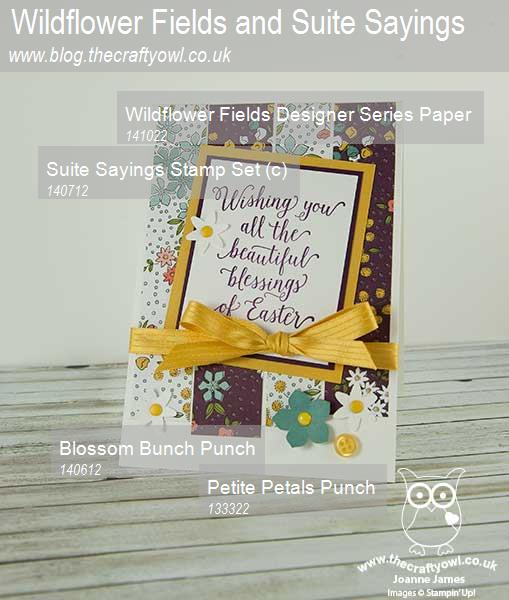
I used extra-thick Whisper White for my card base and added alternating strips of the bold flower patterned papers for my background. I tweaked the sketch slightly in as much as I used the central panel to showcase my sentiment, which broke up the detail of the busy paper, and chose Blackberry Bliss and Hello Honey for my ink, mats and ribbon colours. I embellished with a few flowers punched with my Petite Petals and Blossom Bunch punches and a retired Hello Honey button. This is the first stamp I've used in my 'Suite Sayings' stamp set; this is such a versatile set with a great variety of sentiments - I think this Easter one is my favourite though.
Here's today's visual reference showing the key supplies used to make today's card:
That's all from me today; back tomorrow with another project. Until then, happy stampin'!
Stampin' Up! Supplies Used:
b7576886-7d36-4d6d-a68b-401c1b9900b7|0|.0|96d5b379-7e1d-4dac-a6ba-1e50db561b04
Tags: Wildflower Fields, Stampin' Up Supplies, Stampin' Up Card ideas, Stampin' Up Card, Stampin' Up, Shop online, Shop Stampin' Up online, Sale-A-Bration 2016, Suite Sayings, Petite Petals Punch, Blossom Bunch Punch, Easter
Cards | Sale-a-bration | Shop Online | Stamping
by Joanne James25. February 2016 08:05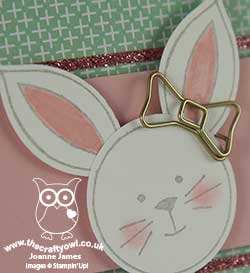
Today it's time for a new challenge over at Create With Connie and Mary and this week we have a great sketch for you:
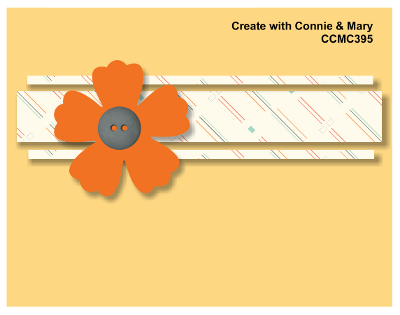
I decided to create a fun Easter card today using the new 'Friends and Flowers' stamp set that co-ordinates with the returning Festive Flower Builder punch - take a look:
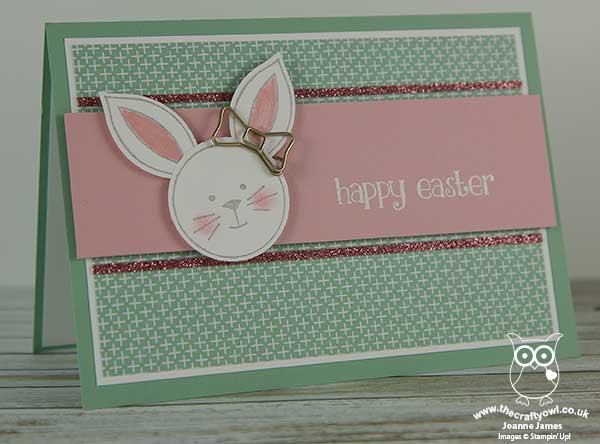
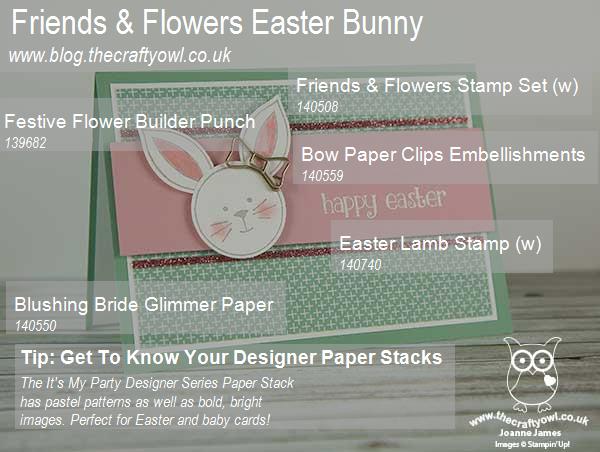
This is a great stamp set with lots of pieces that enable you to make bunnies, fish, flowers and more! It's so easy to punch out the various bits and pieces for easy creation with the co-ordinating punch; my Festive Flower Builder Punch got a real work out before Christmas (do a search on it or the 'Reason For The Season' stamp set here on my blog to see the many projects I've created using it) so I'm glad I get to use it with another co-ordinating stamp set too. I simply stamped the bunny face and ears in Smoky Slate on a piece of Whisper White cardstock, added a little Blushing Bride pink using my Stampin' Write markers and punched out (using the 1 3/8" circle for the face). I added a Bow Paper Clip embellishment to one ear for added 'cute' factor and bordered my sentiment panel with two thin strips of blushing Bride glimmer paper - a little glimmer goes a long way! The sentiment is the one you'll find with the 'Easter Lamb' stamp - I simply masked my stamp so that I would only get the words and not the image - which I stamped in Versamark and heat embossed in white for added gloss.
Lastly, do you recognise the pretty pastel paper I used for my background layer? It's actually from the It's My Party paper stack. Whilst this is a pack with lots of bold patterns and colours, the presence of Mint Macaron and Sahara Sand in the colour combination means there are some hidden pastel gems in there too, so be sure to check it out.
Here's today's visual summary for easy reference:
Do visit the other Design Team members to see how they interpreted this week's sketch; there's lots of inspiration over on their blogs too!
Enjoy your day and I'll be back tomorrow with another project; until then, happy stampin'!
Stampin' Up! Supplies Used:
- Friends & Flowers Wood-Mount Stamp Set
- Festive Flower Builder Punch
- Easter Lamb Wood-Mount Stamp
- Blushing Bride Glimmer Paper
- Bow Paper Clips Embellishments
- Smoky Slate Classic Stampin' Pad
- Blushing Bride Classic Stampin' Pad
- Blushing Bride A4 Cardstock
- Mint Macaron A4 Cardstock
- Whisper White A4 Cardstock
- It's My Party Designer Series Paper Stack
- 1-3/8" Circle Punch
- Embossing Buddy
- Versamark Pad
- White Stampin' Emboss Powder
- Heat Tool (Uk)
a099c02c-a726-48c5-bdaa-95ba30b70f0a|0|.0|96d5b379-7e1d-4dac-a6ba-1e50db561b04
Tags: Create With Connie And Mary, Stampin' Up, Stampin' Up Card, Stampin' Up Card ideas, Stampin' Up Supplies, Easter Lamb, Easter, Friends and Flowers, Festive Flower Builder Punch, It's My Party, Shop online, Shop Stampin' Up online
Cards | Shop Online | Stamping
by Joanne James24. February 2016 15:01
It's mid week Wednesday - happy hump day everyone! I'm a little later posting today as I didn't get a chance to post prior to my Coffee and Card Class at Bells in Northampton this morning. Fun was had by all and we are looking forward to doing it again in two weeks time at the next session on Wednesday 9th March, so I hope to see some of you there! Back to today and I have a card for this week's CAS(E) This Sketch:

There are some fabulous Design Team examples over there this week and I just had to have a go. The weather in the UK has been much brighter the last few days; gone are the rain clouds, with sunny, crisp frosty days in their place - the change in weather made me think of rainbows and I had the urge to create a bold and bright birthday card to this week's challenge:
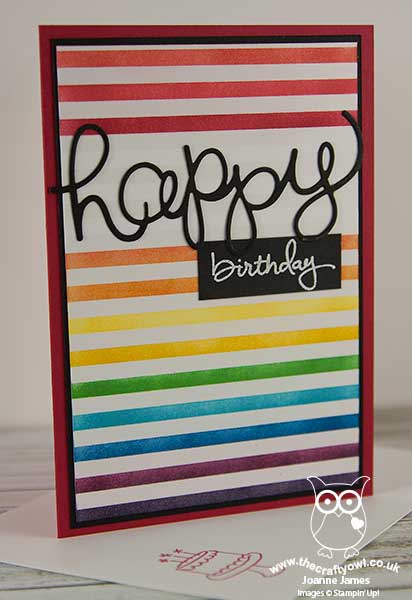
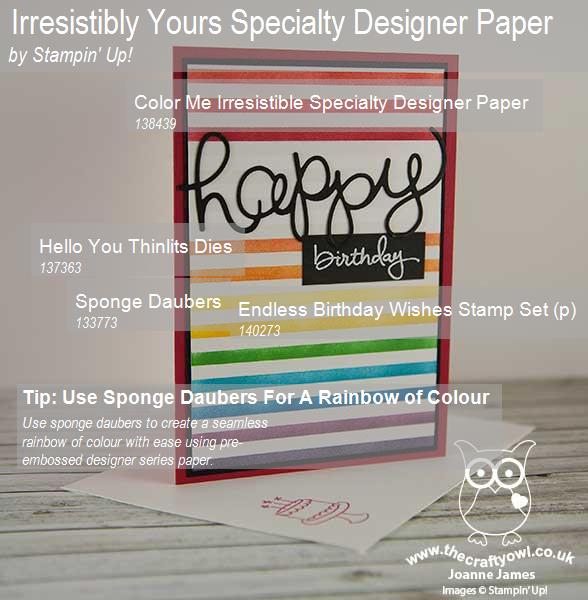
Using a piece of Real Red for my card base and a Basic Black mat, I took a piece of Irresistibly Yours Speciality Designer Paper (I used some of my last year's Sale-A-Bration paper, but the current pack has a slightly narrower stripe that would work too). I sponged my panel using sponge daubers a line at a time in a rainbow of colours: Calypso Coral, Watermelon Wonder, Real Red - left a few lines blank to house my diecut - Tangerine Tango, Pumpkin Pie, Daffodil Delight, Crushed Curry, Cucumber Crush, Tempting Turquoise, Pacific Point, Rich Razzleberry and Elegant Eggplant. Sponge daubers are great for allowing control and shading without needing to mask off your pre-embossed card. For my sentiment, I used a combination of a diecut sentiment cut with my Big Shot and 'Hello You' thinlits and a stamp that I heat embossed in white on black from the 'Endless Birthday Wishes' stamp set. I also used this stamp set to decorate the inside of my card and the envelope - no naked envelopes today!
This is one of those cards that is easy to create, bright and suitable for pretty much anyone - young or old, girls and boys; a great card to have on standby! It has a lovely subtle sheen in real life due to the embossing on the white lines and it's also nice and flat, so great for mailing.
Here's today's visual summary for easy reference:
That's all from me today; I'm off to put the finishing touches to a few more projects. Back tomorrow with a cute card for this week's new challenge over at Create With Connie and Mary. until then, happy stampin'!
Stampin' Up! Supplies Used:
by Joanne James24. February 2016 08:00It's Wednesday and you know what that means: a new collection of Wednesday Weekly Deals! These offers are valid for one week only. As always, a new collection of deals will be announced next Wednesday.
If you want to take advantage of any of the deals on offer, you can support my business by placing your order online by clicking here or using the link to my store on the right hand side of my blog page where it says 'Shop Online' or with me in person. Don't forget to add the new Hostess Code for February UYGWGF4W if your order is under £150 and be sure to make sure that you don't check the 'no contact' box if you'd like to be kept updated with the progress of you order and receive a little thank you in the post from me.
Here's a summary of this week's one-week only Wednesday deals - click on each item to go to the online store to purchase:
A few choice items this week - I think I may have to add that embossing folder to my collection!
Back later with today's creative project; until then, happy shopping!
by Joanne James23. February 2016 09:00
Hello everyone! Today I have a card for this week's challenge over at Pals Paper Arts where they have a sketch to work with:

I love a good sketch and this one allowed me to get my Easter Lamb stamp out for the first time and try something that I've been wanting to do since I bought it - take a look:
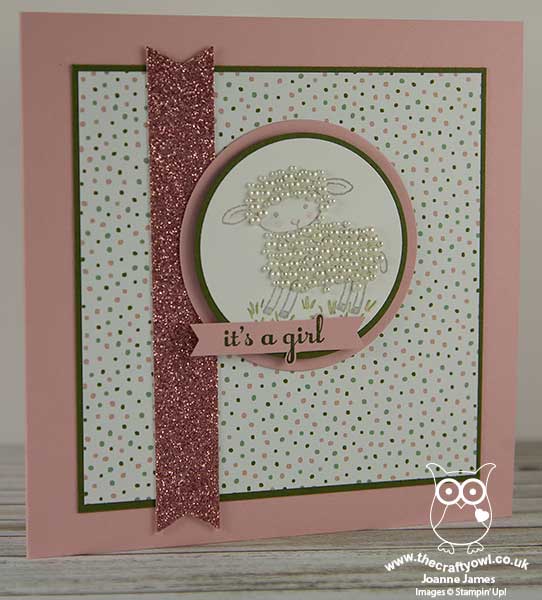
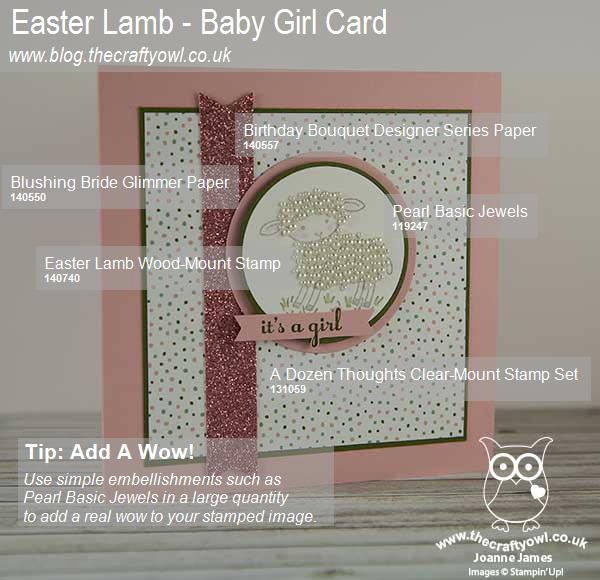
The sketch is perfect for using the circle to create a stunning focal point - and this is where my cute lamb comes in! I decided to stamp it without the 'Happy Easter' sentiment as I wanted to make a card to celebrate the arrival of a baby girl. I stamped the image in Smoky Slate, adding a few touches of Blushing Bride and Mossy Meadow ink with my blender pen, then proceeded to add a pearl to each of the circles of the image to create my pearlescent woolly coat. Two packs of Pearl Basic Jewels and some time later, this was the result! I chose to use Blushing Bride and Mossy Meadow as my feature colours from the delicate spotty Birthday Bouquet designer series paper for my base and mat layers - whilst the green is quite dark for a pastel baby card, I was careful to use it sparingly to frame the paper and image only and to stamp my sentiment from the set 'A Dozen Thoughts'. I love this font but since I wanted a narrow banner, decided to make a feature of the loops and cut around them, which fits quite neatly to my circle too - bonus! Lastly, I decided that a strip of Blushing Bride Glimmer Paper was necessary for the vertical banner - just in case anyone was in any doubt that this is most definitely a card for a little lady! I may well be responsible for a run on packs of pearl jewels from the Stampin' Up! store with this card and I know that this is not the sort of card you would make every day, but for a special one-off to commemorate the addition of one more to the female race, I think it's totally worth it!
Here is today's visual summary for easy reference:
That's all from me today. I have lots to be getting on with, including last minute preparations for my new 'Coffee and Card' drop in class at Bells in Northampton tomorrow. Back tomorrow with another project and this week's new Weekly Deals; until then, happy stampin'!
Stampin' Up! Supplies Used:
168b32d2-ddcf-4c5a-b048-eec0c99508d5|0|.0|96d5b379-7e1d-4dac-a6ba-1e50db561b04
Tags: Baby cards, Big Shot, circle punch, Circles Framelits, Easter Lamb, A Dozen Thoughts, Shop online, Shop Stampin' Up online, Stampin' Up Supplies, Stampin' Up Card ideas, Stampin' Up Card, Stampin' Up
Cards | Shop Online | Stamping
by Joanne James22. February 2016 07:30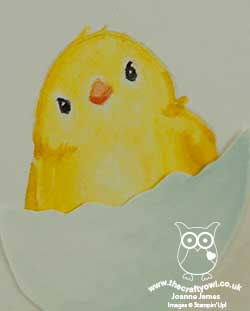
Happy Monday everyone! I have a card made with a few challenges in mind today:


I was keen to try out an idea I had for this week's challenge over at CASology where the cue card is 'egg' and decided to use the open sketch over at Freshly Made Sketches for my layout. I've seen lots of cards on Pinterest featuring no-line watercolouring this week, so wanted to have a go using the little chick in the 'Honeycomb Happiness' stamp set, one of a number of Sale-A-Bration stamp sets that is free with a £45 spend before 31st March. I will also be linking up to SUO Challenges where the team are featuring Sale-A-Bration products in their challenge this week. Here's my card:
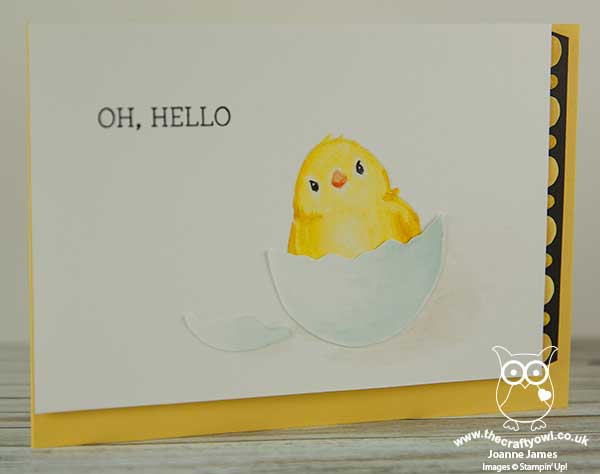
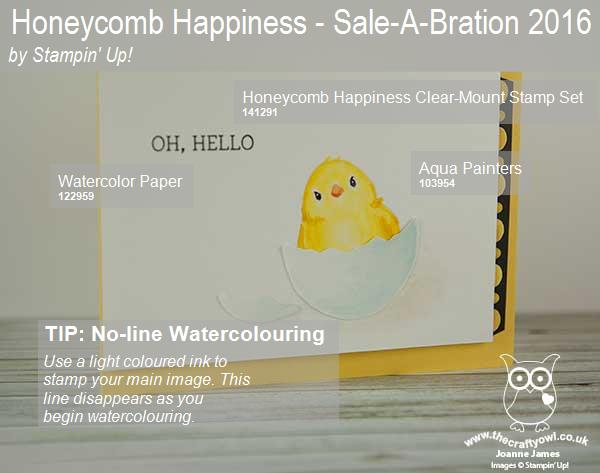
How cute is this little fella? I think he is adorable! I stamped my chick onto watercolour paper in Sahara Sand, then watercoloured him using my aquapainter and So Saffron, Daffodil Delight and Crushed Curry inks. The key to no-line watercolouring is to make sure that when you stamp your initial image you use a light-coloured ink that 'disappears' as you colour in. Having painted his whole self, I then proceeded to cover him up! I fussy cut an eggshell, also from watercolour paper, then coloured it with my Soft Sky ink and adhered it over my chick so that it looked like he was just breaking out of his shell. Some shadow and a sentiment finished this panel. I then added a thin strip of Everyday Chic designer series paper along the edge, having coloured in the pattern with my Daffodil Delight and Crushed Curry Stampin' Write markers, before adhering to my Daffodil Delight card base with dimensionals. I really enjoyed my first attempt at this style of watercolouring and I can see me using this chick in lot of other ways too. He will undoubtedly be useful as Easter approaches, but he would also make a cute addition to a baby card. The one thing I'm not sure about in hindsight is the strip of dsp - I think it's a little bold for the rest of my card.
Here is today's visual summary for easy reference:
That's all from me today; I'll be back tomorrow with a super cute project for this week's challenge over at Pals Paper Arts. Until then, happy stampin'!
Stampin' Up! Supplies Used:
9029859f-c961-4e7b-88c0-851f1eec9853|0|.0|96d5b379-7e1d-4dac-a6ba-1e50db561b04
Tags: Watercolouring, Honeycomb Happiness, Everyday Chic, Shop Stampin' Up online, Shop online, Sale-A-Bration 2016, Sale-a-bration, Stampin' Up, Stampin' Up Card, Stampin' Up Card ideas, Stampin' Up Supplies
Cards | Promotions | Sale-a-bration | Shop Online | Stamping