Honeycomb Happiness Pop-Up Chick Card

by Joanne James27. March 2016 10:00

It's Sunday and time for a new challenge over at The Paper Players! It's the turn of the talented LeAnne to host our challenge this week and she has my favourite type of challenge, a sketch, for you to play along with:

    PPA-293-Mar24

As it's Easter Sunday today, for my card this week I decided to make one last Easter card to share with you, using this week's colours over at Pals Paper Arts. I'm also linking up with the Friday Mashup again as I've used the theme part of their challenge (Easter and chicks or bunnies - read on and all will become clear!) Here is the front of my card:


Simple enough: some polka dot panels, alongside an oversize flower made with 1 1/2 and 1 3/4 circle punches and the Flower Fair Framelits as a backdrop to my pair of Easter eggs. The eggs themselves are using a tip picked up from Cindy Schuster on the Stampin' Up! corporate blog (you can see her card here) where she used the balloon punch to create Easter Eggs (I stamped mine first using the outline in the 'Balloon Celebration' set and used the grunge stamp in 'Awesomely Artistic' for my mottled effect).

The best bit for me about today's card is the inside, take a look:

Having wrestled with myself every time I went to stick one of the Honeycomb embellishments to the front of my card, knowing that it would mean either a box needed to send it or risk the embellishment being crushed (I'm still suffering post-traumatic stress from having watched Shannon West uncerimoniously squash one on the front of a card whilst on stage at Onstage Live in Brussels last November!!) , I decided that there was a perfect way around it - use it on the inside! I stamped my chick from the 'Honeycomb Happiness' Sale-A-Bration stamp set on the inside of my card along the central score line, paper-pieced him with another stamped on So Saffron card, then added my honeycomb embellishment (I spritzed one of the white ones in So Saffron). I also stamped my Easter greeting from the 'Suite Sayings' stamp set on the inside of my card on the left-hand panel:


Isn't that just the cutest?! I am so happy with how this turned out! I can now use my Honeycomb Embellishments with a clear conscience!

Here is the visual summary of the key products used on today's project for you to pin for easy reference:

You can see all of my 'How To' summaries on my 'How To - Tips and Techniques' Pinterest board in case you've missed any.  

Before you reach for your ink and papers, check out what our amazing team has created to inspire you this week:

The Paper Players Design Team
 
 
Here's a quick recap of our challenge rules:
 
1.  Create a new paper project
2.  Upload your creation to your blog with a link back to us and provide a direct link to the post featuring your challenge submission.
3.  Please link your card to no more than four challenges, TOTAL.
4.  Have FUN! 


I look forward to seeing what you create with this week's sketch. We have a rare sport-free day today. We are looking forward to our Easter egg hunt (likely to be indoors if the weather forecast is correct!), a leisurely lunch and an afternoon eating too many chocolate eggs whilst watching a good movie!

Back tomorrow with another project (or two!); until then, happy stampin'!


Stampin' Up! Supplies Used:

Table built using Product Table Builder by The Crafty Owl - Independent Stampin' Up! Demonstrator.

Work of Art Easter Egg and Honeycomb Happiness Chick

by Joanne James25. March 2016 18:57

Good Friday blessings one and all! I've spent most of today outdoors making the most of the sunny weather; I met my girlfriends for a run this morning and we went on a James family bike ride this afternoon. No time to craft, but since the forecast is dreadful for the rest of the week I'm sure I'll make up for it! Today's card is for the challenge over at The Friday Mashup. I love this challenge and am sad to read that this one is their last one!

This week you can use the sketch above or create a project with an Easter theme and chicks or bunnies, or mashup and create with both. I went with the latter for this card, although I do have a mashup card planned for a few days time! Here's today's card:

I actually made this card with the ladies at my Coffee and Card session at Bell's in Northampton this week. The key elements of my fun Easter card are as follows:

An oval egg - I used my Big Shot and Ovals Framelits to create my fun Easter egg in my layer of Pink Pirouette cardstock. Now I know that technically an egg is more pointed at one end, but without an egg framelit this oval makes a pretty good alternative! Before cutting out my oval, I stamped my chick onto the card. Why? Read on below to find out!

An Easter work of art - To decorate my egg, I cut a second mat of white the same size as my pink layer and stamped the large brushstroke stamp from the 'Work of Art' stamp set in a variety of pastel colours and placed this behind the aperture. The curve of the stamped image adds to the illusion of the egg shape.

A happy chick - The little chick from the 'Honeycomb Happiness' Sale-A-Bration set has been getting lots of use this week as he is perfect for Easter cards. I stamped mine onto So Saffron cardstock, snipped him out with my paper scissors and coloured his beak with my Pumpkin Pie Stampin' Write marker. I didn't fussy cut those fiddly legs though - remember the chick I stamped on the pink layer earlier? Yes, I simply coloured the ones on this layer with my Pumpkin Pie Stampin' Write marker and then lined up my yellow chick with the stamp outline, adhering him with a couple of Stampin' Dimensionals. Clever, right? You have just 6 more days to get your hands on the 'Honeycomb Happiness' stamp set for free with a £45 order; if it's on your wish list, don't leave it too late!

An Easter sentiment courtesy of the 'Easter Lamb' stamp and a trio of Itty Bitty punched flowers completes my card. 

Here's the visual summary of the key supplies used to make today's card for you to save for easy reference:


That's all from me today; if you would like to know more about my drop-in Coffee and Card Sessions, you can read all about it here. We have a short break for Easter then the next one is scheduled for 13th April - I'd love to see you there. I'll be back tomorrow with another project. until then, happy stampin'!


Stampin' Up! Supplies Used:

Table built using Product Table Builder by The Crafty Owl - Independent Stampin' Up! Demonstrator.


Honeycomb Happiness Meets Birthday Bouquet Ice Creams!

by Joanne James23. March 2016 20:20

The middle of the week has arrived - and a short week at that! Today I have a card to share with you for this week's challenge over at TGIF Challenge that also uses the sketch layout at Fab Friday:


I got such lovely comments on my card for last week's TGIF Challenge, that when I saw the badge for this week I just knew it was the perfect opportunity to get out the ice cream patterned paper in the Birthday Blossoms DSP and play along. Here is my card:

My card is a mix of mouth-watering ice-cream in pastel colours, with a little texture and another go at no-line watercolouring. Today's highlights include:

A sweet treat stamp and paper combination - The Birthday Bouquet Designer Series Paper has some gorgeous florals, but also includes a number of great alternative patterns that are perfect for a sweet celebration. I love these soft, watercoloured ice creams and decided to stamp one using the ice-cream stamp in the 'Honeycomb Happiness' Sale-A-Bration stamp set onto watercolour paper and coloured it using inks and my aquapainter to mirror those on the paper. I needed a small sentiment that wouldn't overwhelm my cone, so I trimmed the top part away for a better fit.

A colour combination that's good enough to eat - I love the combination of pale pink and pale green, with the warm brown of soft suede - the ice-creams combine these colours perfectly and the pink and brown make the perfect base for my card. Here's this colour combination if you would like to save it to use on your projects:


Waffle-y Versatile Stylish Stripes - I used the pastels for the horizontal stripes on my card and decided to use Soft Suede to mat my watercoloured image. I don't often use texture and embossing on my cards but decided to create a little more interest with a textured layer that emulated the cone of my ice cream. The Tiny Triangles or Zig Zag Textured Embossing Folders would have been good choices, but since I don't own either of those I embossed my cardstock twice with my trusty Stylish Stripes Textured Impressions Embossing Folder, embossing once then rotating my cardstock through 90 degrees and embossing again to give a criss-cross look. It works for me!

Here is today's visual summary of the key products used for you to save for easy reference:

I hope you like today's card. As I mentioned yesterday, today is the first day of the school holidays and when I returned from my drop-in Coffee and Card session at Bell of Northampton this morning (I'll be back to share the card we made today later in the week), Rebecca decided that having played outside all morning, she wanted to do something creative this afternoon. So what do you do when two of your greatest passions in life are Lego and craft? Well, you use your Lego Mindstorms to build a robot that you can programme to decorate your Easter eggs! We made a short video to show the results and I thought I'd share here as I thought the results were rather impressive:

Who said school holidays were boring? Not when you're 10 years old and a member of the James family, for sure!

Back tomorrow with this week's card for the new challenge over at Create With Connie and Mary; until then, happy stampin'!


Stampin' Up! Supplies Used:

Table built using Product Table Builder by The Crafty Owl - Independent Stampin' Up! Demonstrator.


Honeycomb Happiness Chick Amongst The Flowers

by Joanne James20. March 2016 09:00

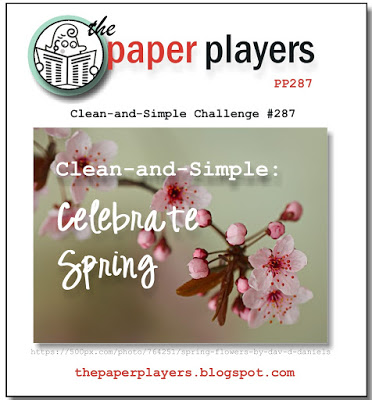
It's Sunday and time for a new challenge over at The Paper Players! It's the turn of our very own Birthday Girl, the lovely Jaydee, to host our challenge this week and she has a fun clean and simple theme for you to play along with:


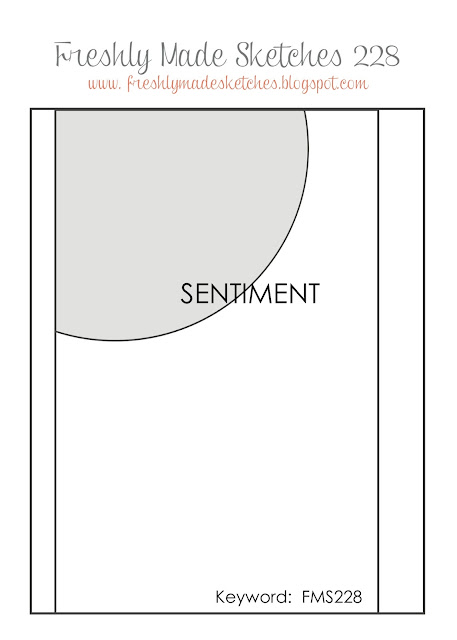
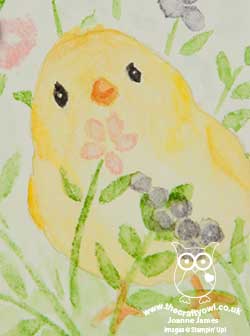
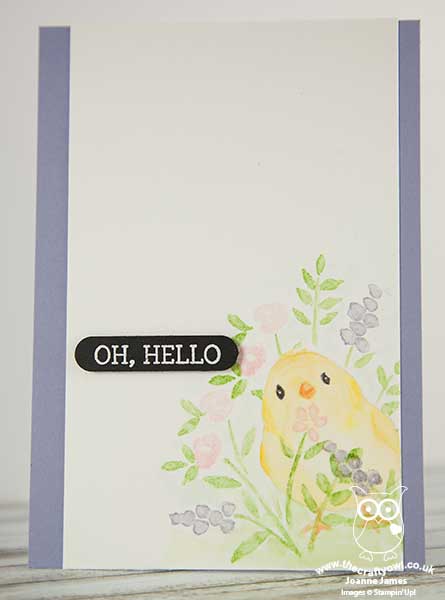
So along with Jaydee's birthday - happy birthday wishes to you Jaydee! - we are also celebrating the arrival of Spring! For my card this week I was inspired to use the cute little chick from the Sale-A-Bration Honeycomb Happiness stamp set, this time in conjunction with the floral spray in the 'Number of Years' stamp set. I used this week's layout over at Freshly Made Sketches for my card - take a look:


Key points to note about today's card:

More than a number - The 'Number of Years' stamp set is big on numbers, but it also has this lovely floral spray which can be used in conjunction with the other stamps in the set or for something totally different, as I've done here. The watercolour-effect stamp was the perfect pairing for my no-line watercoloured chick today. I stamped it twice, masking my chick once so that some of the stems appeared behind for depth of field, then went over the top with my aquapainter to further enhance to watercoloured effect. 

No-line watercolouring - I've used this technique with this same little chick previously (you can see that card here). Today I wanted to use soft pastels and delicate colouring to have him peeking out of the spring flowers, so no-line watercolouring was the perfect solution. I stamped him in Sahara Sand and coloured him in So Saffron and Daffodil Delight with my aquapainter to give him a realistic finish.

Sketches are open to interpretation - Kim's sketch is great but I needed my chick to be grounded and not floating in mid-air, so I rotated the sketch through 180 degrees (this is allowed!) I used the floral spray to give the circular shape within the sketch without adding another layer to my card and keep it looking 'clean and simple'.

A bold Hello - With such delicate watercoloured pastels, I decided to stamp my sentiment in Versamark on Basic Black and heat emboss in white to give my sentiment some prominence. I then punched this out with my Word Window Punch. A nice contrast I think to the softness of the rest of my card.

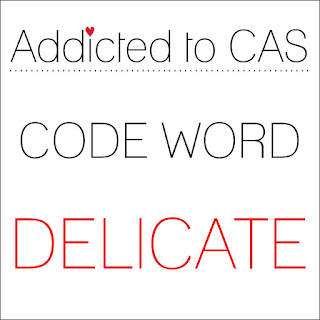
I'm also linking up my card today with the challenge over at Addicted to CAS, where the current theme is 'delicate' and SUO Challenges where the theme is 'welcome Spring'.

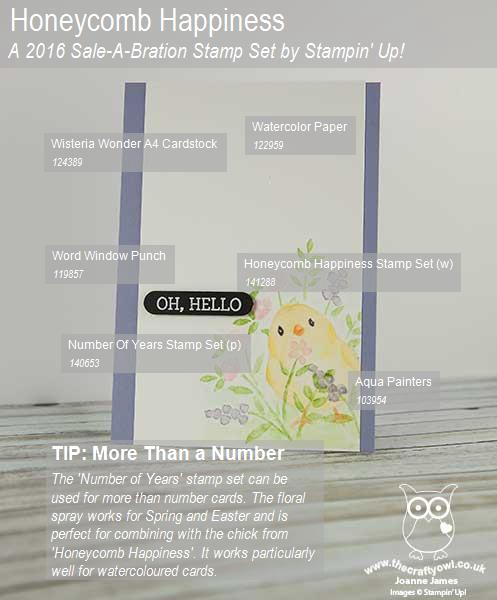
Here's today's visual summary of the key products used on today's card for easy reference:


Before you reach for your ink and papers, check out what our amazing team has created to inspire you this week:

The Paper Players Design Team
 
 
Here's a quick recap of our challenge rules:
 
1.  Create a new paper project
2.  Upload your creation to your blog with a link back to us and provide a direct link to the post featuring your challenge submission.
3.  Please link your card to no more than four challenges, TOTAL.
4.  Have FUN! 

I look forward to seeing what you create with this week's clean and simple theme. We have a jam-packed day of sport today: hockey and basketball training, followed by a hockey tournament, lunch and then both James Juniors are playing in a basketball match. I'm thinking we need to start the day with at least two Weetabix each to get us through to dinner!!

Back tomorrow with another project; until then, happy stampin'!


Stampin' Up! Supplies Used:

Table built using Product Table Builder by The Crafty Owl - Independent Stampin' Up! Demonstrator.

Honeycomb Happiness Hello Chick

by Joanne James22. February 2016 07:30

Happy Monday everyone! I have a card made with a few challenges in mind today:


I was keen to try out an idea I had for this week's challenge over at CASology where the cue card is 'egg' and decided to use the open sketch over at Freshly Made Sketches for my layout. I've seen lots of cards on Pinterest featuring no-line watercolouring this week, so wanted to have a go using the little chick in the 'Honeycomb Happiness' stamp set, one of a number of Sale-A-Bration stamp sets that is free with a £45 spend before 31st March. I will also be linking up to SUO Challenges where the team are featuring Sale-A-Bration products in their challenge this week. Here's my card:

How cute is this little fella? I think he is adorable! I stamped my chick onto watercolour paper in Sahara Sand, then watercoloured him using my aquapainter and So Saffron, Daffodil Delight and Crushed Curry inks. The key to no-line watercolouring is to make sure that when you stamp your initial image you use a light-coloured ink that 'disappears' as you colour in. Having painted his whole self, I then proceeded to cover him up! I fussy cut an eggshell, also from watercolour paper, then coloured it with my Soft Sky ink and adhered it over my chick so that it looked like he was just breaking out of his shell. Some shadow and a sentiment finished this panel. I then added a thin strip of Everyday Chic designer series paper along the edge, having coloured in the pattern with my Daffodil Delight and Crushed Curry Stampin' Write markers, before adhering to my Daffodil Delight card base with dimensionals. I really enjoyed my first attempt at this style of watercolouring and I can see me using this chick in lot of other ways too. He will undoubtedly be useful as Easter approaches, but he would also make a cute addition to a baby card. The one thing I'm not sure about in hindsight is the strip of dsp - I think it's a little bold for the rest of my card. 

Here is today's visual summary for easy reference:


That's all from me today; I'll be back tomorrow with a super cute project for this week's challenge over at Pals Paper Arts. Until then, happy stampin'!


Stampin' Up! Supplies Used:

Table built using Product Table Builder by The Crafty Owl - Independent Stampin' Up! Demonstrator.

Mini Catalogue

BROWSE THE CATALOGUE

The mini catalogue is now live! Read and download your copy here.

Shop Online

Access my online shop 24 x 7, 365 days of the year:

Current March hostess code:

S9F2XJJW

Shop Online

Join My Team

It's always a great time to join Stampin’ Up! New team members can get £130 worth of products for only £99 + free business supplies + free shipping + all the fun being a part of Stampin’ Up! Stampin' Up! has something for everyone: join my growing team and benefit from my support to enjoy Stampin' Up! however you choose.

If you're interested, call me for a chat to understand how I can help you realise your goals. Alternatively, if you have already decided to sign up and you just can't wait, please click here for the link to the online form where you can sign up and order your starter kit right away! 

Latest Kit!

Stampin Cut and Emboss

The Rock Legend Kit has all you need to make 8 cards with coordinating envelopes. Along with the new Panda Friends Kit, both are available from January 4th for just £14 each - get yours here!

2023-24 Annual Catalogue

BROWSE THE CATALOGUE

Click on the catalogue for a full list of current SU! supplies - if you would like to order any of the items featured, please drop me a line at [email protected] or give me a call on 07773 421446 - I'd be happy to help.

New Online Exclusives

There will be new products available exclusively in the online store from 5 March - check them out here.

About Me

Hi I'm Joanne and live in Northampton and when I'm not looking after my husband and two beautiful children, am an avid crafter with a passion for all things Stampin' Up!

I must confess that I have never been a big rubber stamper - until I discovered Stampin' Up! that is. I love the fact that I can get such great results with co-ordinating stamps, inks, papers and punches - the possibilities are endless! Join me on my stamping journey as I share the things I love and be inspired to create amazing things yourself!

Follow Me

Monthly Newsletter

Box Builder

Click the button above to use Box Buster to create your custom box design using the Envelope Punch Board!

Kits Collection Now Available!

Stampin Cut and Emboss

The new Kits Collection from Stampin' Up! is now available!

Click here to see the current kits available and order yours online today.

I Design For


Stampin' Up Stuff

This is my personal blog and is not endorsed by Stampin’ Up! I hope you find it a plentiful source of ideas and personal inspiration but please don't copy my designs for contest submission or use for classes, publication or sale without express permission.