Make Your Handcrafted Christmas Easy With The Watercolor Christmas Card Kit

by Joanne James21. December 2017 09:00

Today is the last day for posting here in the UK to guarantee your Christmas cards will arrive in time for Christmas. If, like me, you have been making Christmas cards all season but still need a few extra at the last minute, the Watercolor Christmas Project kit is definitely a quick solution.

I am a big fan of Stampin' Up!'s kits, which are very generous and of extremely high quality and the Watercolor Christmas Project Kit s no exception. Here are each of the designs in the kit:


Each kit makes 20 cards, 5 each of 4 designs, which look time-consuming but in fact take only minutes to assemble. Which is good news, given that I made up a pack last night for sending out today! I love the co-ordinating Watercolor Wishes stamp set too, however the kit can be used with other sentiment sets you have if you prefer. These kits are on offer as part of the year-ed sale, so I would highly recommend you grab a few and make them up now ready for next year - it will give you a great head start for your cardmaking and you will hit the festive season running!

Here is the visual summary of the key products used on today's project for you to pin for easy reference:
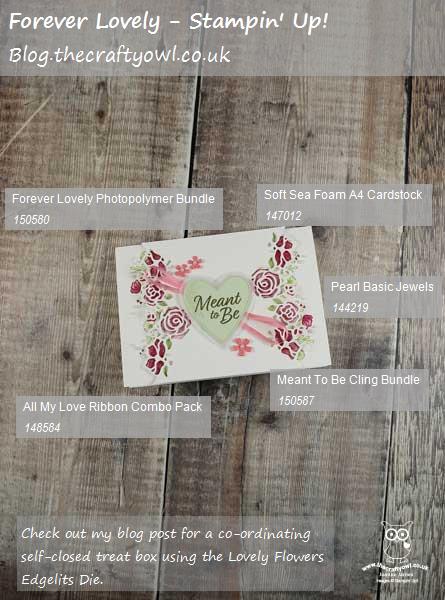
 

You can see all of my 'How To' summaries on my 'How To - Tips and Techniques' Pinterest board in case you've missed any. 

Back soon with another project; until then, happy shopping!


Stampin' Up! Supplies Used:

Table built using Product Table Builder by The Crafty Owl - Independent Stampin' Up! Demonstrator.

Tags: , , , , , ,

Cards | Shop Online | Shop Stampin' Up! Online | Stamping

Brightly Lit Christmas 3 Ways From Simple To Stepped Up - Part 2

by Joanne James20. December 2017 22:00

I've been away for a few days with my family to experience the delights of the German Christmas markets and enjoy some much-needed pre-Christmas R&R, but have just managed to squeeze in a post for you this evening amidst some last-minute card writing to share the second part of my Brightly Lit Christmas set and possibly one of my favourite cards of the season - take a look:


 Here's the low-down on today's card:

A Framed Christmas Lampost - I created my delightful snowy lampost scene and use the crossbar lampost framelit to create a gorgeous frame for my mini focal point, something I picked up from a wonderful crafty friend of mine, the talented Amanda Bates over at The Craft Spa; thanks for the inspiration, Amanda!

Light The Lamps - The best bit of this stepped-up card? The lamps light up! I used a Chibi circuit kit to create a circuit behind the main panel and when you press the presents, the lamps light as you can see on this zoomed-in photo below:


How cool is that?! These circuits are easy to create although with three bulbs on this card, a little pricey and only really suitable for a special card, but a fun way to step up a card with the Christmas Lampost Thinlits Dies for sure.

Pick A Piece Of Paper - The only stamping on my card is the little 'Merry' banner across my wreath; the wreath itself and the presents were diecut from the Christmas Around The World Designer Series Paper. This paper is the one I initially found the most difficult to work with, yet in reality have used most - it's amazing how creative you can be when challenged! 

Here is the visual summary of the key products used on today's project for you to pin for easy reference:


You can see all of my 'How To' summaries on my 'How To - Tips and Techniques' Pinterest board in case you've missed any. 

Enjoy your day and I'll be back soon with another project. Until then, happy stampin'!


Stampin' Up! Supplies Used:

Table built using Product Table Builder by The Crafty Owl - Independent Stampin' Up! Demonstrator.

Bargains Galore - The Clearance Rack has updated!

by Joanne James18. December 2017 09:42


What a great start to the week - I logged on this morning to find a surprise update to the Clearance Rack. There are now lots of new items available, some with as much as 60% off. As is always the case, popular items will sell out quickly, so don't spend too long deliberating - get in there quick! There are some great paper bargains, including many designer series papers, accessories, framelits and even a few punches. Some of my favourite framelits are there along with some gorgeous ribbons too - I could go on, but the best thing you can do is hop on over and take a look.

Click here to go the clearance rack in my online store and grab a bargain whilst stocks last!  Don't forget to include the current hostess code NASJ4PVF make sure that 'allow your demonstrator to contact you' is ticked in order that you receive your special 'thank you' in the post from me. 

Race you to the shop - first one there gets the bargains! Happy shopping! 


Tags: , , , ,

Shop Online | Shop Stampin' Up! Online | Stamping

Last Day For Online Ordering To Guarantee Arrival For Christmas!

by Joanne James14. December 2017 13:23


Just popping by with a quick reminder that today is the last day to place your Stampin' Up! orders online to guarantee shipping in time for Christmas. You will still be able to place orders after today, and of course gift vouchers and Stampin' Up!'s all-inclusive kits will still be available to purchase and collect from me right up until Christmas Eve, however for orders that need to be shipped, today is the day!

Don't forget to add the current hostess code NASJ4PVF to receive a thank you in the post from me.


Tags: , , , , ,

Shop Online | Shop Stampin' Up! Online | Stamping

Brightly Lit Christmas 3 Ways From Simple To Stepped Up - Part 1

by Joanne James11. December 2017 22:09

It's a little while since I shared a 'one stamp set, three ways' post with you showing you three cards using one suite and how to use the products within that suite to create cards that range from simple to stepped up. Today is the first of two posts that will do just that - this time featuring the Christmas Around The World Suite and the Brightly Lit Christmas Bundle that you can find on pages 28-29 of the 2017 Autumn-Winter seasonal Stampin' Up! catalogue that I used in a class a couple of months ago.

The Brightly Lit Christmas stamp set has a fun collection of festive banners that co-ordinate with a basic lamppost design and when paired with the co-ordinating Christmas Lamppost Thinlits Dies can be used to make the most ornate and detailed 3D traditional lamppost designs. The set is great for quick and easy and more complex cards with a real 'wow' factor.  

Clean and Simple - Quick And Easy - If you're short on time or new to crafting, this set is great for a simple card like this one:


All you need to do is take a sheet of Extra Thick Whisper White for your card base and mat layer, stamp your lamppost and hanging banner directly onto the card front and sponge a little yellow ink for lamp light, use the wreath bauble stamp to add some snowflakes (stamp in Versamark and add Dazzling Diamonds glitter) and a red ribbon bow and your card is done. Festive red and the subtle sparkling snowflakes help this simple card to have a big impact.

Step It Up - If you have a bit more time and are feeling more adventurous, using a few extra tools and embellishments will allow you to 'step up' your card and create something with a little more depth and detail, whilst still relatively easy to make:


My second card follows the same basic layout as the first, still using just the stamps from the Brightly Lit Christmas set, however this time I've stamped only the top portion of the lamppost and masked off the lower portion and used the Carols of Christmas stamp set and co-ordinating Card Front Builder Dies to cut out some festive poinsettia flowers to adorn the lamppost, centred with some gold enamel shapes, added a couple of twists of red and gold ribbon behind and a couple of background banners using the Triple Banner Punch, one of which is a contemporary tartan to add a bold splash of colour. 

My third card is a real 'wow' - but you'll have to come back for Part 2 for that one!

Here are the visual summaries of the key products used on today's projects for you to pin for easy reference:

Card 1:


Card 2:


You can see all of my 'How To' summaries on my 'How To - Tips and Techniques' Pinterest board in case you've missed any. 

I'll be back soon with the third card in this set, which is my absolute favourite. Until then, happy stampin'!


Stampin' Up! Supplies Used:

Card 1:

Table built using Product Table Builder by The Crafty Owl - Independent Stampin' Up! Demonstrator.


Card 2:

Table built using Product Table Builder by The Crafty Owl - Independent Stampin' Up! Demonstrator.

FREE SHIPPING On All Stampin' Up! Orders - For 24 Hours Only!

by Joanne James10. December 2017 22:30

You loved it so much last time, the lovely people at Stampin' Up! have decided to give you one more opportunity to receive free shipping on all Stampin’ Up! orders for 24 hours only - what a great opportunity to stock up on storecupboard craft items or just try out online ordering and see how easy it is can be.

Online ordering is so easy to do: your order gets delivered directly to your door and you get the opportunity to add the monthly online reward code that earns you additional goodies when shopping with me. The current reward code is NASJ4PVF - this changes each month and the current one can always be found on the right hand side of my blog where it says 'shop online'. If you have some crafting staples such as adhesive, Stampin' Mist stamp cleaner or trimmer blades that you've been needing to stock up on but not wanted to pay the usual flat rate £4.95 postage for, this is a great time to stock up on the little things at no additional cost. Or perhaps you just need a few stocking-fillers for a crafty friend or even a little something for your secret Santa - keep within your budget by saving on postage and get your order delivered straight to you. The Year-End Deals are also still going strong; if you would like to pick up a bargain or two, you can see the full list here.

Or perhaps you still need a Christmas gift or two? Our all-inclusive kits make great gifts for novice and experienced crafters alike and our Love Today Planners have universal appeal. The last day for ordering to ensure delivery in time for Christmas is Thursday 14th December, but with free shipping for the next 24 hours, why wait - why not treat yourself or a loved one today?

Free shipping runs from 11:00 p.m. (GMT) Sunday 10th December to 10:50 p.m. (GMT) Monday 11th December. Don't forget to add the current hostess reward code NASJ4PVF for an extra little thank you from me; this will also ensure you receive a copy of the new Spring-Summer catalogue and Sale-A-Bration leaflet which will be on its way next month!

Click here to go to my online store

Happy shopping everyone!

Tags & Trimmings Festive Christmas Stocking Gift Box For The Paper Players PP374

by Joanne James10. December 2017 09:00

It's Sunday and time for this week's new challenge over at The Paper Players- what's more, it's the last one of 2017! It's the turn of my good friend, the lovely and talented Claire, to host this week and she has a bright colour challenge for us to end the year with:


This is a palette with lots of options - you could still craft for Christmas, or use these colours for a non-festive project, it's up to you. Our design team this week has done a little of both, so there's lots of inspiration for you. I took the opportunity to squeeze in another Christmas project, but went with a 3D gift box rather than a card today. In fact, a Christmas stocking - take a look:


Here's the low-down on today's project:

Trim Your Stocking - These colours were perfect for a pink and girly Christmas stocking, complete with spotty heel, toe and cuff trim then finished off with a sprig of festive greenery. I've used the Trim Your Stocking Thinlits on this card previously but whatever your project, this set has an abundance of useful dies that are perfect for all kinds of embellishments. 

It's What's Inside That Counts - I love this sentiment! Whether it's a little chocolate - the content of choice of Rebecca - or money (most definitely the content of choice for my teenage niece!), the pillow box on the reverse of this stocking is just big enough for either. I haven't yet decided who this stocking will be heading for and for me how it looks on the outside is the most important thing, but one thing is for sure, for the recipient it's definitely what's inside that counts!

A Little Added Sparkle - I couldn't resist adding in a little sparkle to my festive stocking, with a silver foil bell, some mini sequin trim and a liberal dose of clear Wink of Stella on the lime green pieces - I'm hoping Claire considers silver (almost) a neutral such that I can get away with it - I just couldn't resist, those jingle bell dies are my favourite! 

Here is the visual summary of the key products used on today's project for you to pin for easy reference:


You can see all of my Product and 'How To' summaries on my 'How To - Tips and Techniques' Pinterest board in case you've missed any. 

Before you reach for your ink and papers, check out what our amazing team has created to inspire you this week:

The Paper Players Design Team
 
 
Here's a quick recap of our challenge rules:
 
1.  Create a new paper project
2.  Upload your creation to your blog with a link back to us and provide a direct link to the post featuring your challenge submission.
3.  Please link your card to no more than four challenges, TOTAL.
4.  Have FUN! 


I look forward to seeing what you create with this week's colour palette. As I mentioned above, this is our last challenge for 2017; we will be taking a two week break before returning with a fresh new set of challenges for 2018 starting on Sunday 7th January 2018. Thanks to everyone who plays along each week, to this year's guest designers, Crystal and Valentyna, Deanne, Jan and Annie, and everyone of you who visits our blogs and leaves us encouraging comments each week - it's great to know that you enjoy our creations! We will be announcing our new guest designers for the first half of 2018 this coming Wednesday, in my mid-week reminder post, so be sure to check back then to see who will be joining us to kick off the Paper Players fun at the start of 2018!

Enjoy the rest of your weekend as it will be over all too quickly; we are hoping to put our Christmas tree up and decorate the house tomorrow - then it really will feel like Christmas! I'll be back soon with another project; until then, happy stampin'!


Stampin' Up! Supplies Used: 

Table built using Product Table Builder by The Crafty Owl - Independent Stampin' Up! Demonstrator.

Celebrate The Good Stuff - Guest Designer With Inspired By All The Little Things

by Joanne James9. December 2017 13:00

Today I've been invited by my good friend and team leader over at The Paper Players, the lovely Nance Leedy, to be the Guest Designer over at Inspired By All The Little Things - what an honour!

I love this challenge, also set up originally by the creative powerhouse that is the lovely Lesley Croghan, and although I don't get to play along as often as I would like I can often be found browsing the gallery each week, for inspiration from the awesome team of designers, the challenge for the week and also to have a little nosey at the invited guest - you see they have a fun feature where they do a little interview  and you get to find out what inspires them, along with some interesting things that you might not know about the featured designers. Yes, that includes me - I included one or two fun things that even my regular readers might not know about me too, so hop on over and have a read if you'd like to find out more! You could even have a go at this week's challenge - I would love to see what you make of it!

And so to my card! Here is the inspiration photo for this week's challenge:


Now I must confess, I thought long and hard about this card and had a false attempt too before I produced something that I felt embodied the feeling of 'party' evoked in the inspiration picture. Here's what I came up with:


Here's the low-down on today's card:

Inspired By All The Little Things - I thought I would give you a little insight into how I used the inspiration photo to get to my final card design today, as I often get asked "where do you start?" when making a card. The photo has lots of elements: black, gold, peach, vellum, white, confetti, hexagons, squares, circles, art deco, party blowers, glitter balls, happy new year, a rosette, a champagne glass to name just some -  and whilst I could have used any or all of them on my card, I chose to zone in on a few. I decided to major in on the black and gold colours for my colour scheme, with just a pop of peach, and create a card with a party theme that could be used for new year but would also work for any other kind of party celebration. Then I browsed my stamp sets and accessories to see what would work and set to work.

A Playful Background - I originally set about creating some rather fancy art deco-inspired hexagons using gold washi tape and black cardstock, but eventually decided these were too busy on my card so they are now waiting in my scrap box for another project! I decided to go with something less geometrical and create a background using one of the stamps in the Playful Backgrounds stamp set that mimicked the mat beneath the peach party cup in the photo (I selectively inked it so that the little dots on the stamp are omitted from my design) and heat embossed it in gold. I then did the reverse colour combination for my sentiment, i.e. black heat embossed on gold foil, so that it provides contrast yet is still in keeping with my theme.

A Picture Perfect Party - My card needed a focal point, so what better than a couple of party blowers? And a new stamp set that I acquired at Stampin' Up!'s Onstage event recently provided just the thing - the 'Picture Perfect Birthday' set has ribbon bows, candles, confetti and party sentiments galore, but also has the bits to construct a party blower - how fun! I made two and gave them each a vellum frill that I cut with my fringe scissors, as another nod to the inspiration photo. I wanted to make them stand out from the rest of the card, hence to addition of my Peekaboo Peach stitched circle behind; I didn't want peach to be a major feature of my design yet it serves a useful purpose here to highlight my blowers and ensure they don't get lost against the busyness of the background pattern. Picture Perfect Birthday is in the new Spring-Summer Stampin' Up! catalogue out on January 3rd - be sure to get in touch with me if you'd like a copy.

And that's how I did it! I'm also linking my card up with the team over at Freshly Made Sketches - what can I say, I love a good sketch :-)


Here is the visual summary of the key products used on today's project for you to pin for easy reference:


You can see all of my 'How To' summaries on my 'How To - Tips and Techniques' Pinterest board in case you've missed any. 

Enjoy your day and I'll be back tomorrow with another project for the last challenge of the year (gulp!) over at The Paper Players. Until then, happy stampin'!


Stampin' Up! Supplies Used:

Table built using Product Table Builder by The Crafty Owl - Independent Stampin' Up! Demonstrator.

Swirly Snowflakes Thinlits Square Easel Christmas Card

by Joanne James8. December 2017 12:00

It's Friday and finally I've managed to squeeze in a blog post to share with you - hurrah! Today I'm sharing another card using the Snowflake Sentiments bundle - and just like my card for The Paper Players on the Sunday before last (you can see that card here if you missed it), it uses the thinlits in a rather unusual way. I'm also linking up with the team over at Stamp Ink Paper who are looking for snow-themed creations this week:

I decided to make an easel card  - this is what it looks like closed:


This is what it looks like open:


And finally here's another shot from above, that shows the detail of the front edge and my sentiment, which I stamped in Versamark and heat embossed onto a label punched with the Everyday Label Punch:


I wanted to make a special card that really showcased the versatility of the Swirly Snowflakes Thinlits Dies, so I used the edge thinlits to create two layered squares and finished it with a stitched square, onto which I stamped a snowflake from the co-ordinating Snowflake Sentiments set in Versamark and heat embossed it in gold. I finished with one of the super-sparkly faceted gems to create a focal centrepiece. Creating a card like this is not for the faint-hearted - it took a fair amount of partial die cutting and snipping of the gold piece to remove excess pieces in order to have a symmetrical design, but it was so worth it - the finished card has a real 'wow' factor, I love it!

I'm pleased to see that the Snowflake Sentiments stamp set and Swirly Snowflakes Thinlits Dies are on carryover and will remain available beyond the end of the Autumn-Winter catalogue - this means lots more opportunities to create with this set! They won't be available as a bundle though, so if you want the 10% saving, be sure to snap them up before January 2nd - just click on the link in the supplies list at the bottom of today's post.

Here is the visual summary of the key products used on today's project for you to pin for easy reference:


You can see all of my 'How To' summaries on my 'How To - Tips and Techniques' Pinterest board in case you've missed any. 

Enjoy your day and I'll be back around lunchtime tomorrow with a special post as I'm the guest designer over at Inspired By All The Little Things this week. My project contains a Spring-Summer sneak-peek too so be sure to come back and take a look. Until then, happy stampin'!


Stampin' Up! Supplies Used:

Table built using Product Table Builder by The Crafty Owl - Independent Stampin' Up! Demonstrator.

Layered Gingerbread In A Jar - The Perfect Homemade Christmas Gift PP373

by Joanne James3. December 2017 09:00

It's Sunday and time for this week's new challenge over at The Paper Players! The lovely Laurie is the hostess this week and she has a rather delicious seasonal theme for us to work with:


I'm also linking up with the team over at Stamp Ink Paper this week who are looking at Christmas wrapping and packaging solutions. I love to make gingerbread at this time of year but it's still a little early for me to have baked and wrapped creatively, so instead I decided to share with you a little something that I've been preparing for Ben's school Christmas Fayre the week after next that fits Laurie's theme perfectly. They are having a 'Jam Jar Tombola' stall, so I've been busy making up jars of all kinds for the children to win, including some jars of dry ingredients that they can use for their own festive baking. Here's one of my jars for gingerbread cookies - take a look:


These really are so easy to make: you simply layer the dry ingredients into a kilner jar, then decorate and add a tag with the details of any ingredients you need to add and the method. 

I used the 'December Deliciousness' stamp from the 'My Little Things' stamp set to decorate my jar, using my markers to selectively colour each of the elements in and adding a heat-embossed sentiment banner across the middle to create a decorated top to my jar. I paired it with some retired paper that fits perfectly with my theme for a folded tag that includes the ingredients and recipe, some ribbon and a wooden spoon that I will be tying to the side of the jar too ready for stirring - you could also add a gingerbread cutter if you have one.

I'm a big fan of homemade gifts at Christmas and there is no limit to the things you can put in a jar; with a little decoration this kind of thing can make a thoughtful, presentable gift.

If you would like to make a jar like mine, I've included the details from the inside of my folded tag below:

Easy Gingerbread Biscuits

This jar contains:

  • 100g soft light brown sugar
  • 1 tsp ginger, ¼ tsp allspice
  • ¼ tsp cinnamon, 225g plain flour
  • ½ tsp baking powder
  • ½ tsp bicarbonate of soda


You will need to add:

  • 150g melted butter
  • 1 tbsp golden syrup
  • 1 egg yolk


Method:

  • Mix 150g melted butter with 1 tbsp golden syrup and 1 egg yolk.
  • Add to the dry ingredients, mix well, then knead to a dough.
  • Chill for 15 mins then roll out.
  • Cut into biscuits and bake at 200C/180C fan/gas 6 for 8-10 mins. Cool on a wire rack.


Here is the visual summary of the key products used on today's project for you to pin for easy reference:


You can see all of my Product and 'How To' summaries on my 'How To - Tips and Techniques' Pinterest board in case you've missed any. 

Before you reach for your ink and papers, check out what our amazing team has created to inspire you this week:

The Paper Players Design Team
 
 
Here's a quick recap of our challenge rules:
 
1.  Create a new paper project
2.  Upload your creation to your blog with a link back to us and provide a direct link to the post featuring your challenge submission.
3.  Please link your card to no more than four challenges, TOTAL.
4.  Have FUN! 


I look forward to seeing what you create with this week's theme. Enjoy the rest of your weekend as it will be over all too quickly; my Christmas festivities have truly started in earnest this week and I am busier than ever! I am off to run a pre-Christmas Stampin' Up! party for a customer and her friends this afternoon, then will be returning home to put the finishing touches to my class preparations for my Delightful Daises Technique Class tomorrow and complete my 100 card challenge for the Ronald McDonald Christmas Cheer campaign that is happening in the UK this weekend.

I'll be back as soon as time allows with more projects; until then, happy stampin'!


Stampin' Up! Supplies Used: 

Table built using Product Table Builder by The Crafty Owl - Independent Stampin' Up! Demonstrator.

New Online Exclusives

There are new products available exclusively in the online store from 5 November - check them out here.

Latest Kits!

Stampin Cut and Emboss

The Layered Landscapes Kit and Nature's Paintings Kit are the latest kits in the online store - get yours here!

Shop Online

Access my online shop 24 x 7, 365 days of the year:

Current November hostess code:

9NKXDTTR

Shop Online

Mini Catalogue

BROWSE THE CATALOGUE

'Tis The Season - the new Stampin' Up! Mini Catalogue is here! For more details and to download your copy click here

Scrapbooking

Stampin' Up! has introduced a new range of 12x12" scrapbooking product and kit - the full range is now available to purchase online. To download a copy of the new digital Scrapbooking Catalogue click here.

2024-25 Annual Catalogue

BROWSE THE CATALOGUE

Click on the image to download your copy of the 2024-25 annual catalogue. For a full list of current SU! supplies, go to my online store. If you would like any help or advice, please drop me a line at joanne@thecraftyowl.co.uk or give me a call on 07773 421446 - I'd be happy to help.

Join My Team

It's always a great time to join Stampin’ Up! New team members can get £130 worth of products for only £99 + free business supplies + free shipping + all the fun being a part of Stampin’ Up! Stampin' Up! has something for everyone: join my growing team and benefit from my support to enjoy Stampin' Up! however you choose.

If you're interested, call me for a chat to understand how I can help you realise your goals. Alternatively, if you have already decided to sign up and you just can't wait, please click here for the link to the online form where you can sign up and order your starter kit right away! 

About Me

Hi I'm Joanne and live in Northampton and when I'm not looking after my husband and two beautiful children, am an avid crafter with a passion for all things Stampin' Up!

I must confess that I have never been a big rubber stamper - until I discovered Stampin' Up! that is. I love the fact that I can get such great results with co-ordinating stamps, inks, papers and punches - the possibilities are endless! Join me on my stamping journey as I share the things I love and be inspired to create amazing things yourself!

Follow Me

Monthly Newsletter

Box Builder

Click the button above to use Box Buster to create your custom box design using the Envelope Punch Board!

Kits Collection Now Available!

Stampin Cut and Emboss

The new Kits Collection from Stampin' Up! is now available!

Click here to see the current kits available and order yours online today.

I Design For


Stampin' Up Stuff

This is my personal blog and is not endorsed by Stampin’ Up! I hope you find it a plentiful source of ideas and personal inspiration but please don't copy my designs for contest submission or use for classes, publication or sale without express permission.