Birthday Cheer Birthday Card And Gift Voucher Wallet

by Joanne James29. January 2019 21:00

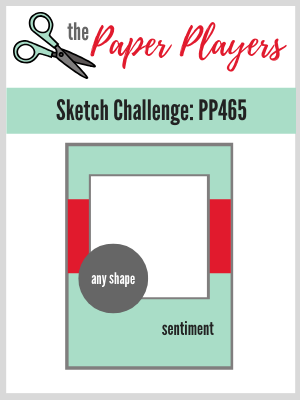
Today I'm sharing a card with a layout inspired by the current Fab Friday sketch:


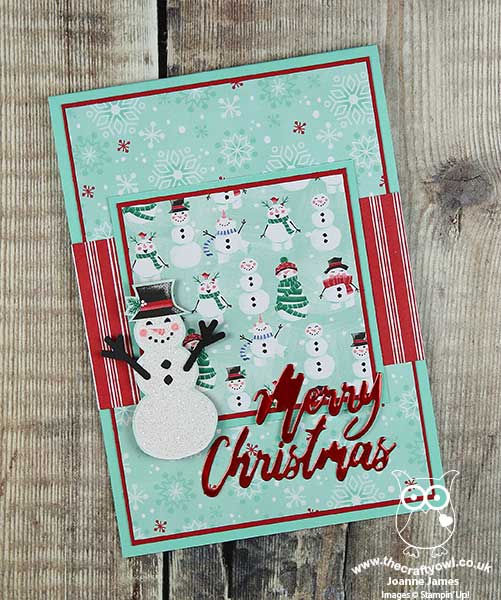
I also have a matching gift voucher wallet too - more of that later. First to my card - take a look:


Here's the low-down on today's card:

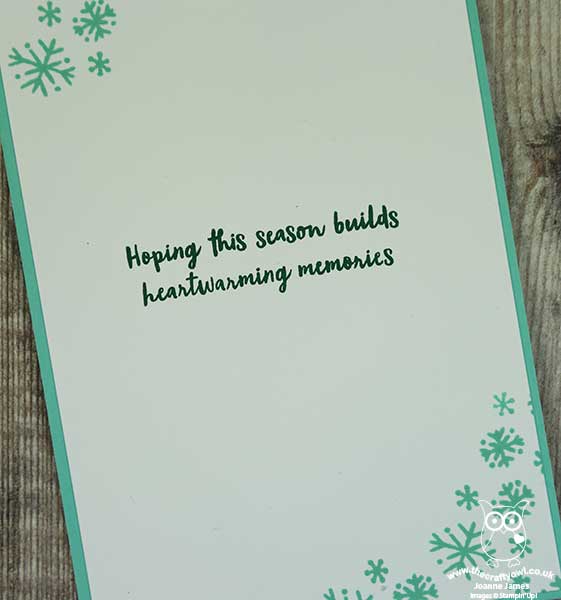
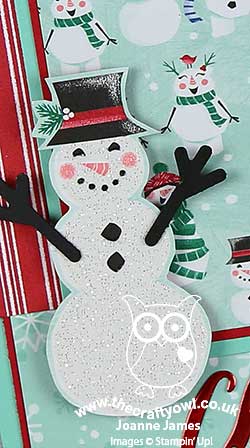
Birthday Cheer - The only stamping on the front of today's card is the background, where I added tone-on-tone confetti, and the sentiment. there are some lovely sentiments and bold images in the Birthday Cheer stamp set, but this card is really about the diecut, which takes centre stage. I've used it to make a birthday card but it could be easily adapted for a Christmas card too in an alternative colourway. I did do a little stamping on the inside too, using one of the larger sentiments:


Colouring Options - The diecuts can be used in lots of ways: on their own, paper-pieced, paper-backed, stencilled or coloured with markers to name just a few. On my card, I coloured the presents using a combination of my Stampin' Write Markers and Stampin' Blends using another identical diecut as a stencil guide. On my gift voucher wallet below, I used whole pieces of cardstock behind each present to give more even blocks of colour. I think I prefer the version below, but will definitely be experimenting with these dies a little more to find intersting ways to add colour to them. 

The Perfect Gift - I had a gift voucher wallet to make up for one of my customers who wanted to gift her sister with Stampin' Up! vouchers for her birthday, so I decided to make it to co-ordinate with my card above and send both. I always make my Stampin' Up! gift voucher wallets in a long, narrow design, so I just needed to elongate my diecut and alter the greeting on the front slightly to something more appropriate:

Did you know you can get Stampin' Up! gift vouchers from me for any amount and any occasion? They do make a great gift, either for yourself or others. If you're ever at a loss for what to buy you nearest and dearest, just give me a call and we can take the pain out of gift giving and give the gift of choice!


Here is the visual summary of the key products used on today's project for you to pin for easy reference:
 

You can see all of my 'How To' summaries on my 'How To - Tips and Techniques' Pinterest board in case you've missed any. 

Enjoy your day and I'll be back tomorrow with another project. Until then, happy stampin'!


Stampin' Up! Supplies Used:

Table built using Product Table Builder by The Crafty Owl - Independent Stampin' Up! Demonstrator.

Get Your Cake Builder Punch Now Whilst Stocks Last - and the Butterfly Duet Punch Too!

by Joanne James28. January 2019 09:00

Happy Monday everyone! First things first - an apology for the lack of posts last week; for those of you who have tried to access my blog or my website to access the BoxBuster and Envelope Expert tools between Tuesday and Thursday, I had a website outage that impacted both my blog and website and my email, and didn't manage to get it back online until late Thursday afternoon. I know many of you enjoy free access to my tools, and interruptions to service are far from ideal. I have been experiencing issues of one kind or another since I was hacked last October and it is proving incredibly difficult to maintain a consistent online presence. We are working on it and I would ask for your patience and understanding until these issues are fully resolved. If you are reading this and not already following me on Facebook, I urge you to do so here since this is where I will post updates of outages and such like, so you will at least be the first to know when I am back online. Here's hoping for a better week on the IT front!

Back to today's business; a slight change to my blog schedule and I'm sharing a card for a few challenges but that is born out an important business announcement - take a look:


There is a great sketch over at CAS Colours and Sketches that is also perfect to showcase some designer paper for the peeps over at TGIF Challenges. I decided to make a bright and colourful birthday card that also fits with the birthday theme over at SUO Challenges:


Here's the low-down on today's card:

A Piece of Cake - Today's fun cake comes from the 'Piece of Cake' stamp set in the Spring-Summer catalogue; great for birthday cakes and wedding cakes, you can use this set to create a cake for any season or occasion. after all there's always a reason to celebrate! The set also comes with lots of fun sentiment pairs - the reply to the 'cake is the answer ...' that I used on the front of my card is featured on the inside along with my birthday greeting:


How fun is that?! Sure to raise a smile, whatever the celebration.

How Sweet It Is - I coloured my cake with my Stampin' Blends, inspired by the spots and stripes patterns that I chose to highlight in my DSP squares. These patterns are two of my favourites in the bright and fun 'How Sweet It Is' Product Suite, that feature lots of sweets and candy, perfect to indulge your sweet tooth. they also co-ordinate with another of my favourite accessories, the glitter enamel dots from the main catalogue.

Get It While You Can - The Cake Builder Punch (item 148525) and the Butterfly Duet Punch (item 148523) have proved extremely popular since catalogue launch and sales have exceeded forecasts. Although not currently on backorder, stocks of these products are expected to run out within the next two weeks, after which they will no longer be orderable until back in stock. Whilst both punches are carrying over to the next annual catalogue in June, you are advised to get your orders in for these sooner rather than later. I am placing an order this week if you are local to me and would like to save on postage, jut get in touch. Alternatively, place your order directly online.

Here is the visual summary of the key products used on today's project for you to pin for easy reference:


You can see all of my 'How To' summaries on my 'How To - Tips and Techniques' Pinterest board in case you've missed any. 

I like this card so much I made a few using the same design, just switching out the background colours - they are so cheery, i'm definitely a predominantly 'brights' girl at heart!

I have a busy work week this week, so need to get cracking. Enjoy your day and I'll be back tomorrow with another project. Until then, happy stampin'! 


Stampin' Up! Supplies Used:

Table built using Product Table Builder by The Crafty Owl - Independent Stampin' Up! Demonstrator.

Tea Together Mother's Day Card for PP426

by Joanne James27. January 2019 09:00

Today it's Sunday and time for this week's new challenge over at The Paper Players! It's the turn of the talented Jaydee to host this week and she has my favourite, a sketch challenge, for you to work with:


Today's card is something of a departure from my usual 'clean' style and is choc-full of detail, so I hope you like it! I've gone pastel with this week's Global Design Project colours and whilst not for Valentine's my card is definitely all about love so is perfect for the Stamp Ink Paper challenge too - take a look:


Here's the low-down on today's card:

Time For Tea - The moment I laid eyes on the 'Tea Together' stamp set in the Spring-Summer catalogue, I knew it would have to find it's way into my shopping basket: as a self-confessed 'teapot' who often drinks between 6 and 8 cups of tea a day, it was bound to appeal, but the clincher was that it was paired with some wonderful Mother's Day sentiments too and the only person I know who drinks more tea each day than me is my Mum, so it seemed a perfect choice. Add to this the fact that the co-ordinating Tea Together Framelits Dies that cut out each of the elements, including the flowers, are available free during Sale-A-Bration with a £90 purchase and that was it - decision made! I decided to continue with my watercolouring phase and for today's teacup and flowers, as it suited the subtle, pastel colours and coloured, cut and layered until I was happy with the result.

Flourishes and Lace - I added additional detail to my background with a combination of an embossed panel - check out that fabulous lace effect detail - and some Petal Pink flourishes, carefully snipped from the new Beautifully Detailed Laser-Cut Paper, which is helpfully already coloured Petal Pink on one side (and white on the other side). Along with a few punched flowers and pearls, I'm really going for the vintage look and feel today. 

A Mother's Love - I've been liberal with my interpretation of Jaydee's sketch, but you can still see the basic circular shape represented by my tea cup full of flowers and my horizontal overlaid sentiment, accentuated by stamping only part of the sentiment on the teacup and substituting the masked word 'love' with a stacked diecut, courtesy of the Well Written Framelits. Whilst I would definitely agree with the sentiment on the front of this card, the sentiment from the 'Tea Together' set really is one of the most wonderful we have had in a stamp set for a long time:


The perfect finishing touch for my Mother's Day card. Here is the visual summary of the key products used on today's project for you to pin for easy reference:


You can see all of my Product and 'How To' summaries on my 'How To - Tips and Techniques' Pinterest board in case you've missed any. 

Before you reach for your ink and papers, check out what our amazing team has created to inspire you this week:

Here's a quick recap of our challenge rules:
 
1.  Create a new paper project
2.  Upload your creation to your blog with a link back to us and provide a direct link to the post featuring your challenge submission.
3.  Please link your card to no more than four challenges, TOTAL.
4.  Have FUN!

You can see all of my 'How To' summaries on my 'How To - Tips and Techniques' Pinterest board in case you've missed any. 

Enjoy your day; we are finishing up on our homework today along with the dreaded tax returns (each year I tell myself I will make time to process them well in advance of the deadline, yet it never happens!) Hopefully I will finish in time to sneak into my craft room for a quick make or two. Either way, I'll be back tomorrow with another project. Until then, happy stampin'!


Stampin' Up! Supplies Used: 

Table built using Product Table Builder by The Crafty Owl - Independent Stampin' Up! Demonstrator.

Minnie Mouse Punch Art Birthday Card

by Joanne James21. January 2019 11:00


This is my second post for you today - you can see my earlier post here in case you missed it. I managed to grab a little crafting time in my office on Saturday afternoon and having seen the challenge over at TGIF Challenges this week just knew I had to take part! I also used this week's sketch over at Freshly Made Sketches for my layout:


Anyone that knows me well knows that I am a Disney addict!  For me there is only one Mickey Mouse (he lives in Florida) and Magic Kingdom is without question THE happiest place on earth (and I've done a fair bit of travelling in my time!) I've made a number of Disney-themed cards before (you can see a couple of my favourites here and here - just search my blog with the term 'Disney' to see lots of similar inspiration) and they are often rather detailed affairs, however today I went for something super-quick to make - I think I was just so excited! Here's my card:


I decided to create a fun Minnie Mouse punch art: all you need is a large circle punch (I used a 2 1/4" punch) and two smaller punched circles (I used a 1 1/4" circle punch) to create a Mickey Mouse shape. You can scale these circles according to your desired finished size. 

My card absolutely had to be red and I used a piece of retired red and white polka dot paper for the centre panel, inspired by the lovely Minnie's iconic dress; you could substitute a piece of the current Real Red spotted paper from the Regals 6x6" DSP pack if you aren't such a purist. To create Minnie's bow, I used two diecut hearts from the new Be Mine Stitched Framelits set and added a little bling with a clear faceted gem. A bold 'celebrate' sentiment diecut finished the front of my card.

With the outside taken care of, I used one of the greetings from the Magical Mermaid stamp set for the inside of my card. I inked it up with my Stampin' Write markers so that I would get the two-tone effect and could easily omit the sprig detail:


I might send this card to me, I love it so much! Here is the visual summary of the key products used on today's projects for you to pin for easy reference:


You can see all of my Product and 'How To' summaries on my 'How To - Tips and Techniques' Pinterest board in case you've missed any. 

Enjoy your day; I am hoping mine is going to be a productive office day - if I get all of my admin tasks completed, i may even manage a little stamping time! I'll be back tomorrow with another project. Until then, happy stampin'!


Stampin' Up! Supplies Used: 

Table built using Product Table Builder by The Crafty Owl - Independent Stampin' Up! Demonstrator.

Hometown Greetings Snowy Day Diecut CAS Card

by Joanne James21. January 2019 08:00

Another Monday, another week! As promised, I'm back today with another card that meets the criteria for this week's challenge over at The Paper Players - this one uses the current challenge colour palette over at CAS Colours and Sketches:


Today's card has a similar layout to yesterday's with a clean and simple style - and no stamping at all on the front of my card! So here it is: 


Again I used my Hometown Greetings Edgelits Dies, with a simple uncluttered design and minimal layers and embellishments. I used the challenge colours in blocks: the Crumb Cake for my card base, a panel of Balmy Blue for the sky and a pop of Real Red for the snowman's scarf which I cut by hand and adhered to his body with a little Tombo glue. For the snow on today's card, I used my retired Blizzard Thinlits die and used lots of the tiny circular diecut elements that nestle in between the larger snowflakes and stuck each of them on individually to create my falling snow. A rather painstaking exercise, but not too tricky with my handy Pick Up Tool and worth it for the overall effect.

Whilst there's no stamping on the front of my card, I did stamp a greeting on the inside, along with another pop of red (the heart is from the new Meant To Be stamp set):


Here is the visual summary of the key products used on today's projects for you to pin for easy reference:


You can see all of my Product and 'How To' summaries on my 'How To - Tips and Techniques' Pinterest board in case you've missed any. 

Enjoy your day; I am hoping mine is going to be a productive office day - if I get all of my admin tasks completed, i may even manage a little stamping time! I'll be back tomorrow with another project. Until then, happy stampin'!


Stampin' Up! Supplies Used: 

Table built using Product Table Builder by The Crafty Owl - Independent Stampin' Up! Demonstrator.

Hometown Greetings Snowy Day CAS Card PP425

by Joanne James20. January 2019 09:00

Today it's Sunday and time for this week's new challenge over at The Paper Players! It's the turn of the fabulous Claire to host this week and she has a fun clean and simple challenge for you to work with:


Remember: this is clean and simple week. What do we mean by 'clean and simple' ? Create a card that has:

  • Minimal layers and embellishments
  • Plenty of open space, also known as 'white space'
  • Is simple and uncluttered

I had a clear idea of what I wanted to create for Claire's challenge this week and the colours at Color Throwdown complemented it perfectly (see the challenge badge above) - take a look:


Here's the low-down on today's card:

Hometown Greetings - This week's theme was a perfect excuse to start on this year's Christmas cards, so I pulled out my Hometown Greetings Edgelits Dies to create a focal point for my snowy day scene and simply cut them out of extra thick whisper white card stock. I added a little blue scarf to my snowman but otherwise left them untouched and popped them up on dimensionals above my sponged sky.

Blended Sky - I wanted to create a blended sky background for my little scene and couldn't decide between watercolouring and an ink-blended background. I opted for the latter, having been inspired by this amazing background that Linda Van Wely-Zwolle. I am in awe of the fabulous backgrounds she creates on her cards (there are lots of other examples on her blog too) so I thought I would have a go at creating a similarly intense colour. I used a sponge brayer and a combination of the retired Tempting Turquoise and current in-colour Blueberry Bushel to create my ombre sky and used a base of Shimmery White cardstock - it's difficult to see in the photos, but it gives these panels a lovely all-over shimmer. 

Textured Shimmer Snow - To finish my sky, I had to add the snow to create my snowy day. I used a dry aquapainter to flick frost white shimmer paint across my sky panel to create a random pattern of shimmery textured snow. I love the way the liquid created a mix of fine spray and larger globules - I know the snow doesn't look like flakes, but I think this is what snow looks like from a distance when it's falling. Here's a close up so that you can see the detail:

I liked my first card so much I made a second one using a second piece of snowy background that I created at the same time and one of the other dies in the set:


Here is the visual summary of the key products used on today's projects for you to pin for easy reference:


And here's the second one:


I also made another card using the same layout but approached it in a completely different way - but you'll have to pop by tomorrow to see that one! You can see all of my Product and 'How To' summaries on my 'How To - Tips and Techniques' Pinterest board in case you've missed any. 

Before you reach for your ink and papers, check out what our amazing team has created to inspire you this week:

Here's a quick recap of our challenge rules:
 
1.  Create a new paper project
2.  Upload your creation to your blog with a link back to us and provide a direct link to the post featuring your challenge submission.
3.  Please link your card to no more than four challenges, TOTAL.
4.  Have FUN!

You can see all of my 'How To' summaries on my 'How To - Tips and Techniques' Pinterest board in case you've missed any. 

Enjoy your day; I am looking forward to a day of homework supervision then some cosy family time indoors, having spent yesterday outside watching sport with both of the James Juniors - not so much fun in the current sub-zero temperatures we are experiencing here in the UK!  I'll be back tomorrow with another snowy day-themed card that looks quite different to today's cards. Until then, happy stampin'!


Stampin' Up! Supplies Used: 

Table built using Product Table Builder by The Crafty Owl - Independent Stampin' Up! Demonstrator.

By The Bay Clean and Simple Inlaid Frame Card

by Joanne James18. January 2019 09:00

Yay - it's Friday, bring on the weekend! Today I'm sharing a card for the current challenge over at Less is More where I haven't played for a while:

I had a short window for a spot of crafting yesterday and thought I'd whip up another clean and simple card using a couple of new products that fits perfectly with their theme this week - take a look:


Here's the low-down on today's card:

By The Bay - The seagulls paddling on the shoreline that feature on today's card are reminiscent of the ones that featured in the much loved and now retired Wetlands set (anyone else remember that set?) albeit with a little more definition, and they are one of three line-drawn images that feature with three sentiments in 'By The Bay', one of the stamp sets that can be yours free with a purchase of £45 or more during Sale-A-Bration. Perfect for colouring the images are large enough to stand alone but also not so big that they take a long time to colour. I really like this set and you can be sure I will be using it more before the promotion is over. 

Another Way To Frame - To frame my image, I used a new favourite of mine, the Rectangle Stitched Framelits Dies, but this time to cute an aperture frame into my cardfront. I then adhered my watercoloured image behind this. I like the subtle added detail that this gives to a clean and simple card, without adding overt layers. 

Ways With Watercolour - I feel like I've been watercolouring a lot on my cards lately; I don't consider myself to be by any means an expert at watercolouring, but I think that's why I'm enjoying it so much; on watercolour paper, it's easy to build up colour without needing to be too precise in terms of the overall effect. It would take ages if I was to attempt to properly draw and paint the image to achieve omething like this, so I'm grateful that stamps, ink and an aquapainter enable me to produce something this good in a fraction of the time! I used a combination of blues, greys and sandy neutrals to colour my image.

If you like today's clean and simple card, by purchasing the key items used below, you can earn the By The Bay stamp set for free - perfect for creating your own watercoloured masterpieces.

Here is the visual summary of the key products used on today's project for you to pin for easy reference:

You can see all of my 'How To' summaries on my 'How To - Tips and Techniques' Pinterest board in case you've missed any. 

Enjoy your day - I have a monster basket of ironing to wade through but I'm hoping if I focus I might squeeze in a little stamping time before my afternoon school run, so I'm on a mission! I'll be back tomorrow with another project. Until then, happy stampin'!


Stampin' Up! Supplies Used:

Table built using Product Table Builder by The Crafty Owl - Independent Stampin' Up! Demonstrator.

Bella and Friends Clean and Simple Notecards

by Joanne James16. January 2019 21:00

Happy Wednesday everyone! I've decided to write a regular weekly slot dedicated to simple stamping and since today has been a busy one, I thought it was time for one such post! We all like quick and easy projects from time to time, either because you need something last-minute or you need a few of something and just want to run off some multiples. Equally, if you're new to crafting and don't have lots of supplies, simple stamping can be a way to stretch your supplies and focus on basic techniques whilst still producing something with a quality finish. I'll be using the hashtag #SimpleStamping - if you're a user of social media you should search under this hashtag from time to time for lots of papercrafting ideas that are easy to recreate, often using little more than basic supplies and stamps, ink and paper.

For this week's take on #SimpleStamping I have another couple of super simple thank you cards for you that could be whipped up in a jiffy:


I get through lots of thank you cards and sometimes I need to be able to turn out a lot in one go. I love a little colouring with my Blends markers too and sometimes, whilst relaxing, this can take a little while to do a good job. These little puppies are so quick to colour though you can honestly get each card finished in under a minute.  

These cards are also great examples of #SimpleStamping - a pack of notelets, a single stamped image courtesy of the 'Bella and Friends' stamp set in the annual catalogue, some Stampin' Blends and a little time for some colouring and done!

Here is the visual summary of the key products used on today's project for you to pin for easy reference:


You can see all of my 'How To' summaries on my 'How To - Tips and Techniques' Pinterest board in case you've missed any. 

I'll be back tomorrow with another project. Until then, happy stampin'!


Stampin' Up! Supplies Used:

Table built using Product Table Builder by The Crafty Owl - Independent Stampin' Up! Demonstrator.


Framed Happiness Blooms Floral Card

by Joanne James15. January 2019 20:00

Today I'm sharing a card that uses a great sketch from the team over at As You See It and also combines the colour palette over at Inspire.Create this week:


I love the frame of the sketch and considered lots of ways to use it; I may well use this sketch again in a different way but today I just had to highlight one of my favourite suites in the Spring-Summer catalogue - take a look:


Here's the low-down on today's card:

Happiness Blooms - I just love the bright and bold colours and patterns of the Happiness Blooms suite! I chose to feature one of the beautiful designer series papers on my card today that just so happens to feature each and every colour of the Inspire.Create palette - bonus! I honestly could have chosen any of the florals in this pack and been happy with them for my card - I really do love them all, they are so me! 

A Stitched Frame - I used my Rectangle Stitched Framelit Dies to create the piece that frames my patterned paper - I love that they stitch both the inner and outer cut. I even get the leftover stitched rectangle from the centre of my frame to use for another project. I decided to frame in Night of Navy which I think works really well; it highlights the paper withough overwhelming it and really allowing it to shine. 

A Bitty Bloom For A Friend - The Happiness Blooms set is unusual in that it is sentiment-free; so it's easy to pair with either a sentiment element from the Happiness Blooms Memories and More pack or any other set of your choosing. I went with a friendship sentiment from the Incredible Like You stamp set, that I stamped into a 'flower' of sorts and embellished with a sweet little flower made using the new Bitty Bloom punches - so glad we have any set of these super-useful punches to craft with!

Here is the visual summary of the key products used on today's project for you to pin for easy reference:


You can see all of my 'How To' summaries on my 'How To - Tips and Techniques' Pinterest board in case you've missed any. 

Enjoy your evening and I'll be back tomorrow with another project. Until then, happy stampin'!


Stampin' Up! Supplies Used:

Table built using Product Table Builder by The Crafty Owl - Independent Stampin' Up! Demonstrator.

Needle and Thread Florals for PP424

by Joanne James13. January 2019 09:00

Today it's Sunday and time for this week's new challenge over at The Paper Players! It's the turn of the fabulous Anne-Marie to host this week and she has a fresh colour challenge for you to work with that is perfect for Spring:


I decided some fresh spring florals were in order and using this week's Paper Craft Crew Sketch as inspiration, I decided to have a play with my new Needle and Thread bundle - take a look:


Here's the low-down on today's card:

Pins and Needles - The new Needlepoint Nook Suite is perfect for creating the look of handcrafted embroidery with much less effort and has stamps, papers, accessories and framelits that fit the theme. My favourite aspect of this suite is definitely the Needlepoint Elements Framelits Dies - I used the largest of the needlepoint patterns for the background element of my design and added the needlepoint border to a vellum piece that co-ordinates with the Pretty Label Punch. Such a pretty touch! 

Hand-Stitched Stamping - The floral elements in the Needle & Thread set are distinctive stamps that have the almost photographic appearance of embroidered flowers, as they appear on the Needlepoint nook designer series paper that can also be found in this suite. I used my yellow and grapefuit grove to create a bright spray of flowers and added in a few additional diecut pieces too. I used a simple heat embossed sentiment in white onto Night of Navy - my chosen fourth colour - on the front of my card and used one of my favourite sentiments from this set on the inside:


I also added some of the new gingham gala sequins and a few loops of the lovely Grapefruit Grove Organdy Ribbon to finish the front of my card; this is one of the items you can receive free with a Sale-A-Bration order of £45 or more - and who doesn't love a free gift?!

A Well Written Tag Too - I often cut multiples of flowers or other elements when I'm making this kind of card as I decide on my finished design and this year I'm on a mission in my crafting to use up all the bits and pieces I get left over from a project as I craft, rather than putting them in my bits and bobs box to linger for months on end or eventually end up in the bin when I have a mad craft room tidy up! Today I made a tag with my leftovers, and added the word 'friend' from the Well Written Framelits set:


 This will make a great co-ordinating tag for a gift to go along with my card - and everything used up too! Here's one last photo of both items together:


Here is the visual summary of the key products used on today's project for you to pin for easy reference:


You can see all of my Product and 'How To' summaries on my 'How To - Tips and Techniques' Pinterest board in case you've missed any. 

Before you reach for your ink and papers, check out what our amazing team has created to inspire you this week:

Here's a quick recap of our challenge rules:
 
1.  Create a new paper project
2.  Upload your creation to your blog with a link back to us and provide a direct link to the post featuring your challenge submission.
3.  Please link your card to no more than four challenges, TOTAL.
4.  Have FUN!

You can see all of my 'How To' summaries on my 'How To - Tips and Techniques' Pinterest board in case you've missed any. 

Enjoy your day; I am hoping for a quiet day with maybe a little crafting too! I'll be back tomorrow with another project. Until then, happy stampin'!


Stampin' Up! Supplies Used: 

Table built using Product Table Builder by The Crafty Owl - Independent Stampin' Up! Demonstrator.

New Online Exclusives

There are new products available exclusively in the online store from 5 November - check them out here.

Latest Kits!

Stampin Cut and Emboss

The Layered Landscapes Kit and Nature's Paintings Kit are the latest kits in the online store - get yours here!

Shop Online

Access my online shop 24 x 7, 365 days of the year:

Current November hostess code:

9NKXDTTR

Shop Online

Mini Catalogue

BROWSE THE CATALOGUE

'Tis The Season - the new Stampin' Up! Mini Catalogue is here! For more details and to download your copy click here

Scrapbooking

Stampin' Up! has introduced a new range of 12x12" scrapbooking product and kit - the full range is now available to purchase online. To download a copy of the new digital Scrapbooking Catalogue click here.

2024-25 Annual Catalogue

BROWSE THE CATALOGUE

Click on the image to download your copy of the 2024-25 annual catalogue. For a full list of current SU! supplies, go to my online store. If you would like any help or advice, please drop me a line at joanne@thecraftyowl.co.uk or give me a call on 07773 421446 - I'd be happy to help.

Join My Team

It's always a great time to join Stampin’ Up! New team members can get £130 worth of products for only £99 + free business supplies + free shipping + all the fun being a part of Stampin’ Up! Stampin' Up! has something for everyone: join my growing team and benefit from my support to enjoy Stampin' Up! however you choose.

If you're interested, call me for a chat to understand how I can help you realise your goals. Alternatively, if you have already decided to sign up and you just can't wait, please click here for the link to the online form where you can sign up and order your starter kit right away! 

About Me

Hi I'm Joanne and live in Northampton and when I'm not looking after my husband and two beautiful children, am an avid crafter with a passion for all things Stampin' Up!

I must confess that I have never been a big rubber stamper - until I discovered Stampin' Up! that is. I love the fact that I can get such great results with co-ordinating stamps, inks, papers and punches - the possibilities are endless! Join me on my stamping journey as I share the things I love and be inspired to create amazing things yourself!

Follow Me

Monthly Newsletter

Box Builder

Click the button above to use Box Buster to create your custom box design using the Envelope Punch Board!

Kits Collection Now Available!

Stampin Cut and Emboss

The new Kits Collection from Stampin' Up! is now available!

Click here to see the current kits available and order yours online today.

I Design For


Stampin' Up Stuff

This is my personal blog and is not endorsed by Stampin’ Up! I hope you find it a plentiful source of ideas and personal inspiration but please don't copy my designs for contest submission or use for classes, publication or sale without express permission.