Announcing 2019-21 Stampin' Up! UK In Colour Club - Spaces Available

by Joanne James4. July 2019 08:00

With a new Stampin' Up! catalogue, new in-colours always feature on a new wish list - why wouldn't they? The new 2019-21 In Colors will be with us for the next 2 years and this year's in-colours are very on-trend and co-ordinate beautifully with each other and the other colours in the Stampin' Up! colour families:

To help you spread the cost and gradually grow your new in-colour collection, for the first time I am offering an in-colour club (UK customers only). It begins this month and runs for the next 5 months, up to and including November. Each month, you will receive a collection of  products for one of the colours, with each month featuring a different colour.

Each month, you will receive: 

  • 1/2 pack of A4 cardstock (12 sheets)
  • 1/2 roll of Scalloped Linen Ribbon
  • 1 ink pad
  • 1 ink refill
  • 1 Stampin' Write Marker
  • 18 Faceted Dots
  • Eight 6”X6” In-Color DSP sheets
  • A hand stamped card featuring your in-colour of the month

Since all of the colours except Terracotta Tile are also available as Stampin' Blends, there is the option to add on a Stampin' Up! Blends Marker Combo Pack each month for an additional £8.50. 

For the month you receive the Terracotta Tile colour kit, you will receive 1/4 pack of Woven Threads DSP and Woven Threads Sequins in place of the Blends. Both of these products also feature all five in-colours.  


Details:

Basic Pack Cost: £25 plus postage and packaging (Royal Mail 2nd Class Signed For) every month July through November. If you are local, you can avoid the cost of shipping and arrange to collect. 

Enhanced Pack Cost: £33.50 plus postage and packaging (Royal Mail 2nd Class Signed For) every month July through November. If you are local, you can avoid the cost of shipping and arrange to collect. 

Payment can be made by bank transfer (or cash/cheque for local customers).

If you would like to join my new colour club this month, then you can email me to sign up here.

Rooted in Nature Sympathy Cards Part 2 - For The Avid Crafter

by Joanne James3. July 2019 08:00


Today it's lesson time! I'm sharing a couple of cards that I promised you a while ago that are stepped up versions of an earlier clean and simple sympathy card that I made and since this week's challenge over at TGIF Challenges is to make a sympathy card, this seemed an appropriate time to share with you:


It's never nice to have to create sympathy cards especially on the spur of the moment, so it's always handy to have one or two on hand for when they are needed. There are lots of great sets in the Stampin' Up! catalogue with just the right words for these sometimes difficult cards and Rooted In Nature is definitely on my 'go to' list. Here's my original card that I featured in this blog post here:


This is a great card for a beginner stamper - stamps, ink and white cardstock are all you need to create this card.

I decided that this was a good card to show how easily a card can be 'stepped up' with a few extra supplies. Here's my intermediate version - instead of a one layer white base, I used a coloured card base (retired Lemon Lime Twist, but you could use Granny Apple Green for a similar colour combo), a piece of designer series paper (retired 'Under The Mistletoe' pattern) along with a strip of Night of Navy cardstock, then popped my leaf stamped panel up on dimensionals and heat embossed my sentiment in silver on a strip of vellum and wrapped it around this layer:


A few additional cardstock and paper supplies and the addition of the heat embossing as another technique creates a slightly more stepped up card for the more casual crafter who wants something a little more. Finally I created a card for the avid crafter that features an even wider variety of products and techniques:


For this version, I retained the layout of my stepped up card, but this time stamped the leaves tone-on-tone onto the same coloured cardstock and cut them out using the co-ordinating Nature's Roots framelits, overlapping slightly on my white panel. I then added a double length of navy baker's twine across the middle before overlaying my heat-embossed vellum sentiment. I finished my card with one of the silver metallic leaf trinket embellishments tied with a navy twine bow. 

So what do you think? Which of these do you prefer? I think on balance I am somewhere between the first two cards - I love the simplicity of the outlined leaves on the white, but maybe with the addition of the heat embossed sentiment on the vellum. Decisions, decisions - the joy and freedom of creativity!

Here is the visual summary of the key products used on today's project for you to pin for easy reference:
 

You can see all of my 'How To' summaries on my 'How To - Tips and Techniques' Pinterest board in case you've missed any. 

Enjoy your day; the sun is still shining here in the UK and I am off to sports day this afternoon, so looking forward to a fun afternoon. I'll be back tomorrow with another project. Until then, happy stampin'!


Stampin' Up! Supplies Used:

Table built using Product Table Builder by The Crafty Owl - Independent Stampin' Up! Demonstrator.

2019-21 In-Color Artfully Aware Masculine Card

by Joanne James2. July 2019 20:00

A later post from me today as I've had a busy one that culminated in a wonderful Summer Serenade concert to listen to the youngest of my James Juniors sing - always a joy! Today I'm sharing a card for the current Fab Friday and Inspire.Create challenges which coincidentally both have exactly the same colour palettes this week - the new 2019-21 Stampin' Up! in colors:

   No photo description available.

Whilst I love all of these colours individually, I found it a challenge using all of them on one card - that's the idea though, right? So I resisted making a collection of monochromatic cards featuring each of the colours individually and pushed myself to get all 5 on one card. After much deliberation, this is what I came up with:


Here's the low-down on today's card:

Artfully Aware - I decided that the stamp that features five people intertwined in the 'Artfully Aware' stamp set would be a great way to incorporate all 5 in-colours on my card by giving each person a different colour sweater. I love the sketchy style of these stamps and this set has some great words of encouragement and support. I used one of the sentiments in the set too, but split it and included the first part 'together...' on the tab on the front of my card, then continued it inside with '...we make a difference'. 

A Mix of Mediums -  I did something I don't normally do and used a mix of Blends and inks and a blender pen to colour, as I still have inks in all colours bar Purple Posy, whereas this is the only in-colour I have in Blends. The colours are much softer with ink and a blender pen and I like the more watercoloured look. I decided that this would make a nice masculine encouragement card, so used the darker colours of Pretty Peacock and Terracotta Tile for my base and in-colour DSP layer, along with my tabbed piece.

A Blue Ribbon - The Artfully Aware stamp set co-ordinates with the Support Ribbon Framelits and I decided to use the small support ribbon framelit to cut a pale blue ribbon out of Seaside Spray as a small embellishment to anchor my sentiment.

Here is the visual summary of the key products used on today's project for you to pin for easy reference:


You can see all of my 'How To' summaries on my 'How To - Tips and Techniques' Pinterest board in case you've missed any. 

I really love this year's set of new in-colors and I know lots of you do too. For this first time this year I am running an In-Color Club for my customers and still have a few spaces in my latest round that are available; please contact me if you would like to take part - you can read all about it here.

Enjoy your evening and I'll be back tomorrow with another project. Until then, happy stampin'!


Stampin' Up! Supplies Used:

Table built using Product Table Builder by The Crafty Owl - Independent Stampin' Up! Demonstrator.

Over The Moon In My Favourite Purple Wellies

by Joanne James1. July 2019 10:00

This is already my second post of the day today as it's 1st July and there is lots going on, including the return of bonus days and a fabulous joining offer - you can read about both of these in my earlier post here. For today's creative post I'm sharing my card for this week's challenges over at As You See It and Just Add Ink that also fits the current challenge over at Time Out, which is a new-to-me challenge that I thought I would play along with too (I don't think it's a CAS challenge although a lot of the DT samples and gallery cards are and for once my card is a little less CAS than usual so I hope it fits the bill!):


So I'm not fully finished with my run on Bird Ballad projects, but I did get out another new stamp set that I just couldn't resist called 'Over The Moon' when I grabbed a little crafty time and couldn't resist making some fun cards with it - these comical cows are just adorable - take a look:


Here's the low-down on today's card:

How Now Brown Cow - So I think I am in love with these fun animals! I mean, three comical cows and a bunch of punny sentiments in the 'Over The Moon' stamp set - what's not to love?! I decided to colour mine today with Stampin' Blends, but stamped my outline in stamped-off Sahara Sand so it has an almost no-line look, which I think works nicely with my sweet brown cow. I repeated the same image on my envelope and inside my card too. My choice of browns to compliment the purple was brought about by my desire to use some of that fabby linen-look in-colour scallop edged ribbon and I like the finished look.

Daisy Delights - I continued my browns with a piece of tone-on-tone stamped Crumb Cake for my background, that I stamped randomly with one of the daisy stamps from the Daisy Lane stamp set, which I thought tied in with the flower my cow - let's call her Daisy! - is holding. I like the added detail without detracting from the main image. 

The Colour Purple - This whole card started with the colour purple; apart from navy, it is definitely the colour that features most highly in my wardrobe and is without doubt my most favourite colour to wear. I chose to use the new in-colour Purple Posy as the purple on my card today as it gave me the opportunity to break out new Blends, cardstock, in-colour DSP (love that gingham!) and co-ordinating ribbon and sequins too. My choice of the welly-wearing cow was also no accident, as I am even the proud owner of some beautiful purple wellington boots that the James Juniors gifted me for Christmas a few years ago. I couldn't find a photo of me wearing them, so took this quick snap of them next to a couple of my patio pots - check these out:

Aren't they just the best?! They are more Highland Heather than Purple Posy, however I didn't have as many embellishment options for that colour! There is something about gardening or trudging through the snow in purple wellies that is ever so cheery.

Here is the visual summary of the key products used on today's project for you to pin for easy reference:


You can see all of my 'How To' summaries on my 'How To - Tips and Techniques' Pinterest board in case you've missed any. 

Enjoy your day and I'll be back tomorrow with another project - I am organised this week as it's going to be a busy one! Until then, happy stampin'!


Stampin' Up! Supplies Used:

Table built using Product Table Builder by The Crafty Owl - Independent Stampin' Up! Demonstrator.

Bird Ballad Shadow Box Birthday Card For PP448

by Joanne James30. June 2019 09:00

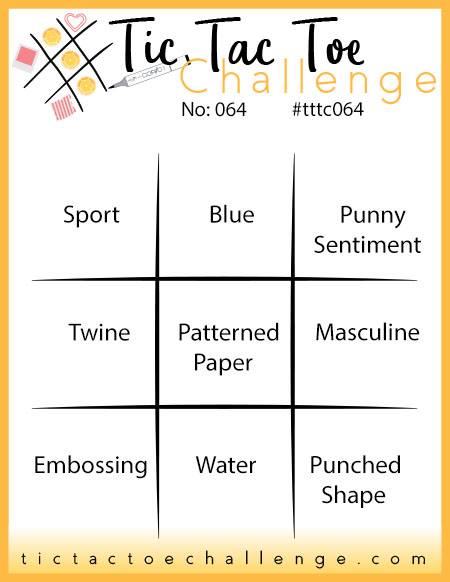
Today it's Sunday and time for this week's new challenge over at The Paper Players! It's my turn to host this week and as it's the fifth Sunday in the month I have a tic-tac-toe challenge for you to work with:


I have been on a bit of a creative roll lately with the lovely Bird Ballad suite and I couldn't resist using it again for my birthday card today - take a look:


Here's the low-down on today's card:

Hello Sunshine - Yellow is one of my favourite colours to work with; I always think there is something so cheery about sending a yellow card, so I couldn't resist including this colour on the board and I decided to use Daffodil Delight for the base of my card. I'm also linking today's card up over at Festive Friday #FF037 where they have the design element of yellow as part of their current challenge:

#festivefridaychallenge, #FF0037, World Emoji Day, Yellow

A Fancy Fold - The outside of my card looks simple enough, with just a hint of embossing and a fussy cut bird and branch to highlight my sentiment, with a little linen thread and a Bird Ballad trinket for decoration. You could even be forgiven for wondering which line on the tictactoe board I completed (I actually followed the middle vertical line and the diagonal bottom left to top right). This card is no ordinary card though - it's a shadow box card and it opens to reveal this pretty stepped inside, courtesy of some windows cut with the Stitched Nested Label Dies and featuring a rear panel of the Bird Ballad DSP:


Not Just  A Label - The Stitched Nested Labels Dies are useful for framing and make great labels for sentiments - but you can also use them to make a fun lidded box too. Here's one I made using the second largest die for the base:


This box measures approx. 1 1/2" x 3" x 2" deep so is the perfect size for a few chocolates or a small gift. This is what it looks like inside:


The base and lid have a lipped edge, slide neatly together and I used colours to tie in with my card - I love when things co-ordinate! I've been working on a whole set of these boxes in different sizes and am planning to share those with you soon (maybe even with a video tutorial!)

This little card and gift combo is heading to my running buddy, whose birthday it is the week after next - she loves something handcrafted! I'm linking up with the team over at SUO Challenges today too where the current theme is 'birthdays'.

Here is the visual summary of the key products used on today's project for you to pin for easy reference:


You can see all of my Product and 'How To' summaries on my 'How To - Tips and Techniques' Pinterest board in case you've missed any. 

Before you reach for your ink and papers, check out what our amazing team has created to inspire you this week:

Here's a quick recap of our challenge rules:
 
1.  Create a new paper project
2.  Upload your creation to your blog with a link back to us and provide a direct link to the post featuring your challenge submission.
3.  Please link your card to no more than four challenges, TOTAL.
4.  Have FUN!

You can see all of my 'How To' summaries on my 'How To - Tips and Techniques' Pinterest board in case you've missed any. 

Enjoy your day; we will be collecting the youngest of the James Juniors from a sleepover and hoping the sun and high temperatures last long enough to enjoy a BBQ lunch. then having a quiet-ish day before his final week of school this year before he breaks for summer - eek!  I'll be back tomorrow with another project. Until then, happy stampin'!


Stampin' Up! Supplies Used: 

Table built using Product Table Builder by The Crafty Owl - Independent Stampin' Up! Demonstrator.

Bird Ballad Spotlight Friendship Card for PCC341

by Joanne James24. June 2019 08:20

Happy Monday everyone! Today I'm sharing a card that I made for my monthly technique class last week featuring the Bird Ballad Suite that uses the current sketch over at The Paper Craft Crew as the inspiration for the layout:

Paper Craft Crew Sketch Challenge PCC341

I was intrigued by the oval shape as I don't tend to use ovals on my cards often and I wanted to incorporate a few different techniques. This is what I came up with:


Here's the low-down on today's card:

A Spotlight on Fussy Cutting - The Bird Ballad Designer Series Paper is beautiful and just like the co-ordinating 'Free As A Bird' stamp set, offers a ton of fussy cutting possibilities - no co-ordinating shaped framelits for these feathered friends I'm afraid! I fussy cut one of the birds and backed him with a Crumb Cake stitched oval shape. If you look closely at the photo below, you will see that I didn't remove all of the paper - for the really tricky bits, such as around the legs and branches, I simply coloured the paper with my Crumb Cake Blends marker to blend in with the background. 


Background Birds on a Branch - The sketch shows some background stamping behind the banner and this inspired me to get out my watercolour pencils and add a very subtle row of birds using one of the stamps in the 'Free As A Bird' stamp set. I did some tone-on-tone stamping, stamping the image in So Saffron, then delicately coloured with my watercolour pencils and blended with a blender pen. Only the outer edges of the image are visible behind the oval, but I really like the way this detail adds interest to the background and spotlights the fussy cut bird and oval. 

Stamp and Emboss - Once I had completed all of the stamping and colouring on my card base, I ran the whole thing through my diecutting machine and embossed it with the Subtles 3D embossing folder. The texture this adds is so subtle it doesn't distort the stamping at all, but adds an almost silky feeling to the cardstock. I love it! Some lace and pearls and a little envelope decoration complete my card. 

Here is the visual summary of the key products used on today's project for you to pin for easy reference:


You can see all of my 'How To' summaries on my 'How To - Tips and Techniques' Pinterest board in case you've missed any. 

Enjoy your day; I have a lot to achieve today so need to get on with it! I'll be back tomorrow with another project. Until then, happy stampin'!


Stampin' Up! Supplies Used:

Table built using Product Table Builder by The Crafty Owl - Independent Stampin' Up! Demonstrator.

One Sketch Three Ways For The Paper Players PP447

by Joanne James23. June 2019 09:00

Today it's Sunday and time for this week's new challenge over at The Paper Players! I am hosting this week on behalf of the lovely Jaydee who had a fall a few weeks ago and is taking a few weeks off from crafting to recuperate. Jaydee has my favourite, a sketch challenge, for us to work with this week:


My regular readers will know how much I love a good sketch and this is one that can be used time and again. I liked it so much I made not one, not two but three cards with it to share with you this week (I'm making up for my lack of blog posts in recent days!) This is the first card I came up with using one of the Bird Ballad papers that I had yet to use:


A simple card with an inset panel of DSP; the neat feature on this card is that I cut off the shaped end and extended one of the nested stitched labels for the sentiment and then added a bird I fussy cut from the paper itself.

My second card uses the reverse of this bird patterned DSP for a soft floral card that is delicate and pretty:


I used a basic nested stitched label for my sentiment this time but added a ruffle of ribbon (retired but I've linked below to a current one that would make a great substitute) and a fussy-cut flower and leaves with a few sparkly self-adhesive sequins. This one is much more girly and pretty!

My third and final card uses both a border and fussy cut hummingbird from the Mosaic Mood paper set and highlights a new in-colour - Terracotta Tile:


I am on a mission to use these papers as the main feature of my cards by simply co-ordinating with a variety of different sentiments. I used the same sentiment on this card from the 'Free As A Bird' stamp set that I used on the previous cards above, but this time punched it out of Very Vanilla cardstock using the new Timeless Label Punch. This is going to be a really useful punch for sentiments - the longer length makes it very versatile. I also picked up the green colour from my hummingbird and added a contrasting edge border to my top layer using the straight stitched die that can be found in the Stitched Nested Labels Die Set. We have a Facebook Group for Stampin' Up! demonstrators that has had lots of discussion as to how you would use this particular die, so I thought I would give you another example!

So which of today's cards is your favourite? I think I'm leaning towards the pretty pink florals with the ruffle of ribbon, which was inspired by this week's TGIF Challenge (badge at bottom of post). I buy lots of ribbon but often don't use it enough on my cards so I'm hoping to find the time to have another go at their challenge this week with something that features ribbon as the main focus, so do pop back later in the week for another idea. I'd love to know which one gets your vote - as always, feel free to leave me a comment below.

Here is the visual summary of the key products used on today's projects for you to pin for easy reference:

Card Number 1:


Card Number 2:


 Card Number 3:


You can see all of my Product and 'How To' summaries on my 'How To - Tips and Techniques' Pinterest board in case you've missed any. 

Before you reach for your ink and papers, check out what our amazing team has created to inspire you this week:

Here's a quick recap of our challenge rules:
 
1.  Create a new paper project
2.  Upload your creation to your blog with a link back to us and provide a direct link to the post featuring your challenge submission.
3.  Please link your card to no more than four challenges, TOTAL.
4.  Have FUN!

You can see all of my 'How To' summaries on my 'How To - Tips and Techniques' Pinterest board in case you've missed any. 

Enjoy your day; finally the sun is shining here in the UK for the second day in a row, so I will be spending mine enjoying a BBQ lunch and pottering in the garden. I might even take my laptop outside and prep some of this week's blog posts! I'll be back tomorrow with another project. Until then, happy stampin'!


Stampin' Up! Supplies Used: 

Table built using Product Table Builder by The Crafty Owl - Independent Stampin' Up! Demonstrator.
 

Bird Ballad Suite Onstage Make and Take

by Joanne James19. June 2019 21:00

I have the second of this month's technique classes tomorrow and it features the Bird Ballad suite. As I'm a little pressed for time today, I thought I'd share with you the 'make and take' we made using products from this suite at Stampin' Up!'s Onstage event when the annual catalogue was launched  - take a look:


Super pretty papers and a stamp set that is perfect for colouring, this suite is great for everything from super-simple cards through to more complicated creations. My card class is focusing on fancy folds, colouring and fussy cutting and I'll share these creations with you later thi week. For now though, this card shows how easy it is to create something pretty with some DSP, a little colouring and a lacy bow.

Here is the visual summary of the key products used on today's project for you to pin for easy reference:

 to follow

You can see all of my 'How To' summaries on my 'How To - Tips and Techniques' Pinterest board in case you've missed any. 

Enjoy your evening and I'll be back tomorrow with another project. Until then, happy stampin'!


Stampin' Up! Supplies Used:

to follow

A Good Man Times Two For One Of The Best

by Joanne James17. June 2019 12:18

Happy Monday everyone! Today I'm sharing two cards made using this week's Freshly Made Sketches layout:

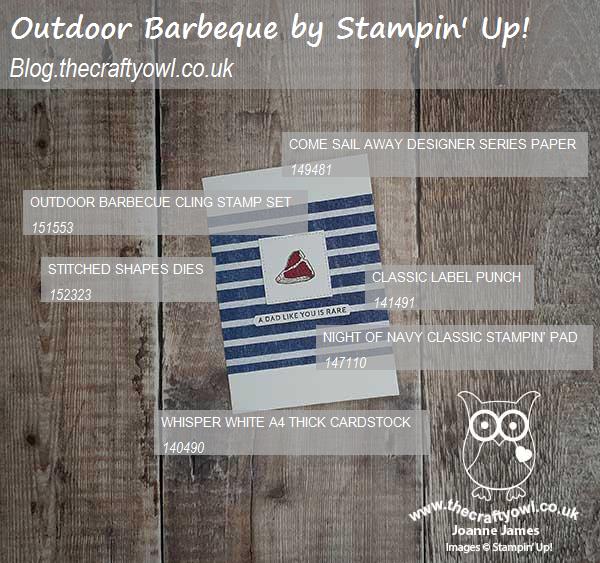
Yesterday was Father's Day here in the UK and I used the FMS sketch and one of my new stamp sets to create a pair of co-ordinating cards from each of the James Juniors for their Dad to celebrate this special day. Here's the first one, from Rebecca:


And here's the second one, from Ben:


Here's the low-down on today's card:

A Good Man - How I love this stamp set! The first time I saw it, it went straight to the top of my wish list. I am fond of the other sets in this style by this particular concept artist (Let It Ride, Beautiful You and Wonderful Moments) with their loose lines and almost handwritten sentiments, but this set with its girl and boy and father figure could have been made for me, it looks so much like my children and their Dad; here's a picture of all of us together so that you can see what I mean:


 They are both a little older now than they were when this picture was taken, but you get the idea! So this set was the perfect way to celebrate a special Dad on Father's Day.

A Split Sentiment - The 'A Good Man' stamp set has some wonderful sentiments, that would work just as well on a birthday card too. To work with the layout, I split both of my sentiments and included the first portion on the three horizontal elements and then the second piece on the main panel, next to the fussy cut images that I coloured with my Stampin' Blends. 

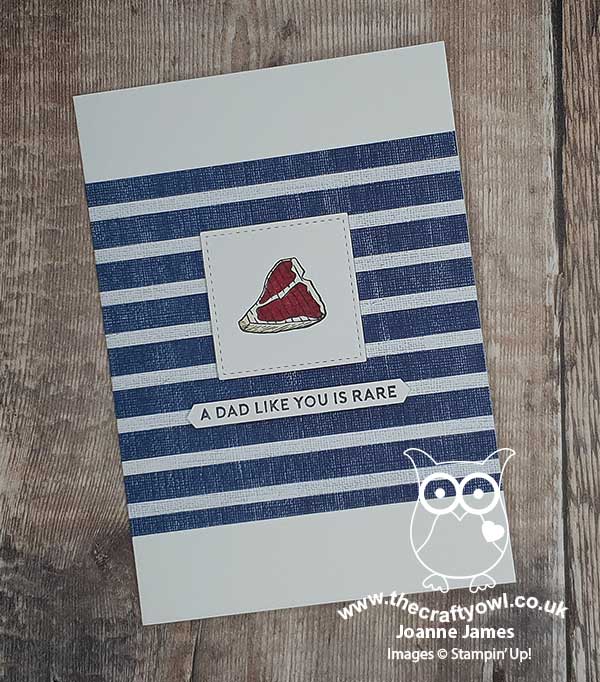
Sail Away Stripes - For a little extra detail, I added a base layer of striped patterned paper featuring two of the designs from the 'Come Sail Away' designer series paper pack. This pack has some great designs and in addition to the obviously nautical sailboats and anchors, these stripes are great for all kinds of cards and projects, with not a boat in sight!

Here is the visual summary of the key products used on today's projects for you to pin for easy reference - for the first card:


And for the second card:


You can see all of my 'How To' summaries on my 'How To - Tips and Techniques' Pinterest board in case you've missed any. 

Enjoy your day and I'll be back tomorrow with another project. Until then, happy stampin'!


Stampin' Up! Supplies Used:

Table built using Product Table Builder by The Crafty Owl - Independent Stampin' Up! Demonstrator.

Colourful Seasons Tropical Summer Drinks Trio PP446

by Joanne James16. June 2019 09:00

Today it's Sunday and time for this week's new challenge over at The Paper Players! It's the turn of the fabulous Claire to host this week and she has a clean and simple challenge for you to work with:


Remember: this is clean and simple week. What do we mean by 'clean and simple' ? Create a card that has:

  • Minimal layers and embellishments
  • Plenty of open space, also known as 'white space'
  • Is simple and uncluttered

Having had a clear out of retired stampsets, I had a minor panic when I realised that today's challenge was all about summer beverages; when I went through my collection, I realised I had only one set that had anything even remotely drink-related. In the end this made things easier - less choice can be liberating! Last week's CAS(E) This Sketch layout was just what I needed to bring my card to life - take a look:


Here's the low-down on today's card:

Colourful Seasons Summer Drinks - Yes, the little drink in the Colourful Seasons stamp set was the only one in my crafting arsenal, but it was perfect for a long, cool summer beverage - complete with a slice! Easy to stamp and then cut out with the co-ordinating Seasonal Layers Thinlits, this little glass was this week's saving grace. Phew!

Tropical Colour Trio - I decided to balance the white of my CAS card with a trio of tropical colours: Grapefruit Grove, Pineapple Punch and Granny Apple Green. Each of my little circles features all three colours, interchanging the background colour, juice glass and slice of oange, lemon or lime respectively, each of which I coated with a liberal dose of Wink of Stella for a lovely sparkle. I added a strip of each colour to the base behind the greeting, to tie in with the circles above and below. This is a great fresh and zingy colour combo; here it is for you if you would like to save to use on future projects:


An Itty Bitty Birthday Greeting - Lastly, follwig another hunt through my depleted stamp sets, I found a suitable sentiment from the 'Itty Bitty Birthdays' set that was a perfect match for my colourful glasses and added to my card using Memento black ink.

Here is the visual summary of the key products used on today's project for you to pin for easy reference:


You can see all of my Product and 'How To' summaries on my 'How To - Tips and Techniques' Pinterest board in case you've missed any. 

Before you reach for your ink and papers, check out what our amazing team has created to inspire you this week:

Here's a quick recap of our challenge rules:
 
1.  Create a new paper project
2.  Upload your creation to your blog with a link back to us and provide a direct link to the post featuring your challenge submission.
3.  Please link your card to no more than four challenges, TOTAL.
4.  Have FUN!

You can see all of my 'How To' summaries on my 'How To - Tips and Techniques' Pinterest board in case you've missed any. 

Enjoy your day; we are celebrating Father's Day here in the UK and yesterday it was also one of the James Junior's birthdays, so we will be rounding off a busy week with a few more celebrations before Rebecca heads off to the Lake District for a week of outward bound activities with her school mates tomorrow. I'll be back tomorrow with another project. Until then, happy stampin'!


Stampin' Up! Supplies Used: 

Table built using Product Table Builder by The Crafty Owl - Independent Stampin' Up! Demonstrator.

New Online Exclusives

There are new products available exclusively in the online store from 5 November - check them out here.

Latest Kits!

Stampin Cut and Emboss

The Layered Landscapes Kit and Nature's Paintings Kit are the latest kits in the online store - get yours here!

Shop Online

Access my online shop 24 x 7, 365 days of the year:

Current November hostess code:

9NKXDTTR

Shop Online

Mini Catalogue

BROWSE THE CATALOGUE

'Tis The Season - the new Stampin' Up! Mini Catalogue is here! For more details and to download your copy click here

Scrapbooking

Stampin' Up! has introduced a new range of 12x12" scrapbooking product and kit - the full range is now available to purchase online. To download a copy of the new digital Scrapbooking Catalogue click here.

2024-25 Annual Catalogue

BROWSE THE CATALOGUE

Click on the image to download your copy of the 2024-25 annual catalogue. For a full list of current SU! supplies, go to my online store. If you would like any help or advice, please drop me a line at joanne@thecraftyowl.co.uk or give me a call on 07773 421446 - I'd be happy to help.

Join My Team

It's always a great time to join Stampin’ Up! New team members can get £130 worth of products for only £99 + free business supplies + free shipping + all the fun being a part of Stampin’ Up! Stampin' Up! has something for everyone: join my growing team and benefit from my support to enjoy Stampin' Up! however you choose.

If you're interested, call me for a chat to understand how I can help you realise your goals. Alternatively, if you have already decided to sign up and you just can't wait, please click here for the link to the online form where you can sign up and order your starter kit right away! 

About Me

Hi I'm Joanne and live in Northampton and when I'm not looking after my husband and two beautiful children, am an avid crafter with a passion for all things Stampin' Up!

I must confess that I have never been a big rubber stamper - until I discovered Stampin' Up! that is. I love the fact that I can get such great results with co-ordinating stamps, inks, papers and punches - the possibilities are endless! Join me on my stamping journey as I share the things I love and be inspired to create amazing things yourself!

Follow Me

Monthly Newsletter

Box Builder

Click the button above to use Box Buster to create your custom box design using the Envelope Punch Board!

Kits Collection Now Available!

Stampin Cut and Emboss

The new Kits Collection from Stampin' Up! is now available!

Click here to see the current kits available and order yours online today.

I Design For


Stampin' Up Stuff

This is my personal blog and is not endorsed by Stampin’ Up! I hope you find it a plentiful source of ideas and personal inspiration but please don't copy my designs for contest submission or use for classes, publication or sale without express permission.