Seasonal Leaves And Autumn Plaid For PP458

by Joanne James8. September 2019 09:00

Today it's Sunday and time for this week's new challenge over at The Paper Players! It's the turn of the fabulous Ann to host this week and she has a rather seasonal colour challenge for you to work with:


It has turned unseasonably cold here in the UK this week and the falling temperatures, combined with Ann's warm colour palette immediately turned my thoughts to Autumn leaves and warm and cozy check blankets, both of which inspired my card today - take a look:


Here's the low-down on today's card:

Autumn Plaid - I chose Crumb Cake as my neutral of choice (I didn't count the Very Vanilla since I took white or vanilla as a given!) and used it as the base to create a cosy strip of plaid to tie together the main colours on my card. I used the plaid stamp from the new 'Tiny Keepsakes' stamp set for my plaid; I could have used the 'Buffalo Check' background stamp but the plaid stamp in the 'Tiny keepsakes' set has a smaller check that worked better for my design. I stamped it in Merry Merlot, then added plaid lines with my Cajun Craze and Pretty Peacock Stampin' Write markers.

Seasonal Skeletal Leaves - For the focal decoration of my card, I cut three skeleton leaves using the Seasonal Layers Framelits in each of the main challenge colours, and tucked them in loosely behind my sentiment and swirl of burlap on a stitched rectangle of Very Vanilla. This die set is another perennial favourite of mine and I'm so glad it stayed in the annual catalogue this year - these framelits, along with the co-ordinating 'Colourful Seasons' stamp set, has served me well and I have used both many times, for all sorts of projects. 

Harvest Thanks - I took one of my favourite sentiments for this type of card, from the'Painted Harvest' stamp set, stamped it in Merry Merlot onto Very Vanilla and added this to a banner cut using the Lakeside Framelits, along with a couple of Pretty Peacock faceted dots to anchor it to my finished card.

Here is the visual summary of the key products used on today's project for you to pin for easy reference:
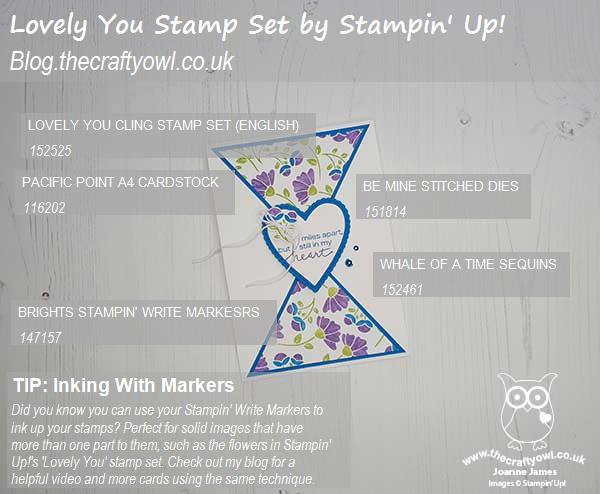
 

You can see all of my Product and 'How To' summaries on my 'How To - Tips and Techniques' Pinterest board in case you've missed any. 

Before you reach for your ink and papers, check out what our amazing team has created to inspire you this week:

Here's a quick recap of our challenge rules:
 
1.  Create a new paper project
2.  Upload your creation to your blog with a link back to us and provide a direct link to the post featuring your challenge submission.
3.  Please link your card to no more than four challenges, TOTAL.
4.  Have FUN!

You can see all of my 'How To' summaries on my 'How To - Tips and Techniques' Pinterest board in case you've missed any. 

Enjoy your day; I have no big plans today and am looking forward to continuing to enjoy my birthday weekend! I'll be back tomorrow with another project. Until then, happy stampin'!


Stampin' Up! Supplies Used: 

Table built using Product Table Builder by The Crafty Owl - Independent Stampin' Up! Demonstrator.

Perfectly Plaid Metallic Embossed Long Christmas Card

by Joanne James4. September 2019 20:00


Today I'm sharing a card for this week's TGIF challenge where they have a product spotlight on embossing powder and the team at Less is More where they are all about Metallics:


Metallics and embossing powder were the perfect combination but with three metallic powders in my desk drawer, which one to choose? In the end, I decided on all of them - take a look:


Here's the low-down on today's card:

I went long and thin with today's card and paired my embossed gold Merry Christmas sentiment with three identical pine trees, also from the new Perfectly Plaid stamp set, each of them heat embossed in a different metallic onto Thick Whisper White cardstock: silver, copper and gold respectively. I added a thin border of gold foil to the top and bottom of my panel before using dimensionals to adhere it to my cardbase. It was helpful that my metallic powders were an odd number -  odds often look better than evens on cards I think!

I have a tip for you when stamping objects in threes: always stamp the outer two first, then the central one; it's much easier to ensure they are evenly spaced that way. 

Here is the visual summary of the key products used on today's project for you to pin for easy reference:


You can see all of my 'How To' summaries on my 'How To - Tips and Techniques' Pinterest board in case you've missed any. 

The first of the James Juniors is back to school properly today; one down, one to go! In the meantime, we have a fun girly day planned with Junior number two who has another day before she is back too. Enjoy your day and I'll be back tomorrow with another project. Until then, happy stampin'!


Stampin' Up! Supplies Used:

Table built using Product Table Builder by The Crafty Owl - Independent Stampin' Up! Demonstrator.

The New 2019 Autumn-Winter Catalogue is Here and Buy 3 Get One Free DSP Promotion

by Joanne James4. September 2019 04:00

The wait is over but the day has finally arrived! The new Autumn-Winter Seasonal Catalogue is here - you can download an electronic copy by clicking on the image below:


Physical catalogues have gone out in the post to my existing customers and anyone else who requested a copy; there will of course be a permanent link to the catalogue in the box on the right side of my blog page until 2nd January 2020 when the sales period ends. I've already shared a few sneak peeks and there is so much more to come! For today, put your feet up and browse the new catalogue in all its glory.


And there's more good news! Between now and the end of September, we have a fabulous promotion too - here is also a fabulous customer offer on during July where for every 3 packs of designer series paper you buy from the following selection, you can choose another one absolutely FREE! The papers included in the promotion are listed below:

I will be sharing some videos during the coming weeks on my Facebook Page highlighting each of these patterns and of course you can check out the projects on my blog for lots of additional paper inspiration. If you would like to see any of these papers up close in more detail, then do get in touch and I can share a sample with you.

Please feel free to contact me with any questions or queries. Don't forget to use this month's current hostess code ZFNK46PH if you are placing an order online to receive an extra thank you from me. Back soon with more creative inspiration for you. Until then, happy browsing and get writing that wish list! 


Snow Front Christmas Card for JAI472

by Joanne James3. September 2019 09:00

Today I'm sharing a card for this week's sketch challenge over at Just Add Ink:

I was intrigued with the angled lines of this sketch, and whilst my instinct was to reach for my beloved designer series papers and start layering, I resisted and instead reached for another new Christmas stamp set and continued with my clean and simple streak - take a look:


 Here's the low-down on today's card:

Snow Front - If you are a lover of the 'Waterfront' set that features in the annual catalogue, then the 'Snow Front' set in the new Autumn-Winter catalogue will most certainly make it onto your wish list. With similar brushstroke designs and lots of scenic motifs, this set offers great creative possibilities. The stamp set I used for my snow is actually from the Waterfront set - go figure!

A Clean And Simple Scene - I decided to use the angular lines of the sketch as the basis for the structure of my scene. I used a row of trees for the back point, then a combination of a large pine tree and a path in the snow for the point at the front. I decided to make a feature of my log cabin and stamp it on a stitched circle to accentuate it, before adding in to my scene. I really let the stamps do the talking on today's card - I did add some clear Wink of Stella to the tops of my trees, the falling snow, the roof of my log cabin and snowman, but whilst it looks very pretty in real life, is nigh on impossible to see in the photo so you'll have to take my word for it.

A Pop of Red - I used a predominantly neutral palette for my card with the exception of Shaded Spruce and even after stamping my sentiment I still felt it needed something else. I settled for a red bird balanced on the word 'Christmas' and a thin red mat border for a pop of additional festive colour.

Here is the visual summary of the key products used on today's project for you to pin for easy reference:


You can see all of my 'How To' summaries on my 'How To - Tips and Techniques' Pinterest board in case you've missed any. 

I have a day of errands today combined with pre-season rugby practice for the youngest of the James Juniors who is back to school tomorrow. Whatever you have planned, I hope you enjoy your day and I'll be back tomorrow with another project and the launch of the new Stampin' Up! 2019 Autumn-Winter catalogue - woohoo! Until then, happy stampin'!


Stampin' Up! Supplies Used:

Table built using Product Table Builder by The Crafty Owl - Independent Stampin' Up! Demonstrator.

Beautiful Friendship and Butterflies

by Joanne James2. September 2019 11:00

It's Monday and I'm starting the week with some of my favourite bright colours as I share a card for the current challenges over at Color Throwdown and the Paper Craft Crew


I love those colourful florals on the CTD badge so thought it was high time I made another card using my current favourite floral stamp set - take a look:


Here's the low-down on today's card:

Beautiful Blooms - I just love the 'Beautiful Friendship' stamp set - I can't believe I overlooked it on my first pass through the catalogue. I think it is actually up there as one of my most favourite floral stamp sets of all time. It's just so easy to use. I love yellow flowers, so decided to choose yellow blooms with a side of hot pink for the buddleia-type flowers, with some bright green leaves for good measure. 

And A Butterfly - I 'saved' my orange for my little butterfly, which I stamped in black then coloured with a blender pen and some Grapefruit Grove ink. I have to say I'm not sure about the butterfly having added it to my card - what do you think - better with or without? 

Birthday Wishes - I heat-embossed my sentiment in white on black for a little extra contrast, using one of my current go-to birthday sentiments from the 'Varied Vases' set. It's perfect for cards with a floral theme so is getting a lot of use at the moment. I bordered my sentiment with a thin sliver of Lovely Lipstick ribbon just to tie the whole thing in with my card a little better. 

Here is the visual summary of the key products used on today's project for you to pin for easy reference:


You can see all of my 'How To' summaries on my 'How To - Tips and Techniques' Pinterest board in case you've missed any. 

We have a day of getting ready to return to school this week! The first of the James Juniors is in tomorrow afternoon for pre-season rugby training - a sure fire way to see it start to rain!! Enjoy your day and I'll be back tomorrow with another project. Until then, happy stampin'!


Stampin' Up! Supplies Used:

Table built using Product Table Builder by The Crafty Owl - Independent Stampin' Up! Demonstrator.

A Pig With Sparkle for PP457

by Joanne James1. September 2019 09:00


Today it's Sunday and the first of September; where is the year disappearing?! It's time for this week's new challenge over at The Paper Players and it's the turn of the fabulous LeAnne to host this week and she has a fun theme challenge for you to work with:


I had limited options for today's theme: cows, pigs or ducks! Limits are often helpful though as they really help focus the mind. I was so tempted to use my current farmyard favourite, those funny cows from the 'Over The Moon' set, however I decided to give some love to one of my other farmyard friends that has been a little neglected of late and took the opportunity to play along with the fourth week of the Freshly Made Sketches celebrations too - take a look:


Here's the low-down on today's card:

This Little Piggy - Whilst pigs are often to be found down on the farm, I'm not sure you'd see many of the flying variety! I do love this flying porcine creature though and I decided that on today's card she really needed wings to be proud of, so I created a stand-out pair in white glimmer paper and paper-pieced them - how cool are they?!

Artistic Touches - I used some of the patterned paper and felt accessories from the Follow Your Art Suite on my card today, heat embossing some clouds in white across my designer paper for added detail, along with a white twine bow. 

Frame It - I did a creative interpretation of the FMS sketch today and created a continuous scene, using a frame created from a pair of square Stitched Shape Framelits to draw the eye to my pig and sentiment and keep true to the sketch, rather than create my scene on a central square. 

Here is the visual summary of the key products used on today's project for you to pin for easy reference:


You can see all of my Product and 'How To' summaries on my 'How To - Tips and Techniques' Pinterest board in case you've missed any. 

Before you reach for your ink and papers, check out what our amazing team has created to inspire you this week:

Here's a quick recap of our challenge rules:
 
1.  Create a new paper project
2.  Upload your creation to your blog with a link back to us and provide a direct link to the post featuring your challenge submission.
3.  Please link your card to no more than four challenges, TOTAL.
4.  Have FUN!

You can see all of my 'How To' summaries on my 'How To - Tips and Techniques' Pinterest board in case you've missed any. 

Enjoy your day; we are enjoying the last few days of the summer holiday before the James Juniors begin a new school year later this week. I'll be back tomorrow with another project. Until then, happy stampin'!


Stampin' Up! Supplies Used: 

Table built using Product Table Builder by The Crafty Owl - Independent Stampin' Up! Demonstrator.

Dashing Deer CAS Christmas Card

by Joanne James31. August 2019 20:00

Today I've a short post to share a clean and simple Christmas card using this week's sketch over at CAS Colours & Sketches:


I had my Dashing Deer Dies out on my desk for another project I had been working on and it suddenly occurred to me that the two smallest deer would work perfectly for the shapes on the sketch:


I stamped one on the cardbase and then added a top layer with the diecut overlay (a process made much easier with the use of my trusty Stamparatus), then stamped the second one and popped it in front on a dimensional. I added a stamped sentiment with a diecut floral embellishment, finished with a faceted dot and I was done. It took longer to think about the design of this card than to make it!

Here is the visual summary of the key products used on today's project for you to pin for easy reference:


You can see all of my 'How To' summaries on my 'How To - Tips and Techniques' Pinterest board in case you've missed any. 

We started today with our very first family 5k parkrun, then had an afternoon where the boys and girls of the James household divided and conquered: the boys went to watch the local football match and the girls did a little shopping and music making. A fun day!

Remember today is your last chance to spend your bonus coupons or take advantage of the current 'Extra, Extra' joining promotion that is happening this month. 

Enjoy your evening and I'll be back tomorrow with another project. Until then, happy stampin'!


Stampin' Up! Supplies Used:

Table built using Product Table Builder by The Crafty Owl - Independent Stampin' Up! Demonstrator.

Bloom and Grow Clean and Simple One Layer Birthday Card

by Joanne James29. August 2019 14:00

Today I'm sharing a card for the current challenge over at Fusion where both the sketch and inspiration photo got my creative juices flowing this week, so much so that I made two cards! Today I'm sharing a clean and simple one layer card inspired by the photo that is also perfect for the current challenge over at Addicted to CAS and I will be back with a stepped up card that uses the sketch too tomorrow.


My card also fits the bill over at SUO Challenges and this month's Stampin' Up! #SimpleStamping challenge since it is a simple combination of stamps, ink and paper to make a birthday card - take a look:


This card really was super simple to make: I positioned my sentiment and stamped it in Memento Black ink onto extra thick whisper white cardstock, then took one of the boughs of flowers from the 'Bloom and Grow' stamp set and stamped it both above and below if along the fold of the card, stamping off the edge to add interest. I coloured them with my Stampin' Blends and added a graduated aqua border to make the flowers stand out and mimic the colour of the inspiration photo.

Here is the visual summary of the key products used on today's project for you to pin for easy reference:


You can see all of my 'How To' summaries on my 'How To - Tips and Techniques' Pinterest board in case you've missed any. 

Enjoy your day and I'll be back tomorrow with another project. Until then, happy stampin'!


Stampin' Up! Supplies Used:

Table built using Product Table Builder by The Crafty Owl - Independent Stampin' Up! Demonstrator.

Come Sail Away Bermuda Bay and Copper Brusho Lighthouse Card TGIFC226

by Joanne James28. August 2019 09:00

Today I'm sharing a card for the current challenge over at TGIF Challenges where they challenging us to use a technique that I don't often feature on my cards:

I did experiment with splatters for my recent technique class featuring the Come Sail Away suite so having been using splatters a little more of late with this set in particular. You can see one of my previous cards here; this is another of the samples I prepared to demonstrate how splattering can be used to create unigue backgrounds: 


On this card I used some Bermuda Bay reinker and blue Brusho on Shimmery White cardstock, covered with scrunched up cling film before leaving to dry and then removed the cling film. I then covered with some splatters of copper shimmer and I added a collage of stamped and diecut bits and pieces from the Come Sail Away suite and some unravelled copper trim to complete my card. I'm not sure this type of card will ever feel natural to me - watercoloured backgrounds and collage-style cards are not my forte, but it's fun to step outside of your comfort zone every once in a while to try something different.

Don't forget to set your alarms for 6pm UK time this evening for your last chance opportunity to order trimmer blades for the discontinued Stampin' Up! trimmer - full details in my previous post here.

We have been busy harvesting fruit and veg from our garden and spent yesterday baking more goodies to eat and for the freezer I hope you enjoy your day and I'll be back tomorrow with another project. Until then, happy stampin'!


Stampin' Up! Supplies Used:

Table built using Product Table Builder by The Crafty Owl - Independent Stampin' Up! Demonstrator.

Copper Metallic Brightly Gleaming Christmas Card AYSI207 FF041

by Joanne James27. August 2019 09:00

Today I'm sharing another Christmas card, this time for the current challenges over at As You See It and Festive Friday:


I was determined to have another go at the current AYSI sketch and go with it the right way up and since metallics are a big feature of my card today it is also perfect for the challenge over at Festive Friday too - take a look:


Here's the low-down on today's card:

Brightly Gleaming - This fabulous copper detailed designer series paper from the Brightly Gleaming specialty designer series paper is the inspiration for the colour scheme of my card today. The Brightly Gleaming Suite is one of the new suites in the forthcoming autumn-winter seasonal catalogue and the specialty paper is most definitely the star of the show in my opinion! Seasonal stars and bauble images combined with all-purpose patterns, with half of the designs having copper foil accents that truly make this paper shine. 

Christmas Gleaming Ornaments - I stamped and heat embossed all of the elements of my decorated bauble ornament and added some Night of Navy colouring with my Stampin' Blends for added detail, before punching out with the co-ordinating ornament punch. This was so quick, a little fussy cutting with the holly and berries was totally worth it. I also did a little stamping inside my card:


Copper Cabana - If you're still reading then please accept my apologies for the dodgy Barry Manilow reference :-) Today's card really is a celebration of metallics, and copper in particular. That gorgeous copper foil-accented paper, a full copper foil mat, the heat embossed sentiment and ornament detail, along with the addition of one of the foil elements that also form part of this suite, all serve to give this card a truly luxurious feel.

Here is the visual summary of the key products used on today's project for you to pin for easy reference:


You can see all of my 'How To' summaries on my 'How To - Tips and Techniques' Pinterest board in case you've missed any. 

Enjoy your day and I'll be back tomorrow with another project. Until then, happy stampin'!


Stampin' Up! Supplies Used:

Table built using Product Table Builder by The Crafty Owl - Independent Stampin' Up! Demonstrator.


New Online Exclusives

There are new products available exclusively in the online store from 5 November - check them out here.

Latest Kits!

Stampin Cut and Emboss

The Layered Landscapes Kit and Nature's Paintings Kit are the latest kits in the online store - get yours here!

Shop Online

Access my online shop 24 x 7, 365 days of the year:

Current November hostess code:

9NKXDTTR

Shop Online

Mini Catalogue

BROWSE THE CATALOGUE

'Tis The Season - the new Stampin' Up! Mini Catalogue is here! For more details and to download your copy click here

Scrapbooking

Stampin' Up! has introduced a new range of 12x12" scrapbooking product and kit - the full range is now available to purchase online. To download a copy of the new digital Scrapbooking Catalogue click here.

2024-25 Annual Catalogue

BROWSE THE CATALOGUE

Click on the image to download your copy of the 2024-25 annual catalogue. For a full list of current SU! supplies, go to my online store. If you would like any help or advice, please drop me a line at joanne@thecraftyowl.co.uk or give me a call on 07773 421446 - I'd be happy to help.

Join My Team

It's always a great time to join Stampin’ Up! New team members can get £130 worth of products for only £99 + free business supplies + free shipping + all the fun being a part of Stampin’ Up! Stampin' Up! has something for everyone: join my growing team and benefit from my support to enjoy Stampin' Up! however you choose.

If you're interested, call me for a chat to understand how I can help you realise your goals. Alternatively, if you have already decided to sign up and you just can't wait, please click here for the link to the online form where you can sign up and order your starter kit right away! 

About Me

Hi I'm Joanne and live in Northampton and when I'm not looking after my husband and two beautiful children, am an avid crafter with a passion for all things Stampin' Up!

I must confess that I have never been a big rubber stamper - until I discovered Stampin' Up! that is. I love the fact that I can get such great results with co-ordinating stamps, inks, papers and punches - the possibilities are endless! Join me on my stamping journey as I share the things I love and be inspired to create amazing things yourself!

Follow Me

Monthly Newsletter

Box Builder

Click the button above to use Box Buster to create your custom box design using the Envelope Punch Board!

Kits Collection Now Available!

Stampin Cut and Emboss

The new Kits Collection from Stampin' Up! is now available!

Click here to see the current kits available and order yours online today.

I Design For


Stampin' Up Stuff

This is my personal blog and is not endorsed by Stampin’ Up! I hope you find it a plentiful source of ideas and personal inspiration but please don't copy my designs for contest submission or use for classes, publication or sale without express permission.