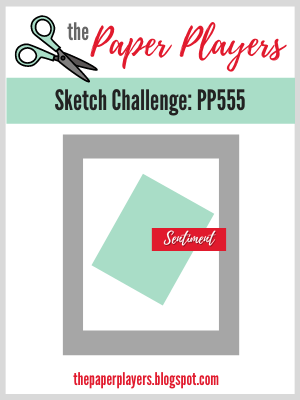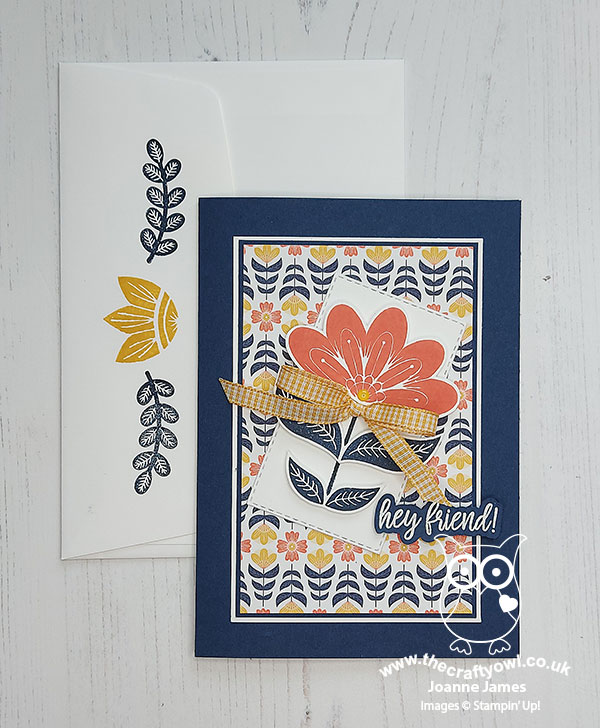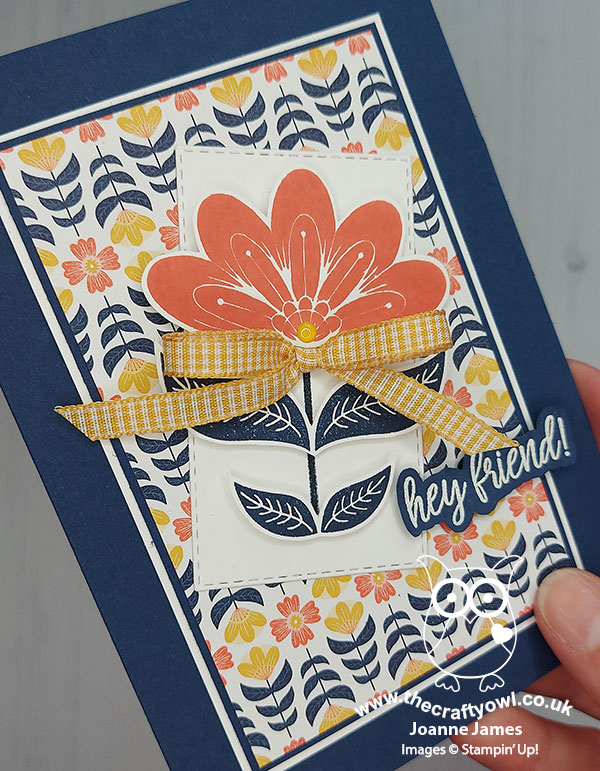
Forever and Always With True Love - A Winning Combination

by Joanne James2. January 2021 21:00

Happy new year lovely readers! I hope you have all enjoyed a restful Christmas and peaceful new year with your nearest and dearest. I have enjoyed a craft-free break over the festive period, instead spending some quality time with my family and indulging in some of my other passions, such as Lego building, board games and book reading. I am slowly getting back to crafting; I have lots of new goodies to play with so am looking forward to sharing some of those with you.Today I'm sharing a card I made for the current challenge over at Freshly Made Sketches:

I love this sketch by Jennifer T and decided to create a layered sentiment and start cutting in to my new pack of True Love black and white designer series paper for my card - take a look:


I diecut the larger of my 'always' outlines out of the patterned paper and after adding some colour to the blooms on the paper with my Flirty Flamingo Blends, I popped this panel up on dimensionals. I cut the narrower 'always' out of Basic Black that I first adhered to a foam sheet and then inset this into the aperture onto the background layer and added a stamped 'forever &' to complete my sentiment, with a trio of black mat dots to finish. I also added some coloured DSP to the flap of my envelope too for a co-ordinated finishing touch.

You can see the dimension of the sentiment and the colour detail better here:


Here is the visual summary of the key products used on today's project for you to pin for easy reference:
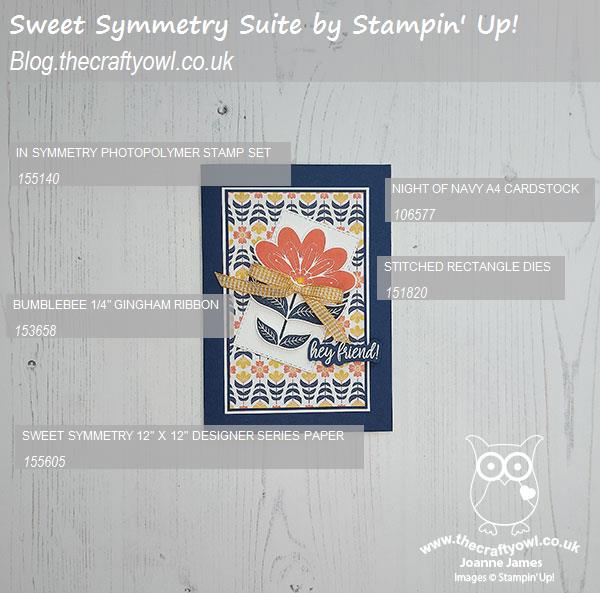
 

You can see all of my 'How To' summaries on my 'How To - Tips and Techniques' Pinterest board in case you've missed any. No online store links as these products are not available to purchase until 5th January.

Enjoy your evening and I'll be back tomorrow with my first challenge post for The Paper Players. Until then, happy stampin'!


Stampin' Up! Supplies Used:

Table built using Product Table Builder by The Crafty Owl - Independent Stampin' Up! Demonstrator.

Peace on Earth Detailed Dove Diecut Christmas Card

by Joanne James21. December 2020 21:32

Good evening everyone! I have had a busy few days with last-minute Christmas preparations so blogging has had to wait awhile, but I've managed to squeeze in some time this evening to share a card I made a few weeks ago following my 'Dove of Hope' online class that features a fun technique. The sentiment and non-traditional colour scheme also make it perfect for the current Christmas Kickstart Challenge and the challenge over at Colour Dare too:


I used the Detailed Dove Dies to create my fabulous dove and teamed it with a sentiment from the Peace and Joy bundle, along with an inked background I created using the salt technique - take a look:


Have you ever created a background using the salt technique? It's really easy: all you need to do is take a piece of watercolour paper and give it a wash in your chosen colour(s), then whilst still wet, sprinkle with salt crystals in varying sizes, some coarse and some fine, then ideally leave your background to dry naturally. When it's dry you can brush off any excess salt and you will be left with a background where the salt has created an interesting textural pattern. I added a fine spray of Frosted White Shimmer Paint too for a little added extra sparkle, before adding my layered sentiment and diecut dove.

I adore this dove die and have a few more cards with it that I've yet to share, so I'll try and add a couple more later this week if time permits. 

Here is the visual summary of the key products used on today's project for you to pin for easy reference:


You can see all of my 'How To' summaries on my 'How To - Tips and Techniques' Pinterest board in case you've missed any. 

Enjoy your evening and I'll be back tomorrow with another project. Until then, happy stampin'!


Tags: , , , , , ,

Cards | Shop Online | Shop Stampin' Up! Online | Stamping

Trimming The Town Christmas Notelets TTT 94

by Joanne James17. December 2020 17:00


It's Thursday and time for a new challenge over at TicTacToe! It's the turn of Team X to host this week and I am our featured designer this week. This is the fun board that we are playing along with: 


I went across the middle row with house-snow-tree and created a trio of festive notecards for you today - take a look:


Here's the low-down on today's cards:

I made a set of notelets similar to these in a case as one of the projects at my Creative Escapes Craft Retreat back in October, and I still had some papers left so I thought I would make a few more. I used a combination of Trimming The Town designer paper, white cardstock, Stitched Shapes Dies and Home Together Dies to create my cards, each one with a snowy tree background, a white snowscape piece and trees and houses in various combinations diecut from the paper to create my little scenes, with each one finished with a sentiment cut from the paper too. Here's each of the cards individually:


A red and green chalet style house:


And lastly a palatial home on a landscape card, complete with porch entrance:


This last card shows lots of detail and layering - check it out:


I just love these cards - and not a stamp in sight! No supplies link today, as these items are no longer available, but I still wanted to share as I had paper to use up and for those of you in a similar position, I hope they give you some creative inspiration! I'm also linking up with the current challenge #GDP271 over at Global Design Project, where their theme is Winter/Holiday.

A tictactoe board offers so many creative possibilities - how does this week's board inspire you? Why not have a go? We would love to see you in the gallery and who knows - you might be selected for Designer's Choice and be eligible to be a guest designer on a future challenge. 

Enjoy your day; I'll be back tomorrow with another project. Until then, happy stampin'!


Circle Punch Snowman for CASology 380 Guest Designer

by Joanne James15. December 2020 14:00

Today I'm sharing a card for the new challenge over at CASology where I have been invited by the lovely Melissa to be the guest designer, following my 'stag' card being chosen as a winner for challenge 378 - if you missed it, you can see that card here

Today's cue card is a festive one and perfect for some last-minute card making for the Christmas season:


 I decided to create a cute snowman using negative space for my card today - take a look:


 Here's the low-down on today's card:

Do You Wanna Build A Snowman - Apologies if you now have THAT song stuck in your head, but that was exactly what I decided to do today, on my card at least! Whilst I used my Snowman Builder Punch for the hat and arms, it wouldn't work for the body but this was easily remedied by using some (retired) circle punches (3/4", 1" and 1 1/4"). I added a felt scarf left over from one of last year's accessory kits for a little added texture, a simple sentiment from the 'Snowman Season' stamp set and my falling snow was courtesy of my much-loved retired Softly Falling embossing folder - it's still a favourite of mine:


This was the stamping on the inside of my card:


Design Defined - One of the things I love about the CASology challenge is that they encourage us to consider what makes our card 'clean and simple'. In addition to the basic guidelines, the design team offer some great tips in terms of their cards. Often when I play along I do the same, and if you check out my previous CASology-related blog posts, you will see lots of similar tips in relation to the cards that I created. For today's card, I defined my card design as 'Use negative space to create a focal point' which is a great way to add interest to a CAS design. 

An Unconventional Take - I actually made a second card using the same design, that was as a result of seeing this week's Inspired By inspiration photo:

I loved the holly against the bright pink for an unconventional take on Christmas colour, so decided I would use this idea to create a second version of the above card. My holly is small and I swapped out my scarf colour for more green, but this card is very much about the pink:


So what do you think? I actually still prefer the original one myself, however it was fun to change out the colour for an alternative effect. Here are both cards together for comparison:


Which one do you prefer? Do leave me a comment below - I would love to hear your thoughts.

Here is the visual summary of the key products used on today's project for you to pin for easy reference:


You can see all of my 'How To' summaries on my 'How To - Tips and Techniques' Pinterest board in case you've missed any. Thank you to the team at CASology for having me as their Guest Designer this week - do check out the team designs and I'm sure they would love you to play along with this challenge too.

Enjoy your day and I'll be back tomorrow with another project. Until then, happy stampin'!


Stampin' Up! Supplies Used:

Table built using Product Table Builder by The Crafty Owl - Independent Stampin' Up! Demonstrator.

Christmas Means More Tag Card FMS465

by Joanne James14. December 2020 18:00

Today I'm sharing a card using the current sketch over at Freshly Made Sketches that is also perfect for the challenge over at Time Out and the current Festive Friday challenge:


It's not often I make a tag card but Jacquie's FMS sketch this week had one front and centre so I thought I'd have a go and use it to showcase a sentiment for a quick and easy Christmas card - take a look:


Here's the low-down on today's card:

Christmas Means More - I just love this sentiment and have had a few ideas on how to feature it on a card but not gotten around to it yet, so today was the day to remedy that and get at least one of those ideas onto paper! The bell patterned paper from the 'Tis The Season stack was crying out to be paired up with it, with all those little silver bells, so I went with a full patterned background and created a simple layered tag to bring in a little more red and stamped my front tag with that famous movie quote from 'It's A Wonderful Life', just colouring the bells with some Smoky Slate Blends for a little added colour.

Sounds Of The Season - I used the Sounds Of The Season dies to diecut two tiny silver bells and some holly out of foil to embellish my tag and paired it with some (retired) twine from last year to finish my card:


Festive Friday Checklist - Having made my card, I realised I'd ticked off 5 of the items on the Festive Friday checklist: holly, tags, bells, red and green. That's all there is to it - a great card for some last-minute crafting!

Here is the visual summary of the key products used on today's project for you to pin for easy reference:


You can see all of my 'How To' summaries on my 'How To - Tips and Techniques' Pinterest board in case you've missed any. 

I've had a fun day today; I managed to get a run in first thing after a week-long hiatus and spent a pleasant couple of hours with some lovely ladies on a Zoom call unboxing my Spring-Summer pre-order; I can tell you there were 'oos and ahs' a plenty! I'm now off to the postbox and then back in time for a Zoom quiz!! Enjoy your evening and I'll be back tomorrow with another project and a guest appearance over at CASology, so don't miss it. Until then, happy stampin'!


Stampin' Up! Supplies Used:

Table built using Product Table Builder by The Crafty Owl - Independent Stampin' Up! Demonstrator.

Christmas Gleaming Ornaments in Silver and Gold PP521

by Joanne James13. December 2020 09:00

Today it's Sunday and time for this week's new challenge over at The Paper Players! It's our last challenge of 2020 and the turn of the amazing Claire to host this week. She has a colour challenge for you to work with:


I've been super busy this week so have not been a frequent blogger I'm afraid. To make amends, I have two cards for you today! I'm still making Christmas cards and wanted to play along with challenge over at The Card Concept because I loved the textures in the inspiration photo so I decided to make two cards, both using the Fab Friday sketch layout: a silver, black and white one for my Paper Players card and then a gold, black and white version for The Card Concept. So first up - here's my Paper Players card:


Here's the low-down on today's cards:

Both cards feature a pair of ornaments from the Christmas Gleaming set, one heat embossed on Whisper White card and the other onto Basic Black, along with piece of foil embossed with the Parisian Flourish 3D embossing folder and wiped with black ink for a slightly more aged look, black and silver/gold glimmer paper, tassels, gem embellishments and mesh ribbon and twine bows. Just check out the texture and detail:


I switched out the background embossing folder and one or two other small details to recreate a gold, black and white version:


I'm going for a 'classy and elegant' look with my cards today: the polished, shiny finish, layered textures and sparkly embellishments are a definite change from my normal 'clean and layered' style, but I quite like them. I think the sparkle and shine balances all the black and the textures are just lovely:


Here is the visual summary of the key products used on today's projects for you to pin for easy reference:


You can see all of my Product and 'How To' summaries on my 'How To - Tips and Techniques' Pinterest board in case you've missed any. 

Before you reach for your ink and papers, check out what our amazing team has created to inspire you this week:

Here's a quick recap of our challenge rules:
 
1.  Create a new paper project
2.  Upload your creation to your blog with a link back to us and provide a direct link to the post featuring your challenge submission.
3.  Please link your card to no more than four challenges, TOTAL.
4.  Have FUN!

This is our last challenge of the year before we take a short break over Christmas. It is time to say thank you and goodbye to Stef, Allisa and Mary, our fabulous guest designers this year. They have all been fabulous and we will miss them lots! 

Enjoy your day; I am going to try and finish writing my Christmas cards today, whilst also squeezing in some festive baking and maybe just a little crafting too. I'll be back tomorrow with another project. Until then, happy stampin'!


Stampin' Up! Supplies Used: 

Table built using Product Table Builder by The Crafty Owl - Independent Stampin' Up! Demonstrator.
 
 
Table built using Product Table Builder by The Crafty Owl - Independent Stampin' Up! Demonstrator.

All Is Calm All Is Bright Candles And A Special Announcement

by Joanne James8. December 2020 13:00

Before I get into the body of my post today, a reminder that today is the start of Stampin' Up!'s Year End Closeout sale of retiring favourites! You can read all about it in yesterday's post here - if you have any questions or would like to add to my local order to save P&P, do get in touch!

Today I'm sharing a card for the new challenge over at CAS Colours and Sketches, but this time not as a participant - as one of their new design team members for 2021! It is the final CC&S challenge of the year and they have reached a milestone 400th challenge - what an achievement! I have been invited, along with the other new design team members, Vicky, Bhavya and Jenny - to create a card for this week's challenge. This week's theme is to create a seasonal card with any of the challenge sketches or colour combinations that have featured in their challenges this year:


I actually didn't go that far back to find the challenge I wanted to work with; I missed participating in Challenge 398 only a couple of weeks ago but I loved this sketch and had so many creative ideas, I had to try one of them out for today's card. Here's the sketch that featured in that challenge:


What to do with those vertical lines? I considered a row of festive stockings, but also wanted to try something with another of my favourite Christmas sets this year, 'Sweetest Time'. Take a look at what I came up with:


Here's the low-down on today's card:

All Is Calm Candles - If you know this stamp set (and if you don't check out the image in the shop link at the bottom of the post), it has a stamp that is a trio of candles. I decided to get creative with my masking and with the aid of my trusty Stamparatus, I stamped the central three candles, then masked them with a post-it note before stamping an additional candle either side. I did stamp the outer candles in two parts, as I wanted to shorten them too to reflect the chaging size of the lines, but this wasn't too tricky; the Stamparatus made it easy to line up the stripes so you'd really never know.

All is Bright - I decided to omit the last word of my stamped sentiment from the set and replace it with a feature 'Bright' diecut across the front of my candles, cut with my 'Joy' dies for the perfect statement centrepiece. 

Unconventional Colour Combo - I've a couple of confessions as far as this card goes: I originally made it as a single white base layer, however when complete it looked less 'clean and simple' and more 'bland'. To be fair I think this might have a lot to do with my unconventional festive colour combo of Night of Navy, Petal Pink and Cherry Cobbler that feature in Color Dare's TicTacToe challenge 422 (bottom row). I liked these colours together and thought the bold sentiment would work well with the pale candles, but when finished it was, well, bland. So I cut it up and added some outline borders and a pastel card base, along with some clear Wink of Stella to the candle flames and the Navy 'Bright' diecut - and instantly liked it a whole lot better!

Here is the visual summary of the key products used on today's project for you to pin for easy reference:


You can see all of my 'How To' summaries on my 'How To - Tips and Techniques' Pinterest board in case you've missed any. 

 I think my card is still (relatively) clean and simple, although does now have a few more layers than I suspect my new team members would like. I am looking forward to honing my CAS skills as I work with this lovely group each week - I think that might be my 2021 New Year Crafting Resolution #1 ...

Enjoy your day and I'll be back tomorrow with another project. Until then, happy stampin'!


Stampin' Up! Supplies Used:

Table built using Product Table Builder by The Crafty Owl - Independent Stampin' Up! Demonstrator.

Tags: , , , , , ,

Cards | Shop Online | Shop Stampin' Up! Online | Stamping

It's The Giant Year End Closeout Event - Get Your Favourites Before They're Gone!

by Joanne James7. December 2020 20:11

 This is my second post today and I have business news for you! It's sale time and if you love great deals, our Giant Year-End Closeout event is the perfect time to shop. You’ll get deep discounts on your favourite products from the August–December 2020 Mini Catalogue—and as an extra bonus—you’ll get a peek at the list of items carrying over to the new annual catalogue. The Year-End Closeout happens only once a year, so don’t delay—make sure to check out the details below!


As you can see from the lists, there are some bargains to be had, with some of the Christmas papers up to 50% off - both of the papers that I used in my 2019 Christmas Creative Escapes Weekend Craft Retreat, Brightly Gleaming, and those that I used in 2020, Trimming The Town, are in the sale at half price - yay!

The sale begins tomorrow 8th December and runs until 4th January, while supplies last so be sure to shop early to avoid missing out on your retiring favourites. 

Remember to add the current hostess code 469YSGD2 if you are placing an order online to receive a thank you in the post from me along with a copy of the new 2021 Spring-Summer mini catalogue and Sale-A-Bration brochure.

If you are buying last-minute Christmas presents, please bear in mind that the last date to place orders to arrive in time for Christmas is this week - Wednesday 9th December. Whilst Stampin' up! will not guarantee that orders placed by this date will arrive in time for Christmas, they have stated that any order placed after this date are unlikely to arrive in time for the big day.

I should be back tomorrow with a creative post; until then, happy shopping!

Paper Pumpkin Joy To The World Craft Along Cards

by Joanne James7. December 2020 14:41

Today I have a quick post to share with you showing the outputs from the Paper Pumpkin 'Joy To The World' craft along session I held a couple of weeks ago. If you need a reminder about this fun global kit, you can read all about it in my post here. We made the cards in the kit as per the instructions, then also make some alternative designs, using items from the kit and some additional ink and cardstock. First up - the card designs that come with the kit:


The kit contains supplies to make 8 cards using the above designs, with materials left over. We made the first four cards, then decided to make some alternatives. I added some extra thick white cardstock and Just Jade cardstock, along with some Cherry Cobbler cardstock, 'Tis The Season designer series paper and a Cherry Cobbler ink pad. First up, a trio of Christmas cards:


 Each of these cards uses the stamp set from the kit, along with various bits and pieces, which when added to allow a completely different card. After the craft along session, when making a few more cards to use up the remainder of the kit supplies, I also challenged myself to make some non-Christmas cards using the same element. With a little creative stamping for the sentiments, I came up with another pair of cards:


 This was the first one, using one of the French diecuts, but I figured everyone is familiar with the word 'amour' for love, so would now what it meant! The second card was designed as a birthday card:


 I used the sentiment from 'Beautiful Friendship' on the inside of my card, which has a very similar font so works well:


I think this card would be lover for someone celebrating a winter birthday - I know just the person, so my card will be winging its way to her! 

If you would like to get your hands on a 'Joy To The World' Paper Pumpkin kit, I've included a link the store below. They are available whilst supplies last but at the time of writing are still in stock, so you can still grab one! Great for easy crafting with 8 lovely cards and matching envelopes at the end of it if you follow the instructions, or a few more if you add some extra supplies and get a little bit more creative!


I'll be back shortly with another post with news of the Year End Closeout Sale and Carryover Products list, which go live tomorrow. Until then, happy stampin'!


Stampin' Up! Supplies Used:

Table built using Product Table Builder by The Crafty Owl - Independent Stampin' Up! Demonstrator.

Snowflake Wishes Hexagonal Shaker Box and Matching Christmas Card PP520

by Joanne James6. December 2020 09:00

Today it's Sunday and time for this week's new challenge over at The Paper Players! It's my turn to host this week and I have a timely theme challenge for you to work with:


19 days to go and yes - it's beginning to feel a lot like Christmas, so that is my theme this week! You can share your gifts, cards, packaging - we would love to see your festive makes! I love to make co-ordinating cards and gift packaging at this time of year so I have one such set to share with you today. My post is photo-heavy as I'm going to share both a Christmas card and a rather fancy matching gift box using products from the Snowflake Splendor Suite. I even have a video tutorial for you!

First up - here's my Christmas card, with the hexagonal aperture cut using the So Many Snowflake dies:


I added some diecut snowflakes painted with Frosted White shimmer paint and finished with those pretty Balmy Blue adhesive-backed gems and a pretty Pool Party sheer ribbon bow, with a simple sentiment and snowflake decoration on the inside of my card:


 Check out the effect of those faceted gems - so sparkly!

This card was a variation on one I made in my monthly card class featuring the Snowflake Wishes bundle a few months ago. I liked the card so much, I decided to make a matching box, using the same hexagonal aperture and the Stitched Nested Label Dies from the annual catalogue. I made a simple birthday gift box using these dies previously (you can see that box here if you missed it) and have been wanting to make a video tutorial to show how it was done, so this seemed like the perfect opportunity. Here is my finished box closed:


And this is what it looks like open - the lid and base extend beyond the sides of the box and the top slides off to reveal the inside:


I wanted to step up my box so instead of simply creating an open aperture on the lid, I added some acetate and created a shaker, filled with snowflake sequins and glitter - check out  this out - it's not only the sentiment that's full of sparkle:


I added some Snowflake Splendor designer paper to the sides of my box lid and wrapped and tied it with more of the Pool Party sheer ribbon, to tie it in with the detail on my card - you can see that better below:


Rather than detail exactly how I made this project in words, I thought I would make a video tutorial should you wish to have a go at making one yourself - so here it is:

I am just in love with this set; the box isn't huge, but will hold small gifts such as chocolates, jewellery, a scented candle - lots of options! Here's a final photo of my projects together:


I would love to know what you thought of my video tutorial too; was it useful? Would you like to see more of this type of content. Do let me know - I would love to hear your thoughts!

Here is the visual summary of the key products used on today's project for you to pin for easy reference:


You can see all of my Product and 'How To' summaries on my 'How To - Tips and Techniques' Pinterest board in case you've missed any. 

Before you reach for your ink and papers, check out what our amazing team has created to inspire you this week:

Here's a quick recap of our challenge rules:
 
1.  Create a new paper project
2.  Upload your creation to your blog with a link back to us and provide a direct link to the post featuring your challenge submission.
3.  Please link your card to no more than four challenges, TOTAL.
4.  Have FUN!

You can see all of my 'How To' summaries on my 'How To - Tips and Techniques' Pinterest board in case you've missed any. 

Enjoy your day; I started writing Christmas cards whilst at hockey yesterday and am hoping to crack on with those this afternoon to get them in the post tomorrow, which will be a huge achievement! I'll be back tomorrow with another project. Until then, happy stampin'!

Stampin' Up! Supplies Used: 

Table built using Product Table Builder by The Crafty Owl - Independent Stampin' Up! Demonstrator.

New Online Exclusives

There are new products available exclusively in the online store from 5 November - check them out here.

Latest Kits!

Stampin Cut and Emboss

The Layered Landscapes Kit and Nature's Paintings Kit are the latest kits in the online store - get yours here!

Shop Online

Access my online shop 24 x 7, 365 days of the year:

Current November hostess code:

9NKXDTTR

Shop Online

Mini Catalogue

BROWSE THE CATALOGUE

'Tis The Season - the new Stampin' Up! Mini Catalogue is here! For more details and to download your copy click here

Scrapbooking

Stampin' Up! has introduced a new range of 12x12" scrapbooking product and kit - the full range is now available to purchase online. To download a copy of the new digital Scrapbooking Catalogue click here.

2024-25 Annual Catalogue

BROWSE THE CATALOGUE

Click on the image to download your copy of the 2024-25 annual catalogue. For a full list of current SU! supplies, go to my online store. If you would like any help or advice, please drop me a line at joanne@thecraftyowl.co.uk or give me a call on 07773 421446 - I'd be happy to help.

Join My Team

It's always a great time to join Stampin’ Up! New team members can get £130 worth of products for only £99 + free business supplies + free shipping + all the fun being a part of Stampin’ Up! Stampin' Up! has something for everyone: join my growing team and benefit from my support to enjoy Stampin' Up! however you choose.

If you're interested, call me for a chat to understand how I can help you realise your goals. Alternatively, if you have already decided to sign up and you just can't wait, please click here for the link to the online form where you can sign up and order your starter kit right away! 

About Me

Hi I'm Joanne and live in Northampton and when I'm not looking after my husband and two beautiful children, am an avid crafter with a passion for all things Stampin' Up!

I must confess that I have never been a big rubber stamper - until I discovered Stampin' Up! that is. I love the fact that I can get such great results with co-ordinating stamps, inks, papers and punches - the possibilities are endless! Join me on my stamping journey as I share the things I love and be inspired to create amazing things yourself!

Follow Me

Monthly Newsletter

Box Builder

Click the button above to use Box Buster to create your custom box design using the Envelope Punch Board!

Kits Collection Now Available!

Stampin Cut and Emboss

The new Kits Collection from Stampin' Up! is now available!

Click here to see the current kits available and order yours online today.

I Design For


Stampin' Up Stuff

This is my personal blog and is not endorsed by Stampin’ Up! I hope you find it a plentiful source of ideas and personal inspiration but please don't copy my designs for contest submission or use for classes, publication or sale without express permission.