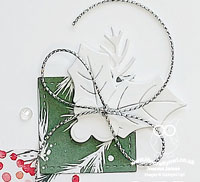
Sweetest Borders Dies Christmas Holly FMS596

by Joanne James31. July 2023 14:00

Happy Monday everyone! It's grey and miserable here in the UK today but I'm not complaining - it gave me time to squeeze in an entry to this week's Freshly Made Sketches where I couldn't resist this fab sketch by Judy:


A split panel with nothing below the line - so many possibilities! I've missed playing along with these ladies whilst I've been on vacation and was excited by this week's layout as I knew exactly where I was headed - take a look:


Here's the low-down on today's card:

A couple of my Paper Players teamies have been making Christmas cards in earnest and I was beginning to get itchy feet for the festive season, so this sketch was a good opportunity to remedy that. I am currently planning my preorder for the new mini catalogue that features Stampin' Up!'s new Christmas range, so for today's card I delved into my retired box for an old favourite, the Sweetest Borders Dies, and chose the holly one. My colour scheme of Pretty Peacock and Old Olive was inspired by memories of some two-tone ribbon we had in this colour combo ages ago, which I loved. It always struck me that this was an unusual pairing, but one that worked surprisingly well. I cut my holly border just above the half-way line and stamped my sentiment in Pretty Peacock on the Old Oliver panel, before adding a selection of pearl berries:


I used standard iridescent pearls, with the exception of the extra large ones that are now sadly retired. Whilst we are perhaps more accustomed to red berries with holly, some varieties do have white berries and I think these ones make an elegant statement on my otherwise clean card. Yay - a card for this year's Christmas card stash - complete!

Here is the visual summary of the key products used on today's project for you to pin for easy reference:


You can see all of my 'How To' summaries on my 'How To - Tips and Techniques' Pinterest board in case you've missed any. 

Final reminder that as today is the last day in July, it's your final opportunity to take advantage of the current Bonus Days promotion. Enjoy the rest of your day and I'll be back tomorrow with another project. Until then, happy stampin'!


Stampin' Up! Supplies Used:

Table built using Product Table Builder by The Crafty Owl - Independent Stampin' Up! Demonstrator.

Painted Christmas Clean and Simple Holly Card

by Joanne James20. September 2021 15:30

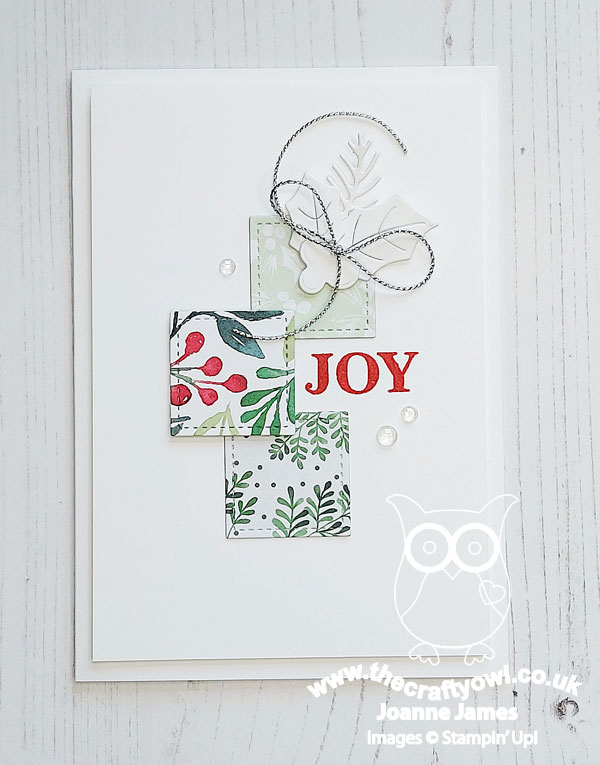
Another Monday, another week! Today I'm sharing a couple of cards that I made using this week's Freshly Made Sketches layout that I'm also linking up over at Addicted to CAS where the codeword is 'leaf':


This week's FMS sketch is courtesy of Cecile Ribon. If you are not a regular follower of Freshly Made Sketches, you should make a point of checking out her cards; I am in awe of her beautifully clean, elegant designs! I didn't get a chance to make a card to play along until today, but couldn't resist the opportunity to channel my 'inner Cecile' and have a go - take a look at what I came up with:
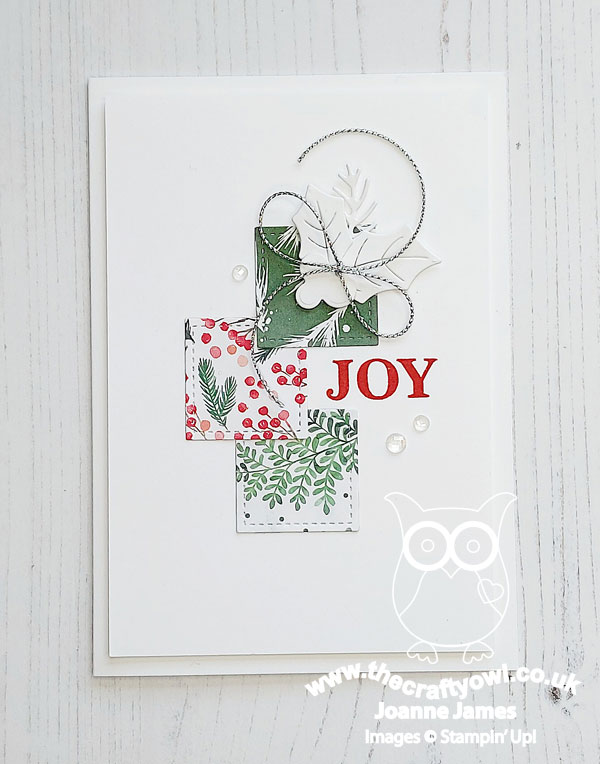
 

Here's the low-down on today's card:

Painted Christmas - I decided to use designer paper for the trio of squares on the sketch and chose a selection of soft watercoloured patterns from the painted Christmas papers. I went mostly with patterns in greens and white with small designs, with one square that had red in too, which I picked up in my simple 'Joy' sentiment from the 'Merriest moments' stamp set. These papers are so pretty but not too overpowering - perfect in small amount for a clean and simple card.

White Holly - I chose to accent my card with a sprig of diecut holly in white; this was a deliberate move, albeit an unusual one for me. I used the (retired) Sweetest Borders Dies as I wanted to have something that was the right size with a little diecut detail, but there are plenty of current dies that could be adapted to achieve the same effect:
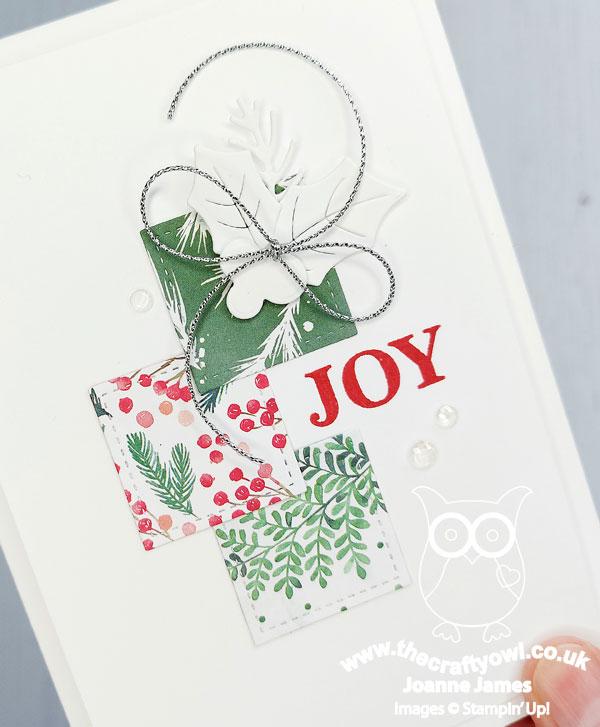
I was aiming for a single leaf for my Addicted to CAS entry, but because I used holly ended up with two; is it just me, but do you ever see holly leaves in ones? I only ever place them in pairs!

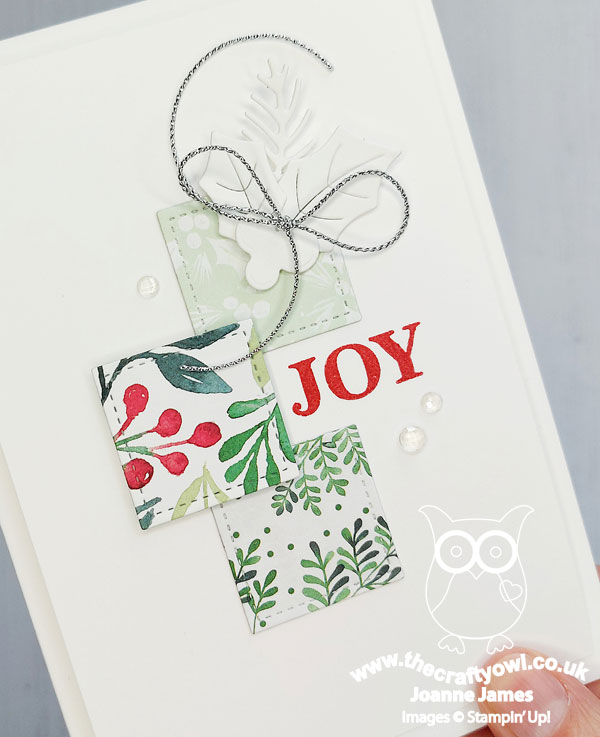
Finishing Touches - I added a trio of clear faceted gems and a silver twine bow to my white foliage for some simple finishing touches, along with a simple sentiment on the inside:
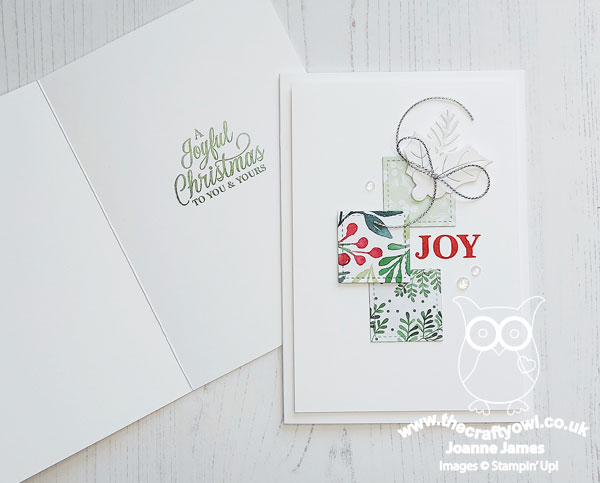
 

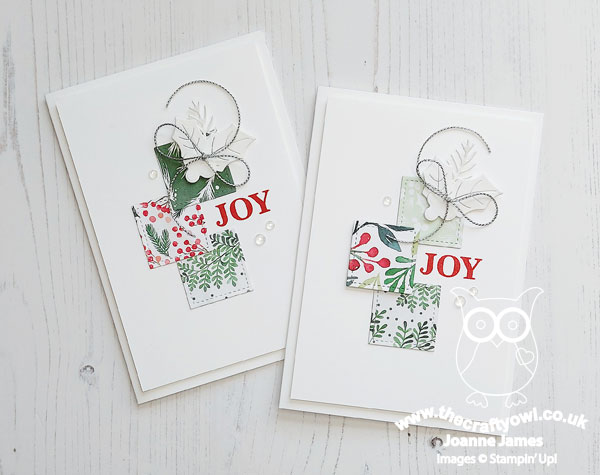
I liked this card and sketch so much, I made a second one too, this one with the centre square being the uppermost and popped up on dimensionals, rather than overlapped as per Cecile's original sketch:
 

I chose a couple of other prints too, with a little more pale green in the print pattern:
 

So what do you think? I love both of these cards and loved trying to channel my 'inner Cecile' to create my FMS entry this week!

Here is the visual summary of the key products used on today's project for you to pin for easy reference:
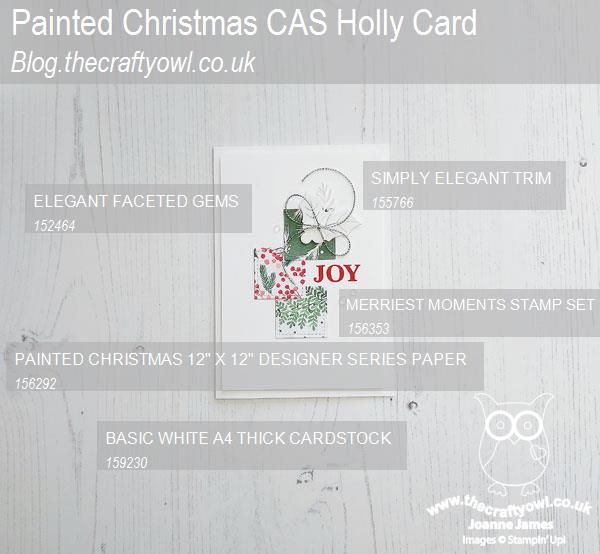
 

You can see all of my 'How To' summaries on my 'How To - Tips and Techniques' Pinterest board in case you've missed any. 

My day has been a topsy-turvy one, with plans upended and rejigged due to changes in school activities such that the restful day of crafting I had planned didn't quite materialise. No matter though - sometimes you have to roll with it and tomorrow may bring less upheaval; here's hoping! Enjoy the rest of your day and I'll be back tomorrow with another project. Until then, happy stampin'!
Stampin' Up! Supplies Used:

Table built using Product Table Builder by The Crafty Owl - Independent Stampin' Up! Demonstrator.

Sweetest Time Christmas Candles PP514

by Joanne James25. October 2020 09:00

Today it's Sunday and time for this week's new challenge over at The Paper Players! It's the turn of the amazing Jaydee to host this week and she has my favourite, a sketch challenge for you to work with:


Jaydee's sketch has three vertical images; it's a great sketch that is wide open to interpretation. I considered something that incorporated three panels but in the end decided on a much more liberal interpretation and decided on three candles - take a look:


Here's the low-down on today's card:

Sweetest Time - I've used the 'Sweetest Time' stamp and co-ordinating borders dies before (here if you missed it), but had yet to combine with the candles. I went all-out on today's card, layering a piece of Feels Like Frost foiled designer paper (it has a pines pattern but that is obscured by the main panels), followed by the panel with the stamped candles, followed by the integrated holly border.

Borders in Blue - Whilst this border looks great in traditional reds and greens, I thought I would ring the changes and make a blue card today. I know that you don't get blue holly and berries but it's the cardmaker's prerogative to get creative with colour, right? That's my story anyway and I'm sticking to it! 

Foil, Frost and Sparkle - The challenge over at Just Add Ink this week is to add two of foil, ribbon and sequins to your card. I did use some foil-embossed designer paper for my background layer to compliment my silver heat-embossed flames and sentiment, but I also added some loops of Seaside Spray/Silver metallic ribbon behind my paper-pieced holly border and since the diecut berries are obscured by my sentiment banner, I added a selection of clear epoxy droplets and a few Seaside Spray sequins for some added sparkle; you can see them better on the photo below:

So I inadvertently ended up incorporating all three - and I love the finished effect!

Here is the visual summary of the key products used on today's project for you to pin for easy reference:


You can see all of my Product and 'How To' summaries on my 'How To - Tips and Techniques' Pinterest board in case you've missed any. 

Before you reach for your ink and papers, check out what our amazing team has created to inspire you this week:

Here's a quick recap of our challenge rules:
 
1.  Create a new paper project
2.  Upload your creation to your blog with a link back to us and provide a direct link to the post featuring your challenge submission.
3.  Please link your card to no more than four challenges, TOTAL.
4.  Have FUN!

You can see all of my 'How To' summaries on my 'How To - Tips and Techniques' Pinterest board in case you've missed any. 

Enjoy your day. We have no specific plans; if the weather is as poor as it has been these last few days, we may hunker down for a movie afternoon. We watched Disney's live remake of 'Mulan' last week; have you seen it? We thoroughly enjoyed it. I'll be back tomorrow with another project. Until then, happy stampin'!


Stampin' Up! Supplies Used: 

Table built using Product Table Builder by The Crafty Owl - Independent Stampin' Up! Demonstrator.

Mini Catalogue

BROWSE THE CATALOGUE

The mini catalogue is now live! Read and download your copy here.

Shop Online

Access my online shop 24 x 7, 365 days of the year:

Current March hostess code:

S9F2XJJW

Shop Online

Join My Team

It's always a great time to join Stampin’ Up! New team members can get £130 worth of products for only £99 + free business supplies + free shipping + all the fun being a part of Stampin’ Up! Stampin' Up! has something for everyone: join my growing team and benefit from my support to enjoy Stampin' Up! however you choose.

If you're interested, call me for a chat to understand how I can help you realise your goals. Alternatively, if you have already decided to sign up and you just can't wait, please click here for the link to the online form where you can sign up and order your starter kit right away! 

Latest Kit!

Stampin Cut and Emboss

The Rock Legend Kit has all you need to make 8 cards with coordinating envelopes. Along with the new Panda Friends Kit, both are available from January 4th for just £14 each - get yours here!

2023-24 Annual Catalogue

BROWSE THE CATALOGUE

Click on the catalogue for a full list of current SU! supplies - if you would like to order any of the items featured, please drop me a line at [email protected] or give me a call on 07773 421446 - I'd be happy to help.

New Online Exclusives

There will be new products available exclusively in the online store from 5 March - check them out here.

About Me

Hi I'm Joanne and live in Northampton and when I'm not looking after my husband and two beautiful children, am an avid crafter with a passion for all things Stampin' Up!

I must confess that I have never been a big rubber stamper - until I discovered Stampin' Up! that is. I love the fact that I can get such great results with co-ordinating stamps, inks, papers and punches - the possibilities are endless! Join me on my stamping journey as I share the things I love and be inspired to create amazing things yourself!

Follow Me

Monthly Newsletter

Box Builder

Click the button above to use Box Buster to create your custom box design using the Envelope Punch Board!

Kits Collection Now Available!

Stampin Cut and Emboss

The new Kits Collection from Stampin' Up! is now available!

Click here to see the current kits available and order yours online today.

I Design For


Stampin' Up Stuff

This is my personal blog and is not endorsed by Stampin’ Up! I hope you find it a plentiful source of ideas and personal inspiration but please don't copy my designs for contest submission or use for classes, publication or sale without express permission.