Colour Combo - Zoo Babies Rhino Party Animal Birthday Card

by Joanne James1. April 2016 08:00

Happy Friday everyone and April Fools Day! Sale-A-Bration is over for another year and the end of the week is here - although this week has been much more laid back than usual; I do love school holidays! Today I have a fun card for this week's challenge over at Less is More, where the theme is to include polka dots on your card. I immediately thought about my Zoo Babies stamps, as a number of these animals have polka dots in their patterns. Here is my card:

I wanted to make a fun birthday card rather than a baby congratulations card this week - so tied a polka dot balloon to him! Here's the low-down on today's card:

Seeing Spots - If you look closely, the horns of my cute rhino have a polka dot pattern. The giraffe in this set is much more spotty, but I could resist the rhino :-) To ensure that polka dots were a clear feature of my card, I used some stripped jute ribbon to tie a balloon punched from Real Red Brights Designer Series Paper and punched with my balloon punch to the back of my party animal.

Party Animal - No party is complete without a party hat, right? My rhino is sporting one that he borrowed from the dinosaurs in the 'No Bones About It' stamp set. The 'happy birthday' sentiment on the front of my card is from the 'Balloon Builders' stamp set and is paired on the inside of my card with another great sentiment from this set 'Party Animal' - my rhino totally knows how to celebrate!

Tip Top Colour Combo - I chose Tip Top Taupe for my rhino today - warmer than grey yet still a true colour for this fun fella. I paired it with Bermuda Bay and Real Red for a pop of colour on my CAS card - here's my colour combo for you to save to use too:


I hope you like it - this is one of those cards that make me smile and I've been desperate to share all week!

Here is the visual summary of the key products used on today's project for you to pin for easy reference:
 

You can see all of my 'How To' summaries on my 'How To - Tips and Techniques' Pinterest board in case you've missed any. 

I'm also linking my card up today with the team over at SUO Challenges where the current theme is 'cute critters'. My rhino may not be warm and fluffy, but I think you'd have to agree he is definitely cute!!

Enjoy your day and I'll be back tomorrow with another project; until then, happy stampin'!
 

Stampin' Up! Supplies Used: 

Table built using Product Table Builder by The Crafty Owl - Independent Stampin' Up! Demonstrator.

Thanks For Helping Me Grow

by Joanne James31. March 2016 08:05

Today it's time for a new challenge over at Create With Connie and Mary and this week we have a colour combination for you:


Ok - so I'll be honest upfront: I'm not a fan of Delightful Dijon! Actually, I'm sure I've declared this to my regular readers before and I can honestly say I've only used it once on a card where I really loved the output (funnily enough a previous CCMC colour challenge - you can see that card here). I have therefore mixed feelings about today's card - and it's really the presence of the mustard that's the reason! So, here is today's creation:

The details for today's card are as follows:

Helping Me Grow - This is a stamp set you haven't seen me use before and there is good reason for that - I don't own it! I actually bought it as a Christmas gift for my mother-in-law, borrowed it back for an idea I had that I then didn't get to try out a few weeks ago but knew it would be just perfect for today's card. The large, over-size blooms in this set are perfect for a centre-piece of their very own; I stamped them in Lost Lagoon and used my Aquapainter to colour them in with the same colour for a soft, washed look. So thank you Kathy! 

Timeless Elegance - If you look really closely, you will see that there is a subtle pattern to the paper I used for my main stamped image. The Timeless Elegance designer series paper has Sahara Sand as one of its feature colours; it adds interest to my floral panel without overwhelming the stamped image and fits with the challenge colours.

The Perfect Label - The sentiment on my card is also from the 'Helping Me Grow' stamp set. There are some great sentiment combinations that can be made with this set; there are also a number of nice corner or border treatments, including the one I used on this card. What's more, the sentiment border is the perfect fit for the framelit in the Rose Garden Thinlits Dies set - bonus! 

So that's my card - not-so-Delightful Dijon and all!

Here is the visual summary of the key products used on today's project for you to pin for easy reference:


You can see all of my 'How To' summaries on my 'How To - Tips and Techniques' Pinterest board in case you've missed any. 

Do visit the other Design Team members to see what they did with this week's colours; there's lots of inspiration over on their blogs too!

Enjoy your day and I'll be back tomorrow with another project; until then, happy stampin'!


Stampin' Up! Supplies Used: 

  • Helping Me Grow Photopolymer Stamp Set
  • Rose Garden Thinlits Dies
  • Timeless Elegance Designer Series Paper
  • Delightful Dijon A4 Cardstock
  • Delightful Dijon 1" Dotted Lace Trim
  • Lost Lagoon Classic Stampin' Pad
  • Lost Lagoon A4 Cardstock
  • Very Vanilla A4 Cardstock
  • Sahara Sand A4 Cardstock
  • Pearl Basic Jewels
  • Venetian Crochet Trim

Last Orders for Sale-A-Bration and New Stampin' Up! Wednesday Weekly Deals Are Here!

by Joanne James30. March 2016 09:00

It's Wednesday and you know what that means: not only a new collection of Wednesday Weekly Deals - today it's only 2 days until the end of Sale-A-Bration!

If you missed it or need a reminder, you can get the full low-down on Sale-A-Bration here; I've had lots of lovely ladies join my team during Sale-A-Bration and I've always room for more, so if you're undecided about whether or not Stampin' Up! is for you, give me a call - this is the best time to give it a try. 

It's also your last opportunity to benefit from extra Stampin' Rewards for orders over £200 and a free gift with every £45 spend; I will be placing my final order tomorrow at 6pm, so if you live local to me and would like to save postage, then call me or email me with the details. That is also when I will be ordering anything from this week's Weekly Deals.

If you want to take advantage of Sale-A-Bration or any of the weekly deals on offer, you can support my business by placing your order online by clicking here or using the link to my store on the right hand side of my blog page where it says 'Shop Online' or with me in person. Don't forget to add the new Hostess Code for April UD3KDWM4 if your order is under £150 and be sure to make sure that you don't check the 'no contact' box if you'd like to be kept updated with the progress of you order and receive a little thank you in the post from me. 

Here's a summary of this week's one-week only Wednesday deals - click on each item to go to the online store to purchase:

Table built using Product Table Builder by The Crafty Owl - Independent Stampin' Up! Demonstrator.


You can see today's creative project here; until tomorrow, happy shopping!

Friends and Flowers Peas In a Pod Baby Card

by Joanne James30. March 2016 08:00

Happy Wednesday everyone! I've already posted today's weekly deals here; don't forget you also have only 48 hours to still take advantage of this year's Sale-A-Bration offers too. Today I have a fun card using this week's sketch over at the As You See It Challenge:

AYSIChallenge129

The challenge brief doesn't restrict us to feathers; anything can be used as long as the card front can fit five of them! I decided that peas in a pod were the way to go for a fun baby card - take a look:

Cute, right? Here's the low-down on today's card:

Friends and Flowers - My peas in a pod are one of the stamps in the 'Friends and Flowers' stamp set. This is a versatile set that includes a variety of stamps that co-ordinate with the Festive Flower Builder punch; I've used the stamp set on its own for today's card. I decided to watercolour my peas, which also made it easier for me to obscure the baby faces on all but one of my pea pods to make one stand out.

Sweet Sentiment - This fun sentiment is from my favourite sentiment set of the moment, 'Suite Sayings' and just perfect for a baby card, especially one with a pea peeking out of a pod.

A Touch of Pink - I finished my card with a sprinkle of pink sequins and some glittery pink enamel dots from the Love Blossoms embellishment kit. This kit is worth it for the enamel dots alone!

Here's the visual summary of the key supplies used to make today's card for you to save for future reference:


I will be back with another card tomorrow for this week's new challenge over at Create With Connie and Mary; until then, happy stampin'!


Stampin' Up! Supplies Used:

Table built using Product Table Builder by The Crafty Owl - Independent Stampin' Up! Demonstrator.

Amazing Birthday Colour Block Birthday Card

by Joanne James29. March 2016 08:00

It's Tuesday and whatever the weather outside, today I have a colourful card for you! As promised yesterday, it's another one using this week's inspiration photo over at Just Add Ink, paired this time with the sketch challenge over at CAS Colours and Sketches:

JAI #304...Inspiration   

Having fathomed out my punch art umbrella for yesterday's card (if you missed it you can see that card here) I had originally contemplated a quintet of umbrellas for today's card. Needless to say, it ended up looking a rather jumbled mess, not at all the vision of CAS beauty I had in mind, so I went back to basics and instead created this altogether simpler card:

A white birthday card that really allows those umbrella colours to pop - read on for the low-down on today's card:

Whiter than white - Whilst I did promise colour today, it's the large expanses of white that preserve the clean lines of today's card. Stampin' Up!'s extra thick white cardstock is perfect for card bases and the white-on-white layering here creates a modern, almost graphic feel. Splitting the top layer and popping it up on dimensionals creates a great recess to highlight the feature colours too.

Blocks of colour - I used the colours of the inspiration photo to create bold blocks of colour and interpreted the sketch quite literally to support my clean design. I simply cut 5 pieces of cardstock of equal height and positioned them next to each other down the front of my card, cutting them slightly wider than my recess so that their edges were concealed. 

Multi-coloured sentiment - When choosing my sentiment, I remembered this stamp from the 'Amazing Birthday' stamp set. I coloured the horizontal lines of the sentiment with my Stampin' Write Markers to echo the pattern of my recessed blocks of colour then 'huffed' on my stamp to moisten it before stamping. The slightly wonky 'happy's' of the sentiment add a fun touch of whimsy to my otherwise perfectly aligned, sharp design.

Here is the visual summary of the key supplies used on today's card for you to pin for easy future reference:


I hope you like today's clean and simple unisex birthday card - it really is so easy to re-create, would work in lots of colourways and requires next to no supplies! A great way to use up lots of scraps of cardstock left over from other projects too.

I am doubly happy that I managed to make it to link up with the lovely ladies over at CAS Colours and Sketches this week; these ladies are a lovely bunch with great talent and for this last month they have also been featuring one of my Stampin' Up! team, the lovely Gail Townsend from Gail's Place as their Guest Designer. You can see Gail's card here and those of the rest of the Design Team on the main CAS Colours and Sketches challenge page. Do pop by and give them a visit - I'm sure they would love to hear from you as we all like a little blog lovin' from time to time :-).

That's all from me today; back tomorrow with another project. Until then, happy stampin'!


Stampin' Up! Supplies Used:

Table built using Product Table Builder by The Crafty Owl - Independent Stampin' Up! Demonstrator.


Sparkle and Shine Punch Art Umbrella

by Joanne James28. March 2016 12:15

I've been having fun playing along with the CASology challenges for the last couple of weeks, so today I have a couple of clean and simple cards for this week's challenge where the theme is weather:

   JAI #304...Inspiration

My first card was a fair weather sunshine card which you can see here. My second card is altogether at the other end of the weather spectrum and was born out my attempts to make a punch art umbrella for this week's challenge over at Just Add Ink where they have the most gorgeous inspiration photo:

Whilst I abandoned the card I had planned in my head for something infinitely more 'clean and simple', I am really pleased with my little punch art umbrella. Read on to find out how I did it:

Punch Art Umbrella - I actually used a combination of two circle punches, the 1 3'4" circle punch which I used to create a semi circle, then I took my 3/4" circle punch and punched it three times along the straight edge to create my umbrella shape. As if that wasn't neat enough, I then found the perfect umbrella handle - the candy cane framelit from the Snow Friends Framelits Dies! The dimensions are just right to complete my punch art creation. These framelits are still available as a carry-over item from the Winter seasonal catalogue if you would like to purchase them, along with the co-ordinating 'Snow Place' stamp set.

Pitter-Patter Raindrops - My raindrop background is from the 'Sparkle and Shine' stamp set. This set has some lovely patterns that work for small backgrounds or repeated patterns and the raindrops were just perfect for today's card. My sentiment is also from this set.

Neutrals That Pop - I deliberately keep my colour palette neutral with just one colour, Real Red, to maintain the CAS feel of my design. I also popped my umbrella canopy up on a couple of dimensionals to help it stand out. You can save my colour palette here:


Here's the visual summary of the key supplies used to make this card and my punch art umbrella tip for you to save for future reference:


This is the weather forecast here in the UK for the rest of this week, but I will be making the most of any fine weather and getting out and about. We also have a stash of craft kits to keep us busy when we aren't so lucky - and all of those chocolate eggs from yesterday to eat too! I have a date with my ironing basket this afternoon and then we are having an extended James family get-together this evening, which is always fun.

I will be back with another card tomorrow for the challenge over at Just Add Ink that this time focuses on the colours of those lovely umbrellas; until then, happy stampin'!


Stampin' Up! Supplies Used:

Table built using Product Table Builder by The Crafty Owl - Independent Stampin' Up! Demonstrator.

Hello Sunshine CAS Card

by Joanne James28. March 2016 09:00

I've been having fun playing along with the CASology challenges for the last couple of weeks, so today I have a couple of clean and simple cards for this week's challenge where the theme is weather:

My first card is a fair weather sunshine card using a freehand cut cloud (I stuck lots of different sized punched circles together and created a template to make this oversized cloud) and a sunburst cut using the Sunburst Thinlit and then punched with a 2 1/2 circle punch:


I can't believe I was 'on the fence' about buying this Sunburst Thinlit when I first saw it in the catalogue; it is so much easier than creating sunbursts by hand! I added a sentiment combination of a 'Hello You' diecut and a stamp from the 'Crazy About You' stamp set. A trio of rhinestones completes my fair weather card.

Here's the visual summary of the key supplies used to make this card for you to save for future reference:


Here too is the cheery summer colour combination I used - fee free to save it:


This is the weather I will be hoping for with the children home on school holidays this week; I'm rather thinking it might be a little more like my next card! I'll be along with my second card shortly; until then, happy stampin'!


Stampin' Up! Supplies Used:

Table built using Product Table Builder by The Crafty Owl - Independent Stampin' Up! Demonstrator.


Botanicals For You Flower Wreath Card

by Joanne James27. March 2016 20:29

I had a little time this afternoon so I had a go at the challenge over at Global Design Project, where this week they are case-ing the designer Jessica Williams:


I don't get the opportunity to play along at GDP as much as I'd like but they do have some great challenges and I particularly like the CASE The Designer ones. Inspiration can strike in many ways and I think this type of challenge is a great way to create something that is clearly inspired by one person's work yet is wholly your own. It also makes for an interesting blog post (hopefully!) that explains where the inspiration for your own take on the original work came from. So, without further ado, here is my card:

So how did Jessica's card inspire me? Read on to find out:

Layout - Whilst I love the layout of Jessica's card, I decided this was one of the things that I was going to change. I used this week's sketch over at Mojo Monday for my card.

Colours - Jessica's colour combination is not one I would ordinarily have chosen, so I decided to work with it to see where it took me. I kept Sahara Sand for my base, although I did major on Watercolour Wonder as opposed to Calypso Coral though, largely on account of my choice of ribbon. Whilst this ribbon is rather wide for a card bow, I liked the rather fancy bow that Jessica used on her card and decided to use my ribbon to make a similar statement. Likewise, whilst I incorporated the black and white colours of Jessica's washi tape borders, I chose to use some Everyday Chic Designer Series Paper for the twin panels on my card. 

Wreath and Sentiment - I recreated the wreath on my card, but instead of using the 'Timeless Love' stamp set, I created my own using the flowers and leaves from the Sale-A-Bration set 'Botanicals For You'. I was also inspired by the sentiment of Jessica's card - I chose one from the 'Suite Sayings' stamp set that has a similar tone. 

Here is the visual summary of the supplies used to make today's card for you to save for easy future reference:


I hope you like my card and found the explanation of my creative process insightful. I'd love to know what you think of my CASE of Jessica's card; do leave me a comment below - I read and appreciate them all!

I'll be back tomorrow with another couple of projects; until then, happy stampin'!


Stampin' Up! Supplies Used:

Table built using Product Table Builder by The Crafty Owl - Independent Stampin' Up! Demonstrator.


Honeycomb Happiness Pop-Up Chick Card

by Joanne James27. March 2016 10:00

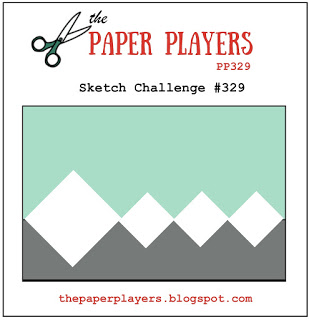
It's Sunday and time for a new challenge over at The Paper Players! It's the turn of the talented LeAnne to host our challenge this week and she has my favourite type of challenge, a sketch, for you to play along with:

    PPA-293-Mar24

As it's Easter Sunday today, for my card this week I decided to make one last Easter card to share with you, using this week's colours over at Pals Paper Arts. I'm also linking up with the Friday Mashup again as I've used the theme part of their challenge (Easter and chicks or bunnies - read on and all will become clear!) Here is the front of my card:


Simple enough: some polka dot panels, alongside an oversize flower made with 1 1/2 and 1 3/4 circle punches and the Flower Fair Framelits as a backdrop to my pair of Easter eggs. The eggs themselves are using a tip picked up from Cindy Schuster on the Stampin' Up! corporate blog (you can see her card here) where she used the balloon punch to create Easter Eggs (I stamped mine first using the outline in the 'Balloon Celebration' set and used the grunge stamp in 'Awesomely Artistic' for my mottled effect).

The best bit for me about today's card is the inside, take a look:

Having wrestled with myself every time I went to stick one of the Honeycomb embellishments to the front of my card, knowing that it would mean either a box needed to send it or risk the embellishment being crushed (I'm still suffering post-traumatic stress from having watched Shannon West uncerimoniously squash one on the front of a card whilst on stage at Onstage Live in Brussels last November!!) , I decided that there was a perfect way around it - use it on the inside! I stamped my chick from the 'Honeycomb Happiness' Sale-A-Bration stamp set on the inside of my card along the central score line, paper-pieced him with another stamped on So Saffron card, then added my honeycomb embellishment (I spritzed one of the white ones in So Saffron). I also stamped my Easter greeting from the 'Suite Sayings' stamp set on the inside of my card on the left-hand panel:


Isn't that just the cutest?! I am so happy with how this turned out! I can now use my Honeycomb Embellishments with a clear conscience!

Here is the visual summary of the key products used on today's project for you to pin for easy reference:

You can see all of my 'How To' summaries on my 'How To - Tips and Techniques' Pinterest board in case you've missed any.  

Before you reach for your ink and papers, check out what our amazing team has created to inspire you this week:

The Paper Players Design Team
 
 
Here's a quick recap of our challenge rules:
 
1.  Create a new paper project
2.  Upload your creation to your blog with a link back to us and provide a direct link to the post featuring your challenge submission.
3.  Please link your card to no more than four challenges, TOTAL.
4.  Have FUN! 


I look forward to seeing what you create with this week's sketch. We have a rare sport-free day today. We are looking forward to our Easter egg hunt (likely to be indoors if the weather forecast is correct!), a leisurely lunch and an afternoon eating too many chocolate eggs whilst watching a good movie!

Back tomorrow with another project (or two!); until then, happy stampin'!


Stampin' Up! Supplies Used:

Table built using Product Table Builder by The Crafty Owl - Independent Stampin' Up! Demonstrator.

Picture Perfect Wonderful Rose Card

by Joanne James26. March 2016 20:07

I've had a great crafty day today and have got lots of cards made, the first of which I made for a few challenges:

      SIP 40 Tic-Tac-Toe Lisa 800

I haven't played along with The Challenge for a while and I just love those flowers in the inspiration picture and the dominance of pink, with the splashes of gold against white. I decided to use this week's CAS(E) This Sketch layout to create my feminine card, which also bears some elements in common with one of the catalogue samples for this set:

Today's card is definitely a 'less is more' card - there are three key elements that define it:

Picture Perfect Pink Rose - I had originally had in my mind that I would use the Rose Wonder framelits and create a paper-pieced rose, but at the last minute I switched and decided on a softer look with the three-step stamped rose from the Picture Perfect set. I used Pink Pirouette for my base stamp and followed with layers 2 and 3 stamped in Rose Red (I stamped off layer 2 before stamping on my card). Super easy to stamp in photopolymer and this gave me the delicate, softer look I was aiming for. 

White on White - I layered white on white twice on this card; the mat and base and my piece of diecut from the Striped Scallop Thinlits. My card remains clean and uncluttered, but with enough texture to create interest across the horizontal banner. I also added some white and clear sequins to my finished card.

All That Glistens Is Indeed Gold - There are three gold elements to my card: my sentiment, stamped in Versamark and heat embossed in gold, the twist of gold metallic thread behind the rose and the third which is actually quite tricky to see but a fine mist of gold Wink of Stella, which I flicked across the front of my card. This adds a beautiful lustre and subtle sparkle to my card in real life.

It just so happens that my card ticks the middle horizontal row of the tic-tac-toe board over at Stamps, Ink, Paper this week (gold, sequins, congrats) so I'm linking up there too. This is my second outing with the Picture Perfect stamp set; I will be using it for my Technique Class in May so expect to see more of it between now and then. If you would like more information on this class or any others, you can check out my complete class schedule here or contact me for more information.

Here is today's visual summary of the key supplies used on today's card for you to save for easy reference:


That's all from me today; I'll be back tomorrow with my card for this week's new challenge over at The Paper Players. until then, happy stampin'!


Stampin' Up! Supplies Used:

Table built using Product Table Builder by The Crafty Owl - Independent Stampin' Up! Demonstrator.


New Online Exclusives

There are new products available exclusively in the online store from 5 November - check them out here.

Latest Kits!

Stampin Cut and Emboss

The Layered Landscapes Kit and Nature's Paintings Kit are the latest kits in the online store - get yours here!

Shop Online

Access my online shop 24 x 7, 365 days of the year:

Current November hostess code:

9NKXDTTR

Shop Online

Mini Catalogue

BROWSE THE CATALOGUE

'Tis The Season - the new Stampin' Up! Mini Catalogue is here! For more details and to download your copy click here

Scrapbooking

Stampin' Up! has introduced a new range of 12x12" scrapbooking product and kit - the full range is now available to purchase online. To download a copy of the new digital Scrapbooking Catalogue click here.

2024-25 Annual Catalogue

BROWSE THE CATALOGUE

Click on the image to download your copy of the 2024-25 annual catalogue. For a full list of current SU! supplies, go to my online store. If you would like any help or advice, please drop me a line at joanne@thecraftyowl.co.uk or give me a call on 07773 421446 - I'd be happy to help.

Join My Team

It's always a great time to join Stampin’ Up! New team members can get £130 worth of products for only £99 + free business supplies + free shipping + all the fun being a part of Stampin’ Up! Stampin' Up! has something for everyone: join my growing team and benefit from my support to enjoy Stampin' Up! however you choose.

If you're interested, call me for a chat to understand how I can help you realise your goals. Alternatively, if you have already decided to sign up and you just can't wait, please click here for the link to the online form where you can sign up and order your starter kit right away! 

About Me

Hi I'm Joanne and live in Northampton and when I'm not looking after my husband and two beautiful children, am an avid crafter with a passion for all things Stampin' Up!

I must confess that I have never been a big rubber stamper - until I discovered Stampin' Up! that is. I love the fact that I can get such great results with co-ordinating stamps, inks, papers and punches - the possibilities are endless! Join me on my stamping journey as I share the things I love and be inspired to create amazing things yourself!

Follow Me

Monthly Newsletter

Box Builder

Click the button above to use Box Buster to create your custom box design using the Envelope Punch Board!

Kits Collection Now Available!

Stampin Cut and Emboss

The new Kits Collection from Stampin' Up! is now available!

Click here to see the current kits available and order yours online today.

I Design For


Stampin' Up Stuff

This is my personal blog and is not endorsed by Stampin’ Up! I hope you find it a plentiful source of ideas and personal inspiration but please don't copy my designs for contest submission or use for classes, publication or sale without express permission.