Today I'm sharing a fancy fold card that I made for my first technique class of the year that is also perfect for a couple of challenges this week:

The ladies over at TGIF Challenges are working with a love theme and the gals over at Just Add Ink have a blog hope this week featuring Pop Up and Interactive Cards. I urge you to check it out and the wonderful entries into this week's challenge, there are some fabulous examples of interactive cards on show.
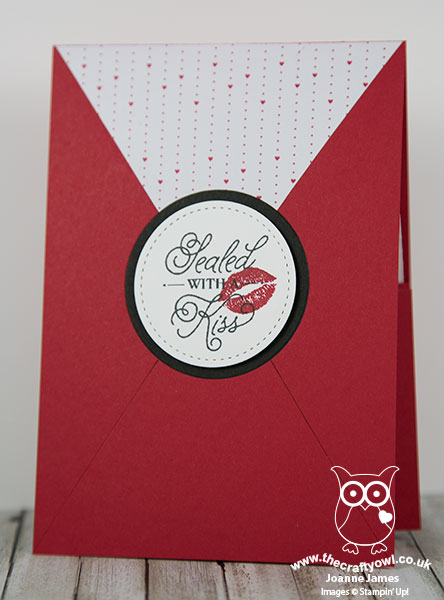
I have been wanting to have a go at the Twisted Pop Up Panel card that has been appearing everywhere over the internet in recent weeks, so having watched a few tutorials I got down to business. On the outside a fairly straightforward looking envelope-style card:
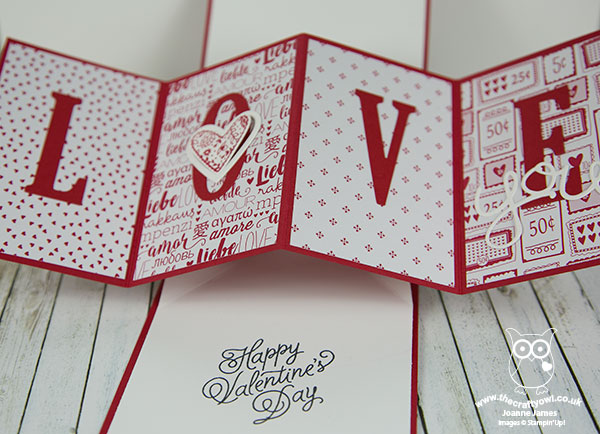
It's when you open it up that the magic happens and the pop-up is revealed:
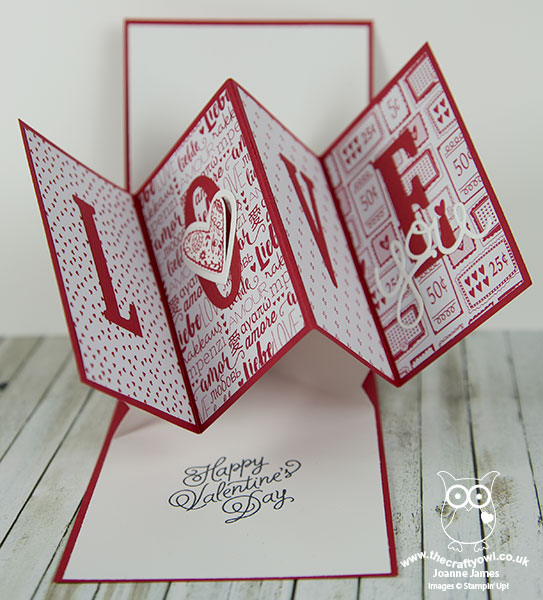
And here it is fully opened so that you can see the fun fold out panels in all their glory:
Here's the low-down on today's card:
Twisted Pop Up Panel Card - I looked at several different versions of this card in order to work out how to create my pop-up panel card and in true Crafty Owl fashion didn't follow any one set of instructions, rather combined a number of 'learns' to create my card. I may well shoot my own video tutorial on this later this week, so if you'd like to find out how I did it, then pop back and check it out. One things for sure, the ladies at my technique class loved it and have definitely got the bug for creating more of them now!
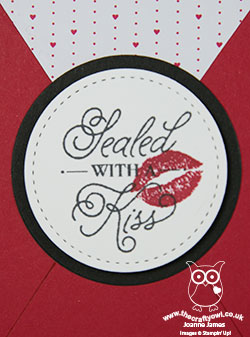
Sending Love in Red and White - My technique class featured the Sealed With Love product bundle - used for the 'Sealed with a kiss' button on the front of my card and that fabulous stamped and diecut heart that adorns the 'O' of the word LOVE. For me this card was a real opportunity to showcase the Sending Love Designer Series Paper Stack, with five different patterns on show. The real challenge was which five of the twelve red and white patterns in the DSP stack to choose - check them out:
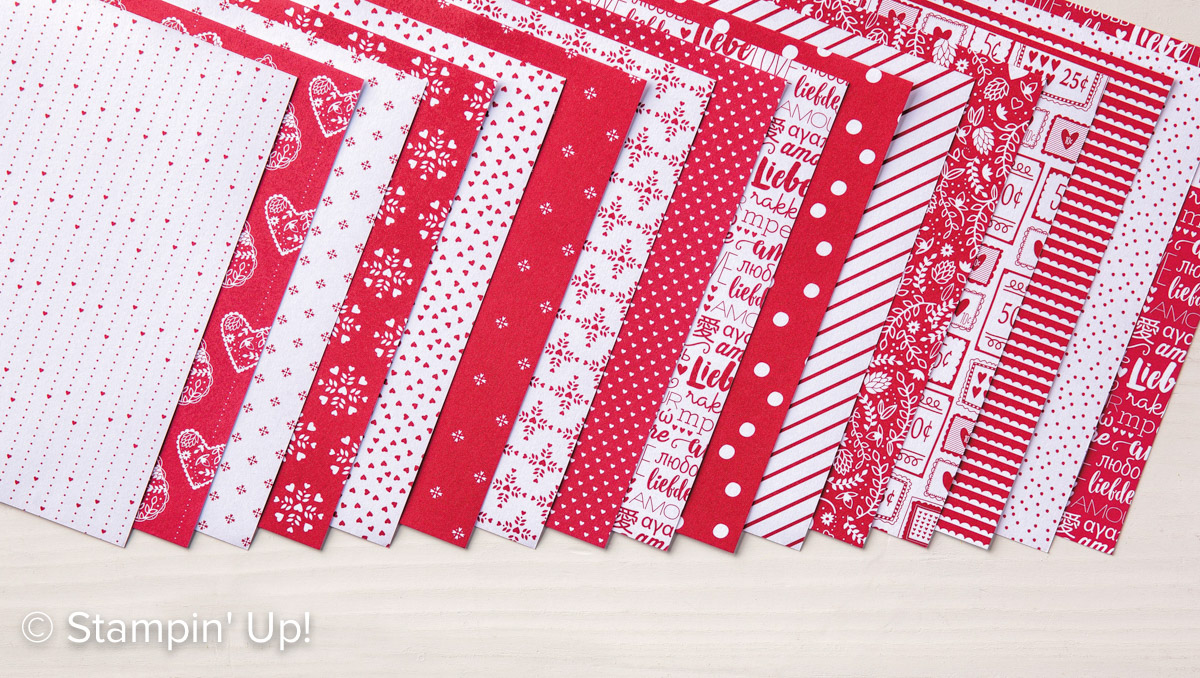
My team laugh at me as they think I have an unhealthy obsession with designer series paper and to be honest, they are probably right! I'm not one of those to keep it and stroke it though - I do cut into it and use it and am always looking for ways to incorporate it into my designs. I particularly like the 6" x 6" stacks, which are incredibly good value for money.
Large Letters, Big Impact - I've said it before and I'll say it again - the Large Letter Framelits are great and well worth the investment! They are great for a sentiment with impact; I've paired mine with the 'you' from the 'Hello You Thinlits' to complete my Valentine's message. If you are considering purchasing the Large Letter Framelits, now is an even better time to pop them in your shopping basket - add a little something to them and earn two free Sale-A-Bration items or alternatively why not include them in a starter kit?
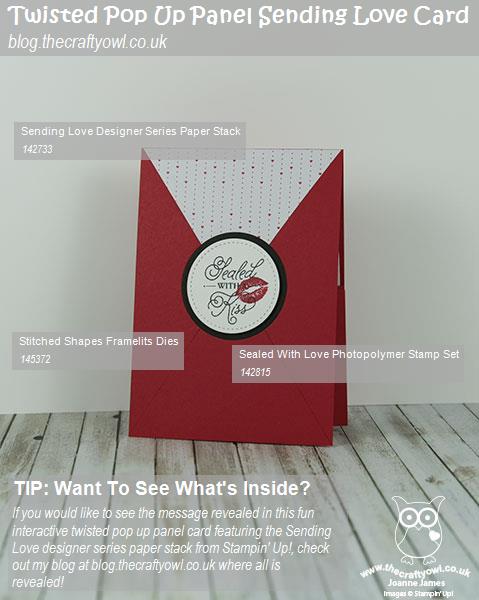
Here is the visual summary of the key products used on today's project for you to pin for easy reference:
You can see all of my 'How To' summaries on my 'How To - Tips and Techniques' Pinterest board in case you've missed any.
Enjoy your day and I'll be back tomorrow with another project. Until then, happy stampin'!
Stampin' Up! Supplies Used: