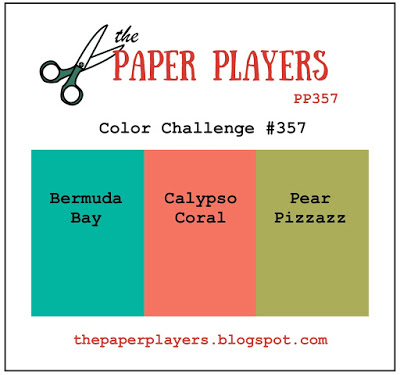
It's Sunday and time for this week's new challenge over at The Paper Players! Firstly, thanks to everyone who left such lovely comments on my High Tide square pop out swing card last week; I have a few more cards made using the same design and will be sharing a more detailed 'how to' for this fun fold, so stay tuned for more information on this one. Back to today: it's the turn of the awesomely-inspiring Sandy to host this week and she has a colour challenge for us to work with:

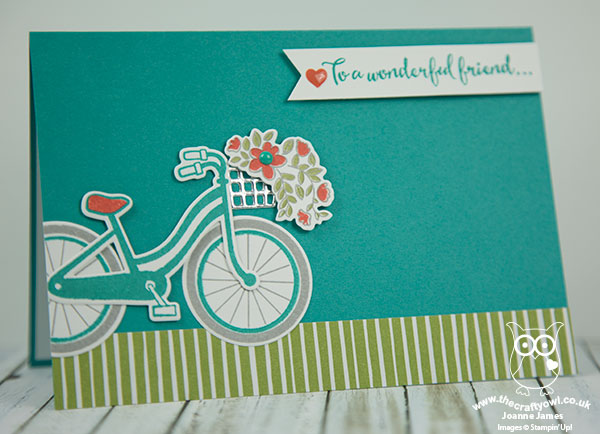
I must say I did find this colour palette rather challenging; the green got me thinking of flowers, but I was struggling to make the three colours work together. Instead I chose to focus on the blue and I took the opportunity to get out my Bike Ride stamp set and create a fun birthday card - take a look:
Here's the low-down on today's card:
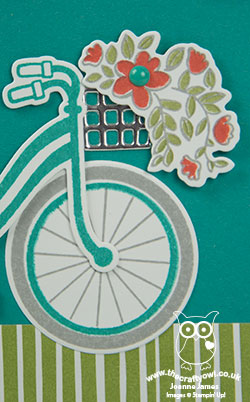
Build A Bike Made Simple - This is the first time I've use my Bike Ride stamp set with the co-ordinating Build A Bike Framelits, as the cards I made with it previously were having returned from Onstage in Amsterdam where we received the stamp set only as an all-attendee giveaway but not the framelits. What a difference they make - I pieced together the pieces of my bicycle with ease and got to use the little wire basket too - love it!
Flip The Sketch And Chop The Bike - I used the sketch over at CAS Colours & Sketches for my layout today (I figured a bike is about as non-rectangular a shape as you can get!), rotating it through 180 degrees as I wanted my bike to be riding onto my card rather than off it. Patricia's sketch shows the shape appearing to hang off the edge of the card so there was nothing else for it - I chopped off the end of my bicycle! I think it works though - if anything, it adds to the sense of movement I think.
Coffee Break Border - My card is predominantly blue, with the Pear Pizzazz and Calypso Coral featuring only in small quantities: the flowers in the basket, a heart enamel dot. I almost left it there, but I felt like I wanted to ground my bicycle and include a little more of one of the colours so added a strip of Coffee Break designer series paper with a subtle green and white stripe.
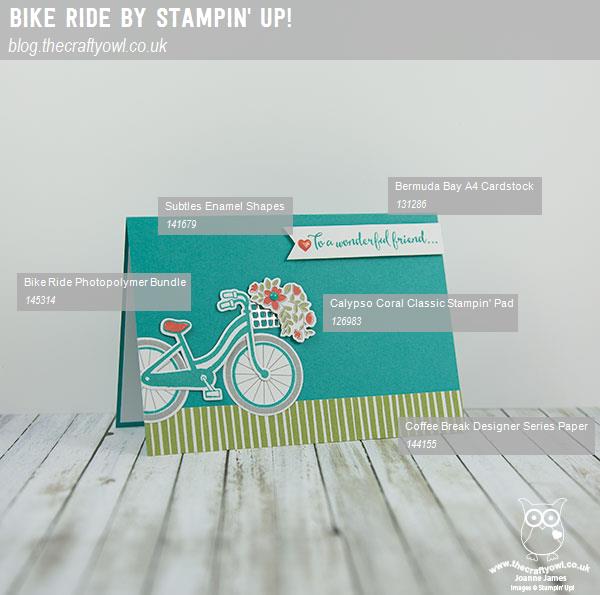
Here is the visual summary of the key products used on today's project for you to pin for easy reference:
You can see all of my Product and 'How To' summaries on my 'How To - Tips and Techniques' Pinterest board in case you've missed any.
Before you reach for your ink and papers, check out what our amazing team has created to inspire you this week:
The Paper Players Design Team
Here's a quick recap of our challenge rules:
1. Create a new paper project
2. Upload your creation to your blog with a link back to us and provide a direct link to the post featuring your challenge submission.
3. Please link your card to no more than four challenges, TOTAL.
4. Have FUN!
I look forward to seeing what you create with this week's colour palette. Enjoy the rest of your weekend - we are continuing with Ben's weekend of birthday celebrations, so lots of fun to be had here! I'll be back tomorrow with another project; until then, happy stampin'!
Stampin' Up! Supplies Used: