Today it's Sunday and time for this week's new challenge over at The Paper Players! It's Laurie's turn to host this week and as it's the fifth Sunday of the month we have a tic-tac-toe challenge for you to work with:


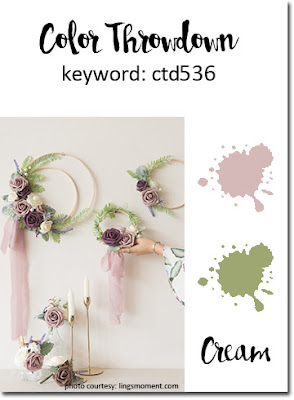
I really struggled with my card today - too many options to choose from on Laurie's fabulous board! I was also under a little time pressure having left my card to the last minute, which is never good for creativity! I also used this week's sketch over at Stamp Ink Paper which is great for a blank canvas with a central focal sentiment and my card also happens to use the colours over at Color Throwdown this week (as close as I have to them). So after much deliberating, I went down the left hand row of Laurie's TicTacToe board to create an Easter card (I've just realised it works for the diagonal too!) - take a look:

Here's the low-down on today's card:
Sale-A-Bration Shades of Purple - I chose to feature this pretty floral paper from the Sale-A-Bration Botanical Butterfly paper pack as the background for my card today. Such a pretty pattern - if you like it as much as I do, then you only have today to still snap it up as this year's Sale-A-Bration promotion is finally coming to an end. I softened it with a piece of vellum, so that it didn't distract from my main design yet still adds a delicate pattern detail.
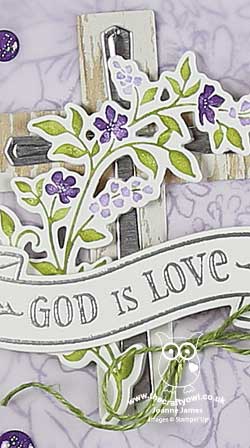
Cross Of Hope - Today's Easter card features a layered cross as the basis for the centre piece: a simple cross cut from Wood Textures DSP and overlaid with a simple silver one at its centre. There are some beautiful cross dies in this framelit set (check out my fellow paper Player LeAnne's card for an example of one of my favourites) however simple was my choice for today to allow my florals to shine.
Easter Greetings - I inked my floral stem with my Stampin' Write markers and overlaid the whole thing with an uplifting sentiment from the 'Hold on To Hope' stamp set, which I heat embossed in silver onto white - I think this is a lovely banner for Easter. A linen twine bow and some glitter enamel dots finish my card.
So what do you think? In hindsight I think my card might have needed to be smaller in size or with a few extra layers behind, as the centre still seems a little overwhelmed by the background, but in the end I just decided to go with it! Feel free to let me know what you think in a comment below - it may prompt a rework!
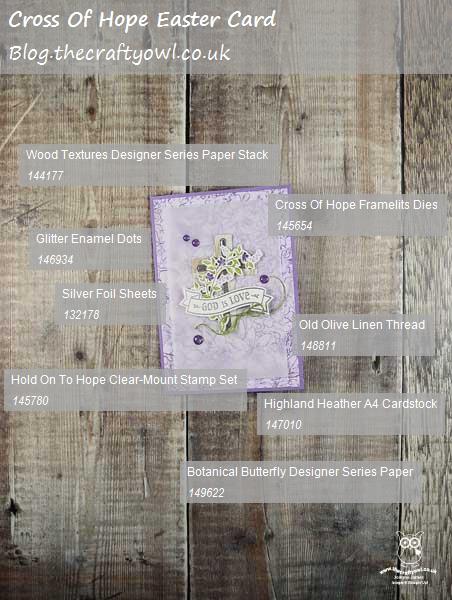
Here is the visual summary of the key products used on today's project for you to pin for easy reference:
You can see all of my Product and 'How To' summaries on my 'How To - Tips and Techniques' Pinterest board in case you've missed any.
Before you reach for your ink and papers, check out what our amazing team has created to inspire you this week:
The Paper Players Design Team
Here's a quick recap of our challenge rules:
1. Create a new paper project
2. Upload your creation to your blog with a link back to us and provide a direct link to the post featuring your challenge submission.
3. Please link your card to no more than four challenges, TOTAL.
4. Have FUN!
You can see all of my 'How To' summaries on my 'How To - Tips and Techniques' Pinterest board in case you've missed any.
It's Mother's Day here in the UK and we still have our German exchange student staying with us, so having experienced the delights of traditional British fish and chips yesterday, we are out to afternoon tea today. I'll try and remember to take a picture to share with you tomorrow! I'll be back tomorrow with another project and news of the fabulous new range of Stampin' Up! storage that will be on sale from April 1st - and that's no joke! Until then, enjoy your day and happy stampin'!
Stampin' Up! Supplies Used: