Feels Like Frost Snowfall Thinlits CAS Christmas Card

by Joanne James19. October 2020 20:35

Happy Monday everyone! I've had a busy day with a great class this morning and physio and some chores this afternoon, so a quick post from me today with a Christmas card I made using the sketch over at CAS Colours and Sketches this week:

I had a few ideas for this sketch but ended up deciding to pair a returning favourite, the Feels Like Frost speciality paper with a cutaway circle, a diecut from the retired Snowfall Thinlits set and a heat embossed sentiment from the new Snowflake Wishes stamp set:


I added a few rhinestones to the foil diecut too for a little extra sparkle:


Here is the visual summary of the key products used on today's project for you to pin for easy reference:


You can see all of my 'How To' summaries on my 'How To - Tips and Techniques' Pinterest board in case you've missed any. 

Enjoy your evening and I'll be back tomorrow with another project. Until then, happy stampin'!


Stampin' Up! Supplies Used:

Table built using Product Table Builder by The Crafty Owl - Independent Stampin' Up! Demonstrator.

Cake and Cookies For PP513

by Joanne James18. October 2020 09:00

Today it's Sunday and time for this week's new challenge over at The Paper Players! It's the turn of the queen of diecuts, the lovely Laurie, to host this week and she has a Clean and Simple challenge for you to work with:


REMEMBER THIS IS CLEAN AND SIMPLE WEEK 
 
What do we mean by Clean and Simple?
 
Minimal layers and embellishments
Plenty of open space, aka "white" space
Simple and uncluttered 

I actually have a few cards for you today! First up - cake! A quick review of my stamp collection told me I had no current cake or cupcake stamps - go figure! So I decided to use Linda's sketch over at Freshly Made Sketches this week:

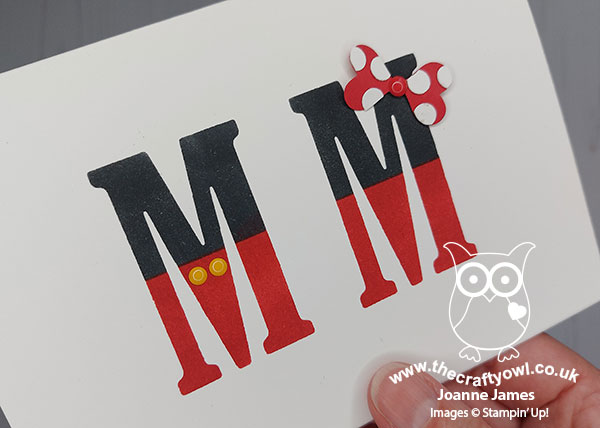
 myI used my current Playful Alphabet Dies, along with some retired Patio Party designer series paper and last year's 'Piece of Cake' stamp set to create a couple of clean and simple cake-themed cards. Here's the first one using the negative space of the diecut letters:


And a close up of that fun sentiment:


And here's the second card, using the same paper and alternative colour base with the actual diecut letters, popped up on foam adhesive sheets:


Both cards finish with this sentiment on the inside:


Perfect for birthdays or other occasions! Here's a picture of them both together:


The Patio Party paper actually dates back to 2013 so I'm thinking there won't be many of you with some of this on your shelves (unless you are a paper hoarder like me!!) so I also made a third card using current products and this week's Global Design Project sketch:

For this card I reached for my 'Nothing's Better Than' bundle and tweaked my sentiment to create a festive cookie card:


I paired my cookies with some festive plaid from the Plaid Tidings DSP pack (15% off in this month's DSP sale!); having photographed my card, I wish I'd added a sprig of holly too (maybe I'll go back and add one on before I send it!) but to be fair this card is less clean and simple than the first two, with a few more layers and elements so probably best I quit when I did!


Here is the visual summary of the key products used on the above project for you to pin for easy reference:


You can see all of my Product and 'How To' summaries on my 'How To - Tips and Techniques' Pinterest board in case you've missed any. 

Before you reach for your ink and papers, check out what our amazing team has created to inspire you this week:

Here's a quick recap of our challenge rules:
 
1.  Create a new paper project
2.  Upload your creation to your blog with a link back to us and provide a direct link to the post featuring your challenge submission.
3.  Please link your card to no more than four challenges, TOTAL.
4.  Have FUN!

You can see all of my 'How To' summaries on my 'How To - Tips and Techniques' Pinterest board in case you've missed any. 

Enjoy your day; we will be having a quiet family day today as we head into the start of the half-term holiday for one of the James Juniors at least (the other has another 4 days of school to go!). I managed to get some crafting done yesterday so will definitely be back tomorrow with another project. Until then, happy stampin'!


Stampin' Up! Supplies Used: 

Table built using Product Table Builder by The Crafty Owl - Independent Stampin' Up! Demonstrator.

Foiled Autumn Leaves TTT86

by Joanne James15. October 2020 18:00

It's Thursday and time for a new challenge over at TicTacToe! It's the turn of Team X to host this week and the lovely LeAnne is our featured designer this week. This is the fun board that we are playing along with: 


My card works for either of the diagonals: stitching, circle, diecut or gold foil, circle, designer paper today! I decided to CASe Sharon's card over at Less Is More with a trio of punched autumn leaves for a card for someone special today - take a look:


Here's the low-down on today's card:

I featured a small area of the vanilla foiled Gilded Autumn designer paper between some curvy stitched borders (courtesy of the snowdrifts in the Freezin' Friends Dies!) and then punched a trio of leaves and mounted these on a selection of gold and copper foil and glimmer paper stitched circles at the meeting point. A gold heat-embossed fussy cut sentiment from 'Rooted In Nature' on the front was paired with this sentiment on the inside of my card:


Foil is always difficult to photograph, so I hope you can see how pretty this card is! I must say having seen some of the other cards from the design team this week, I now have a desire to go and make this card in burgundy too!

Here is the visual summary of the key products used on today's project for you to pin for easy reference:

You can see all of my Product and 'How To' summaries on my 'How To - Tips and Techniques' Pinterest board in case you've missed any. 

One more look at that pretty glittery leaf trio:


A tictactoe board offers so many creative possibilities - how does this week's board inspire you? Why not have a go? We would love to see you in the gallery and who knows - you might be selected for Designer's Choice and be eligible to be a guest designer on a future challenge. 

Enjoy your evening; I am still resting up and will be spending my evening attending a 6th Form Virtual Open Evening with Rebecca from the comfort of the sofa whilst recovering from today's physiotherapy session. I'll be back tomorrow with another project. Until then, happy stampin'!


Stampin' Up! Supplies Used: 

Table built using Product Table Builder by The Crafty Owl - Independent Stampin' Up! Demonstrator.

Let Faith Be Your Biggest Fear Meets Artistry Blooms

by Joanne James12. October 2020 07:00

It's Monday and to start the week I have a short post to share a couple of cards I made with this week's Freshly Made Sketches layout:


They are both encouragement cards, this time with the optional addition of pink, perfect for the current Time Out challenge. One of my cards also features an ombre background which is the trend over at Just Us Girls this week. Here's the first one:


And here's the second one, featuring another of the papers in the Artistry Blooms paper pack: 


Both cards feature a wonderful encouraging sentiment from the 'Ridiculously Awesome' stamp set, that is rather appropriate today as I am headed off for shoulder surgery. I am putting all my faith on my surgeon, that's for sure!

So which one is your favourite? I love them both and will be making a few more with these papers this month whilst they are on offer in the DSP sale :-)

Here is the visual summary of the key products used on today's project for you to pin for easy reference:


You can see all of my 'How To' summaries on my 'How To - Tips and Techniques' Pinterest board in case you've missed any. 

Enjoy your day and I'll be back tomorrow with another project. Until then, happy stampin'!


Stampin' Up! Supplies Used:

Table built using Product Table Builder by The Crafty Owl - Independent Stampin' Up! Demonstrator.

Life is Beautiful Autumn Leaves PP512

by Joanne James11. October 2020 09:00

It's Sunday and time for this week's new challenge over at The Paper Players! I'm back following a break last week as I was running my first virtual Creative Escapes Weekend Craft Retreat. More news on that later this week; today it's the turn of the amazing Ann to host this week and she has a seasonal colour challenge for you to work with:


These colours are just perfect for autumn; as I've been driving through the countryside on the school run this week, I have marvelled at just how wonderful the trees are looking with their blends of colour, so armed with my ink pads, some sponge daubers and the current Fusion sketch, I grabbed my 'Life is Beautiful' stamp set and set about recreating the look. This is what I came up with:


Super simple, with a couple of punched banners and stapled ribbon decoration, but oh so pretty with those variegated autumn leaves.

Here is the visual summary of the key products used on today's project for you to pin for easy reference:


You can see all of my Product and 'How To' summaries on my 'How To - Tips and Techniques' Pinterest board in case you've missed any. 

Before you reach for your ink and papers, check out what our amazing team has created to inspire you this week:

Here's a quick recap of our challenge rules:
 
1.  Create a new paper project
2.  Upload your creation to your blog with a link back to us and provide a direct link to the post featuring your challenge submission.
3.  Please link your card to no more than four challenges, TOTAL.
4.  Have FUN!

You can see all of my 'How To' summaries on my 'How To - Tips and Techniques' Pinterest board in case you've missed any. 

Enjoy your day; I will be busy finishing up some bits and pieces before going in to hospital tomorrow for surgery on my shoulder. This will be my fourth visit in 14 months and I'm hoping this will be the last! I will still be sharing here though and will be back tomorrow with another project. Until then, happy stampin'!


Stampin' Up! Supplies Used: 

Table built using Product Table Builder by The Crafty Owl - Independent Stampin' Up! Demonstrator.

Always Grateful With Celebration Tidings TTT84

by Joanne James1. October 2020 18:00

It's Thursday and time for a new challenge over at TicTacToe! It's the turn of Team X to host and I am the featured designer this week. I chose lots of autumnal elements for my board: 


I used the same layout on today's card as the one I used for Monday's Christmas card (you can see that card here if you missed it). I went across the first row of the tictactoe board, with Plaid-Pumpkin-Thankful and I embraced those fresh Color Dare colours to make a bright autumnal thank you card - take a look:


Here's the low-down on today's card:

I stamped the pumpkin image from the 'Celebration Tidings' stamp set in Memento Tuxedo Black onto a stitched rectangle and coloured this image with my Stampin' Blends, using a panel of bright Plaid Tidings designer paper for my background and some retired Old Olive ribbon from my box to add in a little more green. I used Mango Melody cardstock for my cardbase and Pumpkin Pie for my mat layer - I love how bright this card looks, compared to if I'd used darker, richer colours. Good news on that Plaid Tidings paper too - it, along with many other designs, is on sale for the whole of the month of October as part of Stampin' Up!'s Designer Series Paper sale - more details to follow on that in another post later!

Here is the visual summary of the key products used on today's project for you to pin for easy reference:


You can see all of my Product and 'How To' summaries on my 'How To - Tips and Techniques' Pinterest board in case you've missed any. 

A tictactoe board offers so many creative possibilities - how does this week's board inspire you? Why not have a go? We would love to see you in the gallery and who knows - you might be selected for Designer's Choice and be eligible to be a guest designer on a future challenge. 

Enjoy your day; I'll be back tomorrow with another project. Until then, happy stampin'!


Stampin' Up! Supplies Used: 

Table built using Product Table Builder by The Crafty Owl - Independent Stampin' Up! Demonstrator.

Merry and Bright Trimming The Town Christmas Card

by Joanne James28. September 2020 11:47

Happy Monday everyone! Today I'm earlier with my blog post as I was determined to be in time to share my card using Jacquie's sketch over at Freshly Made Sketches this week:

Such a great sketch; so simple yet so many ways you could interpret it! I have actually used this sketch twice this week - you will see it again on Thursday in my TicTacToe Design Team challenge card - but for today's card I couldn't resist creating layers and having some fun with one of my favourite Christmas Designer Series Papers - take a look:


Here's the low-down on today's card:

It's All About Trimming The Town - Today's card is very much all about the designer series paper. And as papers go, the Trimming The Town Designer Series Paper really has it all: cosy villages and winter scenes, whimsical homes and co-ordinating images, many of which can be cut out using the Home Together Dies, and two sheets of festive sentiments in a range of European languages. I used the paper for my snowy background, then used my Home Together Dies to cut out two houses, a wreath and a tree to decorate my card. I even fussy cut a sentiment and added this to my snowdrift. 

Layered Landscape - I decided to focus on creating my scene across the horizontal strip that features on Jacquie's FMS sketch, using two separate Whisper White 'snowdrifts' to add structure and form to my landscape, also cut using the Home Together Dies, then tucked my house in between and added my tree and sentiment to the front. This creates lots of interest and dimension, but in a small horizontal space, which keeps the clean feel of my card. You can see the layers better below:


What No Stamping? - Today's card is essentially a 'no stamping' card; I did stamp a sentiment on the inside and wanted to share it with you since the Coming Home stamp set is an image-only set. I have been trawling my other stamp sets for sentiments for house- and home-related greetings, especially because I am using the Trimming The Town Suite for my Creative Escapes Craft Retreat this weekend and I want to be able to share my suggestions with the ladies attending. The greeting I used inside today's card comes from the Poinsettia Place stamp set:

I'll share others as I use them on my cards in the coming weeks. So what do you think of this paper-based card? Does it tick your box? Do let me know in the comments below - I'd love to hear your thoughts. 

Here is the visual summary of the key products used on today's project for you to pin for easy reference:


You can see all of my 'How To' summaries on my 'How To - Tips and Techniques' Pinterest board in case you've missed any. 

Enjoy your day: I'm doing one of my favourite things, making treats to go out in the boxes with my virtual retreat boxes this weekend. I'll be back tomorrow with another project. Until then, happy stampin'!


Stampin' Up! Supplies Used:

Table built using Product Table Builder by The Crafty Owl - Independent Stampin' Up! Demonstrator.

Brightly Gleaming Dove of Hope PP510

by Joanne James27. September 2020 09:00

Today it's Sunday and time for this week's new challenge over at The Paper Players! It's my turn to host this week and I have my favourite, a sketch challenge for you to work with:


I love clean and layered cards and decided to incorporate lots of layers into this week's sketch. Lots of ways to interpret it - I decided to go with something new and a returning favourite and create another Christmas card for my stash:


Here's the low-down on today's card:

Dove of Hope - There are lots of elements to today's card but my focal point is one of the doves and sentiment from the new Dove of Hope bundle. There are two stamped doves and an additional diecut dove in the Detailed Dove Die set, and I used the only left-facing one on my card. The stamp set has a number of sentiments, including this one that is perfect for decorating the inside of your card:

Brightly Gleaming - I paired my dove with some of the Brightly Gleaming designer series paper and used this to inspire my Pretty Peacock and Very Vanilla colour scheme. The Brightly Gleaming Specialty Designer Series Paper is a returning favourite from last year; it's great to be able to use if again!

Brushed Metallics - I decided to add in some Brushed Metallic Cardstock in gold to tie in with my metallic edge ribbon and add an additional touch of luxury and elegance to my card. I carried this through to my card too, where on a whim I added a strip of sparkly gold washi tape to the edge of my envelope flap, but have to say I quite like it!

I really like the Dove of Hope Bundle and think it has lots of creative possibilities. It is going to be the focus bundle for my November online card class so if you like this set too, I'd love you to join me. Message me to book your place.

Here is the visual summary of the key products used on today's project for you to pin for easy reference:


You can see all of my Product and 'How To' summaries on my 'How To - Tips and Techniques' Pinterest board in case you've missed any. 

Before you reach for your ink and papers, check out what our amazing team has created to inspire you this week:

Here's a quick recap of our challenge rules:
 
1.  Create a new paper project
2.  Upload your creation to your blog with a link back to us and provide a direct link to the post featuring your challenge submission.
3.  Please link your card to no more than four challenges, TOTAL.
4.  Have FUN!

You can see all of my 'How To' summaries on my 'How To - Tips and Techniques' Pinterest board in case you've missed any. 

Enjoy your day; following a busy day yesterday we are having a day at home with all hands on deck as I complete the final preparations for my bi-annual retreat which is next weekend. There will be lots of diecutting from everyone! I'll be back tomorrow with another project. Until then, happy stampin'!


Stampin' Up! Supplies Used: 

Table built using Product Table Builder by The Crafty Owl - Independent Stampin' Up! Demonstrator.

Stitched Leaf Trio Thank You Card AYSI 235

by Joanne James25. September 2020 12:00

Friday already - wow, that was a quick week! Thank you to everyone who placed orders during the 24 hour stamp sale - there will be lots of lovely bargains heading your way next week! For those of you that missed out - please be sure that you are following my blog and social media channels I'm sh to be reminded of special offers and events and make sure you are signed up for my newsletter by clicking here.

Back to today and I'm sharing my design team card for our new challenge over at As you See It where it's time for a theme challenge:


I was struggling to be creative with my AYSI card this week (too many other things on my mind I think!), so I paired up with those intriguing colours over at Color Throwdown and the Autumn theme over at Paper Craft Crew and decided to go with some atypical leaves - take a look at what I came up with:


Here's the low-down on today's card:

All About The Stitching - Today's card is definitely all about the stitching! I was tempted to use my most favourite of stitched items, my Stitched Shapes Dies, on today's card, but for once they don't feature at all! I decided to go with the Lovely Leaves bundle and Stitched Leaves Dies. Not only do they have those lovely leaf outlines with detailed dies for the centre, there is the fabulous stitched lines die that I used on the panel behind my leaves, which is great for adding interest on all kinds of cards. I also used my Rectangle Stitched Framelits to cut out this panel for added stitch detail. 

Beautiful Autumn - I could have used a sentiment from the Lovely Leaves set on today's card, but I had someone in mind for today's card and instead reached for one of my personal favourites from the 'Beautiful Autumn' stamp set, which is more appropriate. I stamped it in Early Espresso as opposed to black as it fitted in better with the autumnal feel of my card.

Stitched Detail Tip - The other lovely thing about the central stitched detail pieces is that they can be used to add detail to stamped leaves too, even if they haven't been cut out. I've shown this on my envelope flap before and I also added this detail onto my inner lining:


Whilst Cinnamon Cider and Sahara Sand are the dominant colours on today's card, the pop of colour from my blue and aqua leaves really brightens up my card, don't you think? It makes a nice change from the reds and yellows in my view, but I'd love to hear your thoughts!

Here is the visual summary of the key products used on today's project for you to pin for easy reference:


You can see all of my 'How To' summaries on my 'How To - Tips and Techniques' Pinterest board in case you've missed any. 

Here's a summary of our challenge rules:

  • Create any card, scrapbooking page, 3D project or packaging project that fits the challenge.
  • Please include the challenge graphic and link back to the challenge in your blog post. Turn off word verification so we can leave you lots of lovely comments. Make sure you link the post not the whole blog to the Linky. Use #AYSIXXX when uploading to a public gallery.
  • If you’re unsure about ‘the rules’, check the details under the Challenge Guidelines tab on the As You See It Challenge homepage.

We look forward to seeing your creations in the AYSI gallery.

Enjoy your day and I'll be back tomorrow with another project. Until then, happy stampin'!

Stampin' Up! Supplies Used:

Table built using Product Table Builder by The Crafty Owl - Independent Stampin' Up! Demonstrator.

Flight of Fancy Christmas Whoops-A-Daisy Angel

by Joanne James22. September 2020 11:25

Tuesday already! This is my first post for today; you will definitely want to check out my next post too about tomorrow's 24 hour flash stamp sale and details of my upcoming classes - you can see that here.

For today's creative post I'm sharing a card for a couple of challenges:


The team at Just Add Ink are asking us to 'Just Add A' to our cards and from the inspo list over at Festive Friday I chose stars, metallics and blue - with a little added glitter thrown in! The team at Festive Friday are celebrating World Space Week and whilst there are no planets on my card, I did feature a celestial being of another kind - take a look:


Here's the low-down on today's card:

A Is For ... - ... Angel! I adore this whimsical line-drawn angel in the 'Flight of Fancy' stamp set - she looks just like she stepped off the set of a primary school nativity play! I decided to give mine ginger red hair, a coat of clear Wink of Stella and super-sparkly Dazzling Diamonds wings for an overdose of cuteness. 

B Is For ... - ... Brightly Gleaming Specialty Designer Series Paper! This fabulous copper-foiled paper is a returning favourite from last year and mine was still on the shelf; my Paper Player teamie Ann, who also designs with the Festive Friday team, used the same paper on her card this week and it reminded me how fabulous it is. It inspired the whole colour scheme for my card - so pretty!

C Is For ... - ... Copper Brushed Metallic Cardstock! I used this cardstock for my mat and to diecut a swirly star die cut to tuck behind my main image for some added detail. I wanted to see how it paired with the starry paper and whilst it isn't as super shiny as copper foil, it does add a beautiful sheen to compliment it.

This little angel totally reminds me of a play that the James Juniors did at Christmas once when they were at primary school called 'Whoops-A-Daisy Angel' (hence the title of today's blog post) - is there anything more adorable than little children, with wings and halos all askew, singing along at the tops of their voices to Christmas carols? Priceless!

Here is the visual summary of the key products used on today's project for you to pin for easy reference:


You can see all of my 'How To' summaries on my 'How To - Tips and Techniques' Pinterest board in case you've missed any. 

Enjoy your day and I'll be back tomorrow with another project. Until then, happy stampin'!


Stampin' Up! Supplies Used:

Table built using Product Table Builder by The Crafty Owl - Independent Stampin' Up! Demonstrator.

New Online Exclusives

There are new products available exclusively in the online store from 5 November - check them out here.

Latest Kits!

Stampin Cut and Emboss

The Layered Landscapes Kit and Nature's Paintings Kit are the latest kits in the online store - get yours here!

Shop Online

Access my online shop 24 x 7, 365 days of the year:

Current November hostess code:

9NKXDTTR

Shop Online

Mini Catalogue

BROWSE THE CATALOGUE

'Tis The Season - the new Stampin' Up! Mini Catalogue is here! For more details and to download your copy click here

Scrapbooking

Stampin' Up! has introduced a new range of 12x12" scrapbooking product and kit - the full range is now available to purchase online. To download a copy of the new digital Scrapbooking Catalogue click here.

2024-25 Annual Catalogue

BROWSE THE CATALOGUE

Click on the image to download your copy of the 2024-25 annual catalogue. For a full list of current SU! supplies, go to my online store. If you would like any help or advice, please drop me a line at joanne@thecraftyowl.co.uk or give me a call on 07773 421446 - I'd be happy to help.

Join My Team

It's always a great time to join Stampin’ Up! New team members can get £130 worth of products for only £99 + free business supplies + free shipping + all the fun being a part of Stampin’ Up! Stampin' Up! has something for everyone: join my growing team and benefit from my support to enjoy Stampin' Up! however you choose.

If you're interested, call me for a chat to understand how I can help you realise your goals. Alternatively, if you have already decided to sign up and you just can't wait, please click here for the link to the online form where you can sign up and order your starter kit right away! 

About Me

Hi I'm Joanne and live in Northampton and when I'm not looking after my husband and two beautiful children, am an avid crafter with a passion for all things Stampin' Up!

I must confess that I have never been a big rubber stamper - until I discovered Stampin' Up! that is. I love the fact that I can get such great results with co-ordinating stamps, inks, papers and punches - the possibilities are endless! Join me on my stamping journey as I share the things I love and be inspired to create amazing things yourself!

Follow Me

Monthly Newsletter

Box Builder

Click the button above to use Box Buster to create your custom box design using the Envelope Punch Board!

Kits Collection Now Available!

Stampin Cut and Emboss

The new Kits Collection from Stampin' Up! is now available!

Click here to see the current kits available and order yours online today.

I Design For


Stampin' Up Stuff

This is my personal blog and is not endorsed by Stampin’ Up! I hope you find it a plentiful source of ideas and personal inspiration but please don't copy my designs for contest submission or use for classes, publication or sale without express permission.