Today I'm sharing my design team card for our new challenge over at As you See It where it's time for a 'fill in the blank' challenge chosen by my dear friend Jan:
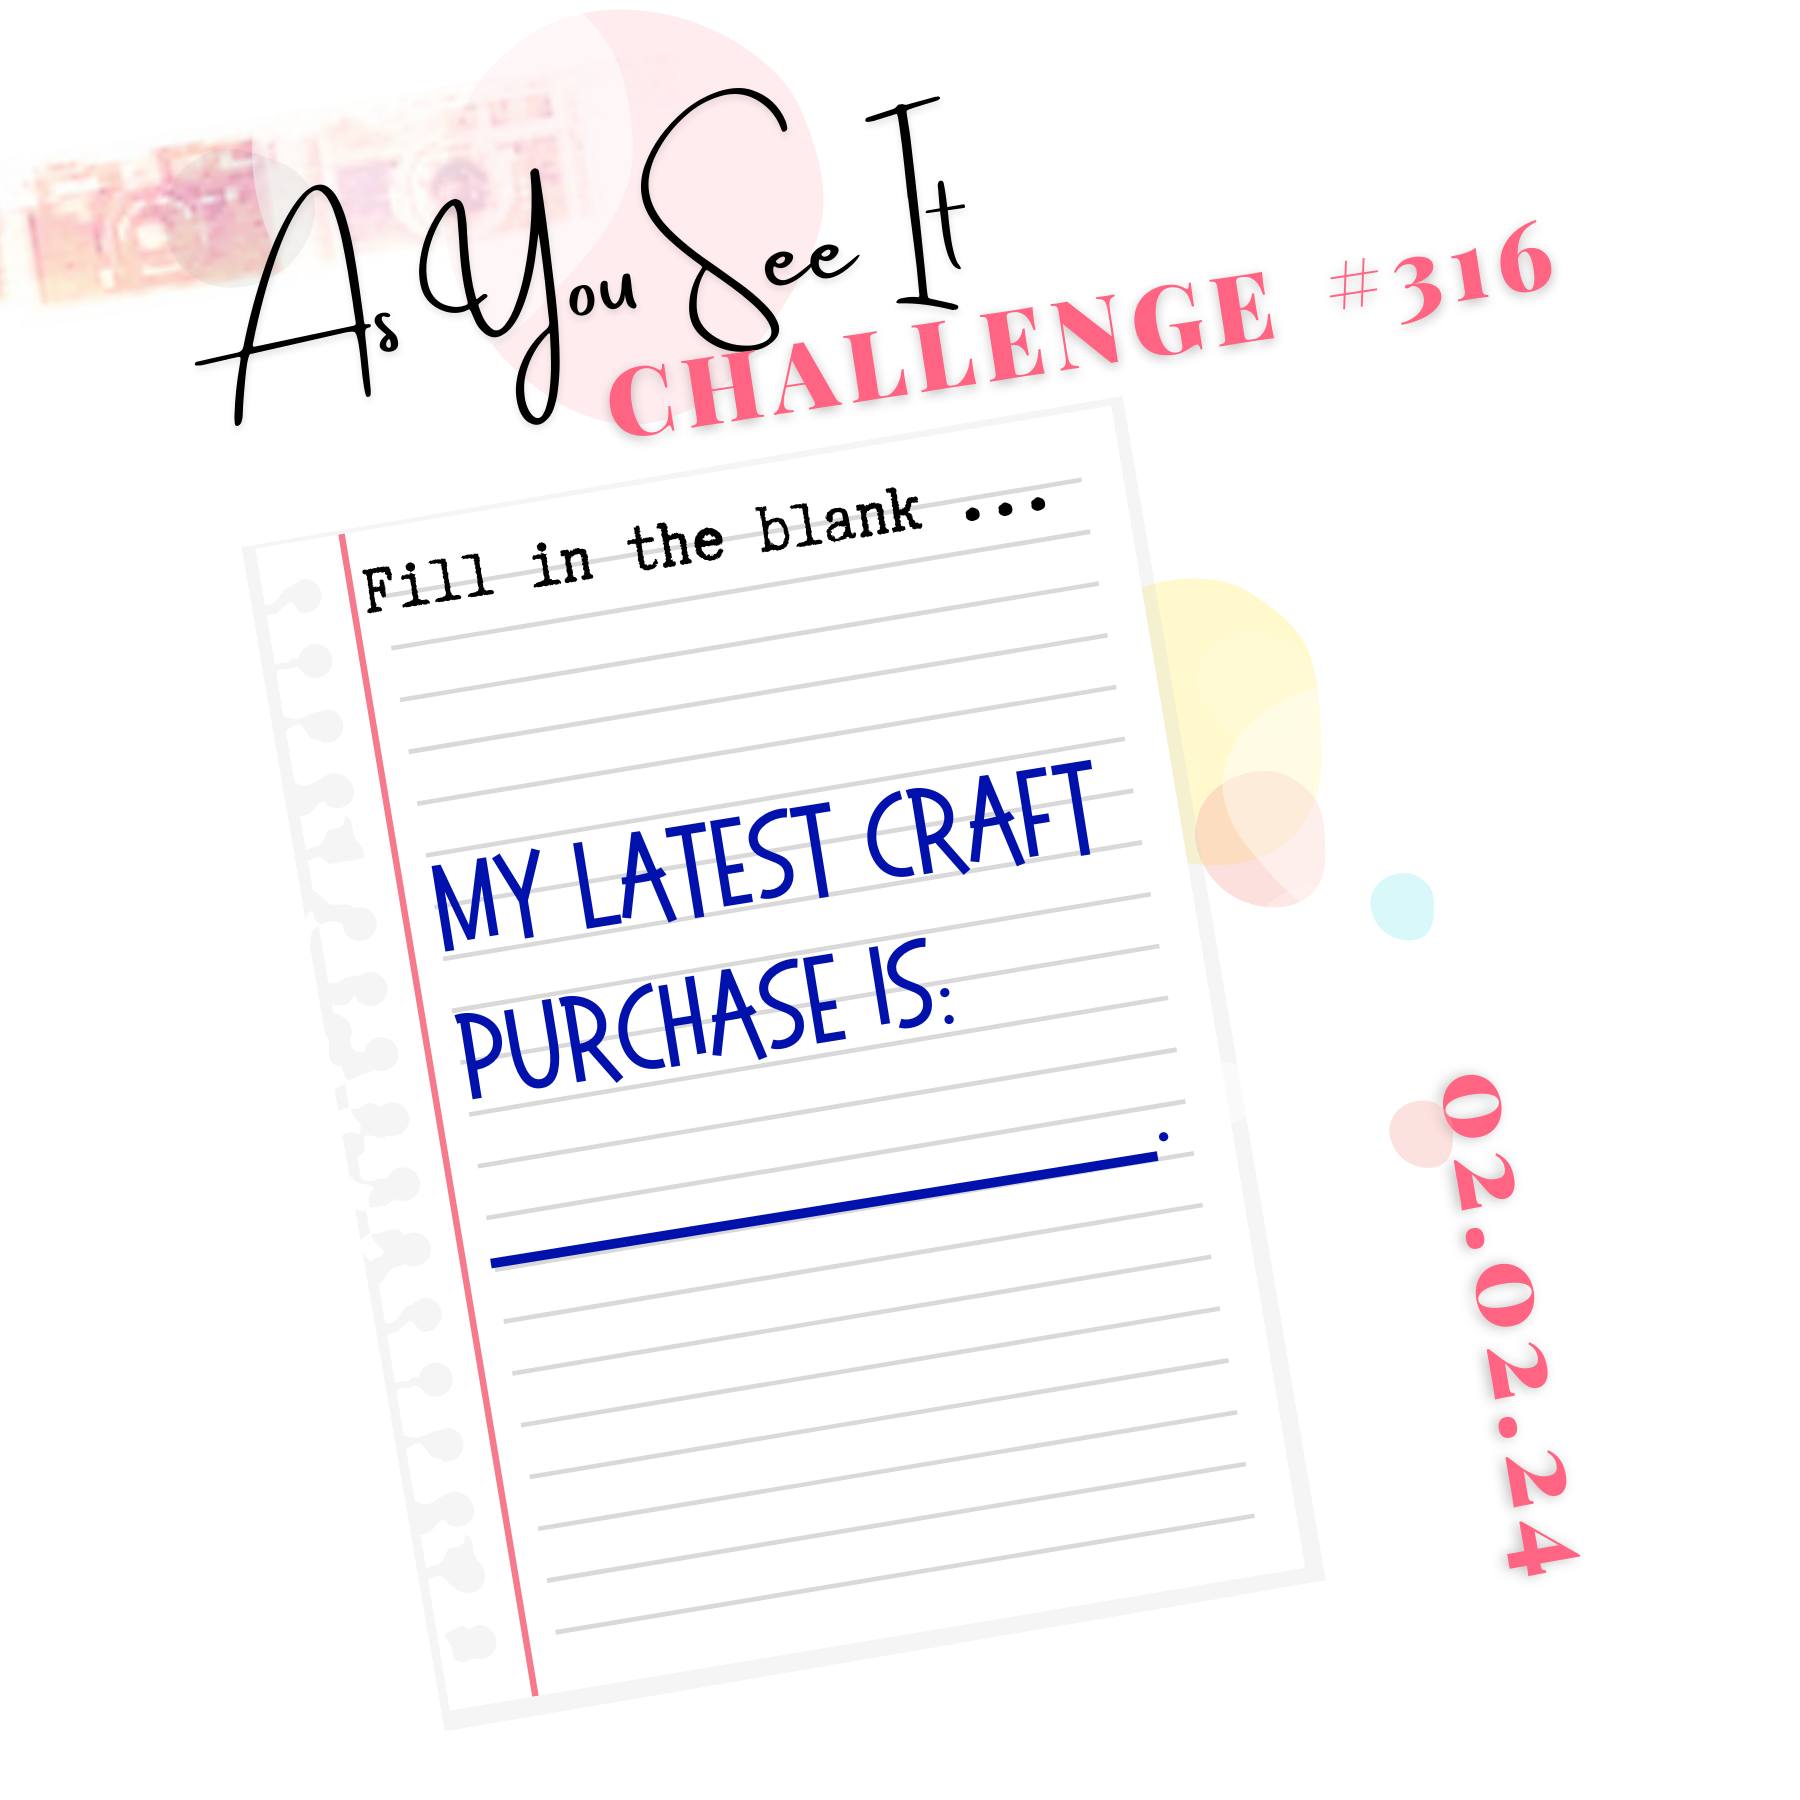

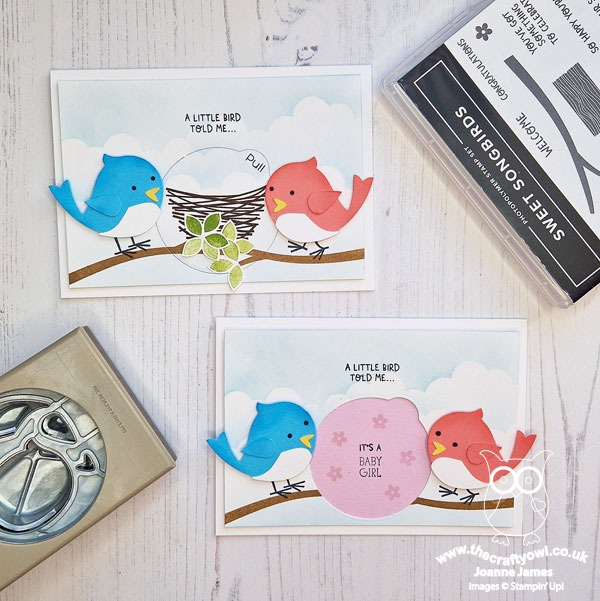
Time to confess, crafty shoppers - what was the last thing you purchased? At first glance you might be thinking I'm pulling your leg today, as my card features the 'Sweet Songbirds' stamp set and co-ordinating punch, both of which I've had for ages and shared several times before. Look more closely though and you will see I paired them with my most recent craft purchase: the 'Hooray For Surprises' bundle - take a look:
Here's the low-down on today's card:
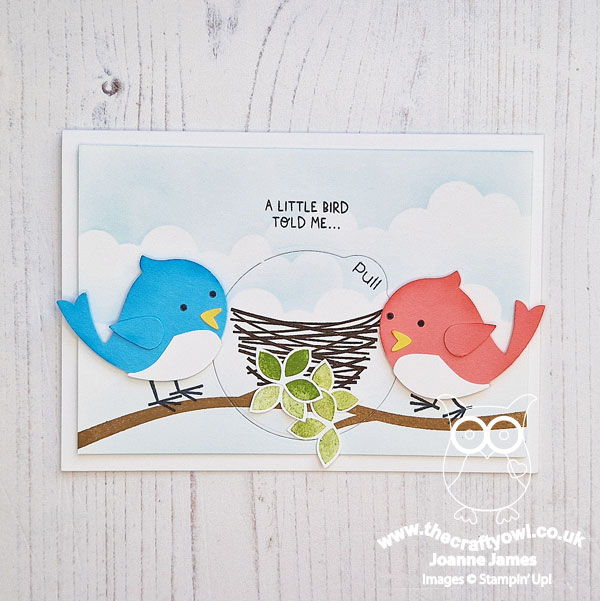
Hooray For Surprises - The 'Hooray For Surprises' bundle is so fun! The dies create perforated edges with a tab that allow you to easily create your own interactive cards. Simply pull the tab to reveal the message inside! I've been creating with this bundle a lot in recent weeks as it features in the next 'Join In With Joanne and Jan' craft tutorial bundle that I create with the lovely Jan Clothier. There are so many different ways you can create with the stamp set and dies together in this bundle, but for my card today I wanted to use one of the dies to show that there are tons of possibilities when you combine them with other sets too. I used Jen T's fabulous sketch over at Freshly Made Sketches this week as my starting point (turned through 90 degrees) and paired the largest of the round circle tab dies with my pair of birds and nest for a fun gender reveal card.
Here's the card front with a close up of the tab before opening:
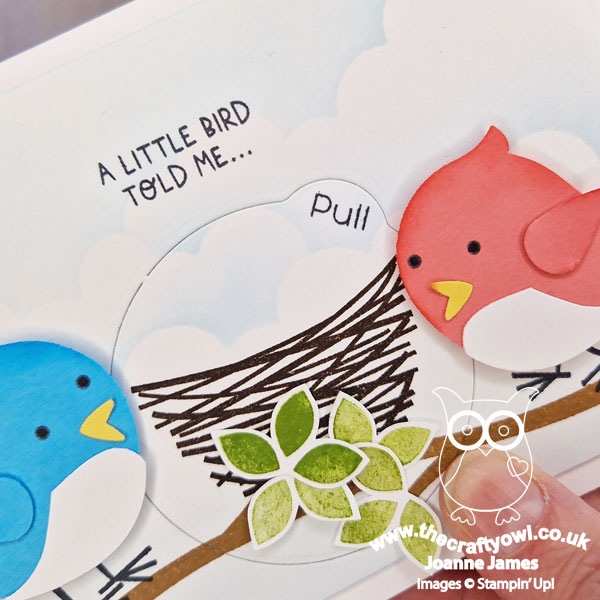
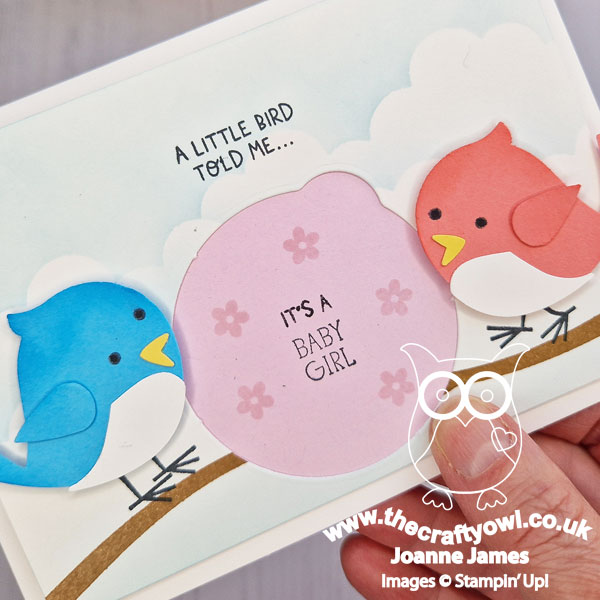
It's A ... - When the tab is removed, there is a message underneath that reveals whether or not the mummy and daddy bird parents are expecting a boy or a girl - check it out below:
Isn't that so fun?! I made two cards, showing both boy and girl inserts. Here's a close up of the baby girl version:
And here's the baby boy version:
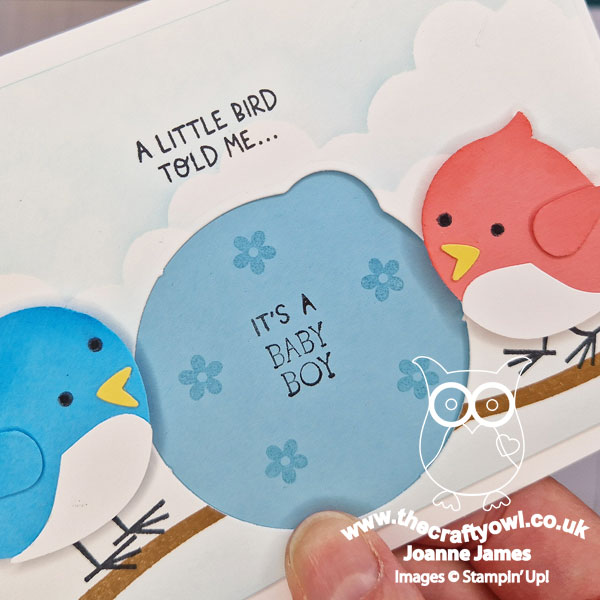
I stamped the surprise greeting with a combination of sets: the 'It's a' is from a couple of the sets in the Sweet Songbirds set and the 'Baby Boy/Baby Girl' comes from a long-retired set called 'Itty Bitty Baby', but you could just as easily hand write your own message or type one on the computer. So what do you think? I think this would make a lovely card to announce an impending birth to soon-to-be grandparents, for example, but I'd love to hear your thoughts - why not leave me a comment below!
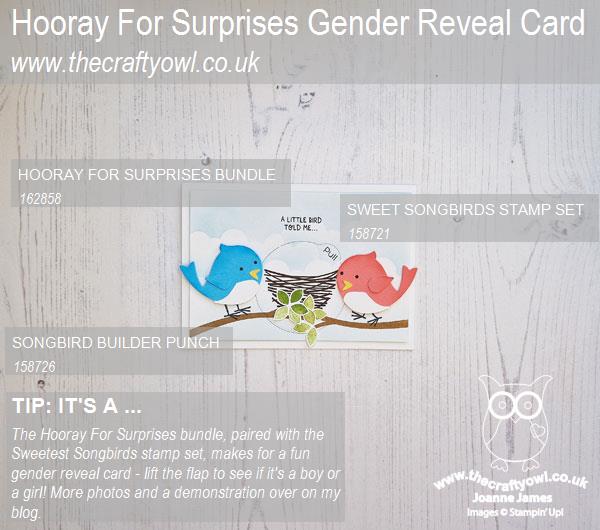
Here is the visual summary of the key products used on today's project for you to pin for easy reference:
You can see all of my 'How To' summaries on my 'How To - Tips and Techniques' Pinterest board in case you've missed any.
Remember if you purchase the 'Hooray For Surprises' bundle from either myself if you are in the UK or Europe or Jan if you are in New Zealand, then you will receive our tutorial featuring this set for FREE, along with access to our Private Facebook Group for more tips and tricks too. In addition, if you purchase before the end of February you will only be £1 away from a free Sale-A-Bration gift too!
Here's a summary of our challenge rules:
- Create any card, scrapbooking page, 3D project or packaging project that fits the challenge.
- Please include the challenge graphic and link back to the challenge in your blog post. Turn off word verification so we can leave you lots of lovely comments. Make sure you link the post not the whole blog to the Linky. Use #AYSIXXX when uploading to a public gallery.
- If you’re unsure about ‘the rules’, check the details under the Challenge Guidelines tab on the As You See It Challenge homepage.
- In a Fill in the Blank challenge, complete the sentence in the Challenge Banner with the phrase that is true for you and create your project using the words you used. Tell us what you said in your blog or on your site.
We look forward to seeing your creations in the AYSI gallery.
Enjoy your day and I'll be back tomorrow with another project. Until then, happy stampin'!
Stampin' Up! Supplies Used: