by Joanne James3. November 2023 12:00
Today I'm sharing my design team card for our new challenge over at As you See It where it's time for a festive recipe challenge chosen by Jane:
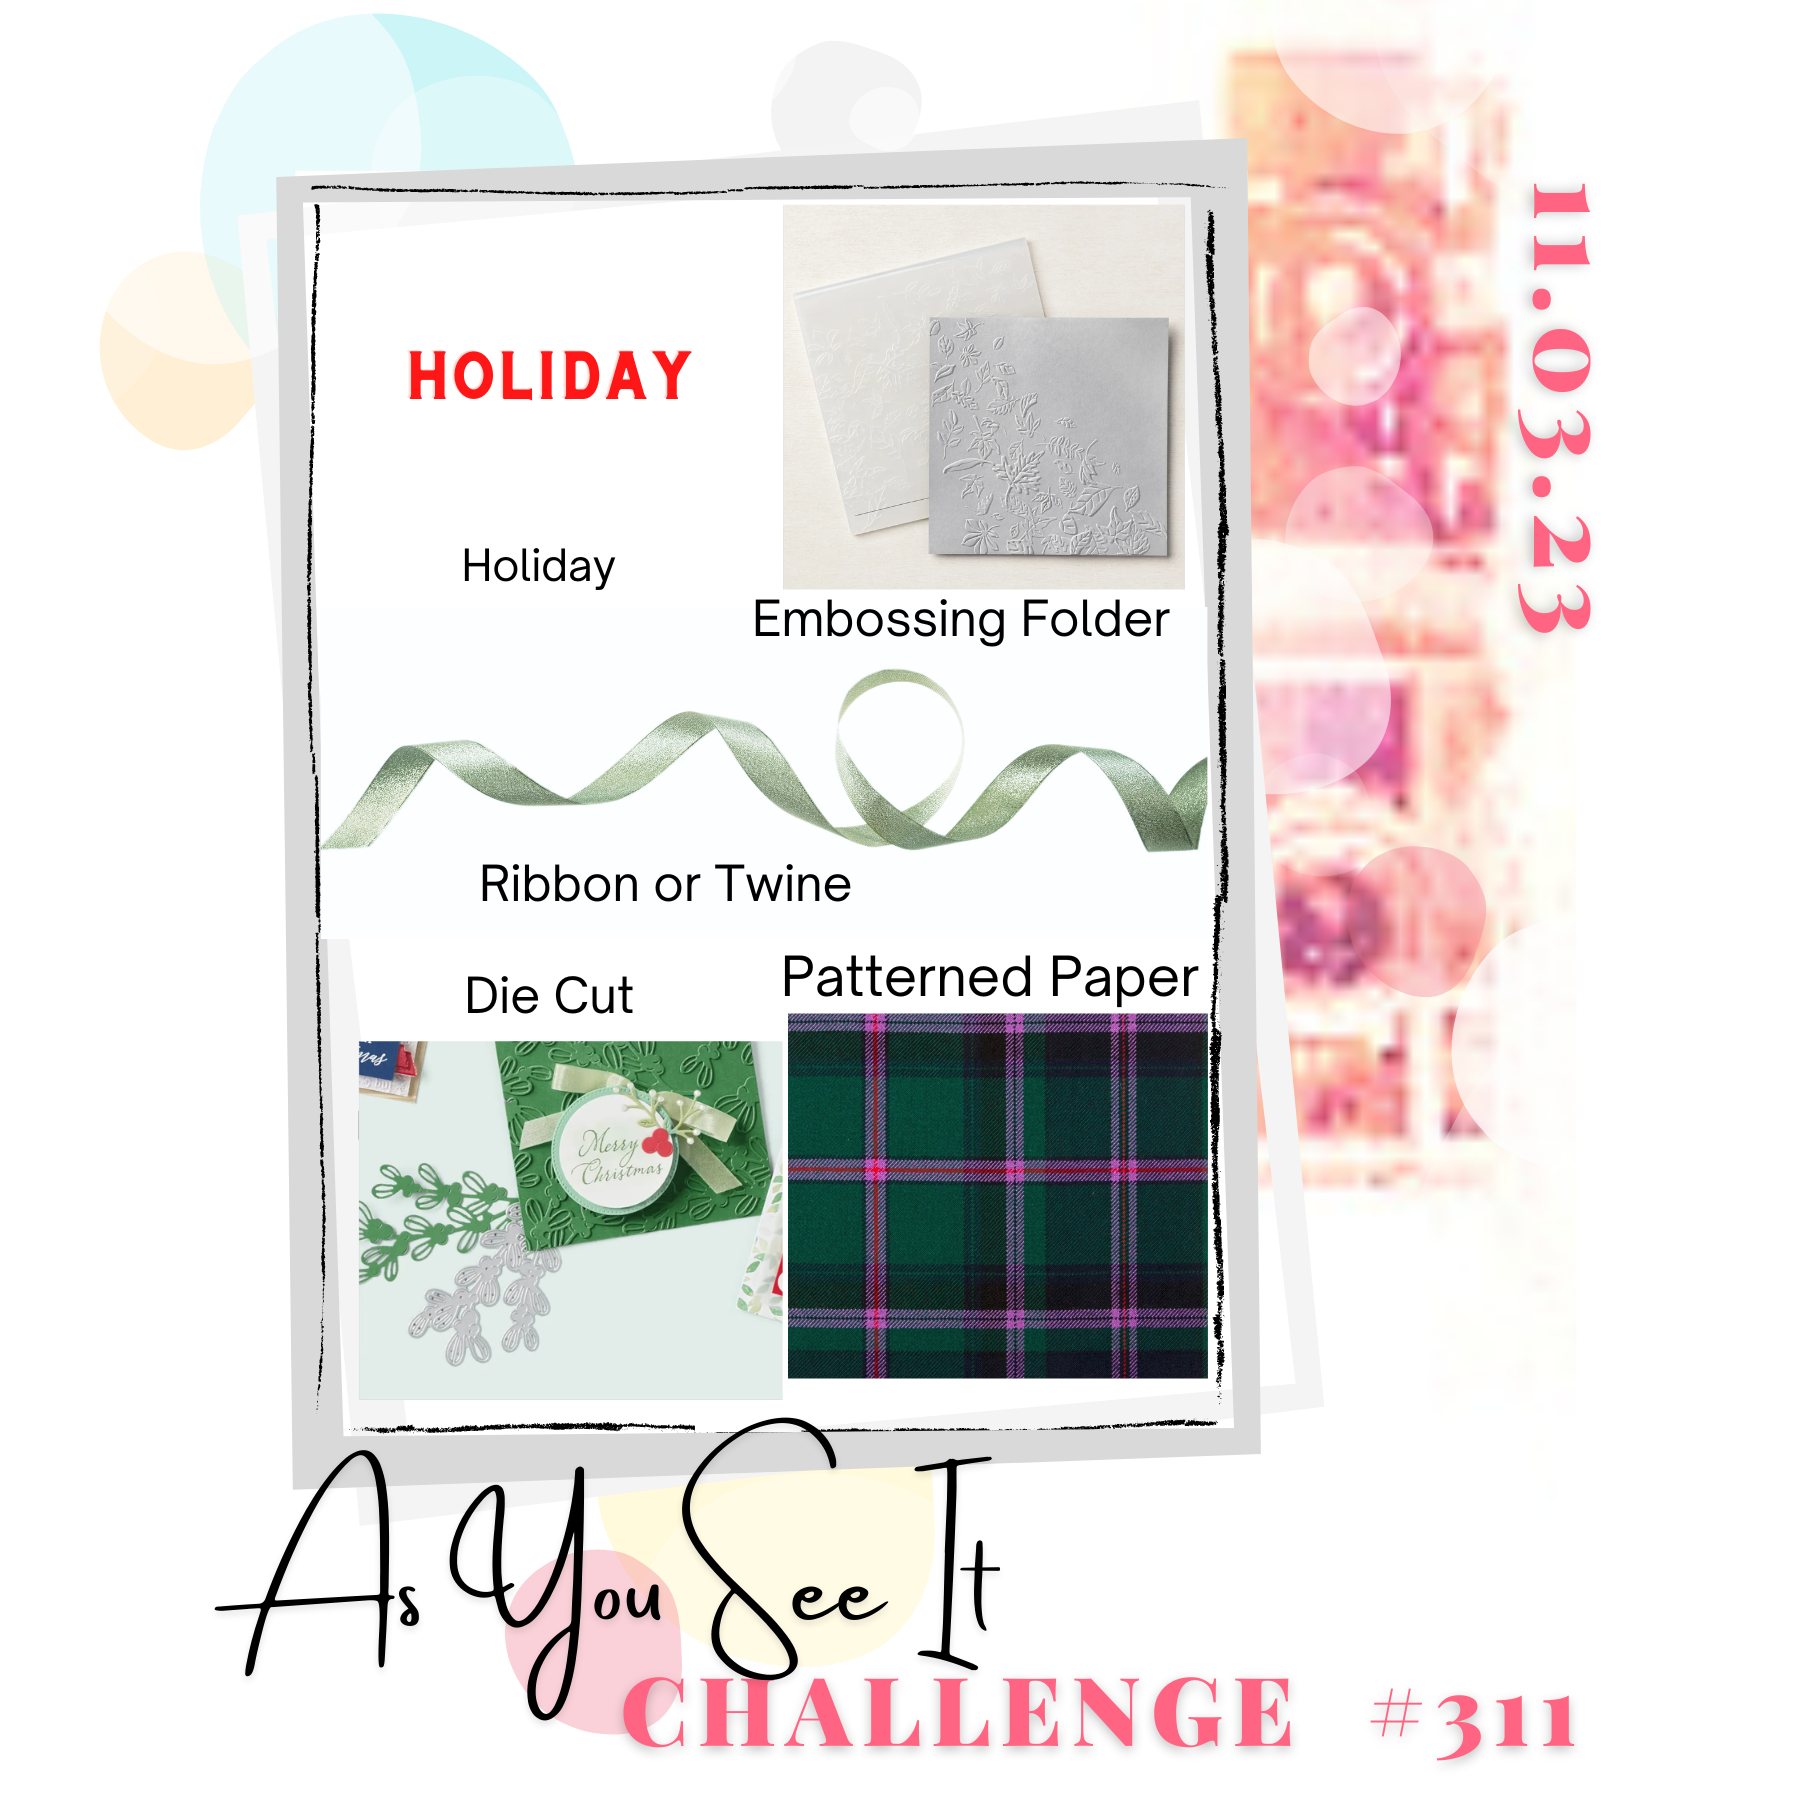

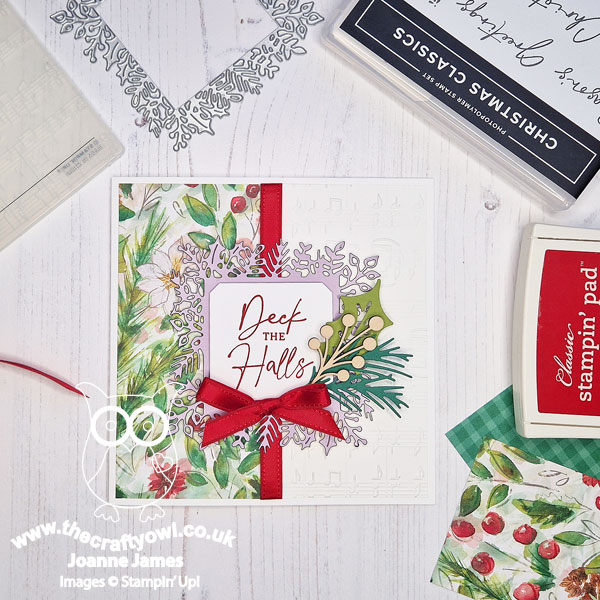
So many lovely things to incorporate! I chose Christmas as my holiday and grabbed the sketch over at Atlantic Hearts for my layout (I flipped my sentiment/foliage panels) - take a look:
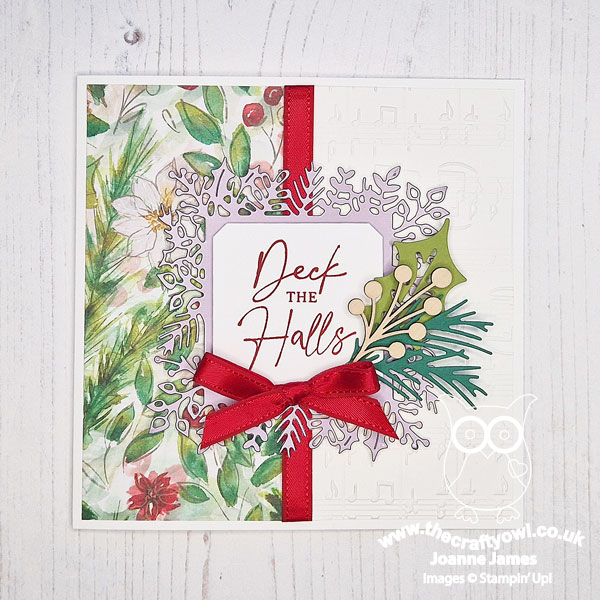
Here's the low-down on today's card:
I added a split panel of Joy of Christmas designer series paper with a panel of white cardstock embossed with the Merry Melody 3D Embossing Folder, adding a wrap of festive red satin ribbon to join them together. I used a sentiment from the 'Christmas Classics' stamp set featuring the beginning of the Christmas carol of the same name and backed this with the square foliage die from the Christmas Classics bundle cut out of retired platinum foil - it has a matt shine that picks out the subtle grey detailing in the designer paper:
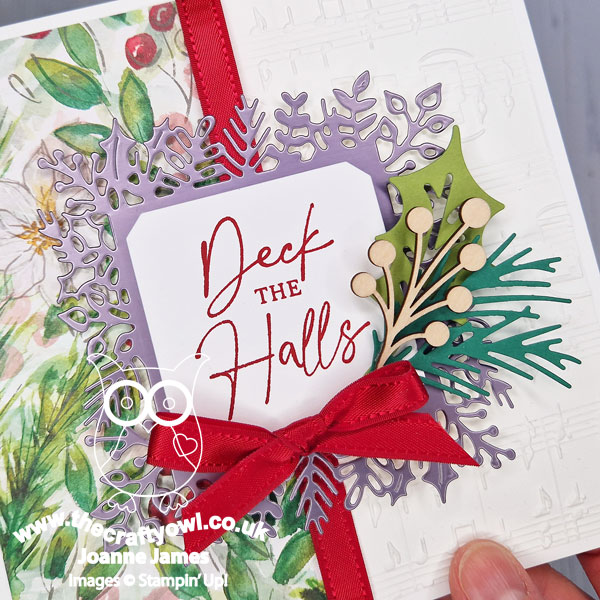
Some diecut greenery and a wooden textural element, along with a red ribbon bow, complete my card. I love the texture and dimension on this card - definitely one for hand delivering rather than posting, but so many interesting elements.
Here is the visual summary of the key products used on today's project for you to pin for easy reference:
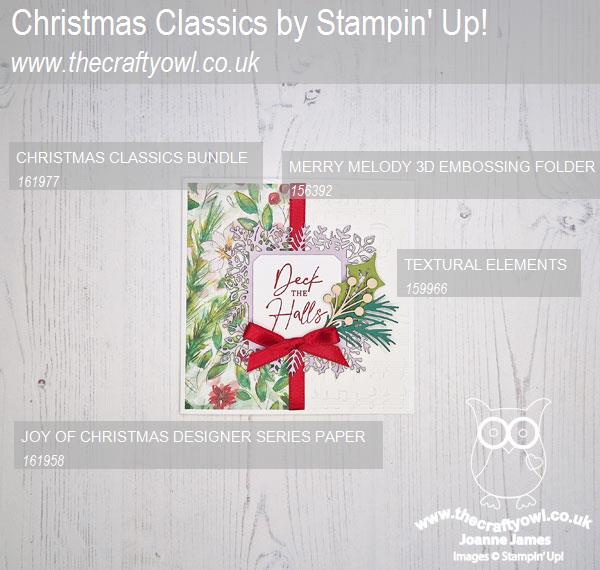
You can see all of my 'How To' summaries on my 'How To - Tips and Techniques' Pinterest board in case you've missed any.
Here's a summary of our challenge rules:
- Create any card, scrapbooking page, 3D project or packaging project that fits the challenge.
- Please include the challenge graphic and link back to the challenge in your blog post. Turn off word verification so we can leave you lots of lovely comments. Make sure you link the post not the whole blog to the Linky. Use #AYSIXXX when uploading to a public gallery.
- If you’re unsure about ‘the rules’, check the details under the Challenge Guidelines tab on the As You See It Challenge homepage.
We look forward to seeing your creations in the AYSI gallery.
Enjoy your day; we are hoping to attend the annual fireworks display at school this evening, assuming it stops raining and we are spared from the worst of Storm Ciaran - keep your fingers crossed for me! I'll be back tomorrow with another project. Until then, happy stampin'!
Stampin' Up! Supplies Used:
42447ee7-d321-46ff-9a37-4236a14767ef|0|.0|96d5b379-7e1d-4dac-a6ba-1e50db561b04
Tags: Stampin' Up, Stampin' Up Card, Stampin' Up Card ideas, Stampin' Up Supplies, Shop online, Shop Stampin' Up online, Shop Stampin' Up! Online, As You See It Challenge, Christmas, Christmas Classics, Joy of Christmas, Merry Melody Embossing Folder
Cards | Shop Online | Shop Stampin' Up! Online | Stamping
by Joanne James2. November 2023 21:30
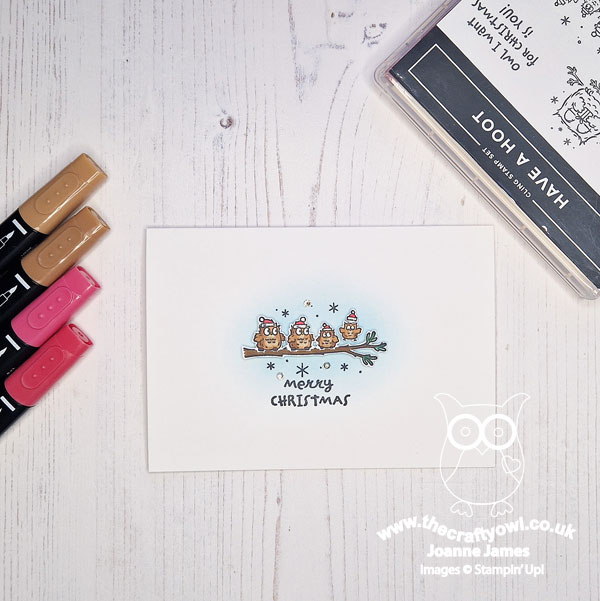
Today's post is a quick one to share a super clean and simple Christmas card for a few challenges that I wanted to play along with this week: at CAS on Friday we need to feature an animal and I also took the opportunity to play along with my friends over at Just Us Girls for what feels like the first time in ages (hello ladies!) as they are on 'CAS Week - use only the centre of your card' to make my annual card featuring the retired 'Have A Hoot' stamp set and this cute family of owls - take a look:
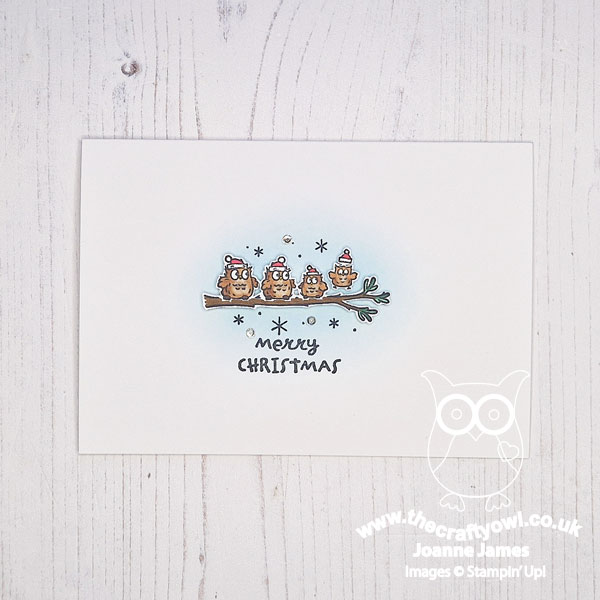
I stamped my image and added some blended Balmy Blue ink to the centre of my card base, then stamped the image a second time and coloured it with my Stampin' Blends. I then fussy cut the second image (I seem to have 'mislaid' my Peek A Hoot Dies since I last used them, which is rather unfortunate - I'm sure they must be here somewhere!) and popped it up on dimensionals:
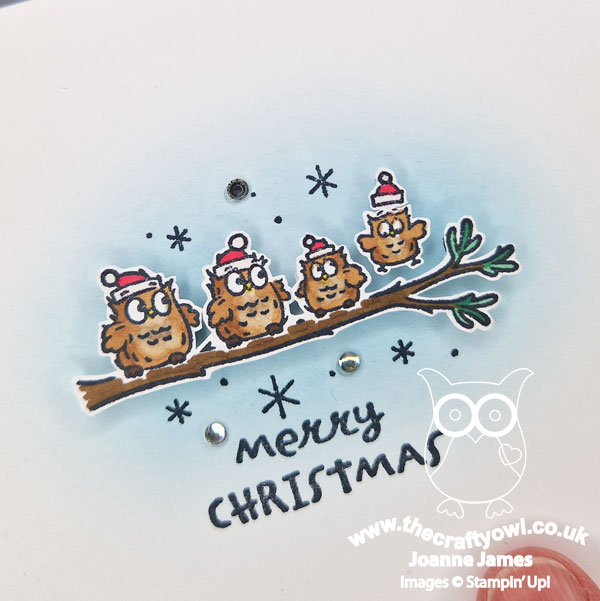
Isn't that little owl on the end of the branch, jumping for joy, just the sweetest?! A few clear rhinestones added a touch of festive sparkle to complete my clean and simple card - not forgetting the inside too:
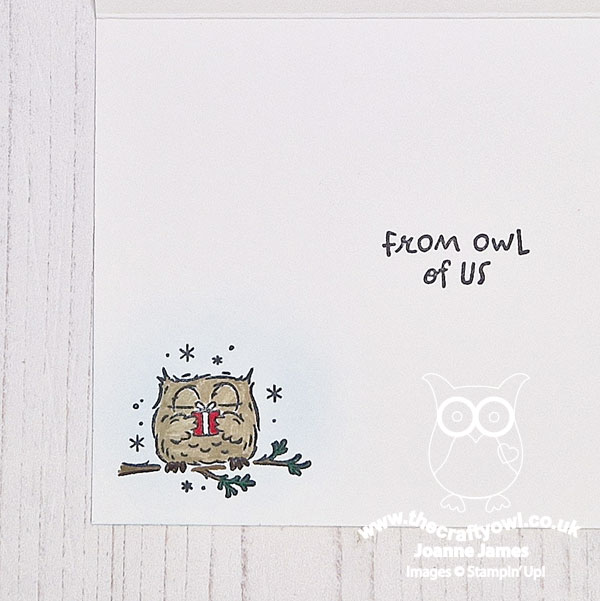
Enjoy your day and I'll be back tomorrow with another project. Until then, happy stampin'!

by Joanne James31. October 2023 12:00
It's Tuesday and time for a new challenge over at CAS Colours & Sketches. We have a third Tuesday in the month so Patricia has designed a retro-double for us, featuring a retired colour palette and a sketch we've used previously:
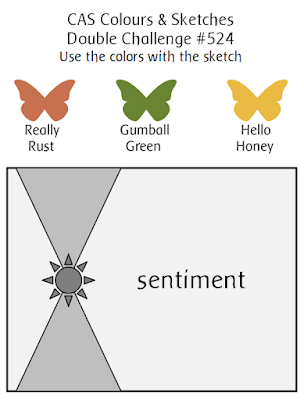
These colours were perfect for autumn so for my card today I decided to feature the 'Season of Chic' stamp set and co-ordinating Chic Dies - take a look:
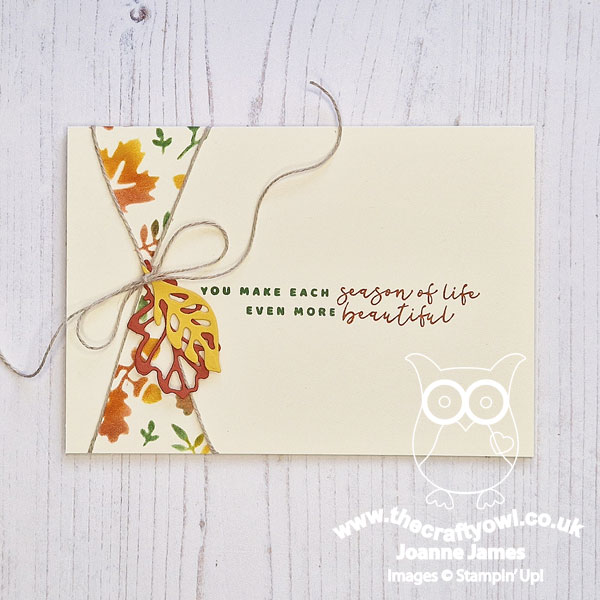
I blended all three colours and added some autumnal stencilling using one of the Abundant Beauty Decorative Masks into the triangles. I tied some twine to define the triangle borders and added a couple of diecut leaves as a focal point:
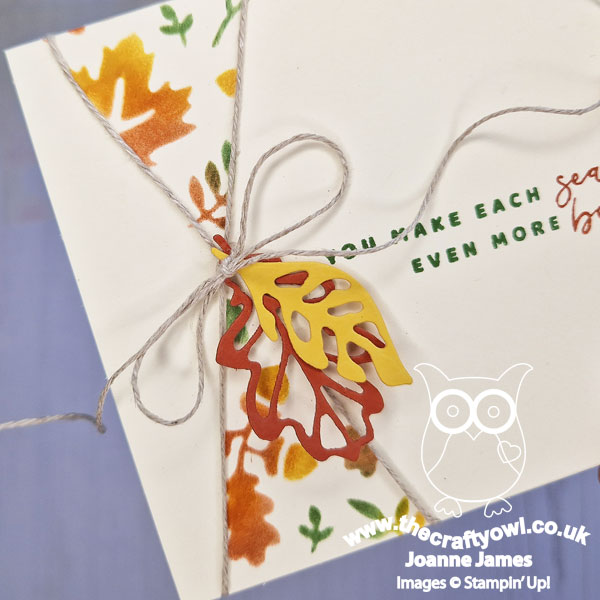
Inking my sentiment in two colours added a little extra interest and completed my card.
Here is the visual summary of the key products used on today's project for you to pin for easy reference:
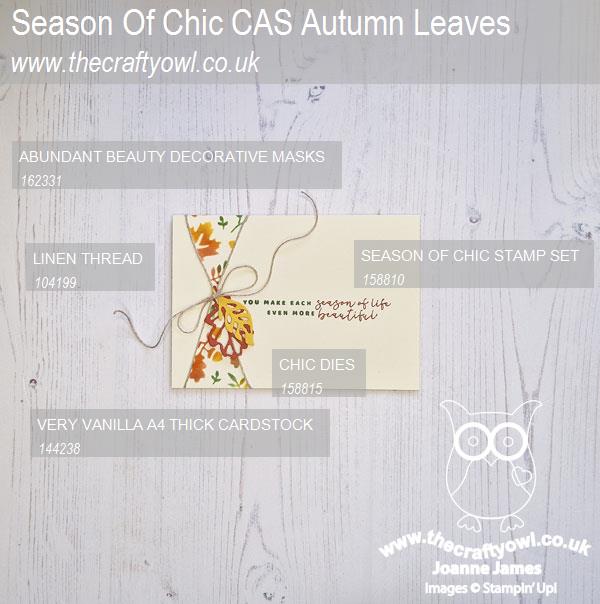
You can see all of my 'How To' summaries on my 'How To - Tips and Techniques' Pinterest board in case you've missed any.
As a reminder, for our colour challenges, you must use all of the stated challenge colours. You may also use neutral colours; however, the challenge colours should be the most noticeable ones featured on your card. We use Stampin' Up! color names for reference, but you are welcome to use any other companies' products as long as you match the challenge colours as closely as possible.
Enjoy your day and I'll be back tomorrow with another project. Until then, happy stampin'!
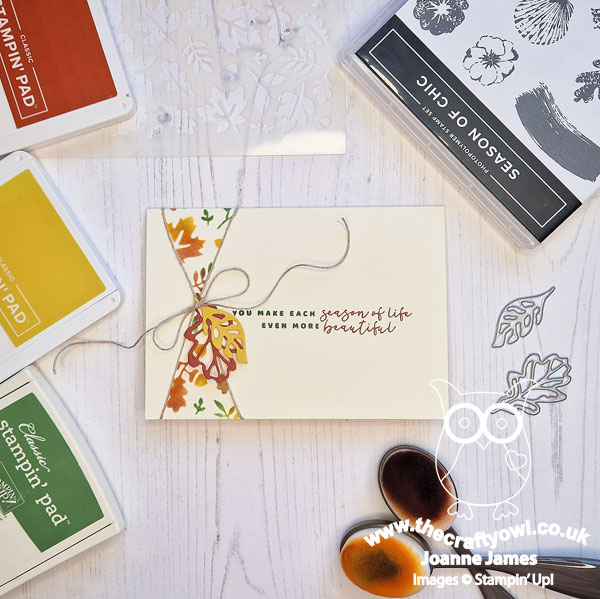
Stampin' Up! Supplies Used:
925d4724-d223-4423-ba9d-07d0e222cb41|0|.0|96d5b379-7e1d-4dac-a6ba-1e50db561b04
Tags: Stampin' Up, Stampin' Up Card, Stampin' Up Card ideas, Stampin' Up Supplies, Shop online, Shop Stampin' Up online, Shop Stampin' Up! Online, CAS Colours and Sketches, Abundant Beauty Decorative Masks, Season of Chic, Chic Dies
Cards | Shop Online | Shop Stampin' Up! Online | Stamping
by Joanne James30. October 2023 19:36
Today I'm sharing a card that I made at the weekend that was just for fun as I wanted to play along with a few challenges:


I still had the (retired) 'Well Defined' stamp set out on my desk having made this card and another of the sentiments in the set was just perfect to make a card inspired by the current Time Out Challenges quote:
"When we focus on our gratitude,
the tide of disappointment goes out and the tide of love rushes on"
Kristin Armstrong
I used the palette over at Color Throwdown - I love the balance of bright orange with pale blue and cream - and the pumpkin inspiration over at Just Add Ink - to create my pumpkin-packed, card full of thanks - take a look:
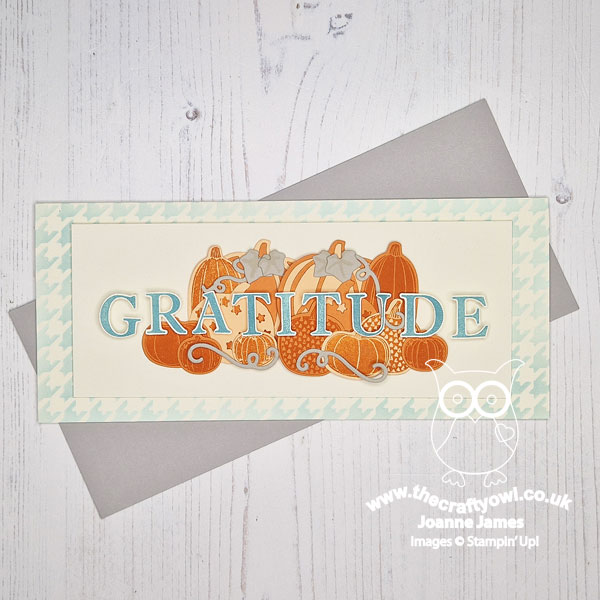
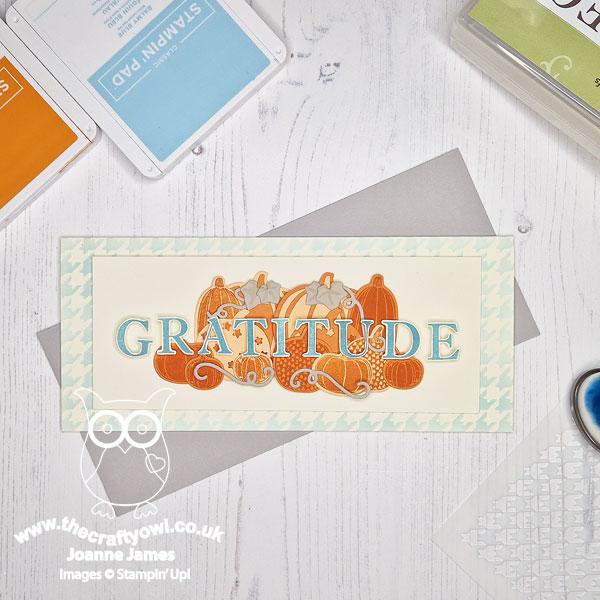
I saw this card by Martin Stone last week and loved the idea of a bold sentiment overlaid on a slimline card, so decided to use the same design principles for my card. I added a light stencilled houndstooth pattern in Balmy Blue to my vanilla card base, followed by a panel featuring a selection of layered stamped and diecut pumpkins and overlaid this with my bold fussy cut 'gratitude' sentiment.
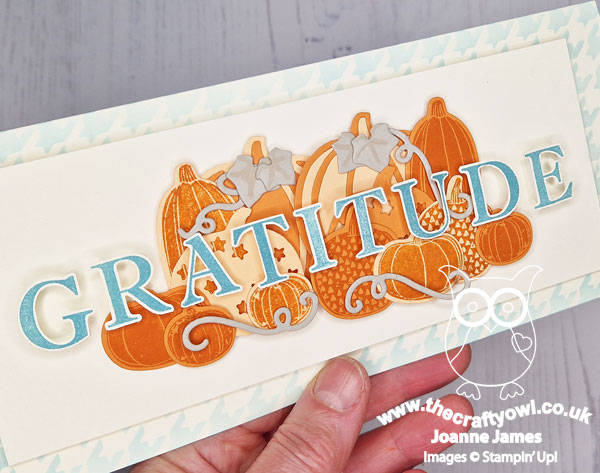
I used the retired set 'Sophisticated Serifs' which is very similar in size and style to the current online exclusive 'Classic Letters' stamp set. I added the rest of my sentiment that paired with this along with a few extra pumpkins inside my card:
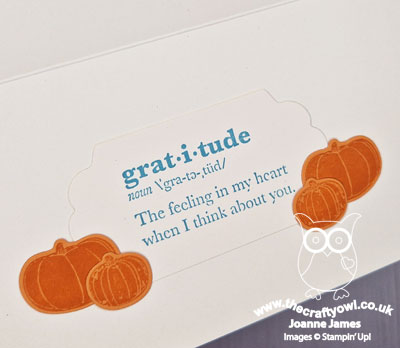
This card took a little while, but I love the finished look and the combination of the bold sentiment on the front and detail inside that for me really does some up what gratitude is all about. I do like to send thank you cards, so these are the kind of cards that there are never enough of and I will definitely be sending this to a worthy recipient.
Enjoy your day and I'll be back tomorrow with another project. Until then, happy stampin'!
Stampin' Up! Supplies Used:
by Joanne James29. October 2023 08:00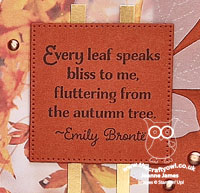
Today it's Sunday and time for this week's new challenge over at The Paper Players! It's the turn of the fabulous Claire to host this week and since it's the fifth Sunday of the month she has a bonus tic-tac-toe board challenge for us to work with:
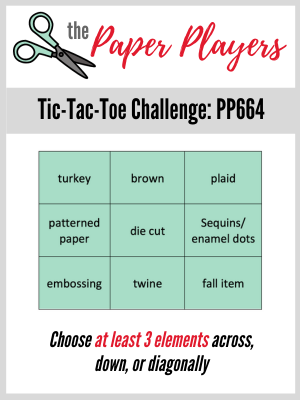


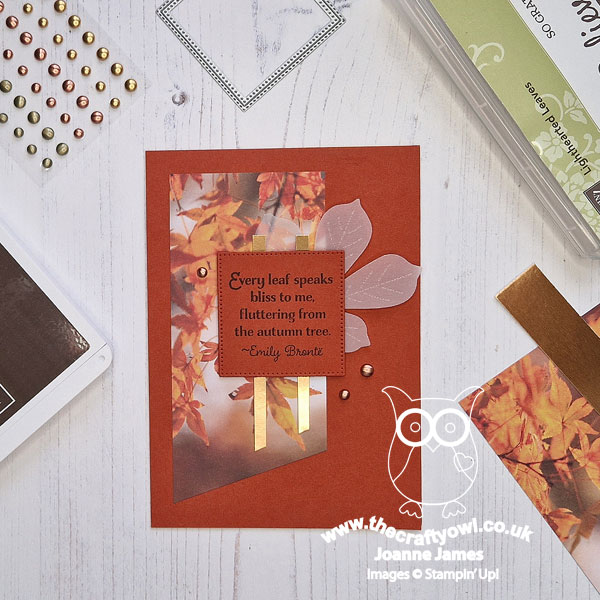
I went across the middle of the board with patterned paper/diecut/enamel dots and used the layout over at Sketch Saturday to showcase another of the beautiful autumn leaf papers in the All About Autumn paper pack - take a look:
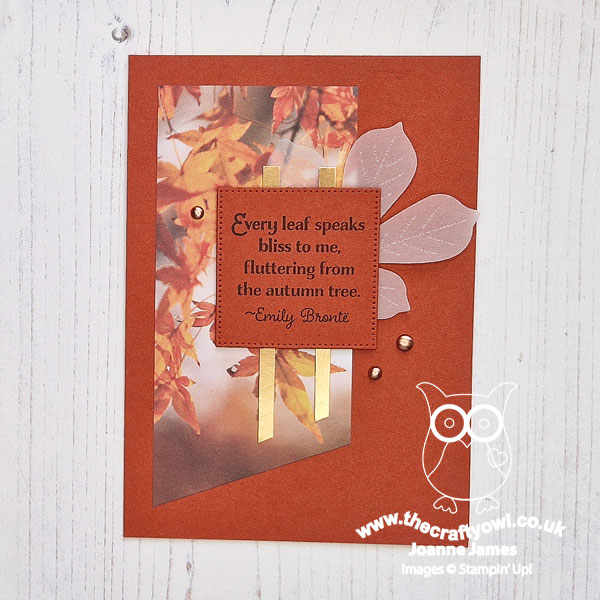
Here's the low-down on today's card:
I cut a slanted banner of the design featuring autumnal horse chestnut leaves and added it to my Cajun Craze card base. I used a sentiment from the retired stamp set 'Lighthearted Leaves', an old favourite of mine, as it seemed to fit the theme of my card perfectly:
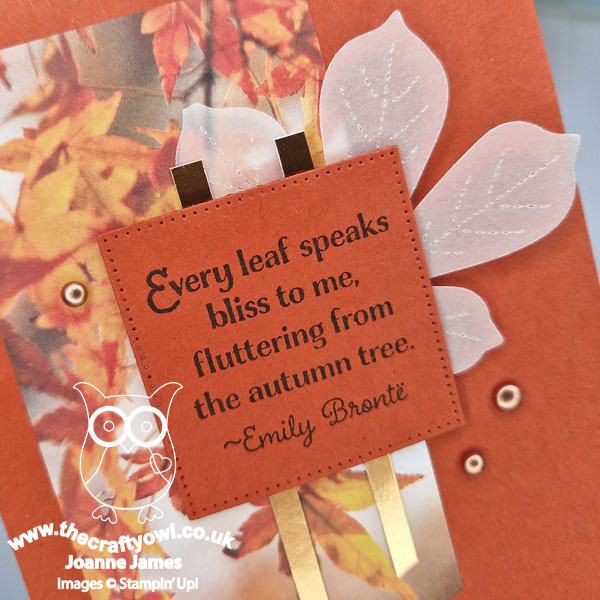
I added a couple of narrow strips of copper foil and a vellum leaf accent (cut using my retired Stitched Leaves Dies) for a little added texture and a trio of copper enamel dots to complete my card.
All in all pretty simple, but a lovely celebration of autumn leaves - so I'm sharing with the ladies over at TGIF Challenges too.
Here is the visual summary of the key products used on today's project for you to pin for easy reference:
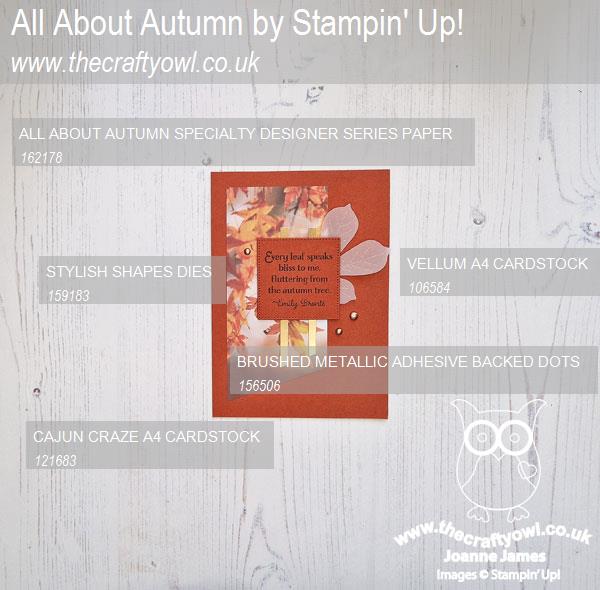
You can see all of my Product and 'How To' summaries on my 'How To - Tips and Techniques' Pinterest board in case you've missed any.
Before you reach for your ink and papers, check out what our amazing team has created to inspire you this week:
The Paper Players Design Team
Here's a quick recap of our challenge rules:
1. Create a new paper project
2. Upload your creation to your blog with a link back to us and provide a direct link to the post featuring your challenge submission.
3. Please link your card to no more than four challenges, TOTAL.
4. Have FUN!
Enjoy your day; I hope you all enjoyed the extra hour in bed - I will be using my extra time today to do some gardening! I'll be back tomorrow with another project. Until then, happy stampin'!
Stampin' Up! Supplies Used:
074fb9f6-93e1-4de3-94fa-2c9aca327b64|0|.0|96d5b379-7e1d-4dac-a6ba-1e50db561b04
Tags: Shop Stampin' Up! Online, Stamping Shop Stampin' Up online, Shop online, Stampin' Up, Stampin' Up Card ideas, Stampin' Up Supplies, Stampin' Up Card, The Paper Players, All About Autumn, Lighthearted Leaves, Stitched Shapes Framelits, Stitched Leaves Dies
Cards | Shop Online | Shop Stampin' Up! Online | Stamping
by Joanne James28. October 2023 20:07
Today I've a quick card for a couple of challenges:


I couldn't resist the sketch over at Atlantic Hearts and decided to pair it with the word prompt over at Inkspirational - take a look:
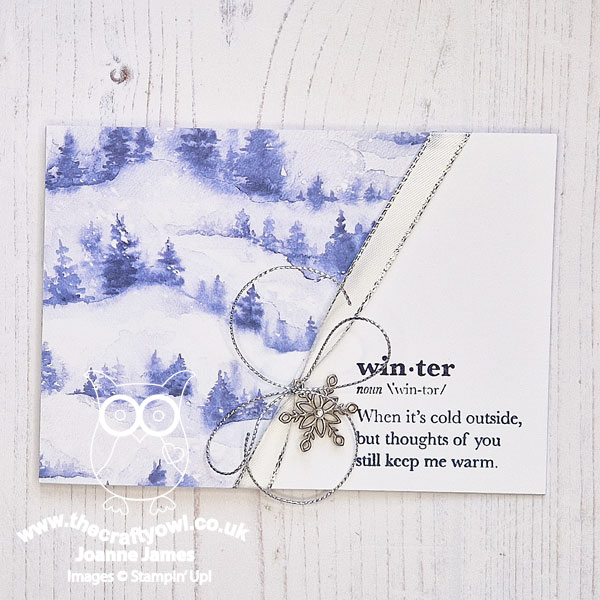
Here's the low-down on today's card:
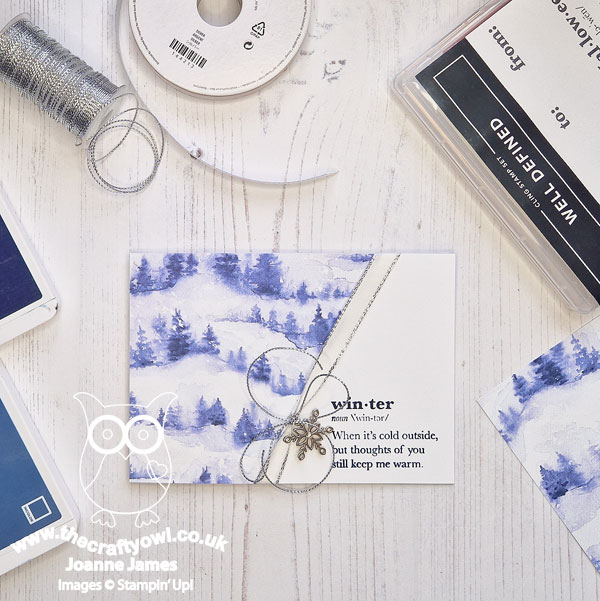
When I first saw the sketch I was so tempted to reach for my Shining Brightly DSP, but since by blog friend LeAnne beat me to it(you can see her fabulous card in the Atlantic Hearts gallery) I decided that I would use one of the frosty, snowy paper designs from the Winter Meadow pack and pair it with the perfect 'cold' sentiment from the retired stamp set 'Well Defined':
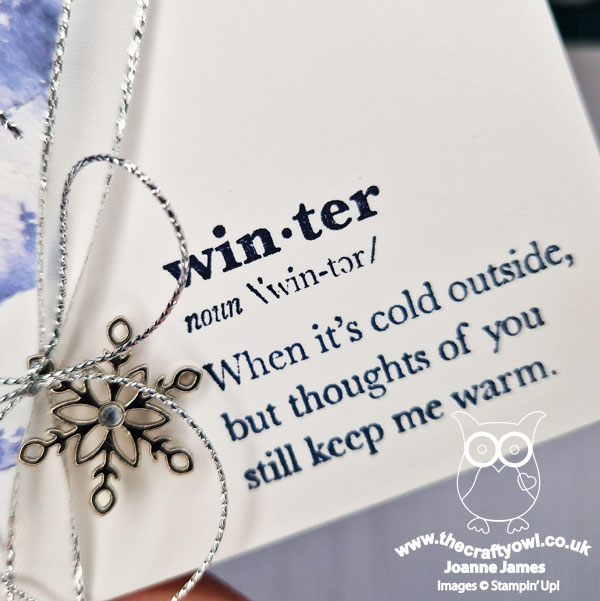
I added some ribbon to the border edge and used some silver twine to tie a snowflake embellishment for a finishing frosty touch.
Here is the visual summary of the key products used on today's project for you to pin for easy reference:
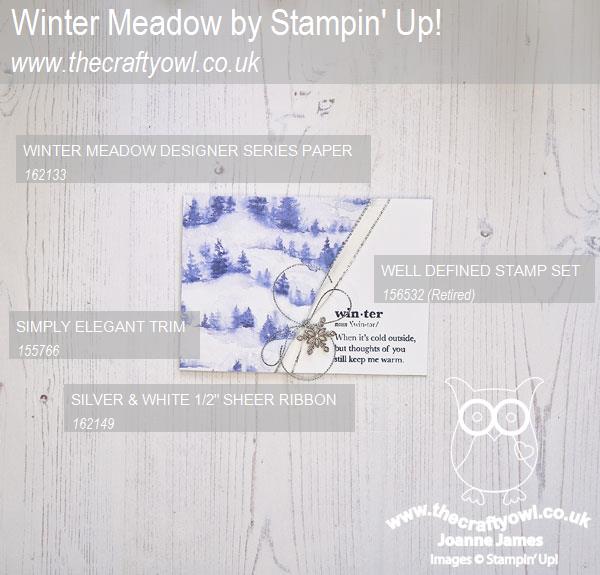
You can see all of my 'How To' summaries on my 'How To - Tips and Techniques' Pinterest board in case you've missed any.
Enjoy your evening and I'll be back tomorrow with my Paper Players project. Until then, happy stampin'!
Stampin' Up! Supplies Used:
by Joanne James27. October 2023 09:00
Today I have my card for the new challenge over at Festive Friday Card Making and Paper Crafting Challenge.
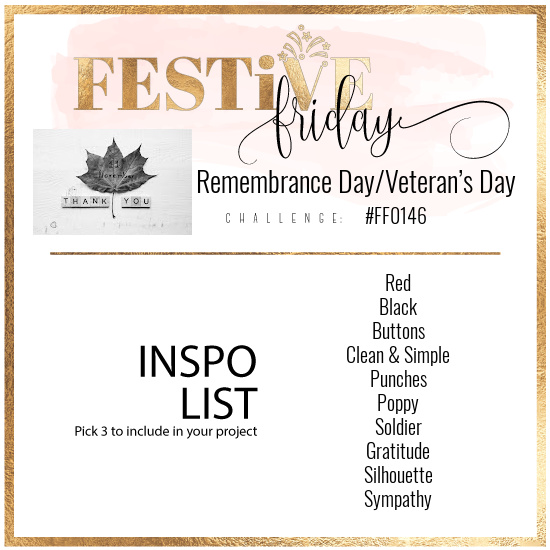

The challenge that we are celebrating this week is 'Remembrance Day/Veterans Day' which is on November 11th. Remember the fun thing is that at Festive Friday you do not need to actually celebrate the occasion; your goal is to simply use three or more items from the inspiration list on your project. This week I used red, black, poppies and sympathy and this is what I came up with:
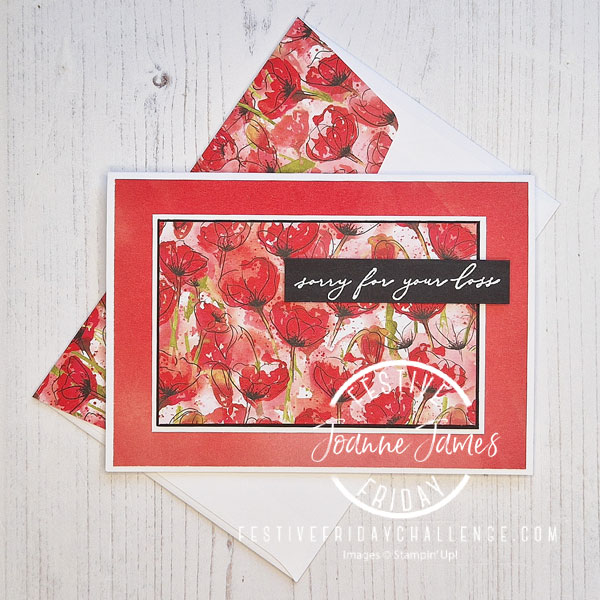
Here's the low-down on today's card:
I don't have any current product featuring poppies, so I had a rummage in the retired box and decided that the Sunday Stamps sketch layout would be perfect to showcase some of the beautiful Peaceful Poppies designer paper that I have been hoarding. I used one sheet using the reverse for my background and then a fabulous poppy print for the central panel. A simple sentiment from a retired Sale-A-Bration set called 'Heal Your Heart' completed the front of my card:
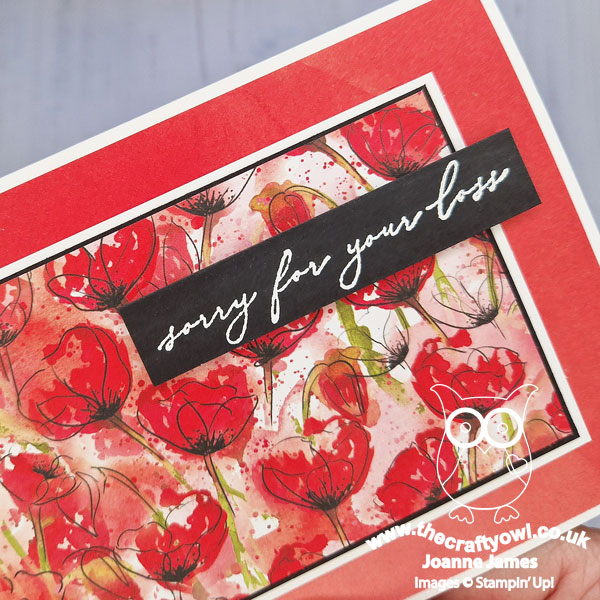
Isn't that paper gorgeous? I used another stamp from the same set on the inside, along with some stamped poppies from the retired 'Painted Poppies' stamp set:
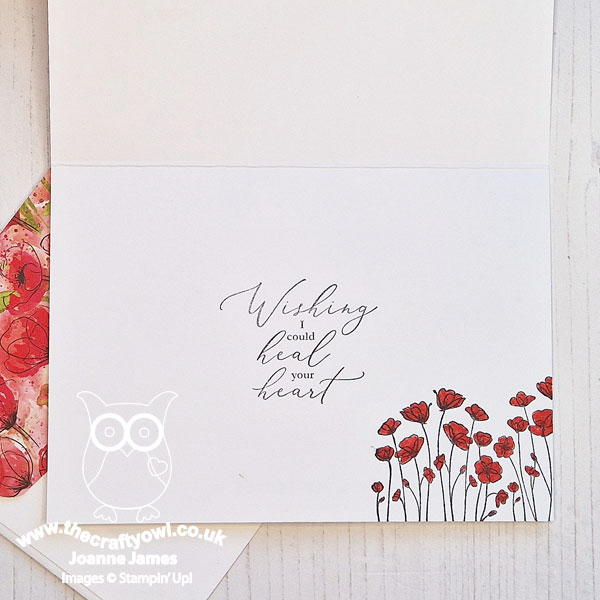
I also added this stamp to the front of my envelope and decorated the flap with more of that pretty paper. Too good to hoard and as the flower of remembrance these poppies are fitting for a sympathy card.
No visual summary of the key products used on today's project as they are all retired except for the basic cardstock.
How does our board inspire you? I can’t wait to see what YOU create! For more inspiration, be sure to visit the rest of the Festive Friday Card Making and Paper Crafting Challenge Design team:
Enjoy your day and I'll be back tomorrow with another project. Until then, happy stampin'!
28e97c91-4eb4-46aa-97ae-0aee6e8f1471|0|.0|96d5b379-7e1d-4dac-a6ba-1e50db561b04
Tags: Shop Stampin' Up! Online, Stamping Shop Stampin' Up online, Shop online, Stampin' Up, Stampin' Up Card ideas, Stampin' Up Supplies, Stampin' Up Card, Festive Friday, Peaceful Poppies, Sympathy cards, Heal Your Heart
Cards | Shop Online | Shop Stampin' Up! Online | Stamping
by Joanne James26. October 2023 18:00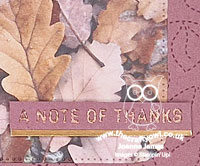
It's Thursday and time for a new challenge over at TicTacToe! It's the turn of Team X to host this week and the lovely Betty is our featured designer this week. This is the fun board that we are playing along with:
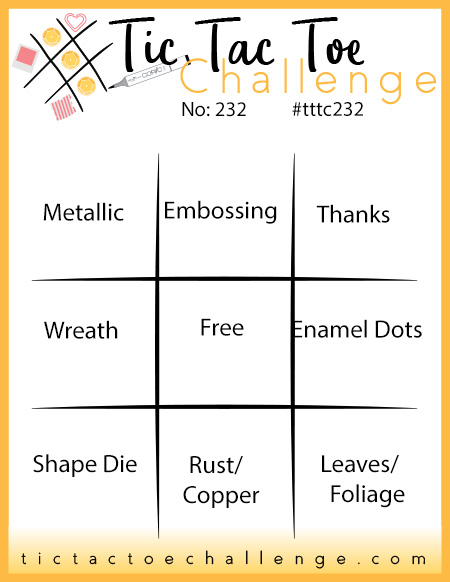

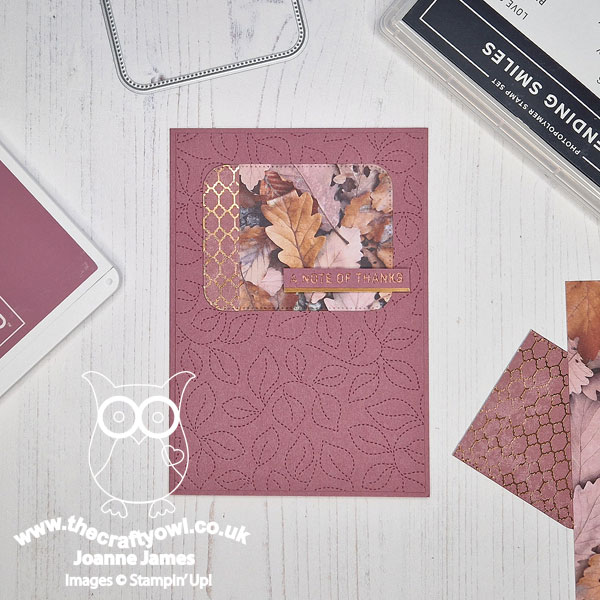
I went on the diagonal from top left with metallics/free/leaves-foliage and took inspiration from the dried leaves and purple tones of the book in the Card Concept inspiration photo for my clean and layered card - take a look:
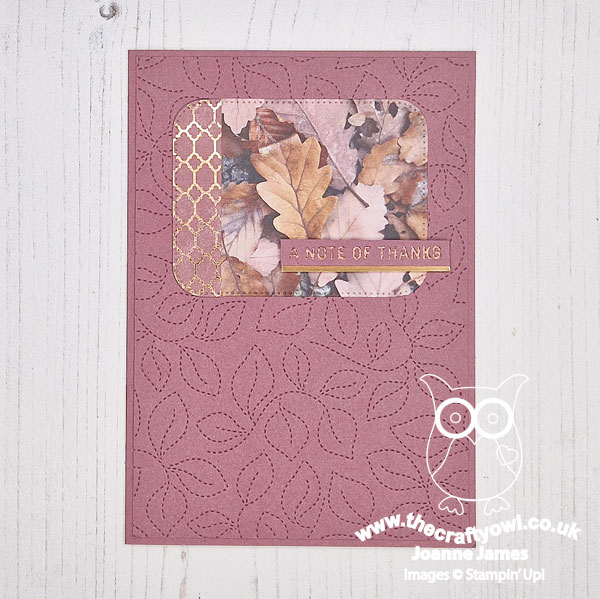
Here's the low-down on today's card:
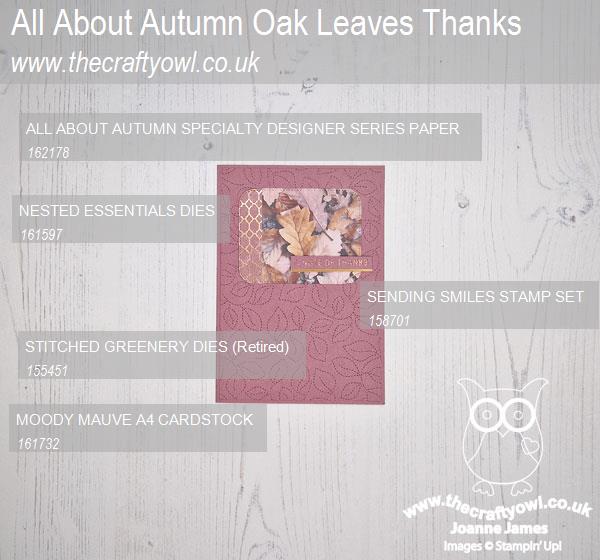
I am loving the photo prints in the All About Autumn paper pack - they truly are so evocative of the season. For today's card I chose a pattern of dried leaves which co-ordinates with Moody Mauve perfectly. I heat-embossed my sentiment and edged it with a snippet of copper foil and to incorporate a little more of the copper metallic once I'd diecut my panel of designer paper using the largest rectangle in the Nested Essentials Dies set, I cut an extra piece of the pattern that is actually on the reverse of the leaf image as it features a distressed copper embossed design - you can see the shine a little more closely below:
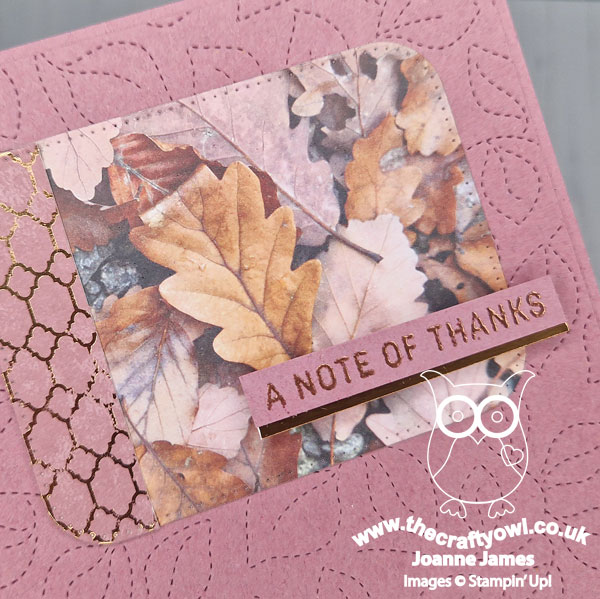
I added a background panel that I'd run through my diecutting machine with the (retired) Stitched Greenery Die for a little added interest and detail. Quite a simple card, with lovely warm autumnal tones of mauve, brown and copper - time to wrap up warm and go romping through the autumn leaves methinks!
Here is the visual summary of the key products used on today's project for you to pin for easy reference:
You can see all of my Product and 'How To' summaries on my 'How To - Tips and Techniques' Pinterest board in case you've missed any.
A tictactoe board offers so many creative possibilities - how does this week's board inspire you? Why not have a go? We would love to see you in the gallery and who knows - you might be selected for Designer's Choice and be eligible to be a guest designer on a future challenge.
Enjoy your day; I'll be back tomorrow with another project for our new challenge over at Festive Friday. Until then, happy stampin'!
Stampin' Up! Supplies Used:
2dab1190-1817-4dea-9079-b45a2ca9a629|0|.0|96d5b379-7e1d-4dac-a6ba-1e50db561b04
Tags: Stampin' Up, Stampin' Up Card, Stampin' Up Card ideas, Stampin' Up Supplies, Shop online, Shop Stampin' Up online, Shop Stampin' Up! Online, TicTacToe Challenge, All About Autumn, Nested Essentials Dies, Stitched Greenery, Sending Smiles
Cards | Shop Online | Shop Stampin' Up! Online | Stamping
by Joanne James22. October 2023 08:00
Today it's Sunday and time for this week's new challenge over at The Paper Players! It's the turn of the fabulous Jaydee to host this week and she has my favourite, a sketch challenge for us to work with:
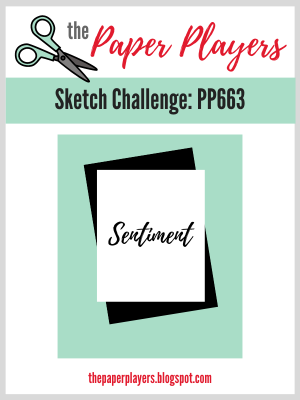
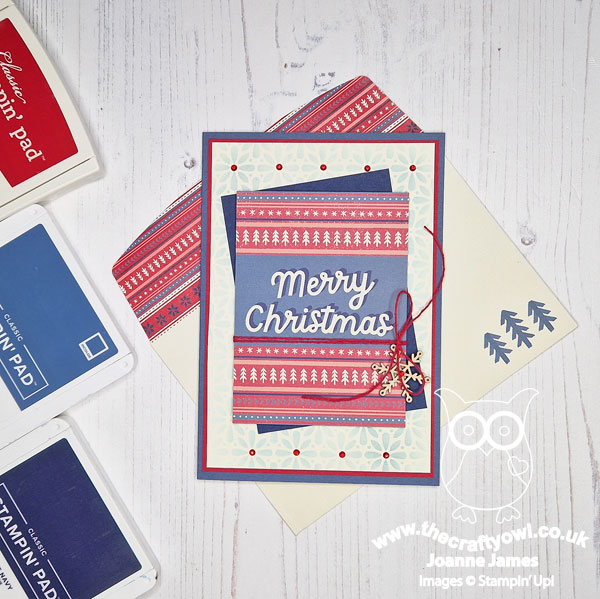
I decided to use one of my Beary Christmas Memories & More cards with a pre-printed sentiment for the front layered panel of my card and the rest of the design evolved from there. Take a look at my finished card:
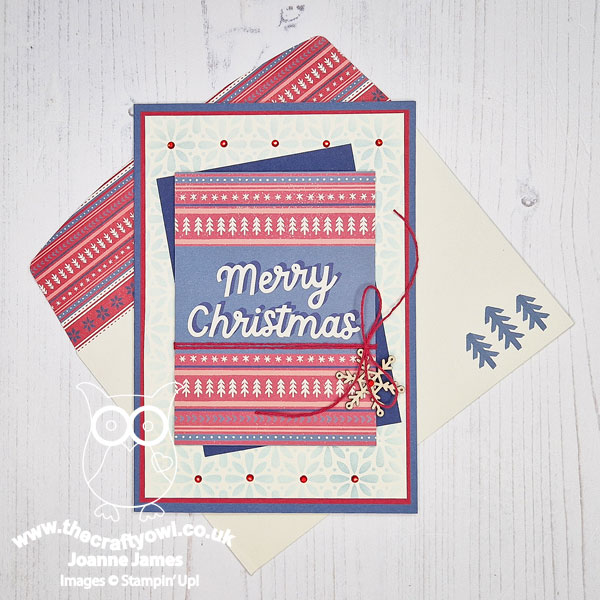
Here's the low-down on today's card:
I cut down one of the large Memories & More cards and used the colours of the card to create my card base and layers. Although I used the co-ordinating envelope from the co-ordinating pack, I didn't use the card base. Instead I added a Very Vanilla layer that I added some soft stencilling to using one of the retired Butterflies and Flowers Layering Decorative Masks, adding some red rhinestones to pick out the pattern centres. I also added some Real Red baker's twine to the card and a wooden snowflake element from my stash:
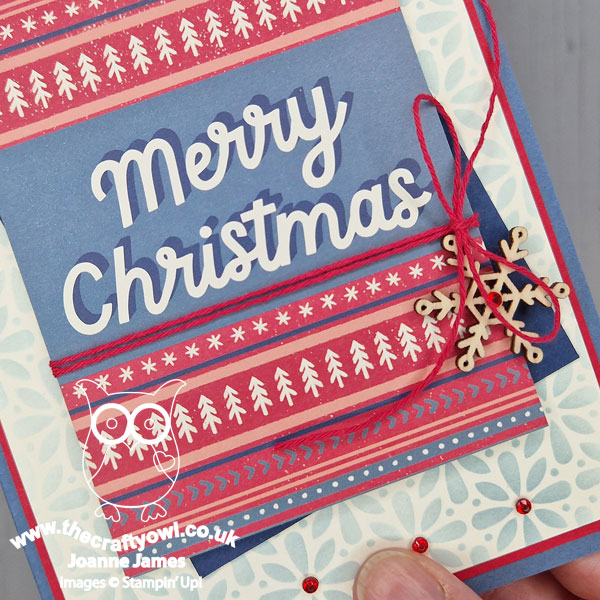
These Memories & More cards are great to use for quick and easy Christmas cards; they are easy to step up too with the addition of a few additional bits and pieces. I think this card has something of a Scandinavian feel to it - what do you think? Leave me a comment below - I'd love to hear your thoughts.
Here is the visual summary of the key products used on today's project for you to pin for easy reference:
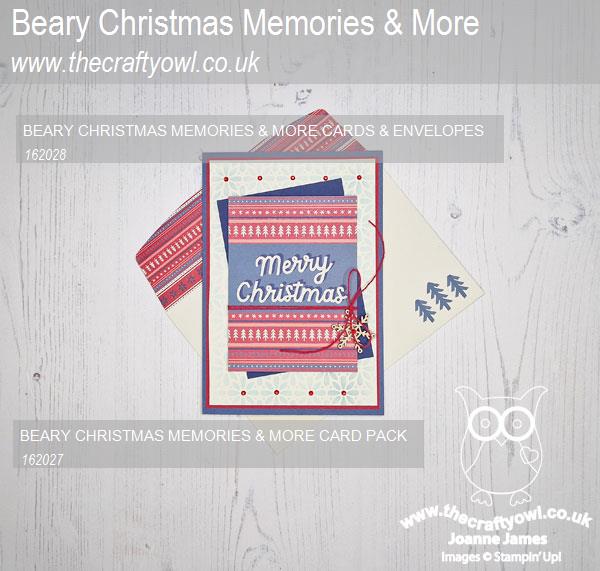
You can see all of my Product and 'How To' summaries on my 'How To - Tips and Techniques' Pinterest board in case you've missed any.
Before you reach for your ink and papers, check out what our amazing team has created to inspire you this week:
The Paper Players Design Team
Here's a quick recap of our challenge rules:
1. Create a new paper project
2. Upload your creation to your blog with a link back to us and provide a direct link to the post featuring your challenge submission.
3. Please link your card to no more than four challenges, TOTAL.
4. Have FUN!
Enjoy your day; we are having a relaxing weekend as it is the start of the half-term break. I'll be back tomorrow with another project. Until then, happy stampin'!
Stampin' Up! Supplies Used:
0855a81f-eaee-4836-add8-047a8ad444e5|0|.0|96d5b379-7e1d-4dac-a6ba-1e50db561b04
Tags: Shop Stampin' Up! Online, Stamping Shop Stampin' Up online, Shop online, Stampin' Up, Stampin' Up Card ideas, Stampin' Up Supplies, Stampin' Up Card, The Paper Players, Beary Christmas, Memories and More, Butterflies and Flowers Layering Decorative Masks
Cards | Memories and More | Shop Online | Shop Stampin' Up! Online
by Joanne James21. October 2023 09:00
Today I'm sharing a card that's a little more involved so perfect for a spot of weekend crafting! I used the fabulous sketch over at Tuesday Morning Sketches for my layout:

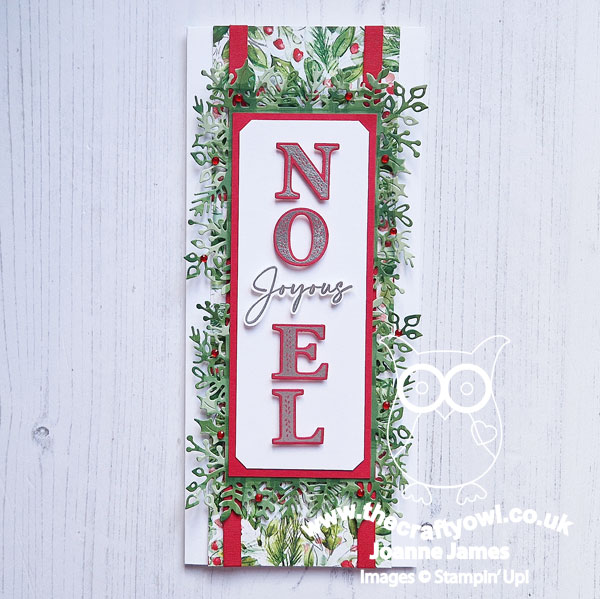
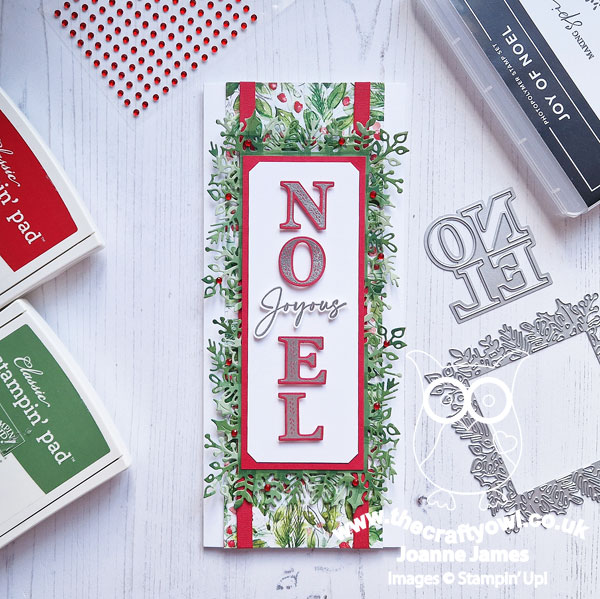
I've made quite a few cards with my 'Joy of Noel' bundle and wanted to try something a little different with this slimline layout - take a look:
Here's the low-down on today's card:
Joy Of Christmas - The colour scheme for today's card was inspired by the beautiful piece of Joy of Christmas Designer Series Paper I used for the first layer on my card. A white background covered in red berries and festive holly and pine foliage, this paper is perfect for a traditional Christmas card. Whilst much of this panel is covered by the other layers of the card, enough of it can be seen to tie in the other elements.
Joy of Noel - Most if not all of my other cards using the NOEL 'Joy of Noel' stamps and dies have positioned the letters in a square. This slimline format allowed for me to use the letters in a column (still broken with 'joyous') - this works really well. I originally stamped my letters in Real Red onto Basic White, but they didn't have enough impact. I swapped them for Real Red cardstock embossed with silver and liked this much better. The silver picks up on the grey outlines of the base DSP and the silver and red combo stands out much better and the red ties in with both the red frame I used for the sentiment panel and the two strips of Real Red cotton ribbon I used on the base DSP layer.
Christmas Classics - For the square layers of the sketch, I used a couple of diecuts of the Christmas Classics foliage border square die. I originally used a sild colour of green for this layer, but it was too stark. Eventually I cut the layers out of a piece of (retired) Garden Green check paper that resulted in a softer, more interesting variegated look. I added some extra detail with a green Blends marker, along with a few red rhinestones for a little extra red berry detail:
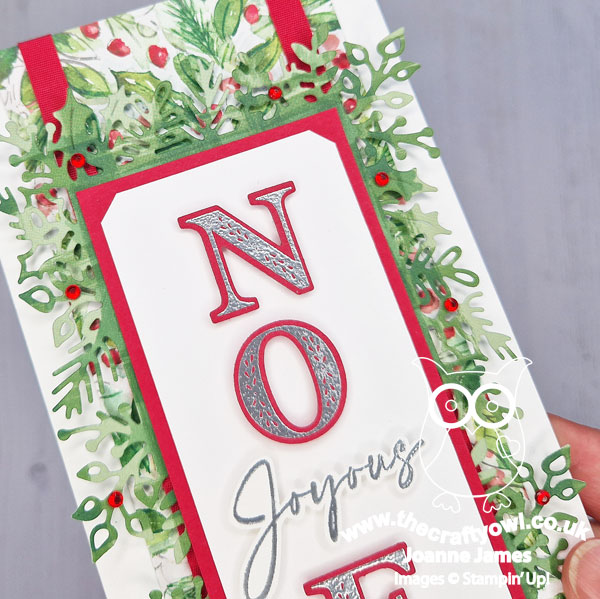
This card has seven layers, but I think each of them serves a purpose and makes a valuable contribution to the overall design, which I love. What do you think - does this celebration of festive foliage remind you of a traditional Christmas? Do leave me a comment below - I'd love to hear your thoughts.
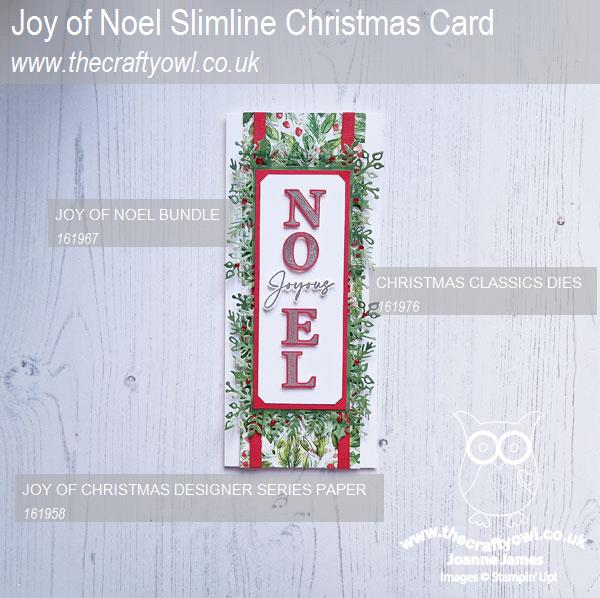
Here is the visual summary of the key products used on today's project for you to pin for easy reference:
You can see all of my 'How To' summaries on my 'How To - Tips and Techniques' Pinterest board in case you've missed any.
Enjoy your day and I'll be back tomorrow with my card for our new challenge over at The Paper Players. Until then, happy stampin'!
Stampin' Up! Supplies Used:
93e654d8-b925-440d-9726-8cfaac1d5a5e|0|.0|96d5b379-7e1d-4dac-a6ba-1e50db561b04
Tags: Shop Stampin' Up! Online, Stamping Shop Stampin' Up online, Shop online, Stampin' Up, Stampin' Up Card ideas, Stampin' Up Supplies, Stampin' Up Card, Christmas, Christmas Classics, Joy Of Noel, Joy of Christmas
Cards | Shop Online | Shop Stampin' Up! Online | Stamping