It's Sunday and you know what that means: time for a new challenge over at The Paper Players! This week it is the turn of my fellow Brit, the lovely Jaydee, to host and she has a fun theme challenge for you:

Yes - square cards! It's always fun to create a square card for a change - when I saw this week's challenge I knew exactly where I wanted to start: the striped paper in the Cherry On Top stack was calling my name! I'm also linking up with the Friday Mashup where the challenge this week is also square cards, although obviously given my paper choice I decided not to go for the 'mashup' and use the colours over there too. Here's my card:
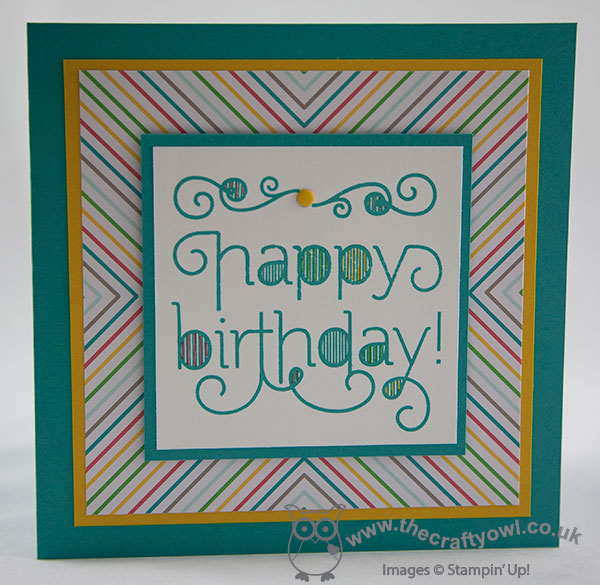
Now the pattern I chose actually has an off-centre point (check out your paper stack to see what I mean!) so I chose to cut my square of DSP square so that the lines all came together in the centre. I chose to use the 'happy' and 'birthday' sentiments from the 'Age Awareness' set as the focal point for my card - I like the contrasting swirls combined with the lined detail, which I infilled with my Stampin' Write markers in the colours that co-ordinated with the striped paper. To balance my sentiment in the square I also included a couple of the swirls across the top, which I joined together using a Crushed Curry Candy Dot. I simply measured my mats and layers and cut them with my trimmer, but you could always use your Square Framelits to make it easier if you prefer. A great clean and layered card and I love the way the striped paper draws your eye to the sentiment. A colourful custom envelope in Watermelon Wonder completes my card!
Before you reach for your ink and papers, check out what our amazing team has created to inspire you this week:
The Paper Players Design Team
Here's a quick recap of our challenge rules:
1. Create a new paper project
2. Upload your creation to your blog with a link back to us and provide a direct link to the post featuring your challenge submission.
3. Please link your card to no more than three challenges, TOTAL.
4. Have FUN!
One of the reasons people avoid making a square card is that it often calls for a bespoke envelope. Don't forget about your Envelope Punch Board! Along with the gorgeous new Envelope Paper in the annual catalogue, and my Envelope Expert tool of course, there is no excuse to not make perfectly customised square envelopes (or rectangular for that matter!) every time. No fuss, no wastage, no guesswork required - if you're not already a fan, check out my free Envelope Expert tool today!
I look forward to seeing how you interpret Jaydee's fun challenge and seeing all your square creations in the gallery this week. As you read this I will be flying high somewhere above Europe, on my way back to the rather wetter climes of the UK. Don't worry - I'm doing my best to bring the sunshine back with me everyone! Enjoy the rest of your weekend, however you choose to spend it.
Back tomorrow with another project; until then, happy stampin'!
Stampin' Up! Supplies Used: