by Joanne James5. July 2014 16:08Not quite the early card I'd hoped for today - no time between the theatre and swimming gala, but I'm here now! Today's card is made with the challenge over at Fusion in mind. I saw the inspiration photo and just had to have a go - I love the bold poppies and stripes on that dress!
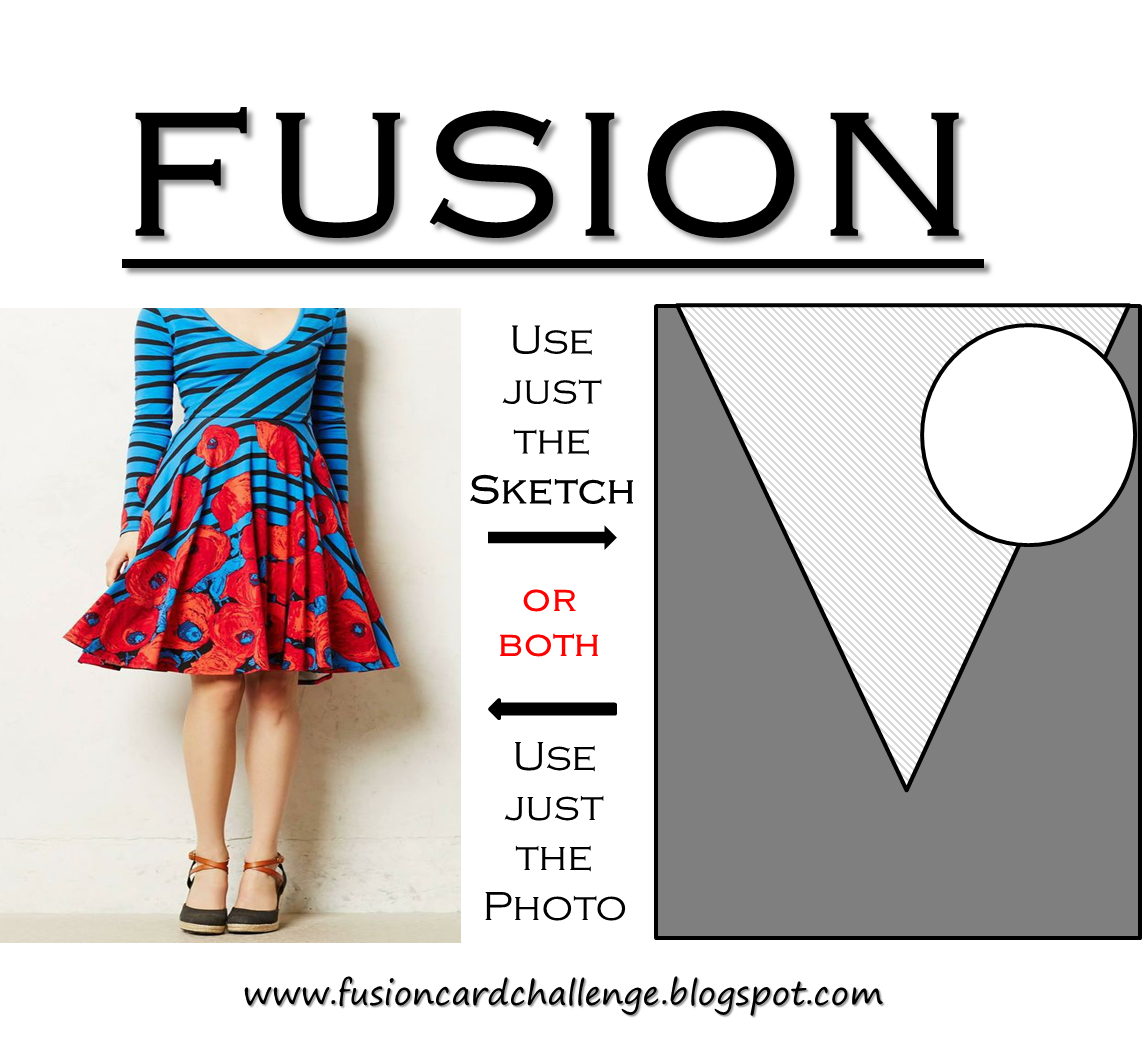
I decided the sketch wasn't for me so went with my own layout and this is what I came up with:
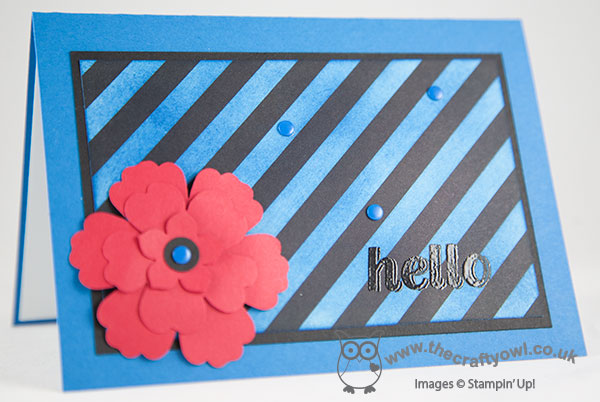
A bright and cheery 'hello' card, with a Real Red punched and layered flower set against the bold black and blue striped background. Wondering where I found my DSP? It's actually a piece of the retired Kaleidescope DSP which was originally black and white striped; I simply sponged the white stripes with Pacific Point ink to achieve the look I was after. Not a task for the faint-hearted - my hands were so blue afterwards I looked like I'd been Smurfed, but I was really pleased with the effect so it was worth it. I then finished it off with a simple 'hello' greeting (from the retired 'Simply Celebrate' stamp set) stamped in Versamark and heat embossed in black so that it would stand out against the striped background. A few blue candy dots just finish things off.
That's all from me today; back tomorrow with my first Design Team card for the Paper Players. until then, happy stampin'!
Stampin' Up! Supplies Used:
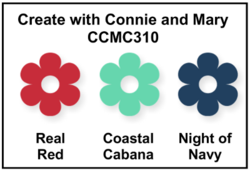
by Joanne James4. July 2014 21:54Today's card is my entry for this week's Summer Collection challenge over at Create with Connie and Mary where they have the following colour challenge:
I love this colour combo and couldn't pass up the opportunity to make something with it. All of these colours can be found in the new Sea Street designer series paper, so I decided this would be my starting point. Here's my card:
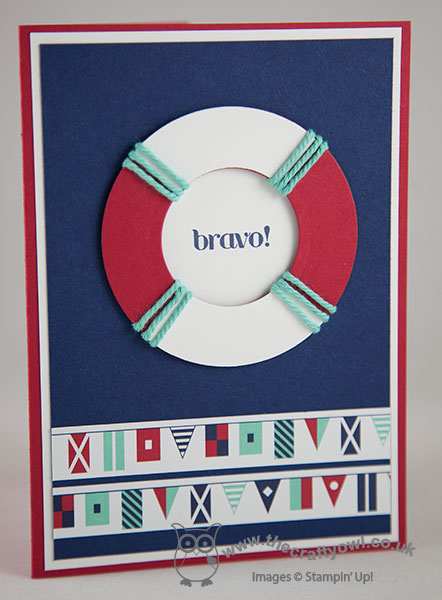
I've been wanting to make a life-buoy on a card with this paper that would enable me to use the new thick baker's twine too and this card provided the perfect opportunity. Using a Real Red base, I then used a mat of Whisper White and a further mat for the top layer in Night of Navy. I created my life buoy by cutting two rings using my circle framelits, one in red and one in white, then cutting the white one into quarters and overlaying two of the sections onto the red one. I wound Coastal Cabana baker's twine around this and adhered it to my card using dimensionals, having first stamped my sentiment onto a circle of Whisper White and adhered that directly to the card base. I then finished the front of my card with two strips of Sea Street DSP showing multi-coloured sailor's flags and stamped the co-ordinating stamp onto the inside card panel.
As my regular blog readers will know, both James juniors are keen swimmers and whilst only Rebecca currently races competitively, Ben is improving all the time as he grows older and stronger and is gaining on her all the time. He often undertakes distance swimming badges and skills-based certifications, so I made this card with him in mind - I think it will make a lovely congratulations card for my little swimmer the next time he achieves a milestone and I like that the card has a masculine feel that would suit both young and old alike.
I'll be back tomorrow with another project and I will be posting early as I will be watching the last swimming gala of the season tomorrow evening. Wish me luck - with the warmer weather we've been having the swimming baths will be roasting, so it will be all I can do to stop myself diving into the water too! Until then, happy stampin'!
Stampin' Up! Supplies Used:
by Joanne James3. July 2014 22:32Good evening all - I've had a busy week so far, most of it out and about so have spent next to no time in my craft room. Good job I have a few things that I've already prepared to share with you! Today I'm sharing one of the cards I made for my new catalogue launch event, featuring the Work of Art stamp set:
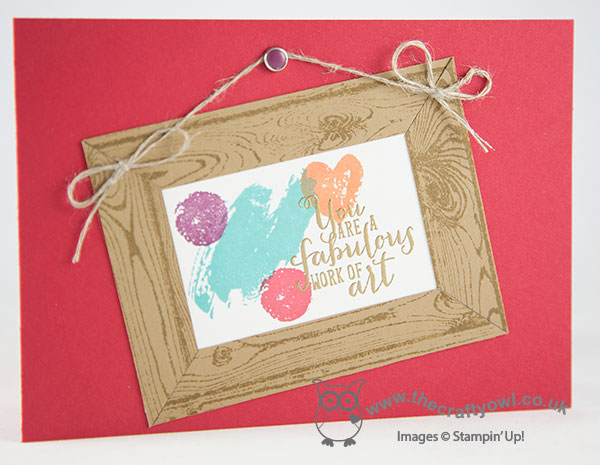
This set, comprising lots of brushstroke-type stamps can be used in lots of different ways and for this card I decided to use it to create my very own 'work of art'. I stamped four of the brushstroke stamps randomly on a piece of Whisper White cardstock, then stamped the sentiment in Versamark and heat embossed in gold. I then stamped the Hardwood stamp in Baked Brown Sugar on a piece of cardstock in the same colour and cut it into strips and created a frame for my picture. I finished off with some linen thread and a candy dot brad to hang it from on my Real Red wall.
Simple enough - but I like it! That's all from me today - a quick post as my bed is calling! Back tomorrow with another project; until then, happy stampin'!
Stampin' Up! Supplies Used:
by Joanne James2. July 2014 08:00A big day today and a special announcement for me here on my blog, although if you are a follower of Colour Me...! and read last Sunday's post you will know this already: Hayley and Tara, the lovely ladies over at Colour Me ...! Card Challenge, have asked me to join their design team for the next 6 months - how great is that?!

Along with Hayley, Tara, Claire, Julia and Sherrie I will be sharing a new card each week that showcases the colour theme to give you lots of ideas and inspiration of ways in which you can use Stampin' Up!'s exclusive colours. For my first week, we are using a monochromatic colour scheme, with possibly my favourite new in-colour this year, Blackberry Bliss, as the star of the show. Here is the challenge image:

Here is the card that I created:
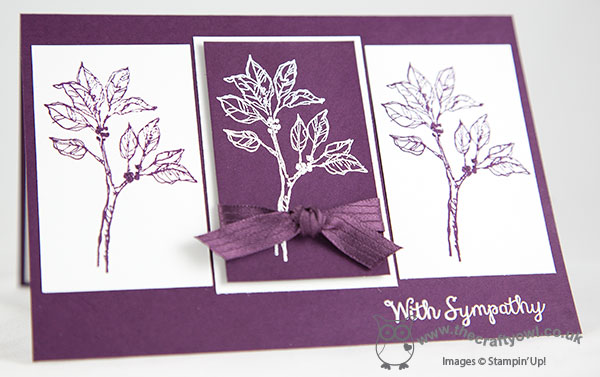
I decided to go with a three panel design featuring the foliage stamp from the new 'Blooming with Hope' hostess stamp set, alternating between stamping the images in Blackberry Bliss on Whisper White cardstock and stamping in Versamark onto a panel of Blackberry Bliss cardstock and heat embossing with white embossing powder. There are some great hostess sets in the new annual catalogue - if you ever needed an incentive to host a party, real or virtual, this catalogue has plenty to tempt; do get in touch if you would like to host one and get your hands on this set too! Back to my card: I mounted the central stamped image on a slightly larger mat of Whisper White so that it would still stand out against the Blackerry Bliss card base and stamped the sentiment directly onto the card and heat embossed that in white too. I raised the central image panel using dimensional so that it would both stand out and to enable me to easily tie some of the gorgeous new Blackberry Bliss Satin Stitched Ribbon around it - LOVE this ribbon! Apart from adding a little extra colour to the berries on the stamped images using a Blackberry Bliss and a chalk marker respectively, I didn't do anything more to them. This kind of card could be used for all kinds of occasions and I decided to make it a sympathy card as it was neutral enough to be elegant yet understated and perfect when you need this type of card.
If you came to my blog via the Colour Me...! challenge blog page and are visiting for the first time a big 'welcome' to you; if you are one of my regular readers why not hop on over to the Colour Me...! page to see what delights the other ladies have in store this week and better still, have a go at entering your own monochromatic Blackberry Bliss card into our challenge this week.
That's all from me today; back tomorrow with another project. until then, happy stampin'!
Stampin' Up! Supplies Used:
by Joanne James2. July 2014 07:00As if there wasn't enough Stampin' Up! goodness to tempt us all this week, today is Wednesday so that means a new collection of Wednesday Weekly Deals too! This week's deals are included below - they will be available for one week only, before a new collection of deals is announced.
As always, if you want to take advantage of any of the deals on offer, you can support my business by placing your order online by clicking here or using the link to my store on the right hand side of my blog page where it says 'Shop Online' or with me in person. Don't forget to add the Hostess Code for July (you can find this under the 'Shop Online' section on the right).
Here's a summary of this week's one-week only Wednesday deals - click on each item to go to the online store to purchase:
Sequins, buttons and best of all punches included this week - race you to the shop! Back later with today's creative post; until then, happy shopping!
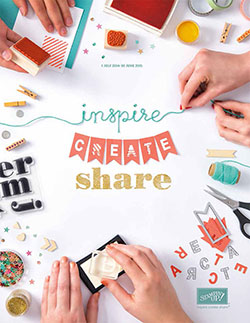
by Joanne James1. July 2014 16:04The wait is over - the new 2014-15 Stampin' Up! catalogue is finally here!
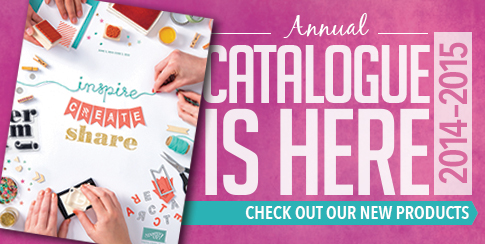
Click on the link below to access and download your own pdf copy of the catalogue - there will be a permanent link to the online catalogue as always in the bar on the right-hand side of the screen:
There are so many great new products - your wish list will be a long one! As always, if you're placing an online order don't forget to add the hostess code found in the 'shop online' box on the right hand side. For today only, if you place an order using the hostess code SM3CS22V you'll get a little something extra from me! Make sure you check the box that enables me to keep in touch with you - lots of customers that place orders with me online select 'no contact' as the default option and what many people don't realise is that this means I can't even contact you to update you with progress on shipment of your order or check that everything is ok - all of which are an important part of me providing you with good customer service. Besides, I like to be able to send out thank you cards too and little gifts from time to time - you wouldn't want to miss out on that would you?!
Right, I'm off to get my order in - come back tomorrow for more news and a special card that I've created using lots of new products. until then, happy stampin!
by Joanne James30. June 2014 21:02It's the 30th June - which sadly means the end of the 2013 annual catalogue and the Spring-Summer seasonal catalogue. So if you have anything that you would like to order today, you only have until 10pm to do so, so get in quick! It's also the last day of the 'Sign and Save' join Stampin' Up! for £50 promotion - details and sign up form in the box on the right hand side of my blog.
Me, I'm already thinking about the new! I've had my launch party for the new 2014-15 Stampin' Up! catalogue today and it was tremendous fun. I saw lots of my existing customers and got to meet some lovely new people too and I thought today I would leave you with a few photos of the day:
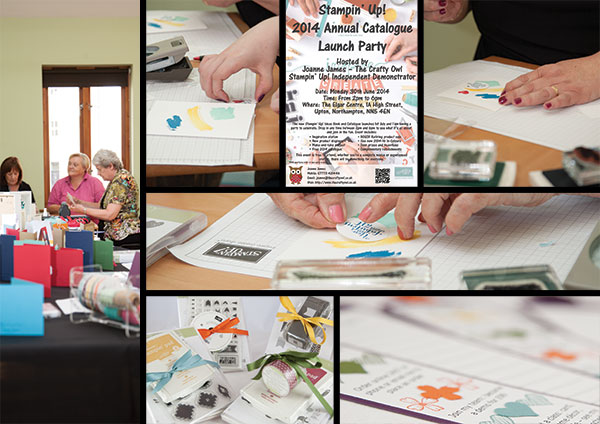
Thank you to everyone who attended and supported my Stampin' Up! business. Congratulations to Clare, Julie, Lorraine and Joy who were the lucky prize winners in today's raffle and to Barbara who won the door entry raffle prize - I will be in touch with you all in due course with your gifts.
Back tomorrow with lots of new catalogue loveliness - until then, happy stampin'!
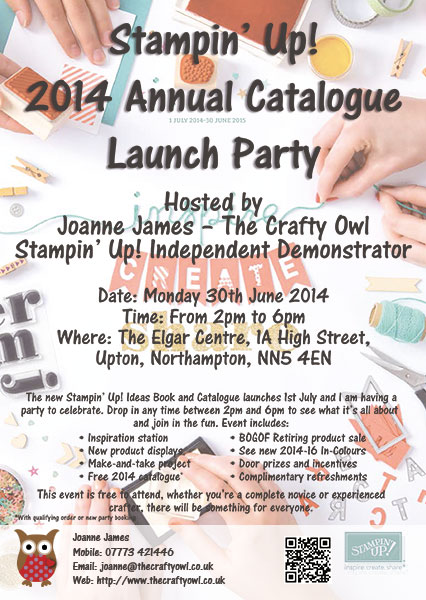
by Joanne James29. June 2014 21:52I have been busy crafting all weekend and apart from dinner with friends yesterday evening, have done nothing else! I am just about to have a quiet 30 minutes before bed, so I just have a last minute reminder for you all that tomorrow is my new catalogue launch party - details below, hope to see you there!
Back tomorrow with lots of photos and a project or two for you. Until then, happy stampin'!
by Joanne James28. June 2014 16:54Another busy day of crafting today, with additional preparations for Monday's 2014-15 Stampin' Up! Catalogue launch party event - details here - I'm so excited and hope as many of you as possible will be able to join me! If you'd like some sneak peeks of what Monday has in store, do pop over to my Facebook Page and give me a 'like' - I am posting there daily to give you a flavour of the lovely things that you'll be able to see and do. In addition to next week's new annual catalogue launch, there are also 2 other important points of note:
- Monday is the last day that you will be able to order from the Spring-Summer annual catalogue
- Monday is the last day that you can join as a Stampin' Up! demonstrator for the reduced 'sign and save' starter kit entry price of £50
If you've ever considered joining up as a Stampin' Up! demonstrator, whether to earn an extra income or simply to purchase discounted supplies to further your papercrafting hobby, this is a great time to do it: whatever your motivation, for just £50 you can give it a go - with the new products on the way, there's never been a better time to see what Stampin' Up! is all about.
There are so many things that I love about being a Stampin' Up! demonstrator, but one of the best things is definitely the people you meet along the way. I have met some great people and found some new friends through my role as a Stampin' Up! Demonstrator, both in the UK and abroad, and none more so than the members of my team. We are all different, but we share a common love - for all things crafty and Stampin' Up! - and today's card is one I received from one of the members of my team, Samantha, recently. It was one of those cards that was unexpected but left me feeling so touched and I wanted to share it with you - here is Samantha's card:

Samantha's card is a riot of 'sneak peek' items from the forthcoming catalogue: a new hostess set called 'I Like You', new in-Colours of Blackberry Bliss and Mossy Meadow - check out the gorgeous new satin ribbon! and her delicately stamped and blended paper-pieced flowers are just lovely. Samantha has been crafting forever, but has only recently started an online blog of her own called Stamp Delights - you can find it here if you would like to check it out, I'm sure she would love to see you.
I love managing a team of demonstrators and inspiring them creatively and supporting them in running their Stampin' Up! businesses in ways that suit them. I may never have met Samantha if it wasn't for Stampin' Up! and the same can be said for most of the other members of my team too - how great to be doing something that you love and making new friends at the same time too? If you are reading this and thinking 'that could be me', then give me a call or click here to join my team - I would love to hear from you!
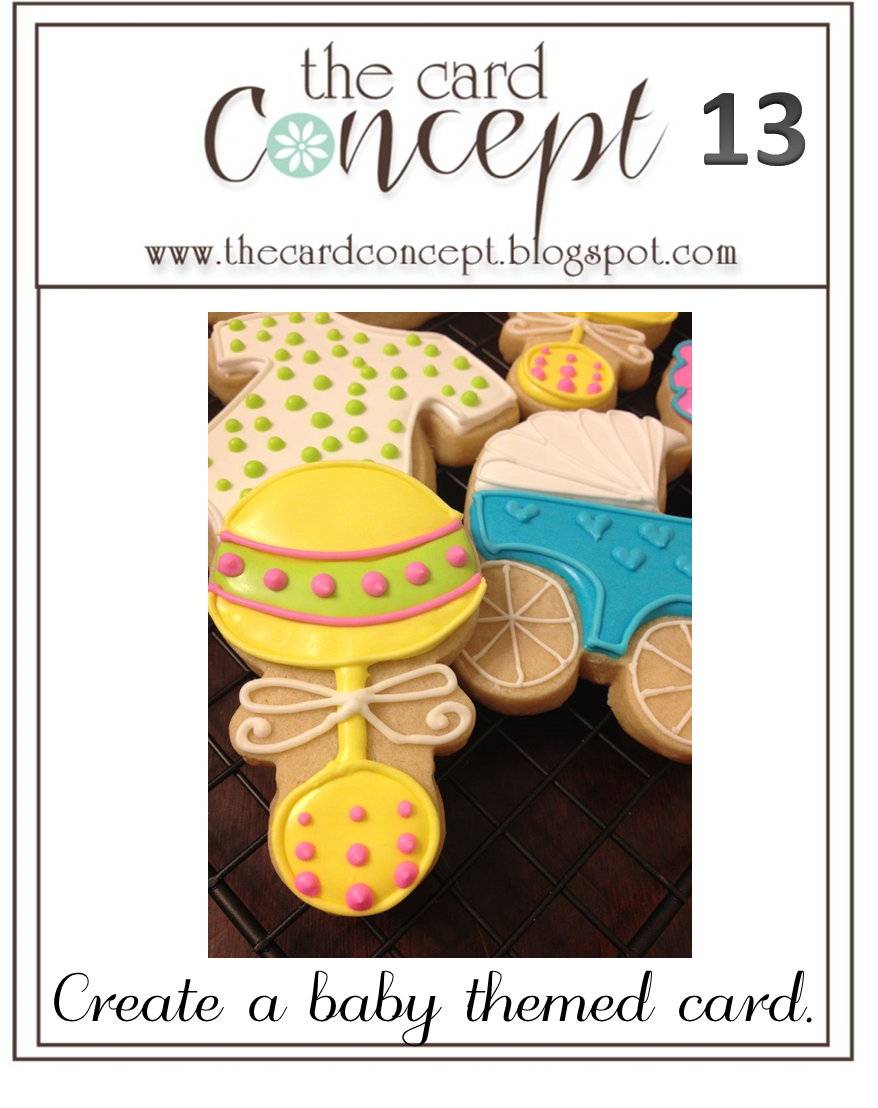
by Joanne James27. June 2014 10:18Yay it's Friday - what more is there to say?! Today I have another new catalogue sneak peek to share with you, this time a cute baby card that I made using this week's sketch layout over at The Papercraft Crew (I haven't managed to play along with these guys for a while and this week's sketch layout really appealed!) and I'm also linking up with The Card Concept, where the challenge is to create a baby-themed card (mine is in the 'clean and layered' style):
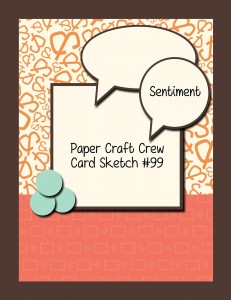
I wanted to use a set from the new catalogue called 'Something for Baby' - a lovely set with lots of baby motifs; not only that, it also has a set of matching framelits - perfect! My card is in fact stacked with new product - see if you can spot it all:
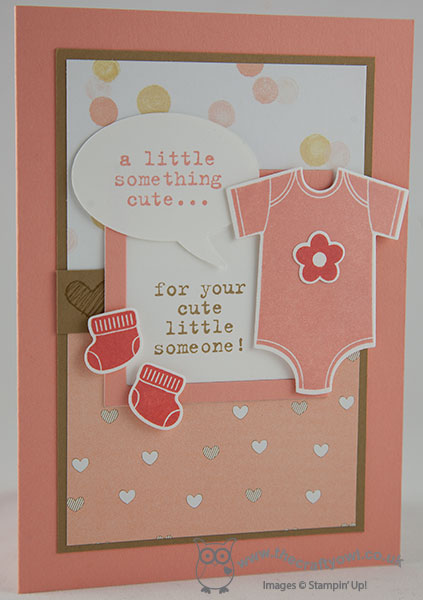
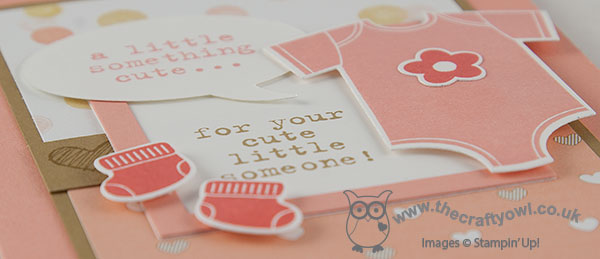
Did you get it all? My card base is Crisp Cantaloupe and I then matted two of the different patterns in one of the new DSP paper packs called 'Lullaby' onto a base of Baked Brown Sugar, and used a strip of the same colour to tie them together. I stamped the central strip with the heart stamp from the 'Something to Say' stamp set to echo the hearts on the bottom panel, although you can't really see them as they are obscured by the frame. I then created a frame using my Big Shot and square framelits and stamped the second half of my sentiment in the box. The first half I stamped in a contrasting colour onto a word bubble cut out with my framelits - I cut first and stamped second, which I don't usually do but I wanted my word bubble to 'hang' the opposite way (hope that makes sense!) - another sentiment from the 'Something To Say' set. I then embellished my card with a cute Crisp Cantaloupe babygro, complete with a Calypso Coral flower, and pair of booties, all popped up on dimensionals.
Hope you like my cute little baby girl card - lots of great sneak peeks there; only 5 more days to go until the new annual catalogue is here! And only 4 more days until my 2014-15 catalogue launch party: full details here and lots more to see so do come along!
Back tomorrow with a special project; until then, happy stampin'!
Stampin' Up! Supplies Used:
* Something for Baby stamp set and co-ordinating framelits - available 1st July
* Something to Say stamp set - available 1st July
* Lullaby Designer Series Paper - available 1st July
79323120-4cbb-44a9-b76b-5b88a30663df|0|.0|96d5b379-7e1d-4dac-a6ba-1e50db561b04
Tags: 2014 Annual Catalogue, Something To Say, Something For Baby, Lullaby, Word Bubbles Framelits, Square Framelits, Stampin' Up, Stampin' Up Card, Stampin' Up Card ideas, Stampin' Up Supplies, Shop online, Big Shot
Cards | Stamping