He's The Man You're A Classic Masculine Card TTT166

by Joanne James16. June 2022 16:00

It's Thursday and time for a new challenge over at TicTacToe! It's the turn of Team X to host this week and the lovely LeAnne is our featured designer this week. This is the fun board that we are playing along with: 


I went down the first column with masculine, car/truck and brown and used the current Try Stamping on Tuesday sketch layout for another Father's Day card featuring the He's The Man specialty designer series paper - take a look:


Here's the low-down on today's card:

I combined a couple of different paper patterns and focused on the transport design to make my slightly larger than usual, A5 size card. The size seemed to give a better balance and allow the diecut car to take centre stage, whilst still allowing lots of the pattern to remain visible:


I combined it with a sentiment from the retired 'Geared Up Garage' set which seemed appropriate for the vintage automobile. A few more layers on this card compared to yesterday's, but not much more in the way of stamping - still all about the paper, He's The Man! This card is already in the post to my Dad in readiness for Father's Day this weekend - he is a classic, in more ways than one!!

Here is the visual summary of the key products used on today's project for you to pin for easy reference:


You can see all of my Product and 'How To' summaries on my 'How To - Tips and Techniques' Pinterest board in case you've missed any. 

A tictactoe board offers so many creative possibilities - how does this week's board inspire you? Why not have a go? We would love to see you in the gallery and who knows - you might be selected for Designer's Choice and be eligible to be a guest designer on a future challenge. 

Enjoy your day; I am driving to Bath this evening for the first of a number of university open day visits with the birthday girl that we have planned over the next few weeks. We are even spending the night in university accommodation to 'try it for size' - should be fun! I'll be back tomorrow with my card for this week's As you See It challenge. Until then, happy stampin'!


Stampin' Up! Supplies Used: 

Table built using Product Table Builder by The Crafty Owl - Independent Stampin' Up! Demonstrator.

He's The Man Flippin Awesome Masculine Card

by Joanne James15. June 2022 09:00

Today I'm sharing a card that uses the sketch layout over at Inspire.Create that was also inspired by the masculine theme and brown palette of browns over at The Card Concept:


This is a really simple clean and simple/layered card (well, there's not that much 'white space'!) that came together in no time thanks to the He's The Man designer series paper - take a look:


This is one of those rare, absolutely no stamping whatsoever cards that uses just three products! I simply added a strip of patterned paper to my base, layered another piece of DSP (this time cut with a Stitched Rectangle Die for a little added detail, but you could skip this step if you don't have one to hand) then used one of the diecuts from the paper pack as my focal point - flames, BBQ tools and sentiment all in one! 


This card will be one of the Father's Day cards for hubby from one of the James Juniors this coming weekend - he loves to BBQ so will definitely appreciate the punny sentiment! I did stamp a suitable greeting on the inside, but otherwise the He's The Man designer Series paper definitely did all of the heavy lifting on this one! If you'd like to see another masculine card using these papers, be sure to come back tomorrow as I have another Father's Day card to share for my TicTacToe card!

Here is the visual summary of the key products used on today's project for you to pin for easy reference:


You can see all of my 'How To' summaries on my 'How To - Tips and Techniques' Pinterest board in case you've missed any. 

Enjoy your day. We are celebrating in the James household today and the eldest of the Juniors turns 17 - although to be fair we started our celebrations earlier in the week, as tonight will be taken up with our first face-to-face parents evening since Covid for the other James Junior - we are hoping to squeeze in birthday dinner beforehand though. I'll be back tomorrow with another couple of projects. Until then, happy stampin'!


Stampin' Up! Supplies Used:

Table built using Product Table Builder by The Crafty Owl - Independent Stampin' Up! Demonstrator.

He's The Man Masculine Anniversary Card

by Joanne James1. June 2022 09:00

Today I'm sharing a quick masculine card, perfect for the challenge over at Inspire.Create that uses the current sketch over at Sketch Saturday:


I thought this was a great sketch layout that was perfect to showcase the new He's The Man designer series papers - take a look:


Here's the low-down on today's card:

The papers in the He's The Man Suite are fabulous - a great selection of masculine designs covering everything from cars, to camping, cooking and lots more besides. Better still, the paper pack includes two whole sheets of pre-diecut pieces that can be used to embellish your cards - no stamping required! I used to different paper patterns and one of the diecuts from the pack, along with some retired Crushed Curry twine that picked up the yellow on the tent and a couple of diecut trees from the (retired) Christmas Trees Dies that reflected the shape of the trees on the DSP:


That's it - simple as that! I'm also entering today's card over at The Alphabet Challenge where they are on 'D is for Diecuts' this week - the diecuts in this set really are the best!

Here is the visual summary of the key products used on today's project for you to pin for easy reference:


You can see all of my 'How To' summaries on my 'How To - Tips and Techniques' Pinterest board in case you've missed any. 

I love these papers so much I am going to feature them in an upcoming class - you can read all about it here and do get in touch if you'd like to register.

Enjoy your day and I'll be back tomorrow with another project. Until then, happy stampin'!


Stampin' Up! Supplies Used:

Table built using Product Table Builder by The Crafty Owl - Independent Stampin' Up! Demonstrator.

The Big Fifty Birthday Card PP557

by Joanne James5. September 2021 08:00

Today it's Sunday and time for this week's new challenge over at The Paper Players! It's the turn of the fabulous LeAnne to host this week and she has a fun theme challenge for you to work with:


LeAnne's theme was a timely one for me this week since my 'better half' celebrates a milestone birthday early next month so this gave me the perfect opportunity to make his birthday card. I thought the colours over at Just Add Ink were perfect for a fresh, masculine card and I absolutely love Kim's sketch over at Freshly Made Sketches so I used this for my layout (albeit I created my card in a landscape orientation in order to fit all the words in! So first up - take a look at my card:


Whilst browsing the internet for birthday inspiration, I saw a pin badge that had the above phrase on it and I thought it would be perfect for a milestone birthday card and I know Jason will appreciate this kind of sideways humour. I stamped the phrase in Night of Navy using my retired 'Sophisticated Serif' stamp set with the 'F' highlighted in Coastal Cabana, which I carried through to my '50', diecut using my retired Large Number Framelits, and used for contrast on my background panels in some retired Brights DSP in a masculine argyle pattern.

Kim's sketch also features a vertical sentiment banner, which was the perfect place to add a happy birthday greeting (stamped using my retired 'Milestone Moments' stamp set) which I heat-embossed in silver on vellum so that it wouldn't obscure the message on my central panel. This was also the perfect place to add an embellishment of a trio of retired co-ordinating ribbons tied with silver twine:


My card is otherwise very clean and uncluttered, but I figured it might be a masculine card but a milestone birthday needs a little pizzazz, right?!

Before you reach for your ink and papers, check out what our amazing team has created to inspire you this week:

Here's a quick recap of our challenge rules:
 
1.  Create a new paper project
2.  Upload your creation to your blog with a link back to us and provide a direct link to the post featuring your challenge submission.
3.  Please link your card to no more than four challenges, TOTAL.
4.  Have FUN!

You can see all of my 'How To' summaries on my 'How To - Tips and Techniques' Pinterest board in case you've missed any. 

Enjoy your day; the forecast here is for a warmer day so we are hoping for one last BBQ before the James Juniors return to school and the summer well and truly leaves us for good. I'll be back tomorrow with another project. Until then, happy stampin'!


Stampin' Up! Supplies Used:

This card uses mostly retired products apart from the current colours so there is no supplies list today.

Garden Shed Birthday Greetings For Dad

by Joanne James1. September 2020 17:30

This is my second post today; click here to catch up on the important news of the day! For my creative post I'm sharing a card for a couple of challenges:


September is the month of birthdays in the James family (mine included!) so I have lots of cards to make. My Dad's birthday isn't until later this month, but I thought I'd get a headstart since the team at Just Add Ink are encouraging us to make 'Cards for Guys' this week and the sketch at Fusion gave me the perfect layout (I am using the sketch there this week and taking a fairly liberal interpretation at that, although I was somewhat inspired by the soft greens of the photo too) - take a look:


Here's the low-down on today's card:

Garden Shed - For as long as I can remember my Dad has been a keen gardener - of vegetables, rather than flowers though! He has a greenhouse and a kitchen garden at home and a large allotment with a shed where he spends much of his time each day now that he has retired and more recently given up golfing too. He can while away hours pottering away, whilst taking shelter in his shed if it rains or sitting out front watching the world go by as he drinks his morning coffee with his fellow allotmenteers. As such the Garden Shed stamp set is perfect for his birthday card; whilst his doesn't have a straw hat adorning the outside and the exterior is more brown in colour than the one I coloured with my Stampin' Blends, the inside is full of paintings and pottery made by his grandchildren and is certainly filled with green-fingered creativity. 

Family Party - I used a slimline card format for my card today, as I knew I would need a larger, customised sentiment and wanted to give my shed plenty of space to shine without being obscured. If you need a special sentiment for a relative, the Family Party stamp set is perfect - I used four different stamps to make my greeting and it fits just right on my card.  

On The Inside - No more embellishments on the outside of my card (it is for a guy, after all!) but I did add a little extra colouring along with a custom greeting to the inside of my card:


I'm sure he will love it; I just need to make a Grandpa card too now and then that order is complete!

Here is the visual summary of the key products used on today's project for you to pin for easy reference:


You can see all of my 'How To' summaries on my 'How To - Tips and Techniques' Pinterest board in case you've missed any. 

Enjoy your evening and I'll be back tomorrow with another project. Until then, happy stampin'!


Stampin' Up! Supplies Used:

Table built using Product Table Builder by The Crafty Owl - Independent Stampin' Up! Demonstrator.


Ahoy It's Your Birthday CAS Masculine Cards for PP464

by Joanne James20. October 2019 09:00

Today it's Sunday and time for this week's new challenge over at The Paper Players! It's the turn of the fabulous LeAnne to host this week and she has a great Clean and Simple challenge for you to work with:


As you are reading this, I am away entertaining a lovely group of ladies at my Creative Escapes weekend craft retreat where we will be Christmas crafting to the max. My cards for you today though are all about birthdays - and male birthdays at that! I made these cards a while ago when I was preparing for my 'Come Sail Away' technique card class, although I didn't feature them in the class itself and LeAnne's challenge this week is the perfect opportunity for me to share them with you. I made two cards in one sitting and wanted to share both with you, so first up the more clean-and-simple of the two: 


Here's the low-down on today's card:

All At Sea - Both of my cards feature a background layer embossed with the High Seas embossing folder for some subtle texture. I love the detail that this gives and it’s perfect for my nautical theme. 

Ahoy The Hand Lettered Prose Dies - I used my diecutting machine and the Hand Lettered Prose Dies to diecut an a, h, and y from my Balmy Blue card layer before I added the waves embossing. This allowed me to use the negative space to show the contrast of colour with the navy cardstock behind and gave me the opportunity to make a second card using the letters I had cut out with just a little extra effort. If you like these letters, it is worth also checking out the blog of one of our current Paper Players guest designers, SU Mohr (see the link list below), who has created many wonderful projects using them.

O It's A Ship's Wheel - I substituted the ‘o’ in the word ‘ahoy’ with a ship’s wheel from the Smooth Sailing Dies to tie in with my theme and added a frosted epoxy droplet to the centre for some subtle bling. I love playing with words to create this effect! I finished my sentiment with a stamp from the ‘Broadway Birthday’ set. The second of my two cards is below, which uses an extra layer and the positive rather than negative letters, but is otherwise the same basic card:


So what do you think? Is today's sentiment loud enough to celebrate a birthday? I’m now of an age where I’m not shout from the rooftops with each passing year, however I do love to celebrate and am thankful for the many thoughtful cards i receive from friends and family near and far. 

Here is the visual summary of the key products used on today's project for you to pin for easy reference:


You can see all of my Product and 'How To' summaries on my 'How To - Tips and Techniques' Pinterest board in case you've missed any. 

Before you reach for your ink and papers, check out what our amazing team has created to inspire you this week:

Here's a quick recap of our challenge rules:
 
1.  Create a new paper project
2.  Upload your creation to your blog with a link back to us and provide a direct link to the post featuring your challenge submission.
3.  Please link your card to no more than four challenges, TOTAL.
4.  Have FUN!

You can see all of my 'How To' summaries on my 'How To - Tips and Techniques' Pinterest board in case you've missed any. 

Enjoy your day; I'll be back later this week with another project. Until then, happy stampin'!


Stampin' Up! Supplies Used: 

Table built using Product Table Builder by The Crafty Owl - Independent Stampin' Up! Demonstrator.

True North Ship's Wheels FMS397

by Joanne James22. July 2019 14:00

Today I'm sharing a card using the current sketch over at Freshly Made Sketches that was also inspired by the current Time Out Challenge:


I went with neutrals and masculine today and with those circles on Kim's sketch offering lots of creative possibilities, I saw ship's wheels in their place - take a look:


Here's the low-down on today's card:

Sailing Home - I suddenly realised this week that despite having brought this set home with me from Onstage back in May, with the exception of my Make and Take this is the first card I've made with it (a case of new product overload as usual!) I have an upcoming class with this set and a ton of 'works in progress' on my desk, so will definitely have lots more to share in coming weeks. The only stamp I used on today's card is the sentiment - I think this makes a nice sentiment for a male anniversary card, but would also work for a mentor, teacher or coach I think; anyone who sets direction and motivates others.

Come Sail Away Compasses - I wasn't sure that I would use the paper pattern that I featured on today's card with all of those compasses and measuring instruments (there's always one in a pack that goes to the bottom of the pile, right?) so I pushed myself to cut into it and I think with some black accents it adds just enough detail to work on today's card. The stripey pattern on the reverse will definitely be more popular with me, but for now challenge accomplished! 

Smooth Sailing Ship's Wheels - My trio of ship's wheels were diecut using the Smooth Sailing Dies - check out the embossed detail on these, so lovely. I cut them from a scrap of (retired) brushed silver cardstock from my scrapbox and finished the centre of each with a black faceted dot for a little understated bling.

Here is the visual summary of the key products used on today's project for you to pin for easy reference:

You can see all of my 'How To' summaries on my 'How To - Tips and Techniques' Pinterest board in case you've missed any. 

Enjoy your day and I'll be back tomorrow with another project. Until then, happy stampin'!


Stampin' Up! Supplies Used:

Table built using Product Table Builder by The Crafty Owl - Independent Stampin' Up! Demonstrator.

Happy Birthday Grandpa #SimpleStamping With On To Adventure PP451

by Joanne James21. July 2019 09:00

Today it's Sunday and time for this week's new challenge over at The Paper Players! It's the turn of the fabulous Ann to host this week and she has a CAS challenge for you to work with:


Remember: this is clean and simple week. What do we mean by 'clean and simple' ? Create a card that has:

  • Minimal layers and embellishments
  • Plenty of open space, also known as 'white space'
  • Is simple and uncluttered

There were lots of great options to choose from this week and in the end I decided to use this week's CAS(E) This Sketch layout and the fun golfer in the new 'On To Adventure' set - take a look:


Here's the low-down on today's card:

On To Adventure - As soon as I saw this set in the catalogue, I knew I would have to have it! My Dad is a keen golfer and so I knew this image would give me a lot of mileage. Many of the sentiments in this set are along the theme of retirement (which is also good for me, as I didn't have any retirement sets up to this point) but the images can easily be combined with other sentiments to be used in tons of different ways. I stamped my golfer above my hole-in-one sentiment then brayered in some Granny Apple Green grass to ground him before colouring him with my Stampin' Blends.

In Color Argyle - This card would look fine as a one layer card, however the sketch calls for some vertical stripes and since this month's #SimpleStamping challenge from stamping up is to use stamps, ink and paper along with some designer series paper on your card, I decided that this argyle pattern in the new DSP stack would work perfectly with my golfer - my Dad certainly has many golf sweaters with this pattern!

A Ribbon of Birthdays -  It's my Dad's birthday next month so I thought this would make a perfect 'Happy Birthday Grandpa' card from one of the James Juniors. With this in mind, I overlaid a 'ribbon' of happy birthday sentiments, courtesy of the 'Itty Bitty Birthdays' set and stamped repeatedly on a narrow strip of white cardstock, along my DSP border.

Here is the visual summary of the key products used on today's project for you to pin for easy reference:


You can see all of my Product and 'How To' summaries on my 'How To - Tips and Techniques' Pinterest board in case you've missed any. 

Before you reach for your ink and papers, check out what our amazing team has created to inspire you this week:

Here's a quick recap of our challenge rules:
 
1.  Create a new paper project
2.  Upload your creation to your blog with a link back to us and provide a direct link to the post featuring your challenge submission.
3.  Please link your card to no more than four challenges, TOTAL.
4.  Have FUN!

You can see all of my 'How To' summaries on my 'How To - Tips and Techniques' Pinterest board in case you've missed any. 

Enjoy your day; we are on a belated spring-clean at home so will be spending a little time doing some more sorting out today. We have a movie to watch and hopefully I'll squeeze in a little crafty time too. I'll be back tomorrow with another project. Until then, happy stampin'!


Stampin' Up! Supplies Used:

Table built using Product Table Builder by The Crafty Owl - Independent Stampin' Up! Demonstrator.

Celebrate Your Day With A Little Elephant Birthday Card

by Joanne James14. July 2019 09:00

Today it's Sunday and time for this week's new challenge over at The Paper Players! It's the turn of the fabulous LeAnne to host this week and she has a colour challenge for you to work with:


I really liked LeAnne's colour combo this week and I have a real shortage of male birthday cards in my box at the moment, especially for young boys (a whole bunch of Ben's friends have had birthdays lately with still more to come in the next couple of months), so that's where I decided to focus my efforts this week. I have two cards to share with you today, both featuring the Little Elephant set. They both use this week's sketch over at CAS(E) This Sketch; here's the first one:


Here's the low-down on today's cards:

I did some simple layering and inset my punched elephant carrying his balloons inside a circle aperture cut with my Layering Circle Dies, then overlayed a stacked diecut sentiment, cut with the Well Written Framelits, that I brushed with clear Wink of Stella for added sparkle. I also made a super clean and simple version that I am going to link up over at Less Is More for their theme of 'Celebrations' this week:


I switched the colours around and punched out the elephant's ear to ring the changes and for both cards I decorated the envelopes and the insides too. My Stamparatus made it easy to line up the balloon and the elephant's trunk - love that tool!

Here is the visual summary of the key products used on today's project for you to pin for easy reference:


You can see all of my Product and 'How To' summaries on my 'How To - Tips and Techniques' Pinterest board in case you've missed any. 

Having made these cards I decided they were maybe a little too youthful for my 'pre-teens' so I used this colour combo to make another masculine, more grown up card that I will share with you on Tuesday, so if you like this colour combo, be sure to pop back then and take a look.

Before you reach for your ink and papers, check out what our amazing team has created to inspire you this week:

Here's a quick recap of our challenge rules:
 
1.  Create a new paper project
2.  Upload your creation to your blog with a link back to us and provide a direct link to the post featuring your challenge submission.
3.  Please link your card to no more than four challenges, TOTAL.
4.  Have FUN!

You can see all of my 'How To' summaries on my 'How To - Tips and Techniques' Pinterest board in case you've missed any. 

Enjoy your day; I will be glued to the TV this afternoon enjoying the Wimbledon Men's Final - the culmination of two fantastic weeks of grass court tennis and spending some quality time with my boys since we are still Rebecca-less, as she continues to experience the delights of life with a German family (only 3 more days t go!) I'll be back tomorrow with another project. Until then, happy stampin'!


Stampin' Up! Supplies Used: 

Table built using Product Table Builder by The Crafty Owl - Independent Stampin' Up! Demonstrator.

Best Catch Masculine Bendi-Fold Card for PP449

by Joanne James7. July 2019 09:00

Today it's Sunday and time for this week's new challenge over at The Paper Players! It's the turn of the fabulous Laurie to host this week and she has a fun theme challenge for you to work with:


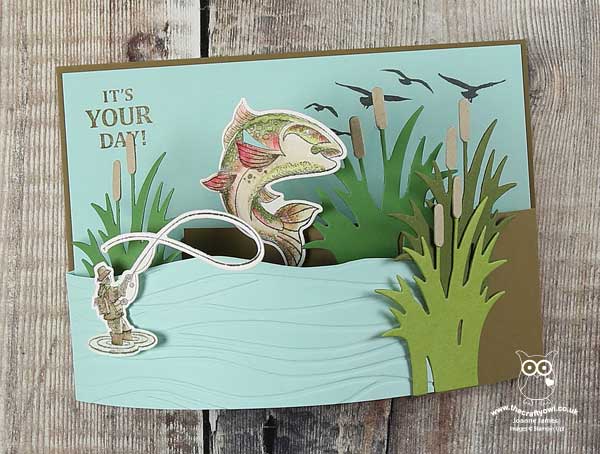
I held a class featuring the 'Best Catch' stamp set a few months ago when it was in the Spring-Summer catalogue. Since this set carried over into the new annual catalogue, today's challenge gave me the perfect opportunity to share one of the fun folds we made - take a look:
 

Here's the low-down on today's card:

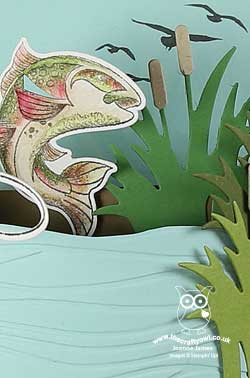
Best Catch -  If you or someone you know is a fan of fishing, then the 'Best Catch' is perfect for you. When I think of watersports, I tend to think of swimming or scuba diving as they are the watersports that I love, yet angling is one of the most popular past-times globally, fly fishing in particular. There are some great images and sentiments in the set, and there is also a useful set of co-ordinating dies, 'Catch Of The Day', that make cutting out the shapes super quick and easy. My favourite image is the fish and he is definitely the star of this card; so many options to colour him, and when you use the framelits to cut him out you get a fun fin detail too that is great on a fancy fold card. I stamped my fisherman and fish on Shimmery White cardstock as this allowed me to watercolour them with inks and an aquapainter and gives the fish a nice sparkly sheen too - just like fish scales!

A Fancy Fold Bendi Card - A bendi-fold card seemed like a fun way to add extra dimension and interest to my fishing card. Using a standard sized A6 cardbase for my backpiece, I then added a narrow panel to each outside edge; one in brown the same colour as my card base, and the other in Pool Party to the other side. To made the bendi fold mechanism, I simply cut a small slit in the back panel approx. one third from the opposite edge and slid the edge of the brown panel into it, creating a bend, then repeated this on the other side with the blue panel, tucking it into the first brown fold (just under the bulrushes).

Making Waves - Aside from my fun fancy fold, I added some texture and interest to my 'river' by running my Pool Party section through my Big Shot with my (now retired) Seaside Embossing Folder. If you don't have this, the new High Seas 3D embossing folder could be used to create a similar effect. Along with some die cut bulrushes and a little stamping, this finished my scene.

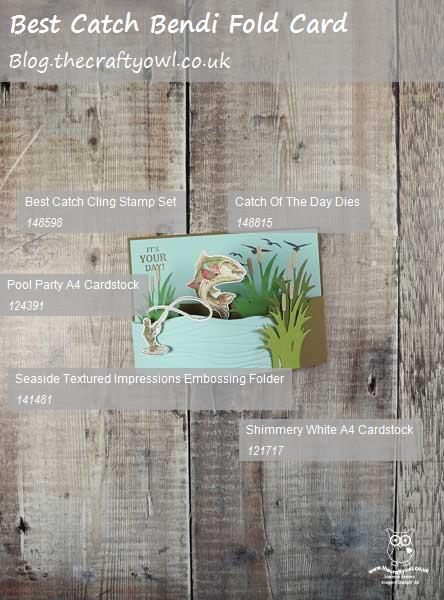
Here is the visual summary of the key products used on today's project for you to pin for easy reference:
 

You can see all of my Product and 'How To' summaries on my 'How To - Tips and Techniques' Pinterest board in case you've missed any. 

So what do you think? Have you ever tried to make a bendi-card? What is your favourite type of fancy fold? Do let me know in the comments below - I love to read your thoughts.

Before you reach for your ink and papers, check out what our amazing team has created to inspire you this week:

Here's a quick recap of our challenge rules:
 
1.  Create a new paper project
2.  Upload your creation to your blog with a link back to us and provide a direct link to the post featuring your challenge submission.
3.  Please link your card to no more than four challenges, TOTAL.
4.  Have FUN!

You can see all of my 'How To' summaries on my 'How To - Tips and Techniques' Pinterest board in case you've missed any. 

Enjoy your day; we will be hoping the weather is slightly warmer than yesterday so that we can spend some time outside. I am also going to be busy getting the oldest of the James Juniors ready for her school exchange trip to Germany this week.  I'll be back tomorrow with another project. Until then, happy stampin'!


Stampin' Up! Supplies Used:

Table built using Product Table Builder by The Crafty Owl - Independent Stampin' Up! Demonstrator.

Mini Catalogue

BROWSE THE CATALOGUE

The mini catalogue is now live! Read and download your copy here.

Shop Online

Access my online shop 24 x 7, 365 days of the year:

Current March hostess code:

S9F2XJJW

Shop Online

Join My Team

It's always a great time to join Stampin’ Up! New team members can get £130 worth of products for only £99 + free business supplies + free shipping + all the fun being a part of Stampin’ Up! Stampin' Up! has something for everyone: join my growing team and benefit from my support to enjoy Stampin' Up! however you choose.

If you're interested, call me for a chat to understand how I can help you realise your goals. Alternatively, if you have already decided to sign up and you just can't wait, please click here for the link to the online form where you can sign up and order your starter kit right away! 

Latest Kit!

Stampin Cut and Emboss

The Rock Legend Kit has all you need to make 8 cards with coordinating envelopes. Along with the new Panda Friends Kit, both are available from January 4th for just £14 each - get yours here!

2023-24 Annual Catalogue

BROWSE THE CATALOGUE

Click on the catalogue for a full list of current SU! supplies - if you would like to order any of the items featured, please drop me a line at [email protected] or give me a call on 07773 421446 - I'd be happy to help.

New Online Exclusives

There will be new products available exclusively in the online store from 5 March - check them out here.

About Me

Hi I'm Joanne and live in Northampton and when I'm not looking after my husband and two beautiful children, am an avid crafter with a passion for all things Stampin' Up!

I must confess that I have never been a big rubber stamper - until I discovered Stampin' Up! that is. I love the fact that I can get such great results with co-ordinating stamps, inks, papers and punches - the possibilities are endless! Join me on my stamping journey as I share the things I love and be inspired to create amazing things yourself!

Follow Me

Monthly Newsletter

Box Builder

Click the button above to use Box Buster to create your custom box design using the Envelope Punch Board!

Kits Collection Now Available!

Stampin Cut and Emboss

The new Kits Collection from Stampin' Up! is now available!

Click here to see the current kits available and order yours online today.

I Design For


Stampin' Up Stuff

This is my personal blog and is not endorsed by Stampin’ Up! I hope you find it a plentiful source of ideas and personal inspiration but please don't copy my designs for contest submission or use for classes, publication or sale without express permission.