Gift Bow Bigz Die Angel Christmas Tree Ornament and Video Tutorial

by Joanne James8. December 2013 16:00

Another weekend of James family busy, busy. Yesterday: hairdressers, mad science parties and swimming gala on top of the usual homework and household chores. Today: swimming lessons, family lunch and decorating the house ready for Christmas. Finally I'm able to share today's post with a cute project: this adorable angel Christmas tree ornament made using the Stampin' Up! Gift Bow Bigz Die:

I've seen a few different examples of these angels on the internet; the first one I saw was on Tanya Bell's blog here which also included a great tip for getting even eyes. I'm not sure where the original idea came from, but as they are all a little different I thought I would share with you my version; I've been making lots of these to decorate the house this year and love that I can use my Gift Bow Die for so many more things than making bows. I made a video tutorial for you to show how I put these together; here it is:


The supplies and equipment you need to make an angel are listed below and the key measurements for the cardstock to make the main part which is the angel dress body are:

2 pieces cardstock: 10.5cm x 5cm

1 piece cardstock: 1.5cm x 8cm

These card sizes enable you to get three angels out of one sheet of A4 cardstock. Come back tomorrow for another project using the Gift Bow Bigz Die; until then, happy stampin'!


Stampin' Up! Supplies Used:

Table built using Stampin' Up! Product Table Builder from The Crafty Owl.


Season of Style Christmas Card Trio

by Joanne James6. December 2013 22:23

Another busy day today so a late post - I'm still putting the final touches to a couple of video tutorials that I've prepared to go with my next couple of posts, so meanwhile I'm going to share with you three of the Christmas cards that we made at this month's card class. Each one features the Season of Style paper and a variety of different stamps. So here is the first one: 

This card uses the 'Love and Joy' single stamp on a set of layered pieces cut with the Deco Labels framelits. This was our second card:

This card uses the 'Warmth and Wonder' hostess set and is a CASE of a card I fell in love with by Mary Fish, who created a similar card using the Winter Frost colour scheme; you can see her original card here. Here is the third card that we made:

This uses a similar layout to one of the cards featured in the seasonal catalogue that showcases the 'Wishing You' stamp set, but I incorporated a small bow made with the Gift Bow Bigz Die for added impact. The last card was the Midnight Muse circle thinlit card I made a while ago featuring a bauble and two ways to make labels using the mosaic punch; the ladies in my class loved this card when they first saw it and were keen to have a go at it themselves. If you missed this card and would like to see it, you can find it here.

I also made alternative non-Christmas cards that followed each of the above design layouts, as I had a customer who didn't want to make Christmas cards (far too organised!); I'll share these cards with you next week.

I hope you liked the above cards, especially the last one - I love my Gift Bow Die and I have some great projects to share with you over the next few days using this useful product. Until next time, happy stampin'!

Stampin' Up! Supplies Used:

Table built using Stampin' Up! Product Table Builder from The Crafty Owl.


Overweight Santa?!

by Joanne James13. November 2013 21:37

A quick post from me today, to share a card I made earlier in the week. The sketch over at Freshly Made Sketches last week really appealed to me, however whilst I had a few rather obvious ideas as to how I could use it (an ornament, a snowflake) I wanted something really unusual. So here is the sketch:


So here's what I did with the sketch:


I figured it really looked like it could be part of a santa suit, but for a santa who's eaten one too many mince pies, as his belt doesn't quite do up around his middle! The sparkly glimmer paper buckle adds some lovely 'bling' and a simple white embossed 'Merry Christmas' sentiment for the finishing touch.

I was too late to link this card up to the challenge, but I'm really happy with my final output.

Come back tomorrow for another project; until then, happy stampin'!


Stampin' Up Supplies Used:


Tags: , , , , , , ,

Cards | Punch Art

Audi Thank You Card

by Joanne James11. November 2013 21:29

Evening folks! I'm back following a couple of blog-free days. It's been a busy weekend, starting Friday evening with Billy Joel in concert (hands down one of the best gigs I've ever attended!) and followed by the annual bonfire and fireworks display on Saturday night (also good, so I'm told, but as I was busy working serving hot dogs I didn't get to see much of it myself). Yesterday was more of a day of catching up, rather than a day of rest, and today we're back to it!

Today's card has a story behind it; I haven't done one of these for a while, but this is one I want to share. So firstly, here is the card:

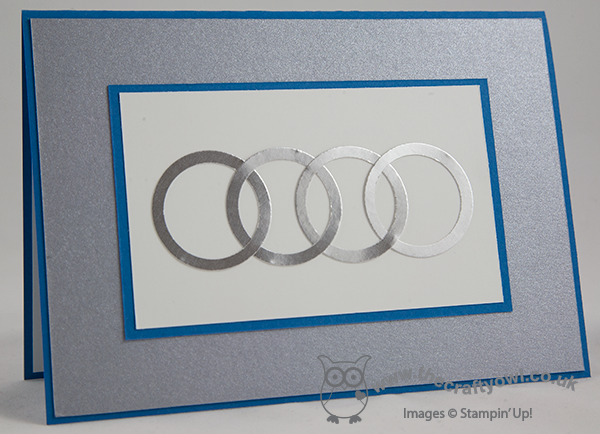
Classically simple; I made the card to say thank you to the salesman who sold us our new car - any guesses as to which brand? So here is the story! We were looking to trade in our Land Rover, having owned two and deciding that even a change in ownership of Hartwell, our local dealer, hadn't improved the shocking after sales service provided there so buying a third one was definitely not an option. Buying a car should be a pleasurable experience, right? I have to say, after trudging round our local showrooms one Saturday recently, I was seriously beginning to wonder. I was genuinely amazed at the number of car salesmen, and women, who either ignore the potential customers walking into their store or were frankly just not interested in assisting with specific requests for brochures or more information. We visited Volkswagen, Mercedes and Ford dealerships amongst others and we were utterly underwhelmed in each. There were two garages who offered exceptional assistance and service: one was Nissan. Whilst they didn't have a car that met our main car requirements, they were very helpful, so much so that when our second car reaches its anniversary we are now seriously considering trading it in for the new Nissan Leaf all-electric vehicle - and I never thought I'd hear myself say that!

The second one was Audi. We almost didn't visit, given the reception received elsewhere that day, as we had no real designs on owing an Audi and we rather fed up with the whole thing. yet the minute we walked through the door and were greeted by Seb, all that changed. We were introduced to Douglas, one of the sales managers and from there on in the experience was just how I imagined it should be. He worked with us to identify the vehicle most suited to our requirements and arranged a variety of test drives. We eventually purchased a car feeling as if we had done something special and very much that we had been helped to buy the right car for us rather than being sold a car - a subtle, but important, difference. I'm told that sales at the Audi Northampton dealership are outperforming those of rival dealers in the area; based on the service we experienced, it's not difficult to see why. As a thank you to Douglas, I designed the above card, completely with interlocking Audi rings on a brushed silver and Pacific Point blue background, to echo the colours of our new purchase.

We are quick to share the stories of poor service and sales experiences (go back to the start of this post for some of mine!) yet we do not always go to the same lengths to share the good news stories. Well, this card is as a result of one of mine, so if you're reading this and in the market for a new car, now or in the future, what can I say - you could do a lot worse than visit Northampton Audi - in case you couldn't already tell, I'm their newest fan!

Back tomorrow with a Christmas card for this week's Paper Craft Crew sketch challenge; until then, happy stampin'!


Stampin' Up Supplies Used:


Tags: , , , , , ,

Cards | Punch Art

Afternoon Picnic Birthday Card PP169

by Joanne James31. October 2013 23:15

A late post from me today and it was supposed to be all about Halloween, but as I'm behind this week and the current Paper Players challenge ends tomorrow, I need to have a switch around so that I can link up today's card. This week's challenge over at The Paper Players is a sketch by the lovely Ann Marie - here it is:

I love sketch challenges as you know and I've actually used this layout for several card designs this week (still in the making and not blogged yet, in case you're thinking you haven't seen them!) The card that I'm going to link up though is the one that is most 'true to sketch' and is actually the birthday card I designed for my Mum - here it is:

Now it's not my Mum's birthday until Saturday, so I'm taking a chance here, but as she rarely looks at my blog I think I'm safe! I took the inspiration for my colour scheme from some of the papers in the Afternoon Picnic DSP stack and it was an opportunity to use a colour that I rarely do: Wisteria Wonder. I actually had some out on my desk as I've been using it for another project recently, but must confess it's a colour I don't find myself drawn to. I love the idea of lilac, but I find too much Wisteria Wonder rather overpowering. Here I've tried to temper that by using a Very Vanilla background and making good use of Pear Pizzazz, the other main colour in the patterned paper. I used my Stampin' Write markers to colour the flower from the 'Oh Hello' stamp set, which so looks like the flowers that you see in this paper stack and I used an embossed strip across the centre of my card because whilst I think it would have looked nice with a strip of chevron ribbon, I wanted it to be post-friendly and I like the way the embossed dots again echo the pattern of the paper.

So that's my card. I may well share some of today's Halloween makes with you tomorrow (call it early planning for next year!) Whilst I don't tend to go in for Halloween cards and as my regular readers will know, I haven't featured a single Halloween project, one of the things that is really big in the James household is pumpkin carving. Each year we try to grow our own pumpkins in the garden and this year we managed to grow four, two of which were the biggest ever! Our record breaking pumpkin was 1.38m in circumference and weighed 17.9kg - only 2kg lighter than my 6 year old son!!! The children and I spent the happiest of days today carving all four of our pumpkins, so I thought I should share some pictures with you:

 This is Rebecca's pumpkin, that she carved herself:

This is Ben's pumpkin, that he too managed himself for the first time this year:


And lastly here are both Ben and Rebecca, with our two 'monster' pumpkins, the largest of which was big enough for a double Monsters University-inspired carving:


Not a piece of cardstock in sight, but very creative, nonetheless! I'll be back tomorrow with another project, meanwhile why not pop over to The Paper Players and see what the designers and other participants have done with the above sketch? Until tomorrow, happy stampin'!


Stampin' Up Supplies Used:

Mosaic Bauble Thinlit Card and Punch Tip Video

by Joanne James26. October 2013 22:16

We have had a lovely day today; we've stayed indoors out of the howling winds and had some family over for Sunday lunch. It's been lovely to spend time with my brother- and sister-in-law, nephew and niece, as we don't do it nearly often enough with the busy lives we all lead.

As promised, I have another Thinlit card for you today, this time with a Mosaic Madness bauble design - take a look:

I created a simple 'layered' bauble using a circle punch and the mosaic punch, then layering by raising the outer circle on dimensionals and creating a ribbon hanger. Here's a close-up of my bauble:

For a greeting on this card, I used a pair of sentiments from the 'Petite Pairs' stamp set, stamping one half on a layered label on the front of the card and the other half on the reverse of the flipped circle:

Lastly, are you wondering what punches I used for my raised sentiment label on the front of my card? Here's a closer look:

No, it's not a new label punch or two, I actually used my Mosaic Punch to create them! I'm all for making your tools work harder for you and this punch is great for creating labels as well as straight forward mosaic shapes. I shot a short video to show you how to make these labels; I actually made it a while ago, but didn't make a card to go with it, so haven't shared it until now. This also explains why the stamped pieces I used in the video are not the actual ones you see on today's card. If you're feeling confused, just watch the video - it will all make sense! Here's the link:

Just to recap on the measurements in the video: I recommend the narrow label is a maximum of 1.5cm in width, and the wider label 3.0cm in width. Either label can be of any length. I hope you found the video tutorial useful.

Lastly, don't forget, you have only until 11pm tomorrow night to order any of the 25 stamp sets that are 25% off - for details on the stamps on offer, click here.

Back tomorrow with another project; until then, happy stampin'!


Stampin' Up! Supplies Used:

Merry Monday - Deck The Halls

by Jason James22. October 2013 21:30

I'm having a fun week at home with the James juniors this week, but it isn't leaving much time for crafting! Once we've finished our holiday homework we should be able to do some crafting together, which will be nice; I have a few Halloween things planned which I should be able to share with you in due course.

This week's Merry Monday Challenge is #80 'Use Music or a Carol Inspired Card' and having seen the great inspiration cards, I was keen to have a go. Here's my card:

I made a simple card where I cut out a circle using my Circle Framelits to reveal the 'deck the halls' stamp on the inside of the card. I decorated simply with some punched holly tied with baker's twine. I finished the punch berries with some Crystal Effects to add a nice shine (it looks much nicer in real life!) and scored the centre of my card panel using my Simply Scored borders plate to add some texture and interest to the Baked Brown Sugar card front. A simple card, yet I have this urge to break into song: Deck the halls with boughs of holly, fa la la la la, la la la la! I love Christmas time.

With all of yesterday's news, I didn't get round to sharing the link to this week's new digital downloads, so here it is:

October 22, 2013

There are some fun autumn pocket cards and some recipe layouts, along with a variety of different Christmas stamps to take a look at. The free trial for MDS is still available to download, so if you haven't already why not take a look - it will open up a whole new avenue of crafting to you.

Back tomorrow with another card; until then, happy stampin'!


Stampin' Up Supplies Used:


Christmas Banners A Plenty!

by Joanne James20. October 2013 20:51

Well, today has been a fun day with a Christmas Build a Banner project class this morning. Following many laughs and giggles and a fair number of inky fingers, the lovely ladies attending my class each made a festive banner using a variety of papers and embellishments and the Build a Banner set. So there are lots of photos in this post! First of all, here is my finished banner that served as their inspiration:

My colours are Bermuda Bay and Coastal Cabana, with rosettes made from some of the lovely Winter Frost DSP and Smoky Slate chevron ribbon and finished with Coastal Cabana bows. Here's some close-ups of the rosettes - the grey one:

And here's one of the Pool Party ones:

Here's a close up of one of the bows, so easy to put together using the new Bow Bigz Die:

And lastly one showing some of the added glimmer on the flag itself:

Here are two of the ladies' lovely finished banners. Firstly, Kathy's, also in the grey/blue colourway:


And this one is Julie's, in the red-green colourway with champagne glimmer accents:


Aren't they just beautiful? I didn't manage to get photos of the other two, but I can assure you they were just as lovely. We are all feeling a little more ready for Christmas now, with one more thing ticked off our Christmas home décor list. The Build A Banner kits are great and come highly recommended; at £17.95 for the full kit including stencils and just £8.95 for the basic set, they are great value. Rebecca has put first dibs on the remaining 9 pieces in my banner kit for a name banner for her bedroom (pictures will no doubt follow in due course!). I can see me having to buy another one so that Ben can have one too ...

If you live in or around Northampton and would like a current class schedule

Back tomorrow with another project; until then, happy stampin'!


Stampin' Up Supplies Used:

 Build a Banner Simply Created KitBuild A Banner Refill KitDesigner Rosette Bigz XL DieGift Bow Bigz L DieWinter Frost Specialty Designer Series PaperFestive Flurry Framelits DiesSmoky Slate 3/4 Chevron Ribbon


Silver Glimmer Paper - by Stampin' Up!Season Of Style Designer Series Paper Cherry Cobbler 1 Grosgrain Stitched Edge Ribbon


Sunshine and Rainbows - Retrosketches #85

by Joanne James17. October 2013 21:51


I managed to grab a quick hour of crafting today in between other jobs and as I debated with my self whether or not to brave the washing line or resort to the tumble dryer, the sun broke through the clouds and I had a sudden flash of crafting inspiration for this week's sketch at Retrosketches. So instead of my planned post, I thought I'd sneak this one in before the close. Here is the inspiration sketch:

Here is my interpretation of the sketch:

I have been so 'in the zone' with Christmas cards that I've been struggling to look at sketches and think about anything else. I think we can all agree that this card couldn't be further from Christmas if it tried! It cheered me up no end though - yellow is one of my favourite colours. I used some retired 'sunshine and sprinkles' DSP (eliminating the and a row of coloured overlapping circles to create a rainbow border in place of the scalloped edge. The perfect background for one of the 'Feel Goods' stamped sentiments, along with the sunny yellow of course.

Lastly, a quick reminder: only 4 more days to take advantage of Stampin' Up!'s incredible joining offer where you can sign up and receive all the benefits Stampin' Up! has to offer for just £25. Click here to read more details about this rarest of offers - I would love to welcome you to my team.

Back soon with another project; until then, happy stampin'!


Stampin' Up! Supplies Used:

 Feel Goods Clear-Mount Stamp SetMarina Mist 3/4 Chevron Ribbon

3/4 Inch Circle Punch - by Stampin' Up!White Bakers Twine - by Stampin' Up!Daffodil Delight Classic Stampin' Pad

Tags: , , , , , , ,

Cards | Stamping

You're One In A Minion!

by Joanne James14. October 2013 20:28

Today I'm sharing another birthday card that I made last week, this time for my daughter to give to one of her school friends who celebrated his birthday yesterday. After much consultation, we decided that we would go with something fun. They've both seen the Dispicable Me movies, so I decided to have a go at creating my very own punch art minion. Here is the end result:

He was actually quite easy to make with the aid of a selection of circle punches and I'm very pleased with the result. I particularly like the striped embossing on his dungarees and the white stitching to add definition. The hair was made following a tip by Tanya Bell of StampingT.com.au by stripping some standard black ribbon into strands and threading through some holes. I've never been one for sewing, but as far as cards are concerned I think this is about as far as it gets! The only stamping on this card was on the inside - I don't have a photo, but I used my ABC 123 Sketch Alphabet to stamp 'You're One In A Minion!' A perfect sentiment to finish off this fun card.

Before I go, a quick reminder that we are 7 days in to the 14 day 'Join Stampin' Up! for £25'. This is a once in a lifetime offer to celebrate Stampin' Up's 25th anniversary and is unlikely to be repeated. You can find more information in my previous post here - if you're thinking of signing up, do give me a call to talk about the benefits that being a part of Stampin' Up and my team has to offer.

Back tomorrow with another project. Until then, happy stampin'!


Stampin' Up Supplies Used:

 Stylish Stripes Textured Impressions Embossing FolderBig Shot Die-Cut Machine - by Stampin' Up!

1/2 Inch Circle Punch - by Stampin' Up!1-1/4 Inch Circle Punch - by Stampin' Up!1-3/4 Inch Circle Punch - by Stampin' Up!Uni-Ball Signo Gel Pen - by Stampin' Up!

Mini Catalogue

BROWSE THE CATALOGUE

The mini catalogue is now live! Read and download your copy here.

Shop Online

Access my online shop 24 x 7, 365 days of the year:

Current March hostess code:

S9F2XJJW

Shop Online

Join My Team

It's always a great time to join Stampin’ Up! New team members can get £130 worth of products for only £99 + free business supplies + free shipping + all the fun being a part of Stampin’ Up! Stampin' Up! has something for everyone: join my growing team and benefit from my support to enjoy Stampin' Up! however you choose.

If you're interested, call me for a chat to understand how I can help you realise your goals. Alternatively, if you have already decided to sign up and you just can't wait, please click here for the link to the online form where you can sign up and order your starter kit right away! 

Latest Kit!

Stampin Cut and Emboss

The Rock Legend Kit has all you need to make 8 cards with coordinating envelopes. Along with the new Panda Friends Kit, both are available from January 4th for just £14 each - get yours here!

2023-24 Annual Catalogue

BROWSE THE CATALOGUE

Click on the catalogue for a full list of current SU! supplies - if you would like to order any of the items featured, please drop me a line at [email protected] or give me a call on 07773 421446 - I'd be happy to help.

New Online Exclusives

There will be new products available exclusively in the online store from 5 March - check them out here.

About Me

Hi I'm Joanne and live in Northampton and when I'm not looking after my husband and two beautiful children, am an avid crafter with a passion for all things Stampin' Up!

I must confess that I have never been a big rubber stamper - until I discovered Stampin' Up! that is. I love the fact that I can get such great results with co-ordinating stamps, inks, papers and punches - the possibilities are endless! Join me on my stamping journey as I share the things I love and be inspired to create amazing things yourself!

Follow Me

Monthly Newsletter

Box Builder

Click the button above to use Box Buster to create your custom box design using the Envelope Punch Board!

Kits Collection Now Available!

Stampin Cut and Emboss

The new Kits Collection from Stampin' Up! is now available!

Click here to see the current kits available and order yours online today.

I Design For


Stampin' Up Stuff

This is my personal blog and is not endorsed by Stampin’ Up! I hope you find it a plentiful source of ideas and personal inspiration but please don't copy my designs for contest submission or use for classes, publication or sale without express permission.