by Joanne James19. August 2014 21:33Today I'm sharing another of the cards we made at our quarterly training session last month, designed by Monica Gale. Yes, it is a Christmas card, but with the exception of the sentiment, uses products that can all be purchased from the Annual Catalogue. Here is the card we made:
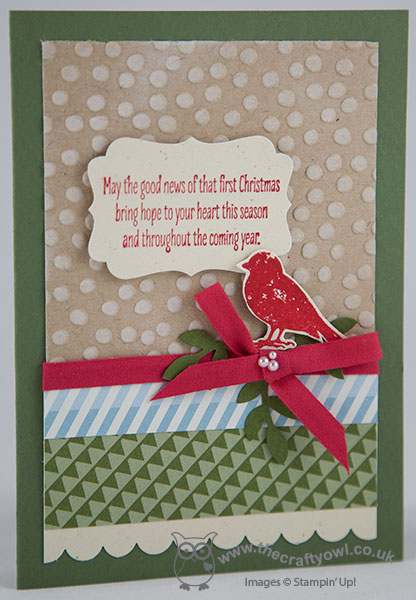
Using Mossy Meadow for the card base, we then cut a piece of kraft cardstock, embossed with the dots embossing folder and lightly wiped with white kraft ink to give the impression of snow. We cut a piece of Naturals Ivory cardstock and punched the edge with the scallop punch, then layered a couple of pieces of DSP from the All Abloom DSP stack on top. Real Red cotton ribbon was wrapped around this section and tied in a bow across the join, and a few green stems punched from the bird punch tucked in around the bow before adhering the bird on top, along with a trio of tiny pearls: the bird is from the 'Choose Happiness' stamp set and is stamped in Real Red on naturals Ivory and fussy cut. Lastly, the sentiment was stamped in Real Red onto Naturals Ivory and punched out with the Decorative Label punch, and adhered using dimensionals.
This sentiment is from the set 'Christmas Messages', which is one of the sets that is available on the Autumn/Winter carryover list until August 27th. Full details of all items on the carryover list can be found in the box on the right-hand side of my blog page and they can be purchased either by clicking directly on the links in the product table below or by clicking the 'shop online' icon that will take you directly to my online store, or of course you can email me or give me a call if you prefer and I can take your order over the phone.
That's me done for today; back tomorrow with a new set of Wednesday Weekly Deals and my Design Team card for this week's Colour Me...! challenge. until then, happy stampin'!
Stampin' Up! Supplies Used:
by Joanne James25. December 2013 21:05Well, it's here at last - Merry Christmas lovely blog readers! We've had a lovely day today that has involved much present unwrapping, eating and Lego building - don't you just love Christmas?!
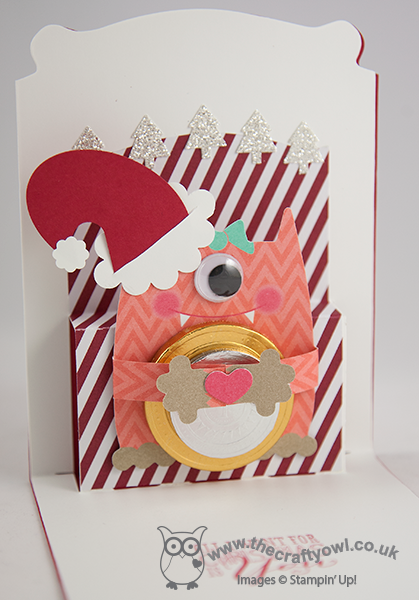
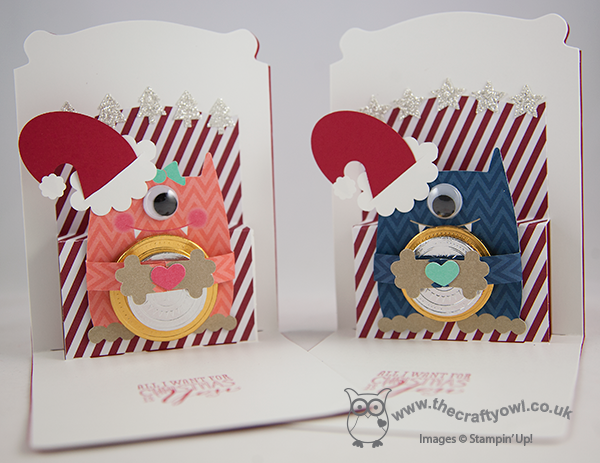
I still have a few Christmas things that I haven't shared with you, so today thought I would share the Christmas cards I made for my little James juniors. I was inspired by Lizy Bartaby's card here - I loved the idea of the Santa Monster Hugs but took my cards a step further by making them into pop-ups using my Pop 'n' Cuts base; I'm always looking for new ways to use this. So I made a co-ordinating pair of his and hers santa monster hugs. Here's the little girl santa monster:
Cute, huh? Here's the little boy monster that is her partner-in-crime:

How cute are these? I made my hats using an oval punch with a section cut out using the word window punch to create the curve of the hat. I made the brim using a 'squashed' scallop circle as I don't own a scalloped oval punch, which would of course make this slightly easier. A pop up card and chocolate coins - I'm not sure which the children thought was best (who I am kidding - the chocolate, of course!)
I'm sure this won't be the last we'll be seeing of these little guys - but for now, I hope you have all had a wonderful Christmas and that Santa brought you everything that was on your wish list.
Back tomorrow with another project; until then, happy stampin'!
Stampin' Up! Supplies Used:
8697ac64-5747-40a2-873e-ccca9c8231c3|0|.0|96d5b379-7e1d-4dac-a6ba-1e50db561b04
Tags: Christmas, large oval punch, Merry Minis, Season of Style, Shop online, Stampin' Up, Stampin' Up Card, Stampin' Up Card ideas, Stampin' Up Supplies, Christmas Messages, Monster Hugs, Pop 'n' Cuts
Cards | Pop Ups | Stamping
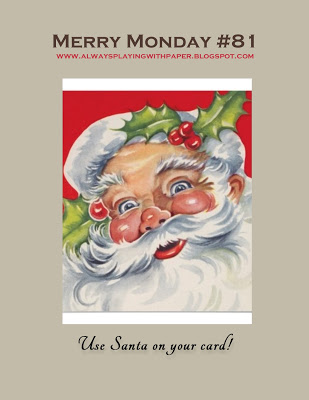
by Joanne James3. November 2013 16:36So, as promised, a creative post at last today! I've been busy this weekend preparing for next week's Christmas card classes, so I have lots to share with you this week, including a couple of videos. Today's card is another made with the circle thinlits card and I'm just in time to link up with this week's Merry Monday Challenge over at Always Playing With Paper, where this week's challenge is to make a Christmas card featuring Santa:
My very first thinlit card was using the 'Best of Christmas' santa, but today I thought I would go for something a little different and so am using the cute santa from the 'Colour Me Christmas' stamp set. Here's my card:
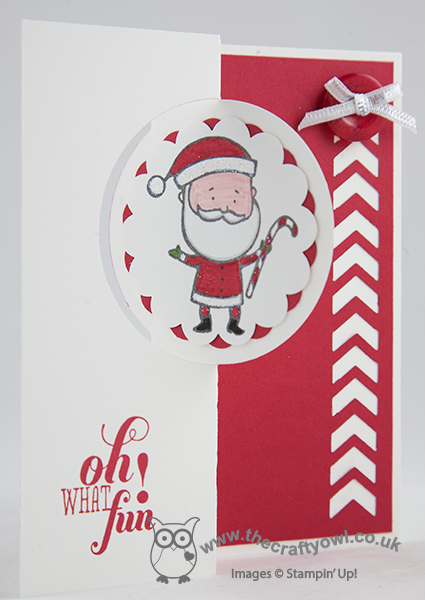
I used a bright red and white colour scheme and coloured my santa with my Stampin' Write markers to give a bold finish. I then cut out my stamped image using the scalloped circle framelit from the thinlit set, which I layered on an offset red scalloped circle for interest. I also used the mini-chevron framelit to create a border edge to my card and finished with a button and some ribbon, and added some Dazzling Diamonds to the trim on santa's hat and coat with the aid of my two-way glue pen just to give a little added sparkle. Well, it is a Christmas card after all!
I hope you like my card; do pop over to the Merry Monday page and see what the designers and other participants have come up with on this theme. Back tomorrow with a card and video for you, as well as a quick post with the digital deal of the day. I also have my first Christmas card class of the week tomorrow, which I'm very much looking forward to and a trip to the cash & carry in readiness for our school bonfire and fireworks display next weekend: a packed day in store, but with the children back at school tomorrow following their half-term break that will be one less thing to think about! Until tomorrow, happy stampin'!
Stampin' Up Supplies Used:
by Jason James22. October 2013 21:30I'm having a fun week at home with the James juniors this week, but it isn't leaving much time for crafting! Once we've finished our holiday homework we should be able to do some crafting together, which will be nice; I have a few Halloween things planned which I should be able to share with you in due course.
This week's Merry Monday Challenge is #80 'Use Music or a Carol Inspired Card' and having seen the great inspiration cards, I was keen to have a go. Here's my card:
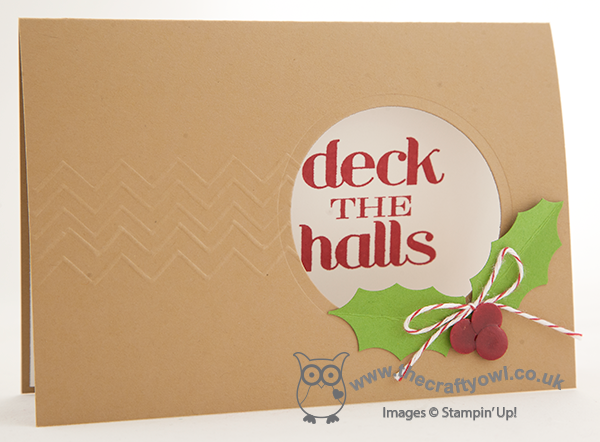
I made a simple card where I cut out a circle using my Circle Framelits to reveal the 'deck the halls' stamp on the inside of the card. I decorated simply with some punched holly tied with baker's twine. I finished the punch berries with some Crystal Effects to add a nice shine (it looks much nicer in real life!) and scored the centre of my card panel using my Simply Scored borders plate to add some texture and interest to the Baked Brown Sugar card front. A simple card, yet I have this urge to break into song: Deck the halls with boughs of holly, fa la la la la, la la la la! I love Christmas time.
With all of yesterday's news, I didn't get round to sharing the link to this week's new digital downloads, so here it is:

There are some fun autumn pocket cards and some recipe layouts, along with a variety of different Christmas stamps to take a look at. The free trial for MDS is still available to download, so if you haven't already why not take a look - it will open up a whole new avenue of crafting to you.
Back tomorrow with another card; until then, happy stampin'!
Stampin' Up Supplies Used:
066b6141-aeaa-4faa-8b33-eff279b973ec|0|.0|96d5b379-7e1d-4dac-a6ba-1e50db561b04
Tags: Christmas, Christmas Messages, circle punch, Itty Bitty Punches, small oval punch, Stampin' Up Card, Stampin' Up Card ideas, Stampin' Up Supplies, Shop online, Circles Framelits, Simply Scored
Cards | Stamping
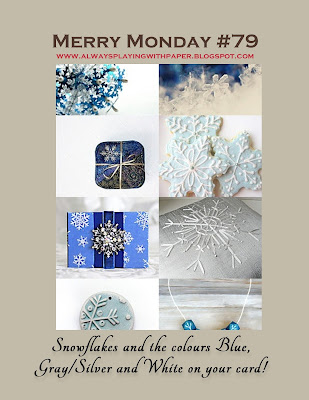
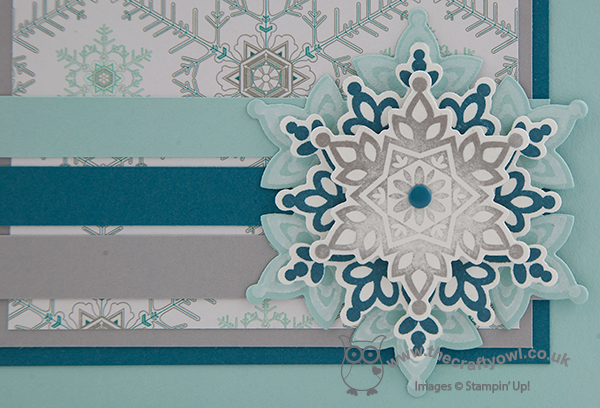
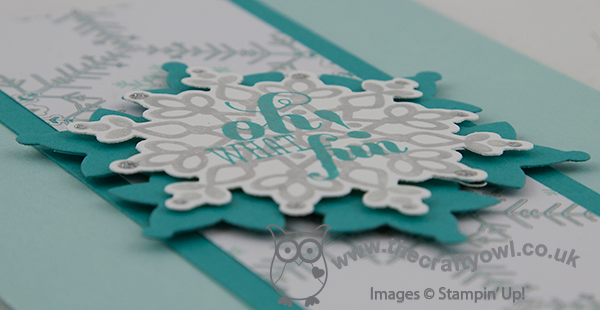
by Joanne James18. October 2013 21:06I know, you're probably thinking 'Merry Monday? It's only Friday!' I'm not wishing away my weekend, far from it. Rather today's card is another Christmas card made with the challenge over at Always Playing with Paper in mind. The challenge was to use blues, grey/silver and white and snowflakes:
I've been wanting to use a sketch layout I saw over at the Paper Pal Arts site a little while ago; here's the card I made:
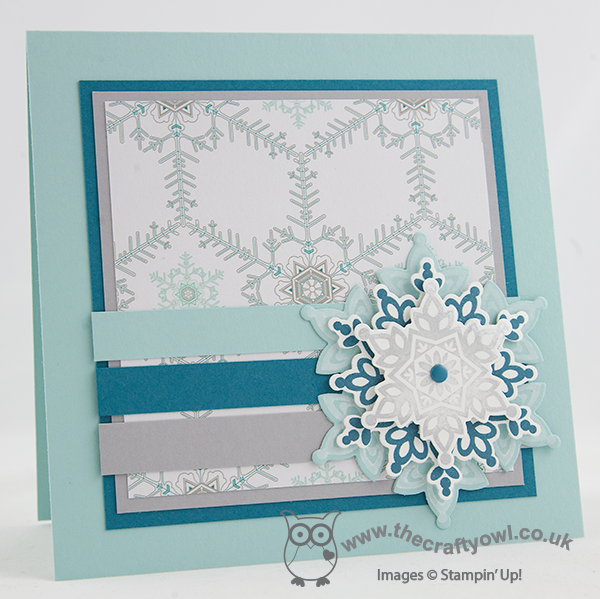
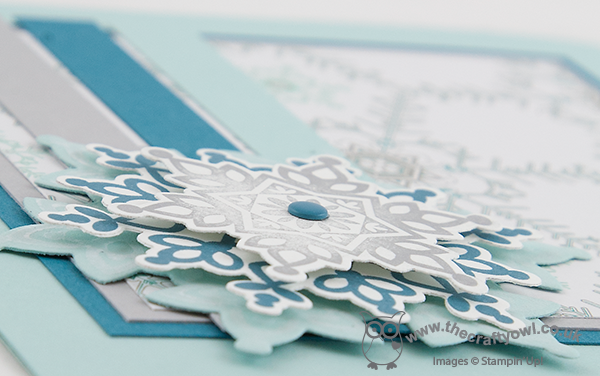
I used Pool Party for the base of my card and layered with Island Indigo and Smoky Slate and some of the Winter Frost DSP for the top layer. My design is anchored with a lovely Festive Flurry layered snowflake , which is stamped Whisper White on Pool Party cardstock for the first layer, Island Indigo on Whisper White for the second layer and then Metallic Silver on Whisper White for the top layer, finished with a single Island Indigo candy dot - I love these! Here's a close up of the snowflake, with the shimmery metallic silver finish (that is very difficult to photograph!):
This photo shows the build of layers of the snowflake - this set is so good for this and the framelits make cutting out so easy:
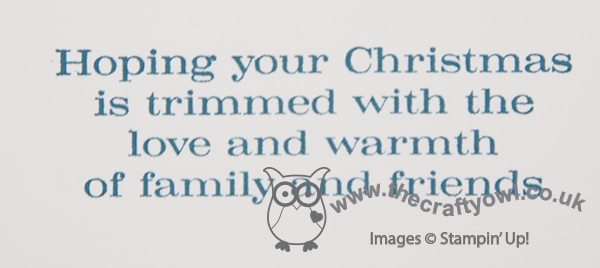
I finished the inside by stamping this verse from the Christmas Messages set:
As of today the James Juniors are on half term for two weeks. We have lots of homework to do, but I am relieved to be having a break from some of the challenges and routine of school life and looking forward to having fun with some pre-Christmas activities of our own. I'm also looking forward to another of my special project classes this weekend; I have a group of lovely ladies coming to make Christmas banners using the Build a Banner kit. Check out my Facebook page tomorrow if you would like a 'sneak peak'; otherwise I will be sharing the completed banners next week.
Back tomorrow with another project; until then, happy stampin'!
Stampin' Up Supplies Used:


ddeb249c-3846-4e93-a87f-ed70704c824d|0|.0|96d5b379-7e1d-4dac-a6ba-1e50db561b04
Tags: Christmas, Christmas Messages, Festive Flurry, Festive Flurry Framelits, Shop online, Stampin' Up, Stampin' Up Card, Stampin' Up Card ideas, Stampin' Up Supplies, Big Shot, Candy Dots
Cards | Stamping
by Joanne James11. October 2013 19:53Today I'm sharing another of this week's class cards using the Festive Flurry stamp set and framelits bundle. Another simple layout featuring the Winter Frost paper stack. Here's the card we made:
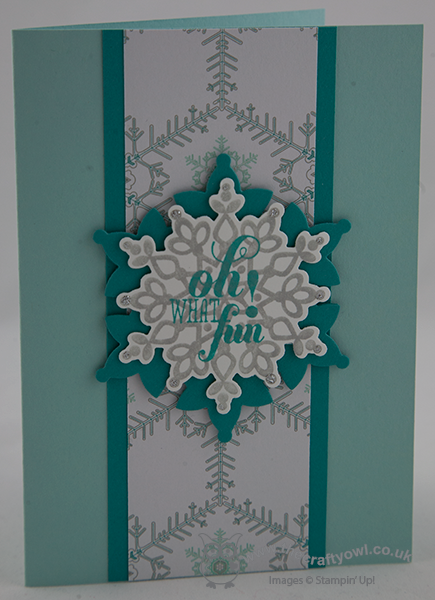
This time we layered the snowflakes and overstamped on the top one (the snowflake was stamped in Smoky Slate, having been stamped off once first onto scrap paper to give a softer background). Bermuda Bay cardstock adds a real striking background and gives this colourway quite a modern feel. Some silver Dazzling Details on the tips of the snowflake adds a little finishing sparkle.
We used both of the seasonal colourways in our class, and I'm really undecided as to which one I prefer most. Which one do you like the most?
Back with another card tomorrow; until then, happy stampin'!
Stampin' Up Supplies Used:


6a2ba4c3-2cd4-4294-9958-badb0e698470|0|.0|96d5b379-7e1d-4dac-a6ba-1e50db561b04
Tags: Big Shot, Christmas, Festive Flurry, Festive Flurry Framelits, Christmas Messages, Magnetic Platform, Shop online, Stampin' Up, Stampin' Up Card, Stampin' Up Card ideas, Stampin' Up Supplies, Winter Frost
Cards | Classes | Stamping
by Joanne James26. September 2013 12:02Another Christmas card and another challenge today! I'm loving the Season of Style paper stack, which is just perfect for making lots of Christmas cards and here's one of the designs in all its glory:
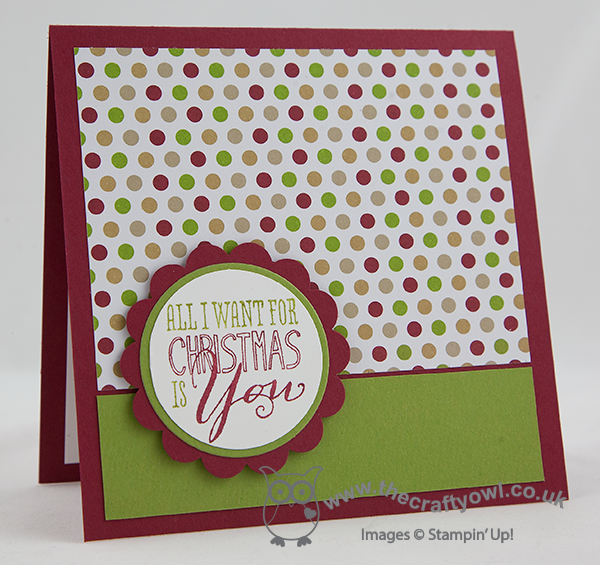
I'm entering this card for the Retrosketches #82 Challenge which has this great layout sketch as inspiration:

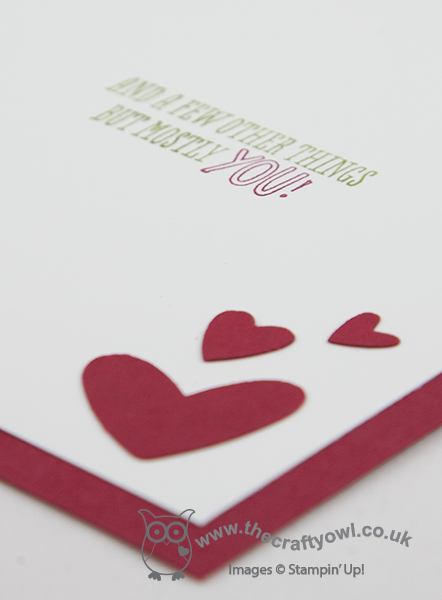
I stayed with the square shape and orientation and made a feature of the fun 'All I want for Christmas' stamp in the Christmas Messages stamp set. It comes with a co-ordinating stamp, which I've used here on the inside of my card:
The links to the products I used for this card are included below. Back tomorrow with another card; until then, happy stampin'!
Stampin' Up! Supplies Used:


3af89bef-c0a7-459f-95e1-78446e734567|0|.0|96d5b379-7e1d-4dac-a6ba-1e50db561b04
Tags: Christmas, Christmas Messages, circle punch, Circles Framelits, scallop circle punch, Season of Style, Shop online, Stampin' Up, Stampin' Up Card, Stampin' Up Card ideas, Stampin' Up Supplies
Cards | Stamping
by Joanne James26. September 2013 10:45I'm finally catching up with my festive card making this week and today I'm very excited to be sharing a Christmas card that I've decided to enter into my first ever challenge! I often take my creative inspiration from challenge sketches or colour schemes, but have never before actually entered one of my card creations. So, here goes - this is today's card:
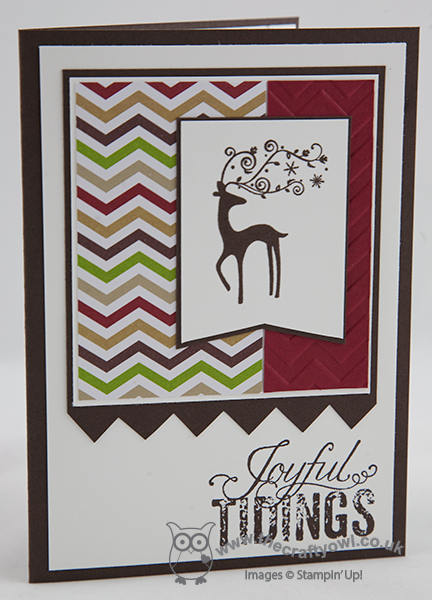
I'm entering my card into The Paper Players Challenge #164: Sandy's Sketch Challenge, which has the following sketch as the inspiration:
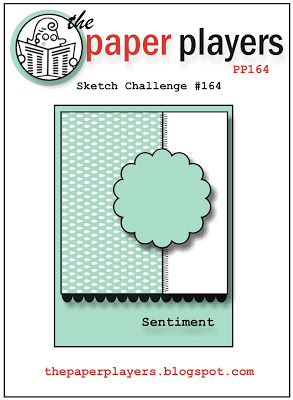
I was quite brave as whilst I kept the layout, I swapped out my scalloped circle and edging for chevrons and a more angular look, but since the sketch is for inspiration and doesn't have to be followed literally I'm hoping that's ok. I've been waiting to use Dasher's little brother on a Christmas card, as I was quite upset at the thought of not blogging about his big brother since his retirement at the end of last year, so this card gave me the perfect opportunity. The Early Espresso base is also quite a departure for me, but it seemed right given my reindeer starting point and I like the masculine feel of this card.
Welcome to any new Paper Players who are reading this! I hope you like the card; back tomorrow with another Christmas card to share. Until then, happy stampin'!
Stampin' Up Supplies Used:


