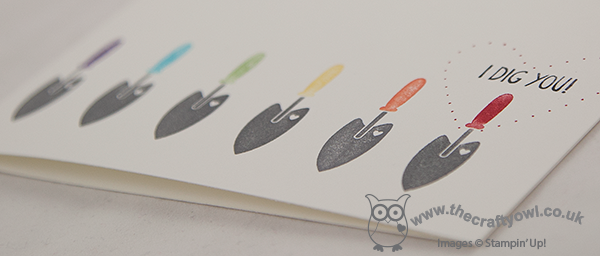
by Joanne James23. January 2014 20:07I have another one layer card to share with you today; I sat down at my desk yesterday with the intention of making something completely different, but having finished the card that I blogged yesterday my head was still in the 'one layer' zone and I suddenly remembered an idea I had had a while ago, but not committed to paper. So I raided my Stampin' Write marker box and came up with the following quick, fun card:
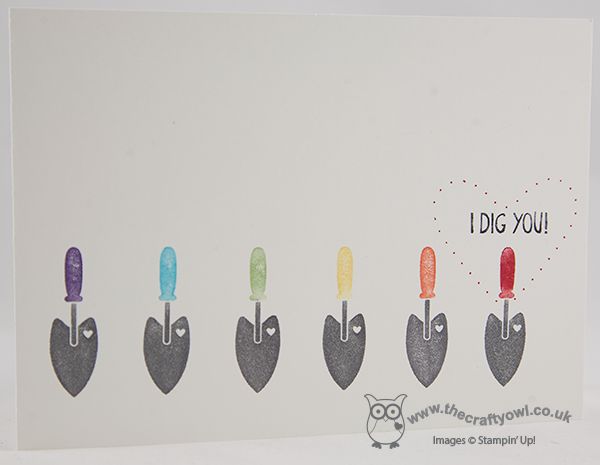
This fun little shovel is from the 'Tag It' stamp set, a great stamp set with a mix of images suitable for a variety of occasions, and for which Stampin' Up! donates £2 from every set sold to Ronald McDonald House Charities. I started with the stamp on the right, which is the complete stamp including the 'I Dig You' sentiment, then worked back from right to left using my stamp-a-ma-jig to ensure perfect placement to create my rainbow of trowels. I wanted my red trowel to be the focal point, so in addition to including the sentiment, I inset it in a read dotted outline heart using the fine tip of my Real Red marker pen and my paper piercing template.
Another cute one layer card with a Valentine's theme - I think I'll link this one up with the challenge over at The Paper Players this week too. Back tomorrow with another project; until then, happy stampin'!
Stampin' Up! Supplies Used:
by Joanne James22. January 2014 09:43I'm sticking with the Valentine's theme today as today's card is also this week's entry for The Paper Players weekly challenge, where Sandy has asked us to create a one layer Valentine's card:
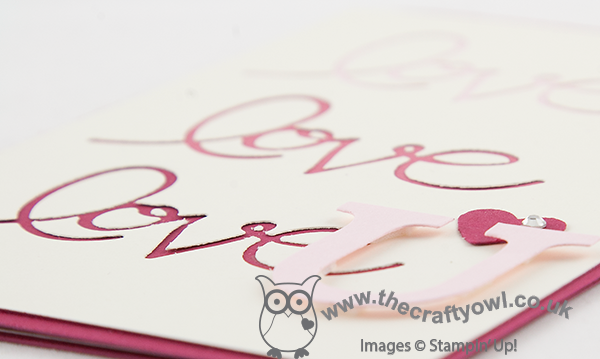
I decided to use the heart as per the challenge tile, but today's card is also showing you how to use one of my favourite Stampin' Up! products, the Expressions Thinlits dies, in a different way. You've seen me use the die cut word itself as in yesterday's card, and I've also used the negative space created by the die cut (you can see an example of that here). Today I thought I would show you how you can use them to create a mask, which gives yet another effect and one that is particularly suited to a one-layer card. Here is my card:
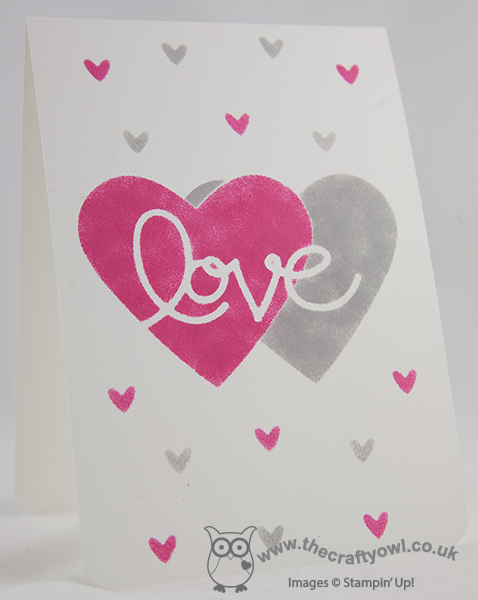
I cut out the die cut word 'love', along with two overlapping hearts cut with my Hearts Framelits and created a mask. Then using Melon Mambo and Smoky Slate ink and a couple of sponge daubers, I carefully sponged around the die cuts to give the illusion of two overlapping hearts, with love running through the centre. I created a second mask using the small heart from the Owl Builder Punch; I could have used a stamp, but I wanted to retain the soft sponged effect so created another stencil then simply sponged a few random hearts across some of the remaining white space. I rounded the bottom corners of the card, but otherwise left well alone; as the Paper Players point out this week, less is more!
I'm really pleased with how this card turned out and it shows yet another way you can use the thinlits to achieve an alternative effect. If you too are 'in love' with 'love' and the other words in the Expressions Thinlits set, don't forget these are only available until 1st February when the current seasonal Autumn-winter catalogue ends - click on the link below to my online store if you would like to purchase. I know I wouldn't be without mine - they can be used in so many ways.
Back tomorrow with another one layer card; until then, happy stampin'!
Stampin' Up! Supplies Used:
59edc7bc-b5db-4717-93b4-ad2ce2d82116|0|.0|96d5b379-7e1d-4dac-a6ba-1e50db561b04
Tags: Hearts Framelits, Expressions Thinlits Dies, Owl Punch, Sponging, Stampin' Up, Stampin' Up Card, Shop online, Stampin' Up Card ideas, Stampin' Up Supplies, Valentines, Valentine's, one layer cards
Cards | Stamping
by Joanne James21. January 2014 20:39Good evening blog readers! I had lots of jobs to do today, but after a morning of paperwork I decided the housework could wait and I spent the afternoon cardmaking instead (oops!!) Today I'm sharing another Valentine's card, this time with a more masculine feel. I used the colours from this week's challenge over at Create with Connie and Mary as my starting point:
I decided to use my 'Hearts A Flutter' stamp set, as although this is one of my favourite sets and one I use a lot all year round, I haven't used it on any of my Valentine's cards yet this year. Here is my card:
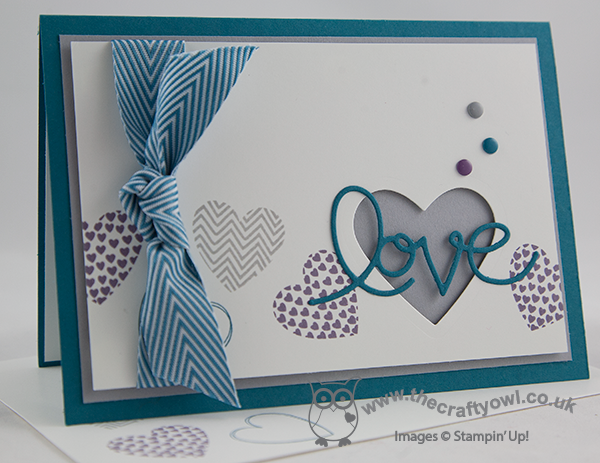
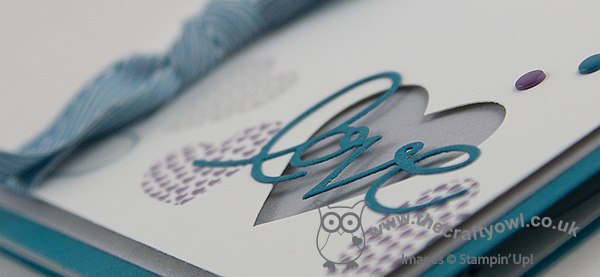
I stamped my hearts somewhat randomly across the lower half of my card, either side of my focal point. I mounted the top layer of cardstock on dimensionals for two reasons: firstly, to make the ribbon easier to attach and secondly so that the heart that I cut out (I used my hearts framelits for this) would have some depth and my die cut 'love' would have more impact. I deliberately chose to use Smoky Slate for my middle layer, as I wanted the heart to have a more masculine appeal, especially as I used ribbon on my card too; Island Indigo Chevron Ribbon isn't too girly, but adds a luxurious feel to the card. A few candy dots to finish just to add balance and done.
Whilst I designed this card with a man in mind, I think it would work equally well for a woman, especially if you're not the kind of person who is into all things pink and red.
Back tomorrow with another Valentine's themed card; until then, happy stampin'!
Stampin' Up! Supplies Used:
3b716918-6b62-4e10-9759-5e7a63b00c72|0|.0|96d5b379-7e1d-4dac-a6ba-1e50db561b04
Tags: Anniversary, Candy Dots, Hearts a Flutter, Hearts Framelits, Expressions Thinlits Dies, Magnetic Platform, masculine cards, Shop online, Stampin' Up, Stampin' Up Card, Stampin' Up Card ideas, Stampin' Up Supplies, Valentine's
Cards | Stamping
by Joanne James16. January 2014 14:48Good day blog readers - I'm back today with a one-layer card! I haven't made a truly one layered card in a while, as I like to frame and layer when I make cards. That said, one layer cards are post-friendly and great if you are sending mail abroad, when weight is more of an issue. They also offer a great design challenge for those of us who don't often design in this way and it can be kind of liberating to design on just one sheet of card stock.
I follow the 'Less is More' blog as it's a great source of inspiration, particularly for one layer cards. This week's Less is More challenge is to create a one layer card with the theme 'Hearts'(week 154), so following a few days reprieve I'm back on the love theme today so that I can join in - here's my card:
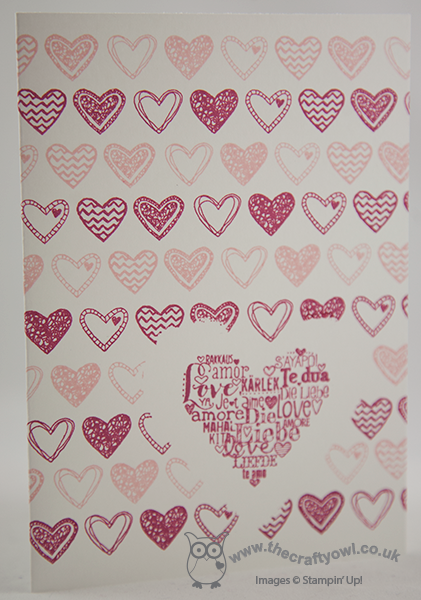
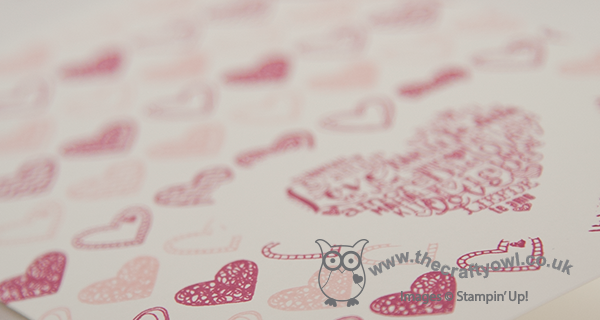
We received the 'Language of Love' set free at Stampin' Up! Convention and it was out on my desk for another project I am working on, so thought I would use it to create this card. I started by positioning and stamping the large heart, then using a mask made from a post-it note using a heart framelit, I positioned this over my stamped image and stamped the rows of smaller hearts around it. I stamped each row in alternating colours and moved the stamp one 'heart' space along each time to create added design interest, allowing them to 'fade' into the masked area so that I retained the heart-shaped space around my focal image. I love the main stamp here - when you say 'love' in so many different ways, no other sentiment is needed!
Back tomorrow with another project; until then, happy stampin'!
Stampin' Up! Supplies Used:
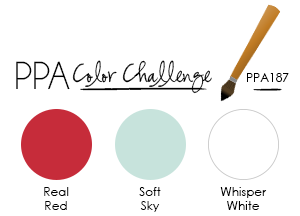
by Joanne James13. January 2014 21:13A busy day today: key highlights were getting to the bottom of the ironing basket (always worth celebrating!), finding Ben's mislaid PE training shoes at school and completing my card for this week's Pals Paper Arts Challenge. This week it's a colour challenge to incorporate the following colours:
I decided to stick with the Valentine's theme and use the contrasting colours to work up a card design that I've been wanting to have a go at for a while - here's my card:
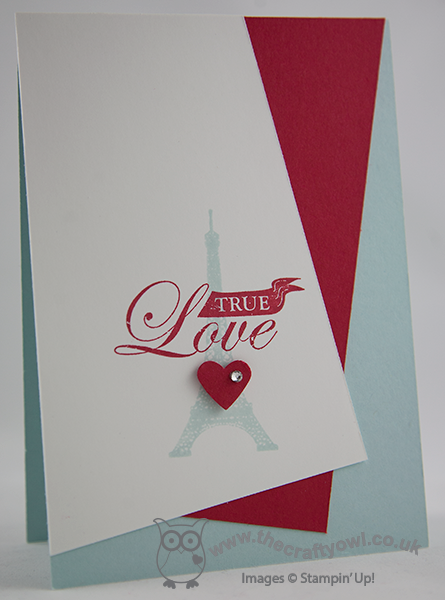
I'm not sure what the term is for this angular layered design (or even if there is one!) but it's the perfect simple layout to highlight both the Eiffel Tower and 'True Love' sentiment from the 'Follow Your Heart' stamp set; I used my Stamp-a-ma-jig to ensure perfect placement. Lastly, I added a small punched red heart with a rhinestone on a dimensional for added interest. I love the simplicity of this card and the statement that the bold red colour makes against the white and soft sky.
I hope you like my card - there's lots more inspiration from the Design Team over at Paper Pal Arts using this colour combination if you fancy having a go.
Back tomorrow with another card; until then, happy stampin'!
Stampin' Up! Supplies Used:
a07e3288-f9df-4767-bc3a-2c5db3e89d2d|0|.0|96d5b379-7e1d-4dac-a6ba-1e50db561b04
Tags: Anniversary, Follow My Heart, Heart Punch, Shop online, Stamp-a-ma-jig, Stampin' Up, Stampin' Up Card, Stampin' Up Card ideas, Stampin' Up Supplies, Valentines, Valentine's
Cards | Stamping
by Joanne James10. January 2014 19:45Evening lovely blog readers! So big news of the day: my voice is (almost) back! Great news for me, not so great for my youngest when he announced he had lost his trainers following his PE lesson just 3 days into the new term - but that's a story for another time!
Today I'm going to share the last of this week's class projects: a gift card holder, once again made with the Envelope Punch Board. I've seen a few holders made in this way on the internet, but I adapted mine slightly to enable me to make it from half a sheet of A4, using metric measurements. So here is the finished gift card holder from the outside:

No apologies for once again using the Flowerfull Heart stamp (I still love it!), this time overlaid with 'love' cut from gold foil using the Expressions Thinlits die (don't forget these are only available to purchase until the 1st February). There's also another sneak peek of new product available in the Spring-Summer catalogue that launches on 28th January; did you spot it? Yes, it's the lovely gold washi tape which I paired here with Very Vanilla to make my pocket. There are lots of silver and gold items in the new catalogue, so if this is your thing, stay tuned - there will be more to come. The flap closure for the gift card holder is the bit you need the Envelope Punch Board for - it makes the two notches that enable the holder to stay closed and keep the gift card firmly in place.
When you unclasp the flap, this is what you see inside:
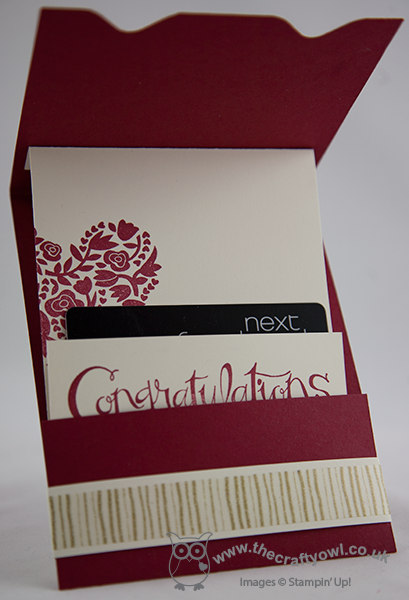
The insert is attached to the opening flap so that it slides out of the pocket as you open it and presents the gift card. I designed my gift card holder with a wedding or engagement gift in mind - vouchers or money seem very popular gifts these days, but you could easily adapt it for a birthday or other occasion. One thing is for sure - when it's as easy to make as this, there's really no excuse for a simply sticking a voucher in an envelope or worse still a carrier bag (believe me, it happens!!)
That's all the projects from my classes this week - I hope they've inspired you to go and be adventurous with your Envelope Punch Board. If you live local to me in Northampton and would like to attend any of my Stampin' Up! papercraft and card classes, you can find the current schedule of my card and project classes on my website here; please contact me for further information regarding location and any equipment you will need to bring. Classes must be booked at least 2 weeks in advance of the class date.
Back tomorrow with a Sale-A-Bration sneak peek; until then, happy stampin'!
Stampin' Up! Supplies Used:
2cbf2591-39f6-471a-9a05-7822cc150877|1|5.0|96d5b379-7e1d-4dac-a6ba-1e50db561b04
Tags: 3D Projects, Classes, Envelope Punch Board, Flowerfull Heart, Gift Voucher, Sassy Salutations, Shop online, Stampin' Up, Stampin' Up Card, Stampin' Up Card ideas, Stampin' Up Supplies, Weddings, Valentines
3D Projects | Cards | Classes | Envelope Punch Board | Stamping
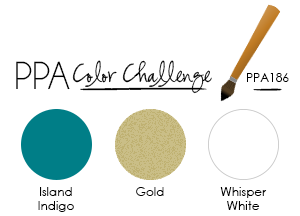
by Joanne James6. January 2014 21:09Today has been a fun day, with my first class of the year. A fun - if quiet! - time was had by all, with all my ladies being very accommodating of my continued voiceless state. I'll share more on our class makes later in the week, but today I'm sharing a card that I am entering for this week's Pals Paper Arts challenge, PPA186, which is to use the following colours:
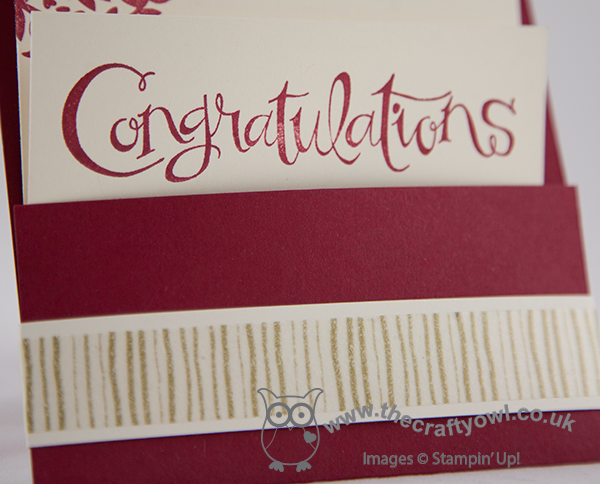
With this in mind, I inked up my Flowerfull Heart stamp again but this time made a slider card - take a look:
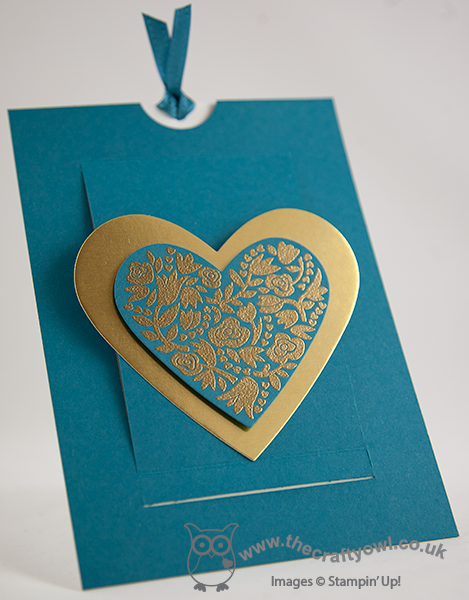
I stamped the heart in Versamark and heat embossed with gold embossing powder, then layered the heart on another one made from gold foil. When the ribbon end is pulled, it reveals the message inside:
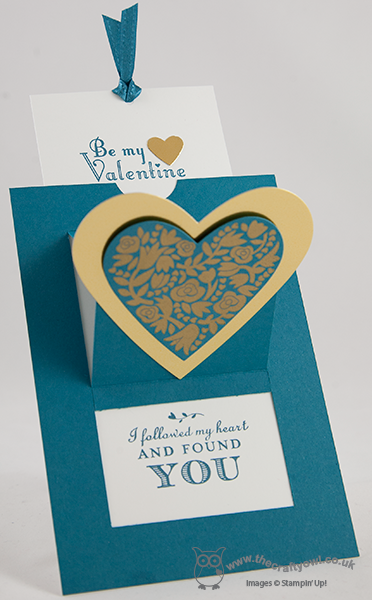
The inside of the slider card is stamped with my favourite stamp from the 'Follow My Heart' set on the lower inside panel, and the valentine stamp from the 'Delightful Dozen' on the extending top section (I replaced the stamped heart with a gold foil one). I think this would make a lovely masculine valentine's card; the gold foil and embossing adds a real luxurious feel.
I will be sharing a video tutorial on how to make this card as soon as my voice returns, so stay tuned. Meanwhile, check out the inspiration from the designers and participants over at Pals Paper Arts here.
Back tomorrow with another card; until then, happy stampin'!
Stampin' Up! Supplies Used:
1aaaf41f-cd5c-4638-ad4c-132b9f354924|0|.0|96d5b379-7e1d-4dac-a6ba-1e50db561b04
Tags: Big Shot, Flowerfull Heart, Heart Punch, Hearts Framelits, Delightful Dozen, Magnetic Platform, Follow My Heart, Embossing, Valentines, Shop online, Stampin' Up, Stampin' Up Card, Stampin' Up Card ideas, Stampin' Up Supplies
Cards | Stamping
by Joanne James3. January 2014 21:35I've another busy day today, so a quick post from me with another 5" square card made using the Flowerfull Heart stamp. This time paired with Strawberry Slush Core'dinations cardstock. So here is today's card:
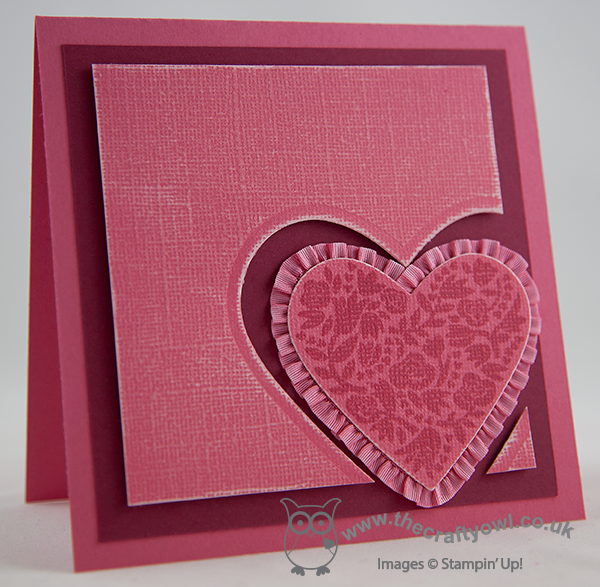
This card has a lovely textured surface and can be sanded to reveal a monochromatic inside layer which can add real interest to a card. I also like the effect you get when you stamp on it as a result of the textured surface. I edged my heart in Strawberry Slush Ruffle Stretch Trim, which gives this card a rather feminine look. I must confess this card is a little pink and frilly for my taste, but as anticipated, when my daughter looked through my recent samples she declared this card her out and out favourite. Knowing her as I do, there are only two things that could be added to improve further: glitter and sequins!! Maybe not this time, but perhaps that should be my starting point for another card ...
Hoping for a quieter day tomorrow that will allow some time for crafting. Either way my blog post is prepared so I will have something lovely to share with you. Until then, happy stampin'!
Stampin' Up! Supplies Used:
a1aa941f-8b98-4201-b71f-708a7ab22f7b|0|.0|96d5b379-7e1d-4dac-a6ba-1e50db561b04
Tags: Big Shot, Hearts Framelits, Flowerfull Heart, Magnetic Platform, Valentine's, Valentines, Core'dinations, Shop online, Stampin' Up, Stampin' Up Card, Stampin' Up Card ideas, Stampin' Up Supplies
Cards | Stamping
by Joanne James1. December 2013 10:49Good morning lovely readers - no blog post yesterday as I had some very important last-minute work to finish, but do not fear - today there will be (at least) two blog posts to make up for it!
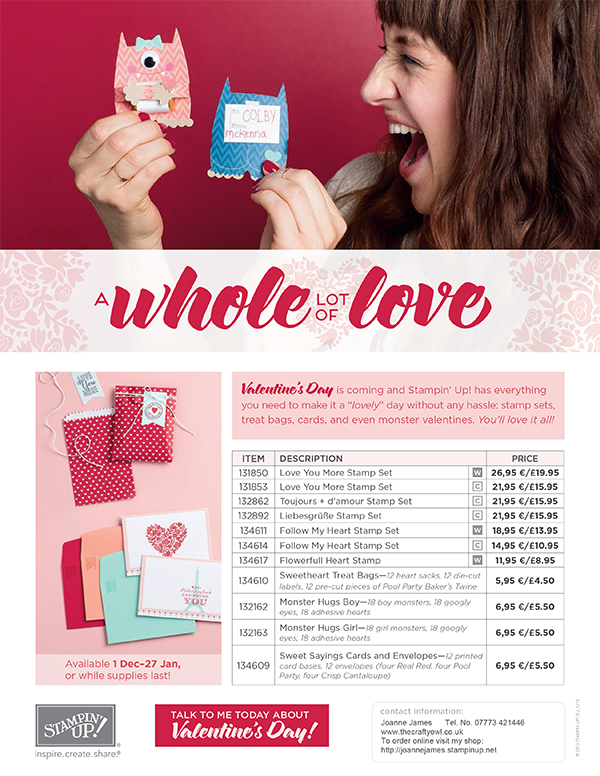
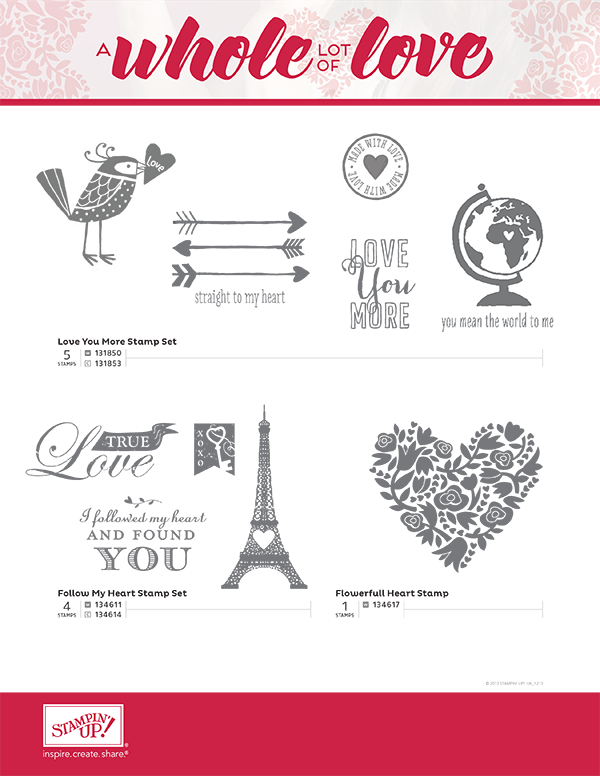
So today we're having a short break from Christmas projects as it's the first of December and the launch of Stampin' Up's 'Whole Lot of Love' promotion - stamps and products designed with Valentine's Day in mind, but can be used for lots more besides. You may have noticed that Valentine's-themed projects didn't feature in the current seasonal catalogue, hence this special promotion to enable you to be prepared in good time for the big day. There are some great products in this set, ranging from cute (Monster Hugs - adorable! - available from 9th December) to practical (pre-cut card and envelope sets) and romantic (check out that Eiffel Tower!) to beautiful (the Flowerfull Heart - a keeper that would look just as beautiful on a birthday card for someone special). Here are the images for each set:
Aren't they great? I'll have some samples to share using a selection of these products in the not-too-distant future, but meanwhile in keeping with the theme I thought I would share this card with you that I made using the 'love' Thinlits die:
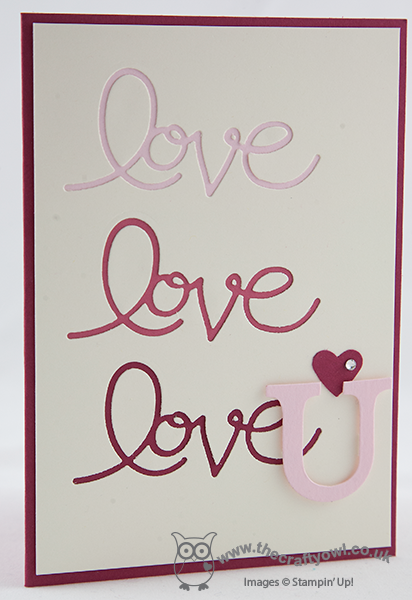
If you're a fellow Stampin' Up! demonstrator and you attended our recent European Convention in Manchester, you may well have seen this card already. It was one of the projects I entered for the Convention Design Competition and whilst it didn't win, it was on the display boards for everyone to enjoy. My other project was 3D, but I chose this card as my second project as it's very clean and simple and typical of my papercrafting style. I am in love with these thinlits and also like how they can be used not only with the word itself, but you can use the relief too - no need to throw away this piece, a real two for one! I created an ombre background in the relief - I love this technique and think it looks great when done in inks with a brayer or sponged, but also like the clean look it gives with this kind of project. A few extra pieces and a small diamante just finish it off.
One of the funniest things that happened at Convention was that I attended an early Friday evening workshop and left my two downline team members who were attending Convention with me to browse the display boards. When I met up with them later, they both said to me 'You should come and see this card on the board - we love it and think you will too.' And the card? Without them knowing it was mine, they led me to this card! What can I say? Great minds clearly think alike! It did give me a lovely warm feeling inside though - love you, my little Crafty Owls!
Check out the product links below if you would like to have a go at either recreating my card or purchase any of the lovely new Valentine's products.
Back tomorrow with another creative project; check out today's other post though if you're a Stampin' Up! demonstrator - your life is just about to get a whole lot easier ....
Until then, happy stampin'!
Stampin' Up! Supplies Used (for love card):
Stampin' Up! Whole Lot of Love Products (Monster Hugs available from 9th December):
by Joanne James13. February 2013 22:10Another Valentine's Day card today - well, only one more day to go!
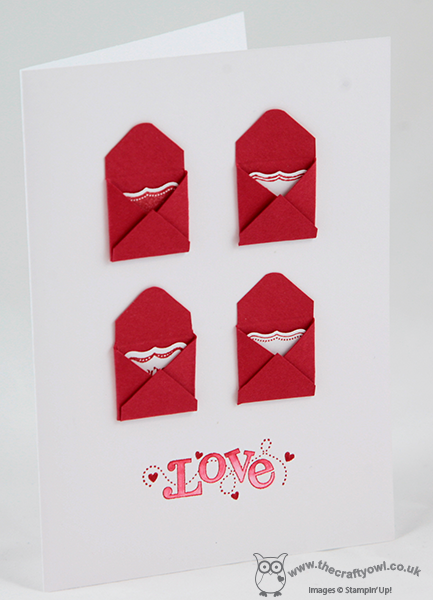
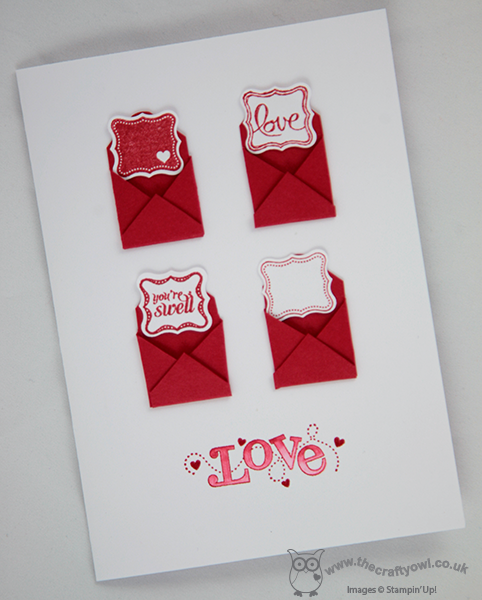
I was playing about with my new Petite Curly Label punch and the Pretty Petites (just one of the stamp sets available free if you spend £45 or more during Sale-A-Bration 2013) and Ciao Baby! stamp sets that fit it perfectly and thought how the little punched shapes would make cute love letters ... if only I could find some super-small envelopes! So, some quality time with my Simply Scored Scoreboard later, and done - 4 envelopes that are the perfect size for the punched love tokens.
A set of 4 makes a great card; you could even write a mini note on the blank one and hide inside for your loved one to find.

I finished off with a 'love' stamp coloured with a real red marker and blender pen; this stamp is from the retired set 'Outlined Occasions' but it just finished this card off nicely.
I hope this leaves you inspired to create - until next time, happy stampin'!
Stampin' Up Supplies:
Stamps: Pretty Petites, Ciao, Baby!, Outlined Occasions (retired)
Cardstock: Whisper White, Real Red
Inks & Stampin' Write Markers: Real Red
Tools: Petite Curly Label Punch, Blender Pen, Simply Scored
3808888f-9047-4219-86f6-0abcc19460c1|0|.0|96d5b379-7e1d-4dac-a6ba-1e50db561b04
Tags: Petite Curly Label Punch, Pretty Petites, Sale-a-bration 2013, Simply Scored, Sprinkled Occasions, Stampin' Up, Stampin' Up Card, Stampin' Up Card ideas, Stampin' Up Supplies, Valentine's, Ciao, Baby!
Cards | Sale-a-bration | Stamping