Flowering Tulips Clean And Simple PP583

by Joanne James20. March 2022 08:00

Today it's Sunday and time for this week's new challenge over at The Paper Players! It's the turn of the fabulous Laurie to host this week and she has a clean and simple challenge for us to work with showcasing 'Blooms':


I used the sketch over at Global Design Project #GDP334 for my layout and couldn't resist another tulip card! This one is super simple and all about the stamping so perfect for this week's TGIF Challenge too - take a look:


Here's the low-down on today's card:

I decided to move away from brights and pastels and create a dramatic purple tulip on today's card. I stamped a single tulip from the 'Flowering Tulips' stamp set in a combination of Blackberry Bliss and Rich Razzleberry, and added it to a Rich Razzleberry base using a couple of strips of Regals DSP in Blackberry Bliss at the top and bottom of my stamped panel to tie the two together. I resisted the urge to add anything else to my card - this is clean and simple week after all. Remember, we are looking for cards that:

  • Have minimal layers and embellishments
  • Have plenty of open space
  • Are simple and uncluttered


I also added a little additional stamping to the inside of my card to finish:


Here is the visual summary of the key products used on today's project for you to pin for easy reference:


You can see all of my Product and 'How To' summaries on my 'How To - Tips and Techniques' Pinterest board in case you've missed any. 

I love the deep purples on today's card, especially when paired with a pop of bright Granny Apple Green so I'm also linking today's card up over at The Alphabet Challenge where their current letter is 'Y for Your Favourite Colour Combination' - purple with green is definitely one of mine!

Before you reach for your ink and papers, check out what our amazing team has created to inspire you this week:

Here's a quick recap of our challenge rules:
 
1.  Create a new paper project
2.  Upload your creation to your blog with a link back to us and provide a direct link to the post featuring your challenge submission.
3.  Please link your card to no more than four challenges, TOTAL.
4.  Have FUN!

Enjoy your day; I'll be back tomorrow with another project. Until then, happy stampin'!


Stampin' Up! Supplies Used: 

Table built using Product Table Builder by The Crafty Owl - Independent Stampin' Up! Demonstrator.

Daffodil Daydream Birthday Card PP582

by Joanne James13. March 2022 08:00

Today it's Sunday and time for this week's new challenge over at The Paper Players! It's my turn to host this week and I have chosen a sunny trio of colours for our colour challenge this week


I combined my colours with Amy's great sketch over at Freshly Made Sketches this week and used that central panel to showcase some spring daffodils - take a look:


Here's the low-down on today's card:

I used two pieces of Brights designer paper each with the same pattern, one in Daffodil Delight and one in Mango Melody, to cover my card base and added a scalloped stitched rectangle to the centre. I stamped and coloured the trio of daffodils from the Daffodil Daydream stamp set with my Stampin' Blends in the challenge colours and then diecut them with the co-ordinating Daffodil Dies and popped them up on dimensionals onto the diecut panel. A trio of yellow opaque sequins completes my card:


I also added a single daffodil to both the inside of my card and a co-ordinating envelope:


I love yellows and at this time of year daffodils were an obvious choice for me. The daffodils in my front garden border came into bloom this week and they looks so bright and cheery - like a little 'welcome home' party each time I pull my car onto the driveway!

Here is the visual summary of the key products used on today's project for you to pin for easy reference:


You can see all of my Product and 'How To' summaries on my 'How To - Tips and Techniques' Pinterest board in case you've missed any. 

So what will you create with this sunny colour palette? Before you reach for your ink and papers, check out what our amazing team has created to inspire you this week:

Here's a quick recap of our challenge rules:
 
1.  Create a new paper project
2.  Upload your creation to your blog with a link back to us and provide a direct link to the post featuring your challenge submission.
3.  Please link your card to no more than four challenges, TOTAL.
4.  Have FUN!

Enjoy your day; I am hoping that the weather will be as nice as it was here yesterday and that I will get to spend some time in the garden as there are lots of odd jobs that need doing. Otherwise, no special plans here in the James household this week. I'll be back tomorrow with another project. Until then, happy stampin'!


Stampin' Up! Supplies Used: 

Table built using Product Table Builder by The Crafty Owl - Independent Stampin' Up! Demonstrator.

You Are Amazing Daffodil and Tulip Spring Bouquet PP581

by Joanne James6. March 2022 08:00

Today it's Sunday and time for this week's new challenge over at The Paper Players! It's the turn of the fabulous Jaydee to host this week and she has a timely seasonal theme challenge for you to work with:


Nothing says spring to me more than daffodils and tulips, so I decided to go all out and diecut a spring bouquet for the front of my card that have these as the centrepiece - take a look:


Here's the low-down on today's card:

I added a panel of (retired) Sale-A_Bration Friendly Hello DSP to the centre of my card and overlaid this with a slimline die coverpiece, leaving the long inset pieces intact, then built up my bouquet from Daffodil Delight and So Saffron daffodils and Fresh Freesia tulips:


I finished with an over-the-top ribbon bow and a layered 'you are amazing' diecut sentiment cut with my Amazing Thanks Dies. This card is larger than usual (15cm x 21cm) to accommodate my spring blooms. I'm afraid I succumbed to the most dreadful cold this week, so I haven't finished decorating the inside of this card. Hence no inside photos - a job for another day.

Here is the visual summary of the key products used on today's project for you to pin for easy reference:


You can see all of my Product and 'How To' summaries on my 'How To - Tips and Techniques' Pinterest board in case you've missed any. 

Before you reach for your ink and papers, check out what our amazing team has created to inspire you this week:

Here's a quick recap of our challenge rules:
 
1.  Create a new paper project
2.  Upload your creation to your blog with a link back to us and provide a direct link to the post featuring your challenge submission.
3.  Please link your card to no more than four challenges, TOTAL.
4.  Have FUN!

Enjoy your day; I will be hiding under my blanket with a box of tissues feeling sorry for myself! Hope normal service will resume soon! Until then, happy stampin'!


Stampin' Up! Supplies Used: 

Table built using Product Table Builder by The Crafty Owl - Independent Stampin' Up! Demonstrator.

Windmill Flowering Tulip Fields Mother's Day Card With Belly Band PP580

by Joanne James27. February 2022 09:00

Today it's Sunday and time for this week's new challenge over at The Paper Players! It's the turn of the fabulous Anne Marie to host this week and she has my favourite, a sketch challenge, for you to work with:


I do love a good sketch and this week I really went to town! I have been making lots of cards with the 'Tulip Fields' bundle as it was the feature bundle for my online class last week and I decided that the layout of Anne Marie's sketch was perfect for a diecut windmill for the central focal point and the beginnings of what turned out to be a rather special card - take a look:


Here's the low-down on today's card:

Many Layers - This is a card of many layers - which means I'm also playing along with the ladies at Just Add Ink this week where I chose 'layers' and patterned paper as my two things. More on patterned paper in a moment, but firstly those layers! I can count 13 on the front of my card alone (not including the band of ribbon!) - and there are even more inside! I used a (retired) stitched oval diecut as a base for my windmill cut using the Windmill dies and added a sentiment combining stamped words taken from 'Art Gallery' and a layered 'amazing' cut using the Amazing Thanks Dies. I attached these to a horizontal band as the focal point for the front of my card.You can see the layered loveliness in more detail below:

A Belly Band Surprise - The layered windmill is in fact attached to a belly band decorated with a strip of DSP, which when removed reveals the beautiful red, pink and white tulips of the Flowering Fields DSP in all it's glory, along with a sentiment made from a combination of some partial stamping from a stamp in the 'Flowering Tulips' stamp set and the word 'Mother's' cut using the Word Wishes Dies:


With Mother's Day here in the UK only a few weeks away, this was a great opportunity to get ahead and make my Mother's Day card. I love that the layered circle greeting sits below the windmill oval of the belly band and is only revealed when the belly band is removed. 

Mother's Day Details - The surprises don't end there though. My card has an additional flap, so when it's opened you see this panel, also decorated with another piece of Flowering Fields DSP and a trio of tulips cut with the Tulips Dies:


 These Tulips Dies are amazing - they create the most amazing dimensional tulips! I cut mine from another pattern in the Flowering Fields DSP pack; it is actually a Petal Pink sky with white and red clouds, but I like the mottled effect that it gives the tulips and they compliment the pattern on the front of the card:


The sentiment, along with the one on the inside of the card is from the retired stamp set 'Strong and Beautiful'. This set is a keeper - the words in this set are so perfect for special female cards. when you open the next flap, the inside panel is revealed. I bordered the edge of the bottom panel with a trio of tulip border dies (I might add another diecut windmill behind these tulips - now that I am looking at it again this panel is a little light on decoration compared to the others):


 And here's a close-up of the innermost panel, decorated with some layered tulips stamped with the 'flowering Tulips' stamp set:


As you can imagine, all those layers make for a bulkier than usual card, so I will be making a custom box-envelope to enclose it in. That's a job for another day though! This kind of card does take a long time to make, but it is worth it - I love the end result and know my Mum will appreciate it too.

Here is the visual summary of the key products used on today's project for you to pin for easy reference:


You can see all of my Product and 'How To' summaries on my 'How To - Tips and Techniques' Pinterest board in case you've missed any. 

Before you reach for your ink and papers, check out what our amazing team has created to inspire you this week:

Here's a quick recap of our challenge rules:
 
1.  Create a new paper project
2.  Upload your creation to your blog with a link back to us and provide a direct link to the post featuring your challenge submission.
3.  Please link your card to no more than four challenges, TOTAL.
4.  Have FUN!

Enjoy your day; we are hoping for another restful Sunday, mainly centred around cooking and eating - we are cooking a Turkish recipe for dinner today for the first time, so that should be fun! I'm also hoping to squeeze in another movie this afternoon - last week's 'Encanto' proved a big hit so this week we might go for 'Sing 2' - hope it's as good as the first one!

I'll be back tomorrow with another project. Until then, happy stampin'!


Stampin' Up! Supplies Used: 

Table built using Product Table Builder by The Crafty Owl - Independent Stampin' Up! Demonstrator.

Catch You Later Monkey Clean and Simple PP579

by Joanne James20. February 2022 09:00

Today it's Sunday and time for this week's new challenge over at The Paper Players! It's the turn of the fabulous Ann to host this week and she has a clean and simple challenge for you to work with:


I decided to use the sketch over at Just Add Ink for my layout this week and used two overlappping hexagons, negative and positive, cut with the Beautiful Shapes Dies for my central shapes and chose to feature the two cute monkeys from the 'Catch You Later' stamp set for my wildlife - take a look:


Here's the low-down on today's card:

I stamped my monkeys onto some white cardstock and coloured them with my new skin tone Blends markers, then masked them off and used some Balmy Blue ink and a stencil I made using my Basic Borders Dies to create a soft and subtle background of clouds with my blender brush behind them:

I added this to my Shaded Spruce card base and then added my top panel, which I ran through my diecutting machine with the Stitched Greenery Die before cutting out the hexagon shape and popping this panel up on dimensionals to frame my little jungle scene. I added a sentiment to another popped-up hexagon and finished my sentiment on the inside, with another stamped-off image of the monkeys too:


So what do you think? Cute, right?! It's my 23rd wedding anniversary today and whilst this didn't start out as a card for my DH, it may well be the one I send as he would appreciate the humour over sweet and smushy love hearts any day!

Here is the visual summary of the key products used on today's project for you to pin for easy reference:


You can see all of my Product and 'How To' summaries on my 'How To - Tips and Techniques' Pinterest board in case you've missed any. 

Before you reach for your ink and papers, check out what our amazing team has created to inspire you this week:

Here's a quick recap of our challenge rules:
 
1.  Create a new paper project
2.  Upload your creation to your blog with a link back to us and provide a direct link to the post featuring your challenge submission.
3.  Please link your card to no more than four challenges, TOTAL.
4.  Have FUN!

Enjoy your day; one of the James Juniors had a friend stay for a sleepover yesterday, so apart from taking him home, we are having a quiet day indoors. The James girls definitely deserve it; as my regular readers know it is not uncommon for us to be out in all weathers either playing or watching hockey at the weekend. Well, despite storm Eunice and the incredible high winds and driving rain we've had here over the past few days, yesterday's match wasn't cancelled. We all turned up and despite a seriously waterlogged pitch, the umpires decided it was safe to play. The end result? Players and parents soaked to the skin and frozen to the bone - and just to give you a flavour of what I'm talking about, here's a photo I managed to snap during 'warm up' before the game started: 


I have genuinely never known anything like it! To make things worse the girls lost 4-2, despite their best efforts. So today we are staying warm - I think we might actually huddle under a blanket and watch 'Encanto' - it's about time we discovered why no-one talks about Bruno!

I'll be back tomorrow with another project. Until then, happy stampin'!


Stampin' Up! Supplies Used: 

Table built using Product Table Builder by The Crafty Owl - Independent Stampin' Up! Demonstrator.

Pierced Blooms Special Moments Friendship Card PP578

by Joanne James13. February 2022 09:00

Today it's Sunday and time for this week's new challenge over at The Paper Players! It's the turn of the fabulous LeAnne to host this week and she has a bright and cheery colour challenge for you to work with:
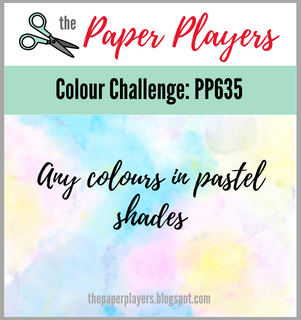
    

I used Kim's fabulous sketch over at Freshly Made Sketches this week for my layout and decided to create something fresh with a hint of spring - take a look:


Here's the low-down on today's card:

Special Moments - I love Kim's sketch this week and will most definitely be CASing her card using my favourite Floral Squares Dies. I decided to use the square to feature my sentiment and the circle for my floral decoration. I love this sentiment from the current Sale-A-Bration set 'Special Moments' - it is a paired sentiment that finishes like this on the inside of my card:

Isn't that so sweet? Perfect to let a friend know how much they mean to you. I layered my sentiment square and added a strip of Sunshine and Rainbows designer paper behind - another Sale-A-Bration freebie!

Pierced Blooms and Stitched Greenery - In addition to my sentiment, my card is all about stitched detailing. I used the Pierced Blooms Dies to create my trio of flowers and leaf stems in the challenge colours to add to the corner of my sentiment square and diecut the background with the Stitched Greenery Dies.

Brass Butterflies - As a finishing touch, I added a couple of teeny tiny brass butterfly embellishments to my sentiment square; these are in the mini catalogue - aren't they sweet?

I really like LeAnne's colour choices this week - they are just the thing to bring a breath of fresh air and spring colour on a cold winter's day!

Here is the visual summary of the key products used on today's project for you to pin for easy reference:


You can see all of my Product and 'How To' summaries on my 'How To - Tips and Techniques' Pinterest board in case you've missed any. 

Before you reach for your ink and papers, check out what our amazing team has created to inspire you this week:

Here's a quick recap of our challenge rules:
 
1.  Create a new paper project
2.  Upload your creation to your blog with a link back to us and provide a direct link to the post featuring your challenge submission.
3.  Please link your card to no more than four challenges, TOTAL.
4.  Have FUN!

Enjoy your day; we have no plans so will be spending it enjoying the start of the half-term break. I'll be back tomorrow with another project. Until then, happy stampin'!
 

Stampin' Up! Supplies Used: 

Table built using Product Table Builder by The Crafty Owl - Independent Stampin' Up! Demonstrator.

Nuts And Bolts Interactive Light-Up Valentine's Card PP577

by Joanne James6. February 2022 09:00

Today it's Sunday and time for this week's new challenge over at The Paper Players! It's the turn of the fabulous Laurie to host this week and she has a fun theme challenge for you to work with:


Love and friendship is our theme this week and my card today is all heart (perfect for the hearts challenge over at Double D). I used the sketch layout over at Paper Craft Crew and decided to put into practice an idea I've been wanting to try with another Valentine's card using the awesome 'Nuts & Bolts' stamp set - take a look:


At first glance, my card is quite simple: some stamped tone-on-tone hearts on my pink layer, a square of heart-patterned Sweet Talk designer paper and a robot, coloured with my Smoky Slate and Real Red Stampin' Blends.

The best part about today's card though? It lights up! I used a simple circuit and a red LED to give my heart a fun Valentine's glow:


When you press the sentiment, it light up the heart - check it out on the video clip below:

This type of card is so easy to create - and the interactive element makes for a super-cute card, right?! I also used an offcut strip of paper and one of the other robots in the set to decorate the inside of my card:


Here is the visual summary of the key products used on today's project for you to pin for easy reference:


You can see all of my Product and 'How To' summaries on my 'How To - Tips and Techniques' Pinterest board in case you've missed any. 

I'm also linking today's card up for a second entry over at SUO Challenges where they are all about Valentine's Day for their current challenge.

Before you reach for your ink and papers, check out what our amazing team has created to inspire you this week:

Here's a quick recap of our challenge rules:
 
1.  Create a new paper project
2.  Upload your creation to your blog with a link back to us and provide a direct link to the post featuring your challenge submission.
3.  Please link your card to no more than four challenges, TOTAL.
4.  Have FUN!

Enjoy your day; I'll be back tomorrow with another project. Until then, happy stampin'!
 

Stampin' Up! Supplies Used: 

Table built using Product Table Builder by The Crafty Owl - Independent Stampin' Up! Demonstrator.

Brilliant Rainbow Dies Shaker Card PP576

by Joanne James30. January 2022 09:00

Today it's Sunday and time for this week's new challenge over at The Paper Players! It's my turn to host this week and since it is the fifth Sunday of the month I have a tic-tac-toe challenge for you to work with:


I designed this board with lots of things that I wanted to use so that when it came to making my card, I was spoilt for choice! In my excitement I duplicated the 'birthday' square and didn't notice until my dear teamie Nance had already made the challenge graphic, so I decided to go with it - we all need lots of excuses for birthday cards, right?! That said, I ended up going in a completely different direction! I used the layout from Jen M's sketch over at Freshly Made Sketches this week (I rotated the sketch 90 degrees to the left and flipped it on the vertical edge for a mirror image) and went across the top row of my board with rainbow/sparkle/diecut and made a fun rainbow shaker card - take a look:


Here's the low-down on today's card:

A Brilliant Rainbow - Having firstly used some Pool Party ink and a blending brush to create a cloudy sky background, I used the largest of the Brilliant Rainbow Dies to cut the windows for my half rainbow. I backed these with a piece of window sheet, ready to create my shaker. 

Frosted Shaker - I chose the four colours for my rainbow stripes, then selected some co-ordinating beads from the frosted beads assortment in the mini catalogue for my shaker element. For added sparkle, I brushed the coloured back panels with clear Wink of Stella. The rainbow shaker effect is so pretty - here's a close-up to show it in more detail:


I used the foam adhesive strips to create four individual shaker elements so that I could keep the colours separate. It's worth noting that because of the size of the frosted beads, the shaker does need a double thickness of foam strips to allow your beads to shake freely. This does made the card quite thick, but I think it's worth it!

All Things Stitched - I used my Basic Borders Dies to create a border of white clouds and to make a stencil for my background, with a combination of a stitched circle and four layered stitched triangles behind for my sunshine. The sentiment is from the free Sale-A-Bration set 'Special Moments' and I paired it with another from the same set on the inside, with some faintly stencilled clouds behind:


I think this will make a nice special card to show appreciation for someone who went the extra mile, don't you?

Here is the visual summary of the key products used on today's project for you to pin for easy reference:


You can see all of my Product and 'How To' summaries on my 'How To - Tips and Techniques' Pinterest board in case you've missed any. 

Before you reach for your ink and papers, check out what our amazing team has created to inspire you this week:

Here's a quick recap of our challenge rules:
 
1.  Create a new paper project
2.  Upload your creation to your blog with a link back to us and provide a direct link to the post featuring your challenge submission.
3.  Please link your card to no more than four challenges, TOTAL.
4.  Have FUN!

Enjoy your day; I'll be back soon with another project. Until then, happy stampin'!


Stampin' Up! Supplies Used: 

Table built using Product Table Builder by The Crafty Owl - Independent Stampin' Up! Demonstrator.

Edit: Jen B chose my card as one of the princesses for FMS520 - yay!

See the source image

Sunshine And Rainbows Clean And Simple PP575

by Joanne James23. January 2022 09:00

Today it's Sunday and time for this week's new challenge over at The Paper Players! It's the turn of the fabulous Jaydee to host this week and she has my favourite, a sketch, challenge for you to work with:


I love Jaydee's sketch this week and could have made a ton of different cards with it! Having seen the lovely Jaydee's card before I made mine, I noticed she had focused on the top portion with her design. I was naturally drawn to filling the bottom section, so decided to take my inspiration from Jaydee's interpretation of the sketch and instead focus on creating detail on the top portion of my card. This is what I came up with:


Here's the low-down on today's card:

I decided to use a piece of the Sale-A-bration Sunshine & Rainbows designer paper to decorate the top portion of my card, and then the rainbow border die to edge my white panel below. I paper-pieced my rainbows across my border edge and then added a sentiment using the rainbow-topped diecut that also features in the Brilliant Rainbows Dies pack. In addition to paper-piecing a larger rainbow on the top of my sentiment tab, I added a sentiment from the 'Rainbow of Happiness' stamp set and added a trio of clouds and a tiny resin heart that I coloured pink using my Magenta Madness Blends marker:

I didn't set out to make a clean and simple card this week, but I really love the end result! I am linking my card up with the lovely ladies over at SUO Challenges too as they are focusing on clean and simple cards for their current challenge.

Here is the visual summary of the key products used on today's project for you to pin for easy reference:


You can see all of my Product and 'How To' summaries on my 'How To - Tips and Techniques' Pinterest board in case you've missed any. 

Before you reach for your ink and papers, check out what our amazing team has created to inspire you this week:

Here's a quick recap of our challenge rules:
 
1.  Create a new paper project
2.  Upload your creation to your blog with a link back to us and provide a direct link to the post featuring your challenge submission.
3.  Please link your card to no more than four challenges, TOTAL.
4.  Have FUN!

Enjoy your day; we are having a quiet day and I'm hoping to squeeze in a little crafting so that I'll have something to share with you tomorrow. Until then, happy stampin'!


Stampin' Up! Supplies Used: 

Table built using Product Table Builder by The Crafty Owl - Independent Stampin' Up! Demonstrator.

Nature's Beauty In Winter Clean and Simple PP574

by Joanne James16. January 2022 09:00

Today it's Sunday and time for this week's new challenge over at The Paper Players! It's the turn of the fabulous Claire to host this week and she has a seasonal clean and simple challenge for us to work with:


Winter animals - so many options! I decided to dig out a rather neglected stamp set of late and using Judy's sketch over at Freshly Made Sketches and very much inspired by the snow and blue tones over at AAA Cards  set to work on my clean and simple card - take a look:


Here's the low-down on today's card:

 I diecut a circle from my white cardfront and added a piece of Beauty of the Earth paper with a watercoloured blue behind and stamped some bushes and twigs in Versamark across the aperture and heat embossed them in silver. I then also stamped and fussy cut a leaf branch and arctic fox, heat embossed them both in silver then added some shading with my Smoky Slate Blends, before finishing with a sentiment from 'timeless Tulips' and a sprinkling of sequins. You can see the detail on the fox and the shine of the metallic slightly better below:


A quick reminder to all of you playing along over at The Paper Players this week, in addition to the theme of winter animals, it is more importantly 'clean and simple' week. What does this mean?

  • minimal layers and embellishments
  • clean, white space

 I liked this card so much I made another one, mirroring the sketch and using the arctic rabbit as the focal point:


 I used a different sentiment on this one - this one comes from the new 'Honeybee Home' set - but I like this card just as much as the fox. Again, you can see the shine and detail slightly better below:


Since my second card also uses this week's colours over at Just Us Girls of white, silver and light blue, I'll be linking it up there.

Here is the visual summary of the key products used on today's project for you to pin for easy reference:


You can see all of my Product and 'How To' summaries on my 'How To - Tips and Techniques' Pinterest board in case you've missed any. 

And one last photo of both cards together - which one do you prefer? I like them both and it was nice to give this stamp some love again.

Before you reach for your ink and papers, check out what our amazing team has created to inspire you this week:

Here's a quick recap of our challenge rules:
 
1.  Create a new paper project
2.  Upload your creation to your blog with a link back to us and provide a direct link to the post featuring your challenge submission.
3.  Please link your card to no more than four challenges, TOTAL.
4.  Have FUN!

Enjoy your day; having spent yesterday outside in the freezing fog watching the oldest of the James Juniors play hockey whilst hubby went to watch the youngest do the same (fun games and wins all round, so that helped!), we are all looking forward to a day indoors enjoying the warmth today! I'll be back tomorrow with another project. Until then, happy stampin'!


Stampin' Up! Supplies Used: 

Table built using Product Table Builder by The Crafty Owl - Independent Stampin' Up! Demonstrator.
 
Edit: Kim chose my card for Princess of Clean for FMS518 - yay!
See the source image

Mini Catalogue

BROWSE THE CATALOGUE

The mini catalogue is now live! Read and download your copy here.

Shop Online

Access my online shop 24 x 7, 365 days of the year:

Current April hostess code:

VDKNV7BH

Shop Online

Join My Team

It's always a great time to join Stampin’ Up! New team members can get £130 worth of products for only £99 + free business supplies + free shipping + all the fun being a part of Stampin’ Up! Stampin' Up! has something for everyone: join my growing team and benefit from my support to enjoy Stampin' Up! however you choose.

If you're interested, call me for a chat to understand how I can help you realise your goals. Alternatively, if you have already decided to sign up and you just can't wait, please click here for the link to the online form where you can sign up and order your starter kit right away! 

Latest Kit!

Stampin Cut and Emboss

The Rock Legend Kit has all you need to make 8 cards with coordinating envelopes. Along with the new Panda Friends Kit, both are available from January 4th for just £14 each - get yours here!

2023-24 Annual Catalogue

BROWSE THE CATALOGUE

Click on the catalogue for a full list of current SU! supplies - if you would like to order any of the items featured, please drop me a line at [email protected] or give me a call on 07773 421446 - I'd be happy to help.

New Online Exclusives

There are new products available exclusively in the online store from 5 March - check them out here.

About Me

Hi I'm Joanne and live in Northampton and when I'm not looking after my husband and two beautiful children, am an avid crafter with a passion for all things Stampin' Up!

I must confess that I have never been a big rubber stamper - until I discovered Stampin' Up! that is. I love the fact that I can get such great results with co-ordinating stamps, inks, papers and punches - the possibilities are endless! Join me on my stamping journey as I share the things I love and be inspired to create amazing things yourself!

Follow Me

Monthly Newsletter

Box Builder

Click the button above to use Box Buster to create your custom box design using the Envelope Punch Board!

Kits Collection Now Available!

Stampin Cut and Emboss

The new Kits Collection from Stampin' Up! is now available!

Click here to see the current kits available and order yours online today.

I Design For


Stampin' Up Stuff

This is my personal blog and is not endorsed by Stampin’ Up! I hope you find it a plentiful source of ideas and personal inspiration but please don't copy my designs for contest submission or use for classes, publication or sale without express permission.