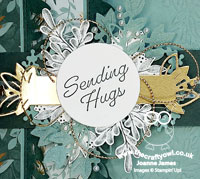
Nature's Beauty In Winter Clean and Simple PP574

by Joanne James16. January 2022 09:00

Today it's Sunday and time for this week's new challenge over at The Paper Players! It's the turn of the fabulous Claire to host this week and she has a seasonal clean and simple challenge for us to work with:


Winter animals - so many options! I decided to dig out a rather neglected stamp set of late and using Judy's sketch over at Freshly Made Sketches and very much inspired by the snow and blue tones over at AAA Cards  set to work on my clean and simple card - take a look:


Here's the low-down on today's card:

 I diecut a circle from my white cardfront and added a piece of Beauty of the Earth paper with a watercoloured blue behind and stamped some bushes and twigs in Versamark across the aperture and heat embossed them in silver. I then also stamped and fussy cut a leaf branch and arctic fox, heat embossed them both in silver then added some shading with my Smoky Slate Blends, before finishing with a sentiment from 'timeless Tulips' and a sprinkling of sequins. You can see the detail on the fox and the shine of the metallic slightly better below:


A quick reminder to all of you playing along over at The Paper Players this week, in addition to the theme of winter animals, it is more importantly 'clean and simple' week. What does this mean?

  • minimal layers and embellishments
  • clean, white space

 I liked this card so much I made another one, mirroring the sketch and using the arctic rabbit as the focal point:


 I used a different sentiment on this one - this one comes from the new 'Honeybee Home' set - but I like this card just as much as the fox. Again, you can see the shine and detail slightly better below:


Since my second card also uses this week's colours over at Just Us Girls of white, silver and light blue, I'll be linking it up there.

Here is the visual summary of the key products used on today's project for you to pin for easy reference:


You can see all of my Product and 'How To' summaries on my 'How To - Tips and Techniques' Pinterest board in case you've missed any. 

And one last photo of both cards together - which one do you prefer? I like them both and it was nice to give this stamp some love again.

Before you reach for your ink and papers, check out what our amazing team has created to inspire you this week:

Here's a quick recap of our challenge rules:
 
1.  Create a new paper project
2.  Upload your creation to your blog with a link back to us and provide a direct link to the post featuring your challenge submission.
3.  Please link your card to no more than four challenges, TOTAL.
4.  Have FUN!

Enjoy your day; having spent yesterday outside in the freezing fog watching the oldest of the James Juniors play hockey whilst hubby went to watch the youngest do the same (fun games and wins all round, so that helped!), we are all looking forward to a day indoors enjoying the warmth today! I'll be back tomorrow with another project. Until then, happy stampin'!


Stampin' Up! Supplies Used: 

Table built using Product Table Builder by The Crafty Owl - Independent Stampin' Up! Demonstrator.
 
Edit: Kim chose my card for Princess of Clean for FMS518 - yay!
See the source image

All Squared Away Floral Squares Birthday Card PP573

by Joanne James9. January 2022 09:00

Today it's Sunday and time for this week's new challenge over at The Paper Players! It's the turn of the fabulous Anne Marie to host this week and she has a fresh colour challenge for us to work with:


Anne Marie's colours feel like a breath of spring this week! I used Amy's fabulous layout over at Freshly Made Sketches, grabbed my dies and some patterned papers and set to work. This is what I came up with:


Here's the low-down on today's card:

Floral Squares - I decided to feature the Floral Squares Dies on my card today, which dictated the size of my shapes in relation to Amy's sketch (I used a horizontal as opposed to vertical layout for this reason). I used two of the four floral designs in the set, and cut each one out three times - once in Just Jade, once in Calypso Coral and once in white, also cutting the flower heads separately in Calypso Coral. I carefully snipped various elements out of each one and layered them to achieve my finished frames, with the flower heads applied last to slightly overlap my white frames.

A Trio of Patterns - I used three different patterned paper designs in the challenge colours for the squares/rectangles across the centre of my card - can you guess which packs each comes from? The first is from Hand Penned, the second from the new Abstract Beauty papers and the final one from the You're A Peach paper pack. Each has a spotted design; this unifies the patterns/colours and avoids the panels appearing too 'busy'. 


Finishing Touches - I used white as a neutral to unify the various elements of my design and as a finishing touch also added an in-colour gem and a neutral linen thread bow to my single flower frame:


I love Calypso Coral and I am really pleased with how today's card turned out - what a great colour combo this week Anne Marie!

Here is the visual summary of the key products used on today's project for you to pin for easy reference:


You can see all of my Product and 'How To' summaries on my 'How To - Tips and Techniques' Pinterest board in case you've missed any. 

I'm also linking today's card up over at The Paper Craft Crew where the theme this week is 'anything goes'. 

Before you reach for your ink and papers, check out what our amazing team has created to inspire you this week:

Here's a quick recap of our challenge rules:
 
1.  Create a new paper project
2.  Upload your creation to your blog with a link back to us and provide a direct link to the post featuring your challenge submission.
3.  Please link your card to no more than four challenges, TOTAL.
4.  Have FUN!

Enjoy your day; I am looking forward to a quiet family day - nothing special planned. I'll be back tomorrow with another project. Until then, happy stampin'!


Stampin' Up! Supplies Used: 

Table built using Product Table Builder by The Crafty Owl - Independent Stampin' Up! Demonstrator.

Rainbow Glimmer Brilliant Rainbow Card PP572

by Joanne James2. January 2022 09:00

Happy new year everyone! I hope you all had a wonderful Christmas and New Year - I thoroughly enjoyed my festive break with my family and much-needed crafty down-time and today I am officially back to it with my first blog post of the new year. It's Sunday so I'm back with our first challenge of 2022 over at The Paper Players! It's the turn of the amazing Ann to host this week and she has a theme challenge that is perfect for this time of year:


Add a little sparkle - what a great way to see the new year in! I chose glimmer paper as my sparkle of choice and also used the sketch over at Freshly Made Sketches as the starting point for today's layout. My card has it all today: something current, something new, something retired and something free! Take a look and see if you can work out which is which:


Here's the low-down on today's card:

Something Current - There are a couple of notable current products on today's card: my favourite rainbow glimmer paper that I used for my diecut rainbow, along with some of the yellow Ombre Glimmer Paper along with one of the Tasteful Labels Dies that I used to diecut my sun. I just love the shimmer and sparkle!


Something New - I made my glimmer rainbow using the new Brilliant Rainbow Dies that will debut in the upcoming January-June mini catalogue that launches next week. These are so fun! They also have a co-ordinating stamp set called 'Rainbow of Happiness' that I used for my sentiment and to add some extra detail to the inside of my card:


Something Retired - I used a retired Textured Clouds Embossing Folder to add some additional cloud detail to the panel behind my focal images - I haven't used this EF in ages but thought it worked quite well here for some added textural detail.

Something FREE - The final element to today's card is a sneak peek of some free product - the cloud at the end of my rainbow comes from the Sunshine and Rainbows Designer Series Paper - just one of the products that can be yours free with a purchase of £45 during the first Sale-A-Bration promotion of the year that also begins on 4th January. These papers are gorgeous and co-ordinate perfectly with the Rainbow of Happiness Bundle - and everyone loves free product, right?

Here is the visual summary of the key products used on today's project for you to pin for easy reference:


You can see all of my Product and 'How To' summaries on my 'How To - Tips and Techniques' Pinterest board in case you've missed any. 

Before you reach for your ink and papers, check out what our amazing team has created to inspire you this week - including the work of our three new guest designers for 2022, Cindy, Christy and Jennie:

Here's a quick recap of our challenge rules:
 
1.  Create a new paper project
2.  Upload your creation to your blog with a link back to us and provide a direct link to the post featuring your challenge submission.
3.  Please link your card to no more than four challenges, TOTAL.
4.  Have FUN!

You can see all of my 'How To' summaries on my 'How To - Tips and Techniques' Pinterest board in case you've missed any. 

Enjoy your day; I'm spending the day at my mother-in-law's building flat-pack furniture today - wish me luck! I'll be back tomorrow with another project. Until then, happy stampin'!


Stampin' Up! Supplies Used: 

Table built using Product Table Builder by The Crafty Owl - Independent Stampin' Up! Demonstrator.
 

Seasons Of Fun Christmas Card PP571

by Joanne James12. December 2021 08:00

Today it's Sunday and time for this week's new challenge over at The Paper Players! It's our last challenge of the year and it's the turn of the fabulous LeAnne to host this week. She has a festive colour challenge for you to work with:


I decided to pair this week's colours with the current sketch over at Try Stamping on Tuesday to use a stamp that I've not yet had the opportunity to ink up, even though I've used each of the other stamps in the same set - take a look:


Here's the low-down on today's card:

A Colour Confession - First up - I have a confession to make! I had decided on my stamp and layout, so gathered my supplies and various ribbons and accessories that would work for my card and set to work. I completed my card and went to upload it then realised my oversight - I had used Cherry Cobbler instead of Merry Merlot! I had the colour banner in my mind but hadn't double-checked it before I started; a rookie mistake and my only defence is that I really have had one of those weeks! I had no time to remake, so I hope LeAnne forgives me and you can imagine how the same card would look in a slightly darker shade of red. What can I say - I think it's time for a Christmas break!

Seasons of Fun - I used the image of the sweet little girl pulling her sled and tiny Christmas tree on the front of my tailored tag. This is the final image in the 'Seasons of Fun' hostess set that I had yet to use and I think it's so sweet, I just had to use it on today's card. I stamped it twice, once directly onto my tag and a second time, so that I could fussy cut the little girl's hat and scarf so that I could layer these and extend the image beyond the boundaries of the tag. I left my card sentiment-free and also added some stars and a stamped image of the little Christmas tree inside:

Sometimes I like to leave clear space to write, even on a Christmas card, when often I'm writing to someone I haven't seen in a long time.

Touches of Gold - I incorporated lots of gold elements into today's card: the (retired) plaid banners, the gold-edged Cherry Cobbler ribbon tied with gold twine, the gold holly leaves and some (retired) gold Wink of Stella for the star on top of the Christmas tree:

I love the addition of the gold to the festive red and green and switching out the usual white for vanilla adds a lovely warmth to this cute Christmas card. The 'Seasons of Fun' host stamp set is still available, so if you have your eye on it now is the time to order - it will disappear for good when the current July-December catalogue ends on 3rd January.

Here is the visual summary of the key products used on today's project for you to pin for easy reference:


You can see all of my Product and 'How To' summaries on my 'How To - Tips and Techniques' Pinterest board in case you've missed any. 

Before you reach for your ink and papers, check out what our amazing team has created to inspire you this week:

Here's a quick recap of our challenge rules:
 
1.  Create a new paper project
2.  Upload your creation to your blog with a link back to us and provide a direct link to the post featuring your challenge submission.
3.  Please link your card to no more than four challenges, TOTAL.
4.  Have FUN!

You can see all of my 'How To' summaries on my 'How To - Tips and Techniques' Pinterest board in case you've missed any. 

Enjoy your day; today we are spending the day fully embracing our Christmas preparations at home, with tree trimming and festive baking planned - yum! I'll be back soon with another project. Until then, happy stampin'!


Stampin' Up! Supplies Used: 

Table built using Product Table Builder by The Crafty Owl - Independent Stampin' Up! Demonstrator.

Peaceful Place Evergreen Winter Wonderland PP570

by Joanne James5. December 2021 08:00

Today it's Sunday and time for this week's new challenge over at The Paper Players! It's the turn of the fabulous Jaydee to host this week and she has a festive theme challenge for us to work with:


We've had snow twice this week in my part of the world and the current freezing temperatures are definitely showing early signs of a winter wonderland! I decided to make another card using the current colours over at The Color Throwdown and decided to get creative with my Peaceful Place designer series papers and create my own idyllic winter wonderland - take a look:


Here's the low-down on today's card:

Peaceful Place - I decided to fussy cut one of the log cabins from the Peaceful Place designer paper, across the upper horizon including some trees, and added this to a precut white circle, that I had added Polished Pink ink to with a blending brush and stamped on some snowflakes in Encore silver. I allowed the trees to overhang the circle border and liberally brushed the snowy areas of the scene with clear Wink of Stella. It's difficult to see on the photos, but this card is so sparkly in real life!

Evergreen Forest - I used another sheet of Peaceful Place designer series paper for my background, this time the sparkly silver snowflakes on a mottled grey background. I ran this panel through the Evergreen Forest Embossing folder to add a row of embossed fir trees to the background for added interest. Again, it's easier to see in real life - the texture adds subtle additional detail. I used the pink for my sentiment banner and borders for a pop of colour against the silver and grey:


Don't Forget The Inside - I carried the winter wonderland theme over to the inside of my card, adding a strip of the sparkly snowflake paper along with a couple of fussy-cut trees and a sentiment from the 'Snowflake Wishes' stamp set:


Doesn't that cosy log cabin look inviting? I could totally hole myself up there with my craft supplies and a roaring log fire for a week or two! 

Here is the visual summary of the key products used on today's project for you to pin for easy reference:


You can see all of my Product and 'How To' summaries on my 'How To - Tips and Techniques' Pinterest board in case you've missed any. 

Before you reach for your ink and papers, check out what our amazing team has created to inspire you this week:

Here's a quick recap of our challenge rules:
 
1.  Create a new paper project
2.  Upload your creation to your blog with a link back to us and provide a direct link to the post featuring your challenge submission.
3.  Please link your card to no more than four challenges, TOTAL.
4.  Have FUN!

You can see all of my 'How To' summaries on my 'How To - Tips and Techniques' Pinterest board in case you've missed any. 

Enjoy your day; I'll be back tomorrow with another project. Until then, happy stampin'!


Stampin' Up! Supplies Used: 

Table built using Product Table Builder by The Crafty Owl - Independent Stampin' Up! Demonstrator.


Painted Christmas PP569

by Joanne James28. November 2021 08:00

Today it's Sunday and time for this week's new challenge over at The Paper Players! It's the turn of the fabulous Anne Marie to host this week and she has my favourite, a sketch challenge for you to work with:


I struggled a little to decide what to do about the split background layer on today's card; I eventually decided to use a single, bright patterned paper from the Painted Christmas pack - take a look:


There are some gorgeous patterns in the Painted Christmas pack, all with a loose watercoloured feel. I love this red and white pattern but it needed an otherwise uncluttered card to show it off to best advantage. So I split the panel into three as per the sketch, then added a red label with a white heat-embossed sentiment, accented with some holly and foliage stamped with the Christmas Season stamp set, some loops of sheer red ribbon and some red sparkly gems to finish:

This card was actually quite straightforward to put together, but I spent ages procrastinating about which paper or papers to feature so seemed to take forever to design!! I really like the pop of red against the white though, with just a little green foliage too. I used one of the sentiments from 'Merriest Moments' - this is most certainly my favourite sentiment set in the current catalogue.

Here is the visual summary of the key products used on today's project for you to pin for easy reference:


You can see all of my Product and 'How To' summaries on my 'How To - Tips and Techniques' Pinterest board in case you've missed any. 

I'm also linking today's card up over at Global Design Project #GDP319 where the theme is 'Christmas'.

Before you reach for your ink and papers, check out what our amazing team has created to inspire you this week:

Here's a quick recap of our challenge rules:
 
1.  Create a new paper project
2.  Upload your creation to your blog with a link back to us and provide a direct link to the post featuring your challenge submission.
3.  Please link your card to no more than four challenges, TOTAL.
4.  Have FUN!

You can see all of my 'How To' summaries on my 'How To - Tips and Techniques' Pinterest board in case you've missed any. 

Enjoy your day; we have had a freezing few days here in the UK so today I will most definitely be staying indoors, keeping warm and might even indulge in a spot of festive baking! I'll be back tomorrow with another project. Until then, happy stampin'!


Stampin' Up! Supplies Used: 

Table built using Product Table Builder by The Crafty Owl - Independent Stampin' Up! Demonstrator.

Strawberry Builder Punch Gnome Art PP568

by Joanne James21. November 2021 08:00

Today it's Sunday and time for this week's new challenge over at The Paper Players! It's the turn of the fabulous Laurie to host this week and she has a fun Clean and Simple challenge for you to work with:


I couldn't resist another crack at Kim's fabulous layout over at Freshly Made Sketches this week and paired with the colours over at Color Dare (I added Cherry Cobbler red as my fourth colour) for today's card - take a look:


Here's the low-down on today's card:

I started out planning today's card with some trepidation; whilst I still have my retired 'Gnome for the Holidays' stamp set, I have no other current gnome stamp sets. I decided though that I would rise to the challenge and embark on trying to create one using some current supplies to fashion some gnome punch art. A quick perusal of Pinterest, I chose a cute cuddly gnome to base my design on, grabbed some current supplies and tools and set to work! I used the largest of the skinny Christmas trees from the Christmas Tree Dies and my Strawberry Builder Punch to make my gnome. I used some offcuts of Peaceful Place designer paper for my gnome body and the top horizontal strip above my sentiment, along with some Snowy White Velvet Paper for his beard and moustache for some subtle texture and a matt dot for his nose. A piece of snowflake behind and a tiny one on his hat, along with a sentiment from 'Penguin Place' complete my clean and simple gnome card:

I created a basic crib sheet so that you can see the main elements of my gnome and how I trimmed them, in case you fancy having a go at making one yourself - feel free to save this for future use:

I based the design of my punch art gnome on one of the ones in the retired 'Gnome For The Holidays' stamp set, which I stamped on the inside of my card for added decoration:

 As you can see, I decided I liked this card so much I made another - I think these little gnomes are rather cute, even if I say so myself!

I think I did a pretty good job of meeting the 'clean and simple' brief too - remember in addition to featuring a gnome (or elf, or fairy!) on your card it should also be clean and simple:

  • minimal layers
  • little/no embellishments
  • lots of clean white space (no pattern)
Here is the visual summary of the key products used on today's project for you to pin for easy reference:


You can see all of my Product and 'How To' summaries on my 'How To - Tips and Techniques' Pinterest board in case you've missed any. 

Before you reach for your ink and papers, check out what our amazing team has created to inspire you this week:

Here's a quick recap of our challenge rules:
 
1.  Create a new paper project
2.  Upload your creation to your blog with a link back to us and provide a direct link to the post featuring your challenge submission.
3.  Please link your card to no more than four challenges, TOTAL.
4.  Have FUN!

You can see all of my 'How To' summaries on my 'How To - Tips and Techniques' Pinterest board in case you've missed any. 

Enjoy your day; mine is shaping up to be a rather uneventful one - here's hoping anyway! I'll be back tomorrow with another project. Until then, happy stampin'!


Stampin' Up! Supplies Used: 

Table built using Product Table Builder by The Crafty Owl - Independent Stampin' Up! Demonstrator.
 
Edit: This card was a WINNER! Kim chose me as her Queen of Clean for FMS512 - woohoo!
 

Peaceful Place Double Box Fancy Fold Christmas Cards PP567

by Joanne James14. November 2021 08:00

Today it's Sunday and time for this week's new challenge over at The Paper Players! It's my turn to host this week and I have a colour challenge for you to work with:


I made a couple of cards to share with you today, both variations on the same theme. Here's the first one - take a look:


Here's the low-down on today's card:

Peaceful Place - So I had an ulterior motive in choosing today's colour combination. I've had a pack of Peaceful Place Specialty Designer Series Paper in my collection since I did my mini catalogue preorder in August, but had yet to use it. I had a feeling that would be the case; I love these papers, but didn't buy the bundle that features in the Peaceful Place Suite. I chose the colour combination that is found in these papers for this week's challenge because it would both force me to cut into these papers and also I am hoping the gallery will have lots of inspiration for me too! I used a combination of two paper patterns from the pack on each of my cards, one for the main panel and a contrasting or co-ordinating one to frame it. The papers are stunning, with beautiful silver foil detailing. Great for special cards!

Merry Snowflakes Seasonal Label - Fancy fold aside (more about that in a moment), today's cards really are a showcase of these beautiful papers. Apart from some sequins, rhinestones and a mesh ribbon bow, the only other element to my card is a heat-embossed sentiment from the Merry Snowflakes set, in silver on black or white respectively, and cut out with one of the Seasonal Labels Dies. The words of this sentiment seemed to be perfectly suited to the snowy scenes on my card:


 The only other stamping is on the reverses of the card, where I've stamped a further greeting and left space for a personal message:


A Fancy Fold - I thought for today's card I would ring the changes with a fancy fold. I decided on a double box fancy fold because I wanted something with a feature panel and this card is really quite straightforward to create. I had seen this design in an A6 card size on the internet, but adapted the basic principle to suit my own requirements. My finished card measures 6"x6" and easily folds flat for posting, which is a bonus! 


I struggled to photograph this one so well - I'm blaming the dark, winter days that we are experiencing here now - so here's another at an angle to try and capture the sentiment detail of the embossed silver against the white:


If anyone is interested in the measurements I sued to create my version of a double box fancy fold card, then do leave me a message below and I'll add them in to my post (I would write them in now but don't have them to hand). 

Here is the visual summary of the key products used on today's project for you to pin for easy reference:


And here's the second one:


You can see all of my Product and 'How To' summaries on my 'How To - Tips and Techniques' Pinterest board in case you've missed any. 

So what do you think? Which of today's cards do you prefer and what do you think of today's fancy fold? Please do leave me a comment below - I'd love to hear your thoughts!

Before you reach for your ink and papers, check out what our amazing team has created to inspire you this week:

Here's a quick recap of our challenge rules:
 
1.  Create a new paper project
2.  Upload your creation to your blog with a link back to us and provide a direct link to the post featuring your challenge submission.
3.  Please link your card to no more than four challenges, TOTAL.
4.  Have FUN!

You can see all of my 'How To' summaries on my 'How To - Tips and Techniques' Pinterest board in case you've missed any. 

Enjoy your day; Ben is on parade with the other army cadets from school at a Remembrance Day parade and service this morning, so this afternoon will be spent completing homework and the like. I'll be back soon with another project. Until then, happy stampin'!


Stampin' Up! Supplies Used: 

Table built using Product Table Builder by The Crafty Owl - Independent Stampin' Up! Demonstrator.

Banner Year With Grateful Heart Thank You Card PP566

by Joanne James7. November 2021 08:00

Today it's Sunday and time for this week's new challenge over at The Paper Players! It's the turn of the fabulous Claire to host this week and she has a timely theme challenge for you to work with:


With Thanksgiving just around the corner, Claire's theme is a timely one although it's fair to say that there is plenty to be thankful for all year round so a card that gives thanks is always a useful one to have on hand. I couldn't resist another card with Jen M's layout over at Freshly Made Sketches this week (this layout is definitely a 'go to' for me!). No wreath this time though, instead totally inspired by the current challenge photo over at The Card Concept - take a look:


Here's the low-down on today's card:

I loved the colours and foliage and pumpkin elements in the Card Concept photo, along with the striking black and white tablescape, complete with gingham napkins and I incorporated all of these elements into my clean and layered card. I used black and white mats, layers and some gingham paper from the Pattern Paper hostess DSP pack, and layered a variety of foliage around one edge of a (retired) stitched circle onto which I heat-embossed my sentiment from the stamp set 'Banner Year'. I added some of the yellow decorative matt dots to my berry sprigs for a little extra dimension and detail which I really love:

Another trio of Evening Evergreen decorative matt dots onto my base complete my card. My foliage elements were taken from various die sets - all listed in the supplies list below. This is one of those cards that turned out exactly as I intended, first time - and I love it! I often spend ages procrastinating whilst card making, so it feels like a bonus when ideas translate exactly how you envisaged, don't you think?

Here is the visual summary of the key products used on today's project for you to pin for easy reference:


You can see all of my Product and 'How To' summaries on my 'How To - Tips and Techniques' Pinterest board in case you've missed any. 

Before you reach for your ink and papers, check out what our amazing team has created to inspire you this week:

Here's a quick recap of our challenge rules:
 
1.  Create a new paper project
2.  Upload your creation to your blog with a link back to us and provide a direct link to the post featuring your challenge submission.
3.  Please link your card to no more than four challenges, TOTAL.
4.  Have FUN!

You can see all of my 'How To' summaries on my 'How To - Tips and Techniques' Pinterest board in case you've missed any. 

Enjoy your day; we had a busy day of sport yesterday so nothing special happening here today, but I'm not complaining. The next few weekends are super busy, so I'll take the calm before the storm! I'll be back tomorrow with another project. Until then, happy stampin'!


Stampin' Up! Supplies Used: 

Table built using Product Table Builder by The Crafty Owl - Independent Stampin' Up! Demonstrator.
 
Edit: This card was Jen T's choice for Princess of Clean for FMS510 - yay!
 

Eden's Garden Pre-Release Fancy Fold Birthday Card PP565

by Joanne James31. October 2021 08:00

Today it's Sunday (and I hope those of you reading this who are in the UK enjoyed a lie-in and remembered to turn your clocks back!) - time for this week's new challenge over at The Paper Players! It's the turn of the fabulous Ann to host this week and as it's the fifth Sunday of the month she has a fun TicTacToe challenge for you to work with:
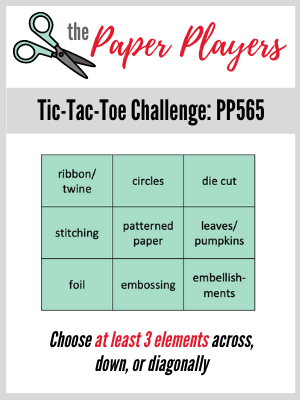
 

I have a very special card to share with you today! Lots of photos and news of an exclusive product pre-release that is happening this week on 2nd November, so time to buckle up and sit tight - here we go! I went along the diagonal of the TTT grid from bottom left to top right with foil/patterned paper/diecut for my card today, which is a fancy fold birthday card featuring the new Eden's Garden suite. Here's a first look at my card when closed and then I'll tell you a little more about the products in the Eden's Garden suite:
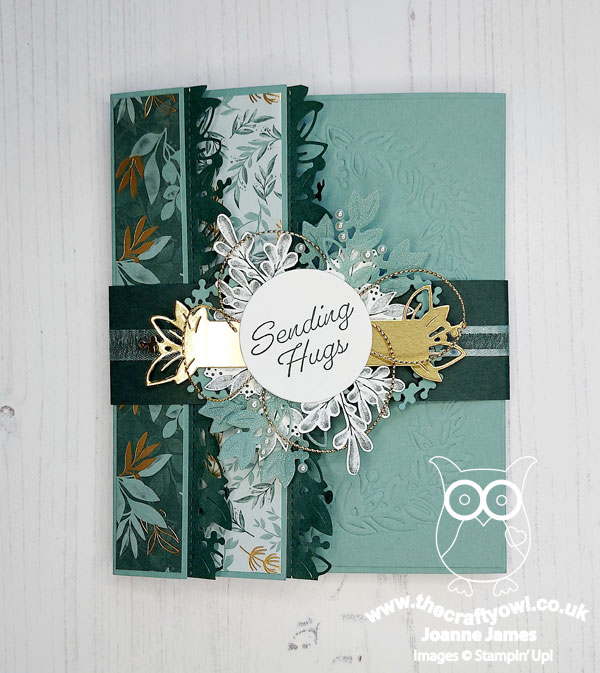
 

Here's the low-down on today's card:

Eden's Garden - The Eden's Garden bundle, comprising the Eden's garden cling stamp set and Eden Dies, will be included in the January-June 2022 Mini Catalogue, however is being released for sale this week on Tuesday 2nd November, so this is the perfect opportunity to explore it before the official release.
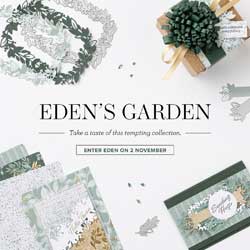
 

Pre-Release Exclusives - In addition to the bundle, for the duration of the pre-release only, you will also be able to order a number of additional exclusive products, that will be available only while supplies last. The other items in the Eden's Garden Collection pre-release include 12"x12" specialty designer paper, cotton paper and garden gems. Here's the flyer detail so that you can see it in more detail:
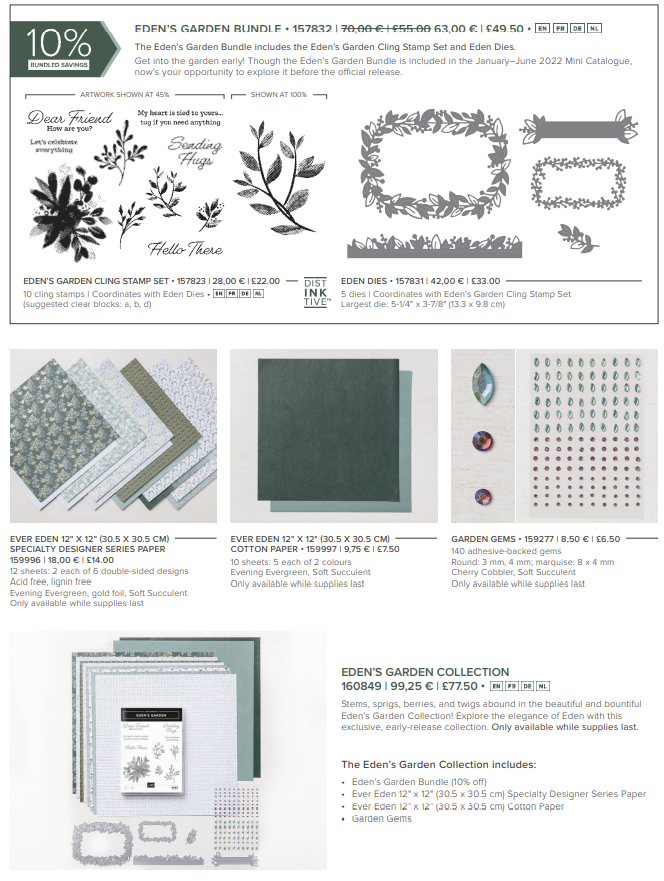
 

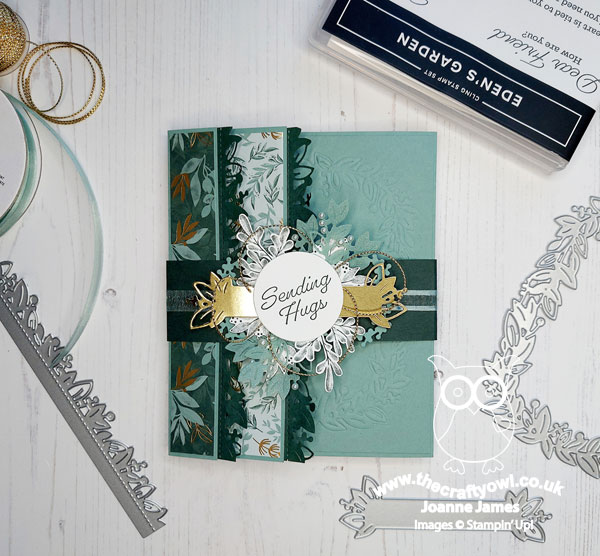
Eden's Garden Fancy Fold - Now you've had the detail, it's time to check out my card! As I mentioned above it's a fancy fold; the talented Elizabeth Price had made a couple of cards with a similar fold that I just loved and she coined it a 'hokey pokey' card, because the back side is in front, the right side tucks into the left and there's detail inside that could in fact be the front of the card. To explain this in more detail, here's another photo of the card closed:


When you remove the belly band that holds the folds in place, you can start to see how it opens, and you can see the embossed detail:
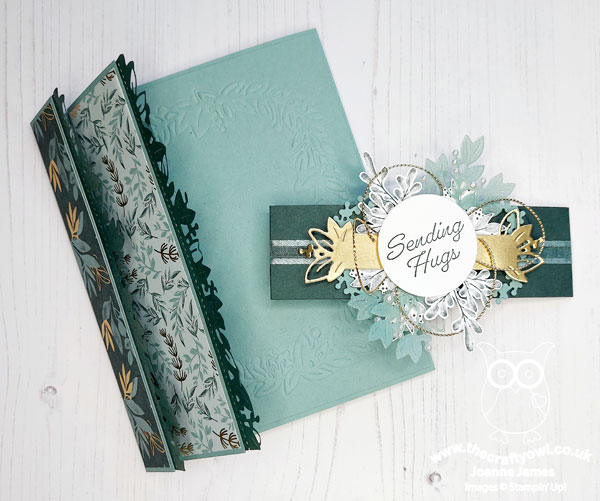
 

This is what it looks like fully open:
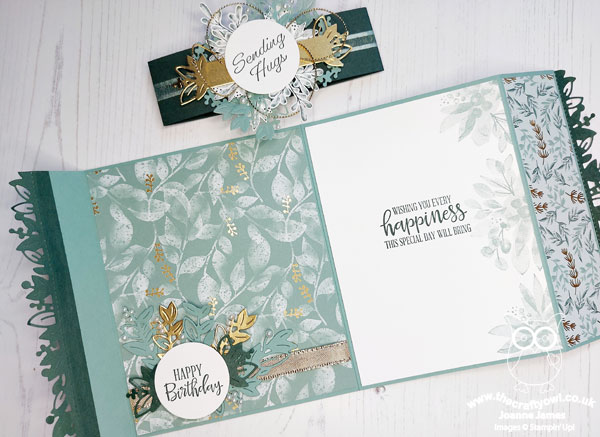
 

My card base is Soft Succulent and it measures 6" by 12" and is scored along the long edge at 1", 6" and 10 3/8". All of the papers come from the Ever Eden specialty designer series paper pack - beautiful, soft serene greens of Soft Succulent and Evening Evergreen with touches of gold foil detail. The sentiment on my belly band comes from the Eden's Garden stamp set, and I used each of the Eden's Dies in different ways on my project: the largest rectangle frame is embossed onto the front right panel of my card, with the smaller rectangle frame as the base for my belly band centrepiece, which also includes a banner piece in gold foil and some sprigs diecut from Soft Succulent shimmer vellum for added subtle sparkle and shine:
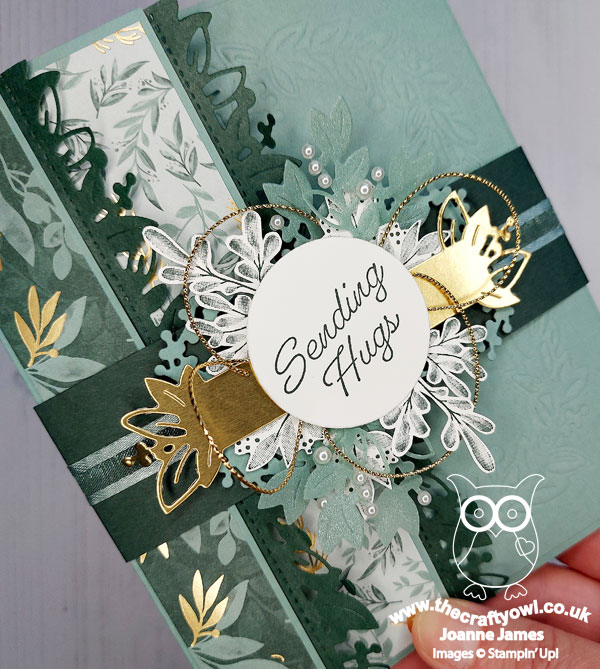
 

I used the edge border die to add detail to my fold out edges, cut in the beautifully soft Evening Evergreen cotton paper:
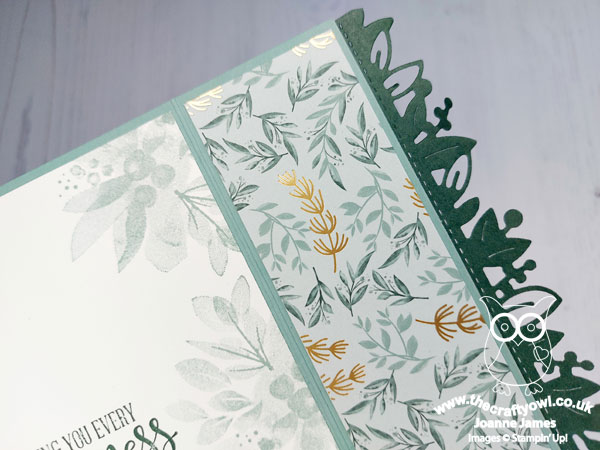
 

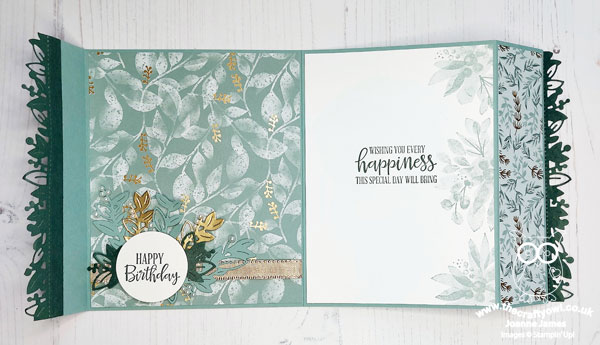
Inside my card, I used more of the paper and diecut foliage with another sentiment piece (this time from the 'Peaceful Moments' stamp set) for my pictoral panel and added some stamping of a repeating pattern using the main foliage image in the Eden's Garden stamp set:
 

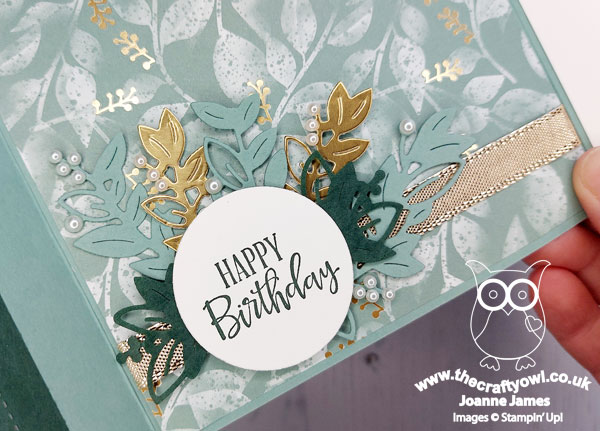
 Here's the birthday sentiment embellishment in more detail:
 

The launch of the Eden's Garden pre-release coincide with my lovely Mums' birthday, so I thought this card would be perfect to send her my love and best wishes. For her version of the card, I also added another shortened banner to the outside panel, as show below:
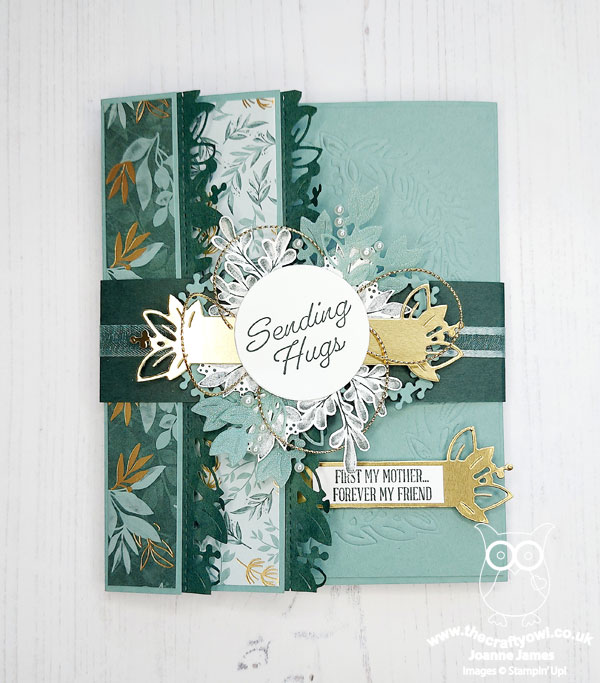
The sentiment is from the 'A Wish For Everything' stamp set, which really does have a sentiment for every occasion:
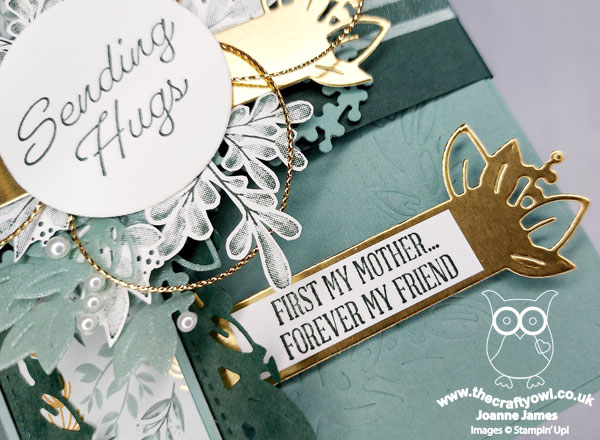
I thought I'd share this additional detail with you as it's useful to see how you can add in a more personal greeting with this kind of card. I'm safe to blog my card today as my Mum rarely reads my blog so won't see this ahead of time; she loves greens and is a big fan of a fancy birthday card though, so I know she will love it. 

If you like the products in the Eden's Garden pre-release, do be sure to pop back Tuesday when these items will be available to order in the online store. the Eden's Garden bundle is also the focus for my online technique card class on Monday 6th December - do get in touch if you would like to join me, you would be more than welcome!

Here is the visual summary of the key products used on today's project for you to pin for easy reference:
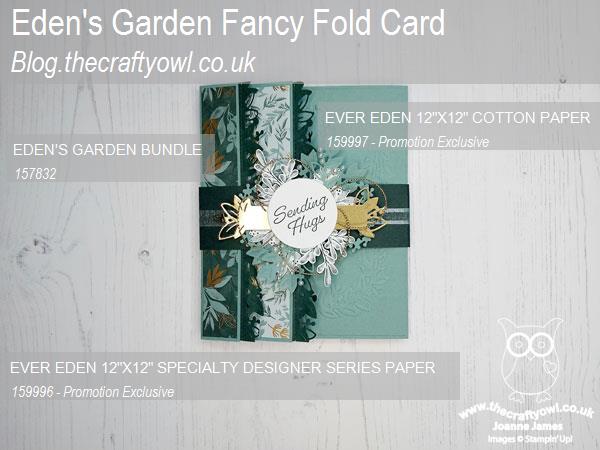
 

You can see all of my Product and 'How To' summaries on my 'How To - Tips and Techniques' Pinterest board in case you've missed any. 

Before you reach for your ink and papers, check out what our amazing team has created to inspire you this week:

Here's a quick recap of our challenge rules:
 
1.  Create a new paper project
2.  Upload your creation to your blog with a link back to us and provide a direct link to the post featuring your challenge submission.
3.  Please link your card to no more than four challenges, TOTAL.
4.  Have FUN!

You can see all of my 'How To' summaries on my 'How To - Tips and Techniques' Pinterest board in case you've missed any. 

Enjoy your day; I will be out at hockey this morning as Rebecca is umpiring at a junior tournament and am looking forward to an afternoon cosying up indoors with the family before we are back to school tomorrow. I'll be back tomorrow with another project. Until then, happy stampin'!
 

Stampin' Up! Supplies Used: 

To be updated on 2 November when these products are available for purchase.

Mini Catalogue

BROWSE THE CATALOGUE

The mini catalogue is now live! Read and download your copy here.

Shop Online

Access my online shop 24 x 7, 365 days of the year:

Current April hostess code:

VDKNV7BH

Shop Online

Join My Team

It's always a great time to join Stampin’ Up! New team members can get £130 worth of products for only £99 + free business supplies + free shipping + all the fun being a part of Stampin’ Up! Stampin' Up! has something for everyone: join my growing team and benefit from my support to enjoy Stampin' Up! however you choose.

If you're interested, call me for a chat to understand how I can help you realise your goals. Alternatively, if you have already decided to sign up and you just can't wait, please click here for the link to the online form where you can sign up and order your starter kit right away! 

Latest Kit!

Stampin Cut and Emboss

The Rock Legend Kit has all you need to make 8 cards with coordinating envelopes. Along with the new Panda Friends Kit, both are available from January 4th for just £14 each - get yours here!

2023-24 Annual Catalogue

BROWSE THE CATALOGUE

Click on the catalogue for a full list of current SU! supplies - if you would like to order any of the items featured, please drop me a line at [email protected] or give me a call on 07773 421446 - I'd be happy to help.

New Online Exclusives

There are new products available exclusively in the online store from 5 March - check them out here.

About Me

Hi I'm Joanne and live in Northampton and when I'm not looking after my husband and two beautiful children, am an avid crafter with a passion for all things Stampin' Up!

I must confess that I have never been a big rubber stamper - until I discovered Stampin' Up! that is. I love the fact that I can get such great results with co-ordinating stamps, inks, papers and punches - the possibilities are endless! Join me on my stamping journey as I share the things I love and be inspired to create amazing things yourself!

Follow Me

Monthly Newsletter

Box Builder

Click the button above to use Box Buster to create your custom box design using the Envelope Punch Board!

Kits Collection Now Available!

Stampin Cut and Emboss

The new Kits Collection from Stampin' Up! is now available!

Click here to see the current kits available and order yours online today.

I Design For


Stampin' Up Stuff

This is my personal blog and is not endorsed by Stampin’ Up! I hope you find it a plentiful source of ideas and personal inspiration but please don't copy my designs for contest submission or use for classes, publication or sale without express permission.