Snowflake Wishes Hexagonal Shaker Box and Matching Christmas Card PP520

by Joanne James6. December 2020 09:00

Today it's Sunday and time for this week's new challenge over at The Paper Players! It's my turn to host this week and I have a timely theme challenge for you to work with:
 

19 days to go and yes - it's beginning to feel a lot like Christmas, so that is my theme this week! You can share your gifts, cards, packaging - we would love to see your festive makes! I love to make co-ordinating cards and gift packaging at this time of year so I have one such set to share with you today. My post is photo-heavy as I'm going to share both a Christmas card and a rather fancy matching gift box using products from the Snowflake Splendor Suite. I even have a video tutorial for you!

First up - here's my Christmas card, with the hexagonal aperture cut using the So Many Snowflake dies:
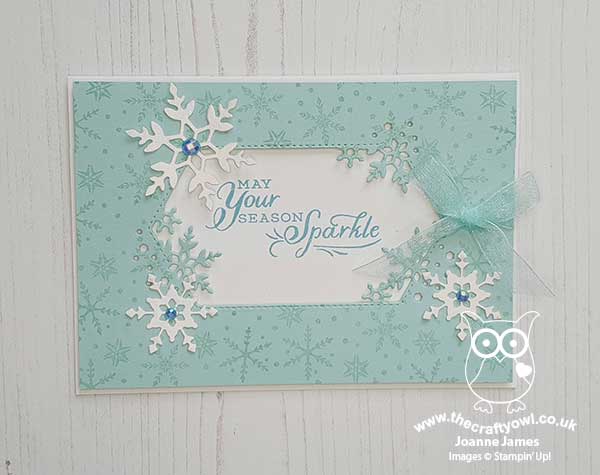
 

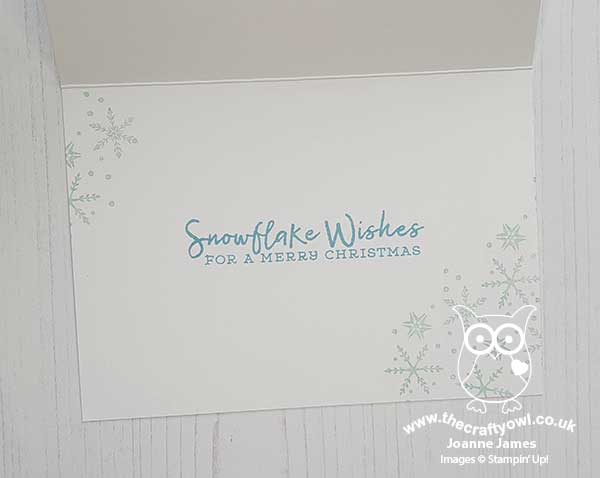
I added some diecut snowflakes painted with Frosted White shimmer paint and finished with those pretty Balmy Blue adhesive-backed gems and a pretty Pool Party sheer ribbon bow, with a simple sentiment and snowflake decoration on the inside of my card:
 

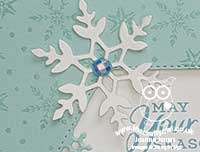
 Check out the effect of those faceted gems - so sparkly!
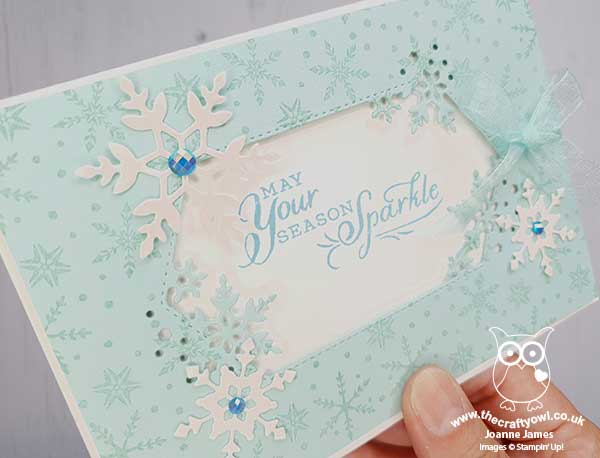
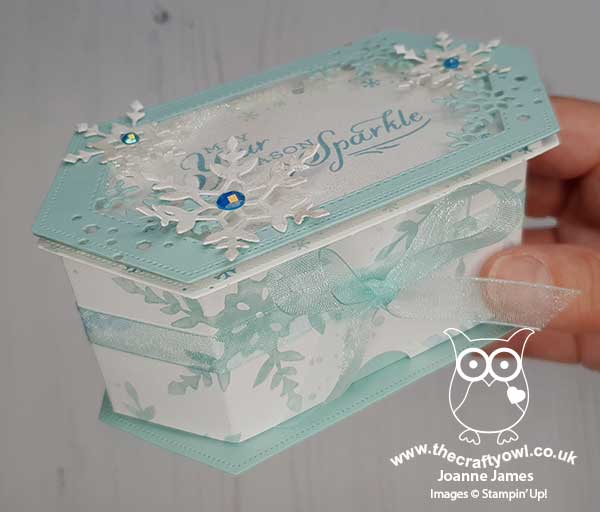
This card was a variation on one I made in my monthly card class featuring the Snowflake Wishes bundle a few months ago. I liked the card so much, I decided to make a matching box, using the same hexagonal aperture and the Stitched Nested Label Dies from the annual catalogue. I made a simple birthday gift box using these dies previously (you can see that box here if you missed it) and have been wanting to make a video tutorial to show how it was done, so this seemed like the perfect opportunity. Here is my finished box closed:
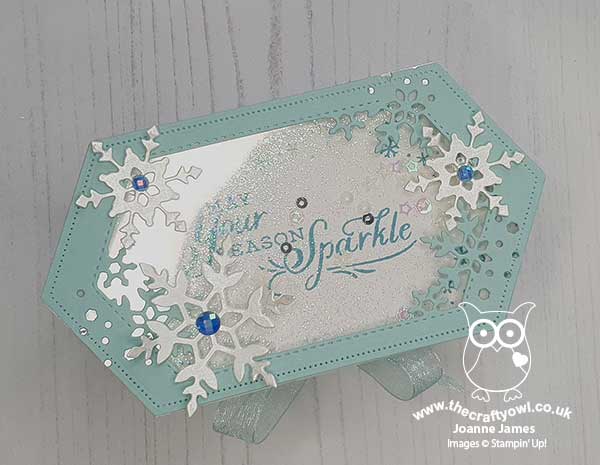
 

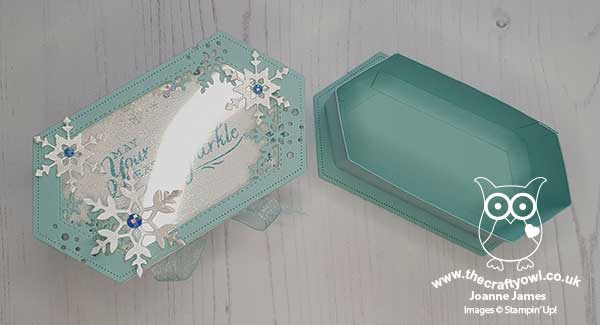
And this is what it looks like open - the lid and base extend beyond the sides of the box and the top slides off to reveal the inside:
 

I wanted to step up my box so instead of simply creating an open aperture on the lid, I added some acetate and created a shaker, filled with snowflake sequins and glitter - check out  this out - it's not only the sentiment that's full of sparkle:
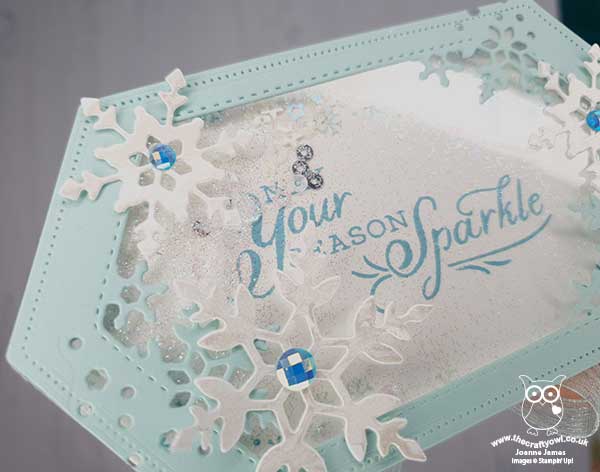
 

I added some Snowflake Splendor designer paper to the sides of my box lid and wrapped and tied it with more of the Pool Party sheer ribbon, to tie it in with the detail on my card - you can see that better below:
 

Rather than detail exactly how I made this project in words, I thought I would make a video tutorial should you wish to have a go at making one yourself - so here it is:

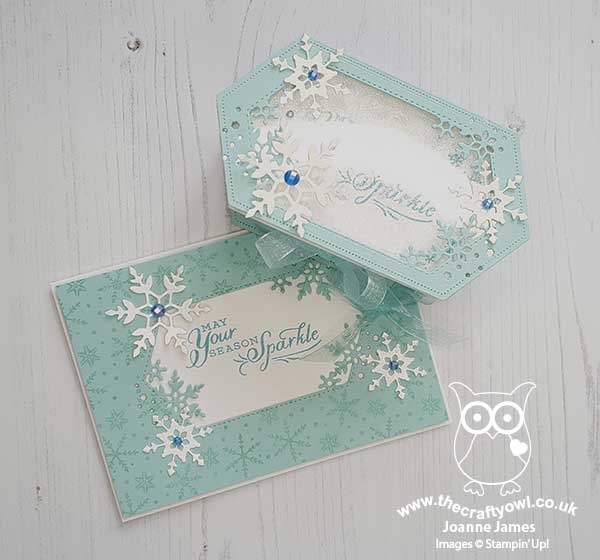
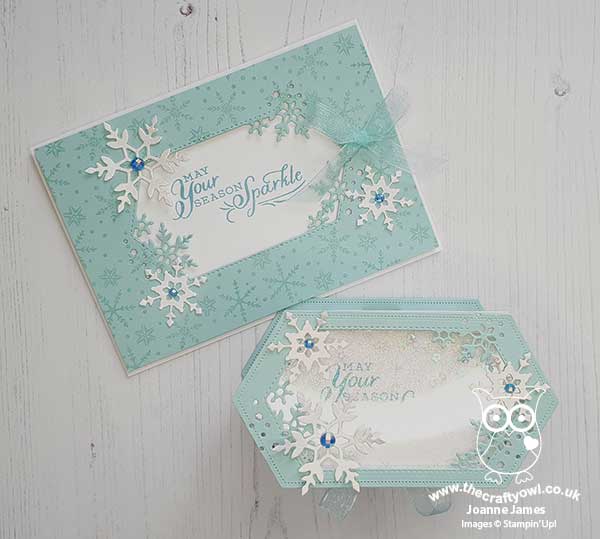
I am just in love with this set; the box isn't huge, but will hold small gifts such as chocolates, jewellery, a scented candle - lots of options! Here's a final photo of my projects together:
 

I would love to know what you thought of my video tutorial too; was it useful? Would you like to see more of this type of content. Do let me know - I would love to hear your thoughts!

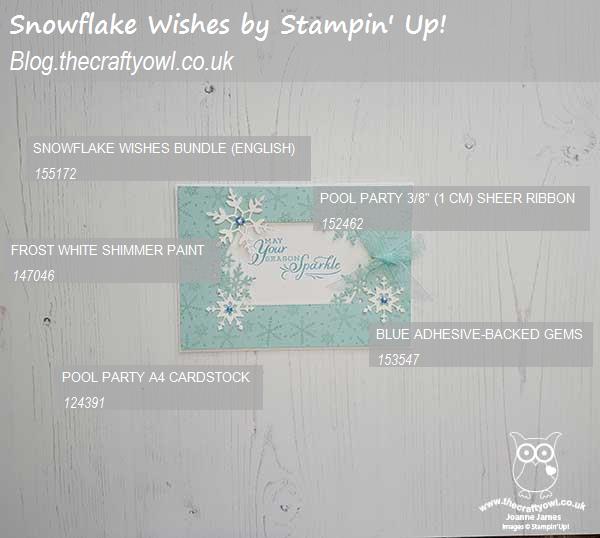
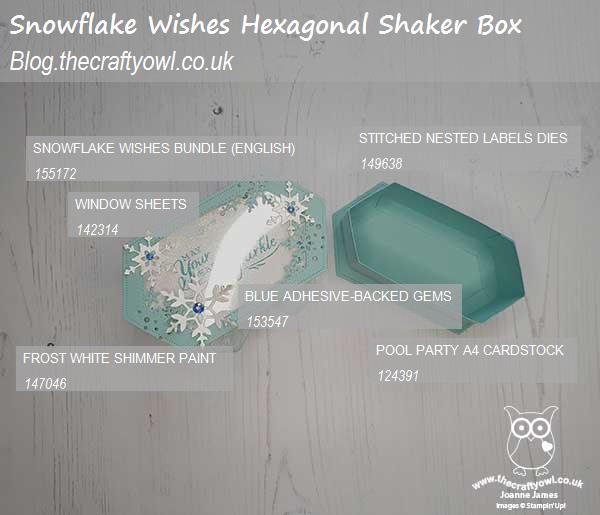
Here is the visual summary of the key products used on today's project for you to pin for easy reference:


You can see all of my Product and 'How To' summaries on my 'How To - Tips and Techniques' Pinterest board in case you've missed any. 

Before you reach for your ink and papers, check out what our amazing team has created to inspire you this week:

Here's a quick recap of our challenge rules:
 
1.  Create a new paper project
2.  Upload your creation to your blog with a link back to us and provide a direct link to the post featuring your challenge submission.
3.  Please link your card to no more than four challenges, TOTAL.
4.  Have FUN!

You can see all of my 'How To' summaries on my 'How To - Tips and Techniques' Pinterest board in case you've missed any. 

Enjoy your day; I started writing Christmas cards whilst at hockey yesterday and am hoping to crack on with those this afternoon to get them in the post tomorrow, which will be a huge achievement! I'll be back tomorrow with another project. Until then, happy stampin'!
Stampin' Up! Supplies Used: 

Table built using Product Table Builder by The Crafty Owl - Independent Stampin' Up! Demonstrator.

Snowflake Wishes Thank You Card TTT92

by Joanne James26. November 2020 17:00

It's Thursday and time for a new challenge over at TicTacToe! It's the turn of Team X to host this week and the lovely Betty is our featured designer this week. This is the fun board that we are playing along with: 


I decided to use the lovely Julee's Mojo Monday sketch along with the Paper Craft Crew inspiration photo (no red presents on this one but I did love that snowy blue sky) - take a look:


Here's the low-down on today's card:

Snowflake Splendor - The paper I used for the background on today's card is another of the Snowflake Splendor patterns. It has a really atmospheric effect that reminds me of the sky when it snows and blends from navy through to seaspray blue.

So Many Snowflakes - I decorated my card with lots of snowflakes: some diecut from (retired) white glimmer paper, a sprinkling of snowflake sequins and then a few holographic self-adhesive snowflakes for good measure. They are all so sparkly:

I added some extra sparkle with a twist of Snowflake Splendor ribbon behind the sentiment circle too.

Snowflake Wishes Thank You - I used the 'Snowflake Wishes' stamp set for my greeting, and decided to use the thank you as opposed to a Christmas one for a (brief!) change - after all, we still need thank you cards at this time of year so it's nice to have one that is seasonally themed. And I'm always up for a good pun, so this one's perfect! 

Here is the visual summary of the key products used on today's project for you to pin for easy reference:


You can see all of my Product and 'How To' summaries on my 'How To - Tips and Techniques' Pinterest board in case you've missed any. 

A tictactoe board offers so many creative possibilities - how does this week's board inspire you? Why not have a go? We would love to see you in the gallery and who knows - you might be selected for Designer's Choice and be eligible to be a guest designer on a future challenge. 

Enjoy your evening; I'll be back tomorrow with another project. Until then, happy stampin'!


Stampin' Up! Supplies Used: 

Table built using Product Table Builder by The Crafty Owl - Independent Stampin' Up! Demonstrator.

Shimmer Embossed Snowflake Wishes

by Joanne James4. November 2020 22:00

Today I'm sharing a quick card I made that was inspired by this picture inspiration from the recent challenge over at Time Out:


I'm too late to link up, but I really liked the mandala design on the rustic wood background and it inspired me to create a Christmas card using one of the Snowflake Wishes dies and some shimmery embossing paste - take a look:


I created a mask using the largest of the Snowflake dies that cuts out a relief snowflake and used it to layer shimmery white embossing paste onto my rustic background, courtesy of the In Good Taste designer series paper. Tricky to see the dimension in the above shot - it's a little clearer below:


I added a sentiment and embellished with a green jingle bell and retired silver grey twine and tassel from my stash, but the snowflake is the real star of the show. The ladies that attended my Creative Escapes luxury weekend craft retreat last month all had a pot of shimmery white embossing paste in their kits, so I wanted to be able to give them some other ideas and ways that they could use it. Hope you like it ladies!

Here is the visual summary of the key products used on today's project for you to pin for easy reference:


You can see all of my 'How To' summaries on my 'How To - Tips and Techniques' Pinterest board in case you've missed any. 

Enjoy your evening and I'll be back tomorrow with another project. Until then, happy stampin'!


Stampin' Up! Supplies Used:

Table built using Product Table Builder by The Crafty Owl - Independent Stampin' Up! Demonstrator.

Have a Hoot Owl Family Christmas Card Sneak Peek

by Joanne James18. July 2020 18:00

A late post from me today as we've been busy cycling and enjoying a dinner of homemade pizzas in our new pizza oven! I'm sharing a card using this gorgeous colour palette over at Colour Inkspiration and the current Paper Craft Crew sketch:

No photo description available.   Vertical sketch with horizontal scallop rectangle placed in bottom left corner with banner behind.

Whilst that lovely colour palette would work really well for an autumnal card, following my Autumn-Winter pre-order unboxing live session online this week, I couldn't resist making my first Christmas card with my new supplies - take a look:


Here's the low-down on today's card:

Have A Hoot - The cute little owls on today's card are courtesy of a new stamp set called 'Have A Hoot' - aren't they just the cutest?! I heat embossed them in white onto Crumb Cake to highlight the little snowflakes and coloured the owls with my Blends. Check out the punny sentiment too!

So Many Snowflakes - I stamped some background snowflakes tone-on-tone onto my Real Red card base and added a diecut snowflake in (retired) white glimmer paper and cut with my new So Many Snowflakes dies as an accent. I also added a sprinkle of snowflake sequins for a little sparkle.

Stitched So Sweetly - My stitched scalloped panel is courtesy of the Stitched So Sweetly dies; I added a couple of strips of Cinnamon Cider cardstock and DSP behind just to highlight the colour and anchor the panel - here's a close up: 


Here is the visual summary of the key products used on today's project for you to pin for easy reference:


You can see all of my 'How To' summaries on my 'How To - Tips and Techniques' Pinterest board in case you've missed any. 

Enjoy your evening and I'll be back tomorrow with another project. Until then, happy stampin'!


Stampin' Up! Supplies Used:

Table built using Product Table Builder by The Crafty Owl - Independent Stampin' Up! Demonstrator.

Mini Catalogue

BROWSE THE CATALOGUE

The mini catalogue is now live! Read and download your copy here.

Shop Online

Access my online shop 24 x 7, 365 days of the year:

Current April hostess code:

VDKNV7BH

Shop Online

Join My Team

It's always a great time to join Stampin’ Up! New team members can get £130 worth of products for only £99 + free business supplies + free shipping + all the fun being a part of Stampin’ Up! Stampin' Up! has something for everyone: join my growing team and benefit from my support to enjoy Stampin' Up! however you choose.

If you're interested, call me for a chat to understand how I can help you realise your goals. Alternatively, if you have already decided to sign up and you just can't wait, please click here for the link to the online form where you can sign up and order your starter kit right away! 

Latest Kit!

Stampin Cut and Emboss

The Rock Legend Kit has all you need to make 8 cards with coordinating envelopes. Along with the new Panda Friends Kit, both are available from January 4th for just £14 each - get yours here!

2023-24 Annual Catalogue

BROWSE THE CATALOGUE

Click on the catalogue for a full list of current SU! supplies - if you would like to order any of the items featured, please drop me a line at [email protected] or give me a call on 07773 421446 - I'd be happy to help.

New Online Exclusives

There are new products available exclusively in the online store from 5 March - check them out here.

About Me

Hi I'm Joanne and live in Northampton and when I'm not looking after my husband and two beautiful children, am an avid crafter with a passion for all things Stampin' Up!

I must confess that I have never been a big rubber stamper - until I discovered Stampin' Up! that is. I love the fact that I can get such great results with co-ordinating stamps, inks, papers and punches - the possibilities are endless! Join me on my stamping journey as I share the things I love and be inspired to create amazing things yourself!

Follow Me

Monthly Newsletter

Box Builder

Click the button above to use Box Buster to create your custom box design using the Envelope Punch Board!

Kits Collection Now Available!

Stampin Cut and Emboss

The new Kits Collection from Stampin' Up! is now available!

Click here to see the current kits available and order yours online today.

I Design For


Stampin' Up Stuff

This is my personal blog and is not endorsed by Stampin’ Up! I hope you find it a plentiful source of ideas and personal inspiration but please don't copy my designs for contest submission or use for classes, publication or sale without express permission.