I had a busy day yesterday, having been treated to a rare breakfast catch up with my sister-in-law, and lots of work and prep in between chasing various items around the garden in the face of the terrific winds we've been having here in the UK at the moment. I finished my day by hosting a Stampin' Up! party for the lovely Jane and her crafty friends yesterday evening to share all things Christmas.
Today I'm squeezing in another entry for the current challenge over at at As You See It where the team are all about getting back to basics with stamps, ink and paper:

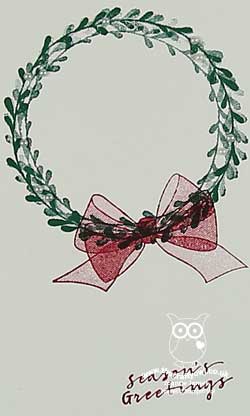
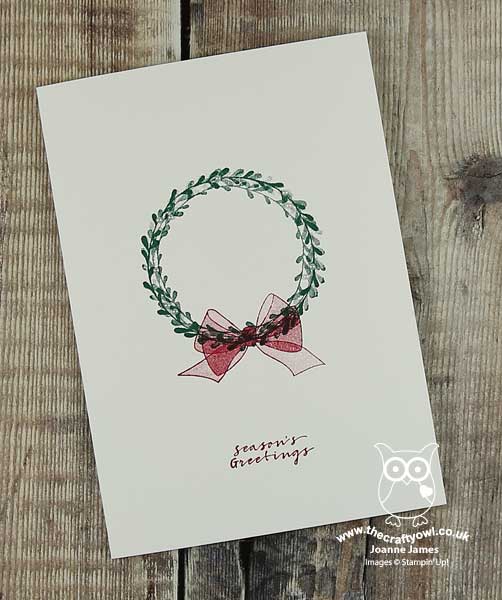
I always send a card out to my customers when I mail them a new catalogue with a 'sneak peek' of what's inside. This is one of my big mass production exercises of the year though, so it needs to be something simple to enable me to get a large volume churned out within a reasonable time frame - yet I still want it to be pretty and have impact. Here's this year's Autumn-Winter catalogue card:
Here's the low-down on today's card:
Back To Basics - The theme over at As you See It this week is 'Back To Basics', creating cards using little more than stamps. ink and paper. There is something liberating though about creating with just stamps, ink and paper and it is fun to be able to share creations from time to time like this. They can be quick(er!) to create and show that it's still possible to create something pretty without needing a ton of supplies. My card uses only 5 items: a blank card base, two ink colours, one stamp set and one (optional) embellishment - basic supplies indeed! The 'Wishing You Well' stamp set is perfect for this kind of card; it's one of Stampin' Up!'s Distinktive stamps, where you can ink your stamp once yet create different opacities in a single stamped image, giving the illusion of dimension. The wreath and bow look layered, even though they have been stamped only once. Clever, right?
Mass Production Made Easy With The Stamparatus - My simple wreath with stamped bow and sentiment would be easy to stamp in multiples even if I did it 'freehand', but the days of that kind of mass-production are long gone for me now that I am the proud owner of the best ever stamping positioning tool, Stampin' Up!'s Stamparatus - this tool makes light work of this kind of stamping! I placed my wreath on one plate and my bow and sentiment on another, then inked and stamped without needing to reposition and got my simple stamping done in record time!
Add A Pearl - Or Thirteen - The dimensional inking of these stamps means that I could have just left my card as is, but I decided to add a sprinkling of tiny seed pearls throughout my wreath, a little like mistletoe berries, for some added interest. It seems despite my extensive ribbon collection, I'm more of a magpie - I can't resist a little sparkle or shimmer.
And The Winner Is ... I've been running a fun competition with my customers over on my Facebook page to see if they could guess correctly how long it took me to make 40 of these cards with the help of my Stamparatus. Well, the answer is just 17 minutes and 21 seconds - it took me longer than that to stick all of the pearls on afterwards! I'm pleased to announce the winner of my competition is Barbara Civil who guessed 17 minutes and 50 seconds - clearly already a seasoned Stamparatus user! Samantha Daglish gets the runner-up prize for her best guess of 7 minutes and 7 seconds; I'm afraid I'm just not that good however that is my new target! Congratulations both of you; look out for the postman as there will be a little something in the post to each of you to thank you for playing along this week!
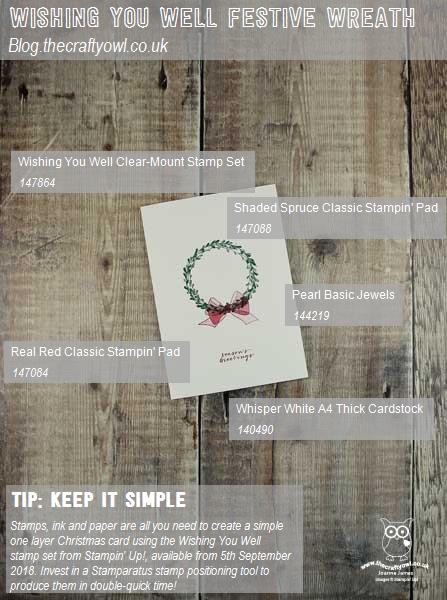
Here is the visual summary of the key products used on today's project for you to pin for easy reference:
You can see all of my 'How To' summaries on my 'How To - Tips and Techniques' Pinterest board in case you've missed any.
Enjoy your day; I have another day of prep, in readiness for an in-home kit party that I'm hosting for a group of friends this evening, although I am minus one of my James Juniors as Ben has gone to the Peak District for a few days with school on an outward bound trip so have a few less school runs for the next few days. I'll be back tomorrow with another project. Until then, happy stampin'!
Stampin' Up! Supplies Used: