Silhouette Scenes Brother Birthday Card PP454

by Joanne James11. August 2019 09:00


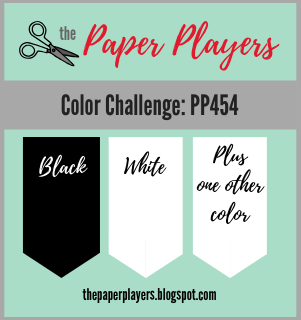
Today it's Sunday and time for this week's new challenge over at The Paper Players! It's the turn of the lovely Jaydee to host this week and she has an interesting colour challenge for you to work with:
    

I had an idea of I wanted to do with this week's colour palette and the sketch from TGIF Challenges was just what I needed to turn my idea into a reality (although I made my base horizontal rather than vertical and used an extra-large card base) - take a look:
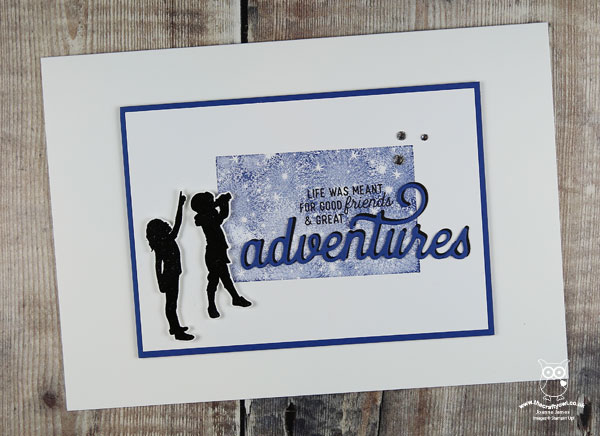
 

Today is a special day in the James household: the youngest of the James Juniors celebrates his 12th birthday. I'm not sure where those years have gone, but I did need as a result need a couple of special birthday cards to celebrate. Today's card is the card I made for Ben from Rebecca and features Blueberry Bushel as my featured additional colour. Here's the low-down on today's card:

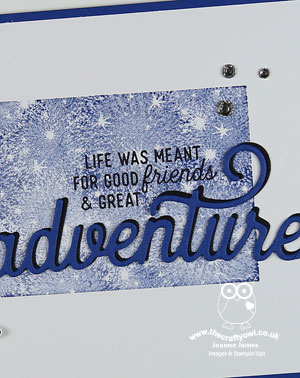
When Is An Adventure Not An Adventure? - The two figures on today's card from the Silhouette Scenes stamp set so remind me of Ben and Rebecca. I can honestly say they truly are each others best friends and always have been. Even as they approach their teens, they still enjoy each others company more than anyone else's - and I love that about them! So it seemed only right to feature them together on my card. I could have stamped the sentiment 'as is', however I wanted to feature the 'adventure' diecut to tie in with the sketch - but I needed it in the plural. Luckily for me, the Sweet Silhouettes dies also incude the word 'inspire' - so I diecut this too, snipped away the letter 's' and paper-pieced it seamlessly to my 'adventure'. Clever, right? :-) I diecut both twice, once in Blueberry Bushel and again in Basic Black and offset this one behind; this allows the diecut to stand out from the background a little better.

A Starry Sky - Since I only had one colour to pair with my black and white, a sponged or brayered sky wasn't really an option. The starry stamp in the 'Bokeh Dots' set came to the rescue; the distinktive nature of this stamp meant that even with one colour, there would be enough variation to create interest. 

Sisterly Love - Lastly, not content with my tinkering of sentiments, I did the same on the inside. Do you recognise this sentiment from an existing stamp set? I'll give you a clue - it's in the 'A Wish For Everything' stamp set, but it doesn't look quite like this:
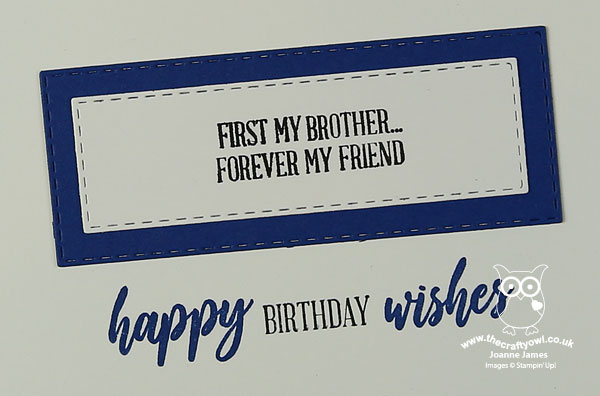
 

Did you spot it? I took the stamp that reads 'First my Mother...forever my friend' and masked out the 'Mo' of Mother and replaced it with the 'Br' from another stamp in this set that reads 'Hope this new year is filled with promises of many bright tomorrow's':


It took a little while to ink and mask with my Stampin' Write marker, but I'm really pleased with the result. Do you look for opportunities to create your own customised sentiments out of your stamp collection when you don't have the perfect fit? Do share any that you've created - I'd love to know what other combinations there are.

Here is the visual summary of the key products used on today's project for you to pin for easy reference:
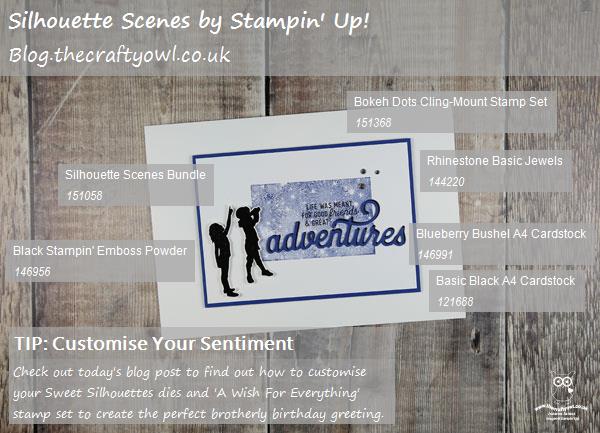
 

You can see all of my Product and 'How To' summaries on my 'How To - Tips and Techniques' Pinterest board in case you've missed any. 

Before you reach for your ink and papers, check out what our amazing team has created to inspire you this week:

Here's a quick recap of our challenge rules:
 
1.  Create a new paper project
2.  Upload your creation to your blog with a link back to us and provide a direct link to the post featuring your challenge submission.
3.  Please link your card to no more than four challenges, TOTAL.
4.  Have FUN!

You can see all of my 'How To' summaries on my 'How To - Tips and Techniques' Pinterest board in case you've missed any. 

Enjoy your day; we will be celebrating with cake, an escape room outing and a best friend sleepover - wish me luck! I have my monthly technique class tomorrow but I'll be back tomorrow with another project. Until then, happy stampin'!


Stampin' Up! Supplies Used: 

Table built using Product Table Builder by The Crafty Owl - Independent Stampin' Up! Demonstrator.

Spectrum Inked Starry Sky For Hearts Come Home CAS Christmas Card

by Joanne James30. September 2018 17:00


Today I have an extra post for you - I've been trying to find the time to share this post since Wednesday but classes and life have gotten in the way! You can see my regular Paper Players post from earlier here. This is  a clean and simple Christmas card using one of my favourite background stamps that is perfect for this week's challenge over at Stamps Ink Paper:

My card also makes use of one of those useful products in the annual catalogue that at fist glance you might have overlooked - more about that in a moment. Here's my card:


 Here's the low-down on today's card:

The Perfect Starry Sky - I used the starry background stamp from the Bokeh Dots background stamp set to create a colourful night sky behind the houses on my card. One of the things I like about the Bokeh Dots background stamps is that they are smaller in size and can be used a a feature in their own right on a card, without covering the whole of the cardbase. 

A Rainbow of Colour -  Did you spot the Uninked Spectrum Ink Pads on page 202 of the annual catalogue? Easily overlooked, they can be inked with 5 separate colours of your choice and are particularly handy when paired with a stamp such as the one I've used here to create a night sky with hues of purple through to blue.  What stamps do you have in your collection that you could use with a spectrum ink pad to create colourful ink effects?

Hearts Come Home - I used the smallest of the Hometown Greetings Edgelits to create my border of houses, cutting it out of Whisper White cardstock brushed with a liberal coating of clear Wink of Stella for a subtle sparkle and shine. To finish, I stamped one of my favourite Christmas sentiments from the co-ordinating 'Hearts Come Home' stamp set in Night of Navy - never more approprate than at Christmas time.

Here is the visual summary of the key products used on today's project for you to pin for easy reference:


You can see all of my 'How To' summaries on my 'How To - Tips and Techniques' Pinterest board in case you've missed any. 

Enjoy your day and I'll be back tomorrow with another project. Until then, happy stampin'!


Stampin' Up! Supplies Used:

Table built using Product Table Builder by The Crafty Owl - Independent Stampin' Up! Demonstrator.

Dandelion Wishes Blue Bokeh Dots Card

by Joanne James13. September 2018 21:00

I'm sorry this week has been a little less blog-filled than anticipated; I am getting back into a routine now that the James Juniors are back at school, however I'm still playing catch-up. I've had two classes this week and lots more going on besides, and can't quite believe it's Thursday before I've managed a post - eek!

Anyway, today I'm sharing a card that I made with the ladies in my stamp class earlier this week that was inspired by the challenges over at As You See It  and Less Is More


My class featured the Dandelion Wishes stamp set and we looked at different techniques to create interesting backgrounds. The Dandelion Wishes set is perfect for clean and simple cards - take a look:


Here's the low-down on today's card:

Back To Basics - The theme over at As you See It this week is 'Back To Basics', creating cards using little more than stamps. ink and paper. I love clean creations, although they aren't always basic in this sense. There is something liberating though about creating with just stamps, ink and paper and it is fun to be able to share creations from time to time like this. They can be quick(er!) to create and show that it's still possible to create something pretty without needing a ton of supplies. My card uses only two ink colours and two colours of cardstock - basic supplies indeed!

Layer Images for Interest - One of the ways to create interest on a basic card is to layer images to create interest. In addition the basic card layers, with a little tone-on-tone stamping on the base, I used the bokeh dots stamp as a 'background' for my dandelion seed heads and positioned both them and my sentiment across the edges in order to create the illusion of an extra layer.

A Drop of Frost - I could have just left my card there as it looked pretty enough to be fair. I often add a little something to a CAS card for extra interest and in this instance decided to add a trio of the new frosted epoxy droplets from the seasonal catalogue. I love the frosted finish they have and am a sucker for something shiny! I'm hoping the ladies at AYSI approve - my justification is that it's less fussy than ribbon ;-)

Here is the visual summary of the key products used on today's project for you to pin for easy reference:


You can see all of my 'How To' summaries on my 'How To - Tips and Techniques' Pinterest board in case you've missed any. 

I'll be back tomorrow with another project for you. Until then, happy stampin'!


Stampin' Up! Supplies Used:

Table built using Product Table Builder by The Crafty Owl - Independent Stampin' Up! Demonstrator.

New Online Exclusives

There are new products available exclusively in the online store from 5 November - check them out here.

Latest Kits!

Stampin Cut and Emboss

The Perpetual Beauty Calendar Kit and Cherry Blossoms Treat Boxes Kit are the latest kits in the online store - get yours here!

Shop Online

Access my online shop 24 x 7, 365 days of the year:

Current December hostess code:

9NKXDTTR

Shop Online

Mini Catalogue

BROWSE THE CATALOGUE

'Tis The Season - the new Stampin' Up! Mini Catalogue is here! For more details and to download your copy click here

Scrapbooking

Stampin' Up! has introduced a new range of 12x12" scrapbooking product and kit - the full range is now available to purchase online. To download a copy of the new digital Scrapbooking Catalogue click here.

2024-25 Annual Catalogue

BROWSE THE CATALOGUE

Click on the image to download your copy of the 2024-25 annual catalogue. For a full list of current SU! supplies, go to my online store. If you would like any help or advice, please drop me a line at joanne@thecraftyowl.co.uk or give me a call on 07773 421446 - I'd be happy to help.

Join My Team

It's always a great time to join Stampin’ Up! New team members can get £130 worth of products for only £99 + free business supplies + free shipping + all the fun being a part of Stampin’ Up! Stampin' Up! has something for everyone: join my growing team and benefit from my support to enjoy Stampin' Up! however you choose.

If you're interested, call me for a chat to understand how I can help you realise your goals. Alternatively, if you have already decided to sign up and you just can't wait, please click here for the link to the online form where you can sign up and order your starter kit right away! 

About Me

Hi I'm Joanne and live in Northampton and when I'm not looking after my husband and two beautiful children, am an avid crafter with a passion for all things Stampin' Up!

I must confess that I have never been a big rubber stamper - until I discovered Stampin' Up! that is. I love the fact that I can get such great results with co-ordinating stamps, inks, papers and punches - the possibilities are endless! Join me on my stamping journey as I share the things I love and be inspired to create amazing things yourself!

Follow Me

Monthly Newsletter

Box Builder

Click the button above to use Box Buster to create your custom box design using the Envelope Punch Board!

Kits Collection Now Available!

Stampin Cut and Emboss

The new Kits Collection from Stampin' Up! is now available!

Click here to see the current kits available and order yours online today.

I Design For


Stampin' Up Stuff

This is my personal blog and is not endorsed by Stampin’ Up! I hope you find it a plentiful source of ideas and personal inspiration but please don't copy my designs for contest submission or use for classes, publication or sale without express permission.

DSP Special Release

Check out 3 popular designer series paper designs in fresh new colourways! Available exclusively in the online store from 3 December - check them out here

Last Chance Products

Last Chance Products will now be updated every other month - check them out here.