by Joanne James27. September 2022 12:00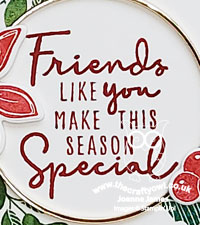
It's Tuesday and time for a new challenge over at CAS Colours & Sketches. Today we have Valerie's final sketch challenge:
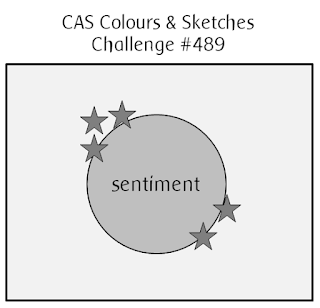


Feel free to flip or rotate the sketch when making your card. I thought this was a great sketch and perfect to enable me to play along with a few other challenges too: the ladies over at Just Add Ink have a 'Choose 2' challenge this week, at Less is More the theme is 'friendship' and since over at CAS on Friday the theme is Christmas, I am playing there too! So - to my card:
Here's the low-down on today's card:
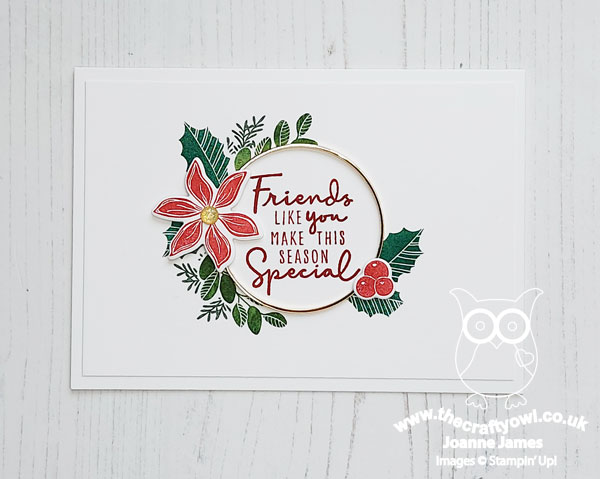
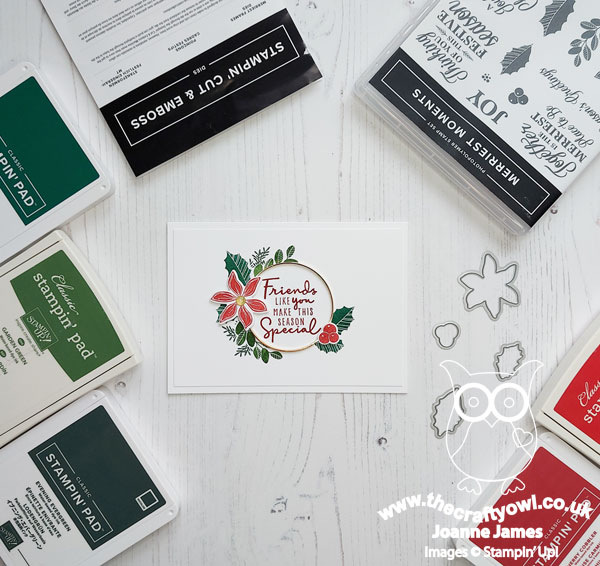
Masked Merriest Moments - I decided to properly rise to the challenge over at Just Add Ink this week and would use not just two but all three of their options! For my foliage and masking, I used the Merriest Moments stamp set - one of my all-time Christmas festive favourites. I used a circle framelit to cut a circle of masking paper, then stamped a selection of festive foliage around the edge, masking the individual pieces too to create a sense of depth and dimension. Once the masking paper was removed, I stamped my sentiment in the clear circle in the centre and used a thin (retired) gold hoop embellishment to outline the edge of my masked circle, then added some diecut red berries and a poinsettia to the front of the hoop - I like the subtle depth that this gives and pop of additional colour amongst the greens of the foliage:

Words of Friendship - My festive friendship sentiment comes from the 'Christmas To Remember' stamp set - a set of sayings perfect for this time of year. I used another two to add detail to the inside of my card, along with a little more festive foliage decoration:

Simple as that! I wish in hindsight I'd taken step by step photos of the construction process for this card, because whilst easy to explain contained a fair number of steps to achieve the desired effect. I really like the finished card though and I know that when one of my oldest, dear friends who I don't see often, but is always in my thoughts, receives this card she will love it too!
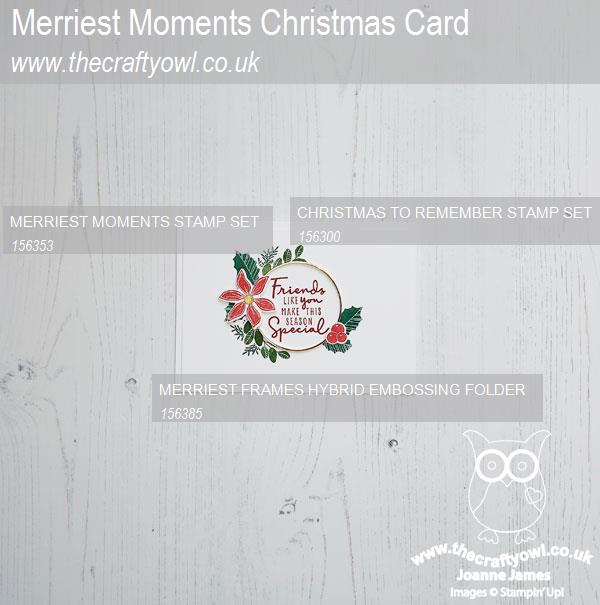
Here is the visual summary of the key products used on today's project for you to pin for easy reference:
You can see all of my 'How To' summaries on my 'How To - Tips and Techniques' Pinterest board in case you've missed any.
Enjoy your day and I'll be back tomorrow with another project. Until then, happy stampin'!
Stampin' Up! Supplies Used:
5fc38bf7-79dd-4a38-84e0-404f2549743f|0|.0|96d5b379-7e1d-4dac-a6ba-1e50db561b04
Tags: Stampin' Up, Stampin' Up Card, Stampin' Up Card ideas, Stampin' Up Supplies, Shop online, Shop Stampin' Up online, Shop Stampin' Up! Online, CAS Colours and Sketches, Merriest Moments, Merriest Wishes, Christmas To Remember, Christmas, Masking
Cards | Shop Online | Shop Stampin' Up! Online | Stamping
by Joanne James18. October 2016 07:00 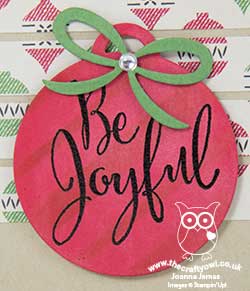
It's Tuesday and today I have a Christmas card for you using this week's sketch over at Pals Paper Arts:

This is such a great sketch with so many options; I decided today to make a Christmas card that is all about baubles - take a look:
Here's the low-down on today's card:
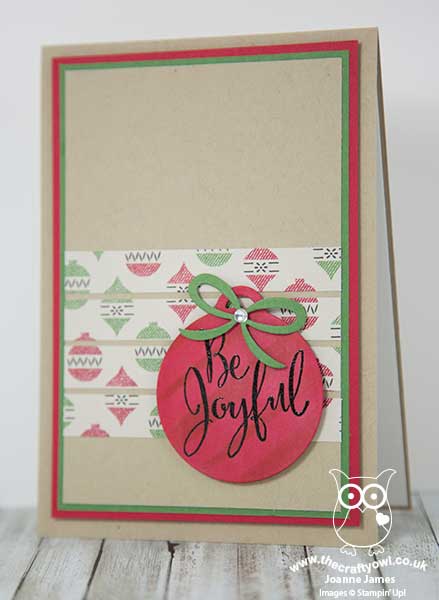
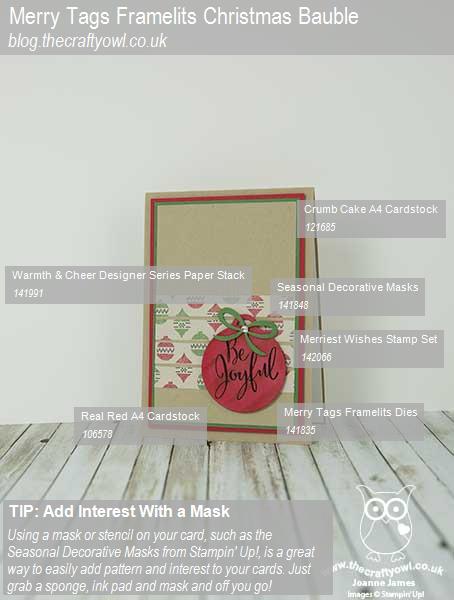
Warmth and Cheer - My strips of festive paper come from this season's 6" x 6" Designer Series Paper stack, Warmth and Cheer. A mix of warm reds, greens and yellows, with everything from sweater patterns to plaids, baubles, pine trees and stars, these papers will take your projects from autumn through to winter and the festive season with ease.
Merry Tags Bauble - I took my inspiration from my DSP strips and diecut a bauble in Real Red using the Merry Tags Framelits for the circular element of my card. I stamped my sentiment from the Merriest Wishes stamp set and heat embossed it in black for added shine. I added a Garden Green bow cut using the Perfect Pines Framelits and finished with a metallic enamel shape.
Decorative Stripes - They are very subtle, however if you look closely at my bauble you will see I sponged some diagonal stripes in Real Red ink using one of the Seasonal Decorative Masks onto my bauble before I embossed my sentiment, to echo the stripe of the baubles on the DSP and just add a little extra interest without stamping.
Here is the visual summary of the key products used on today's project for you to pin for easy reference:
You can see all of my 'How To' summaries on my 'How To - Tips and Techniques' Pinterest board in case you've missed any.
I have another busy day today that will start with the children attending their Speech and Drama exams - wish them luck! I hope your day is a good one too. I'll be back tomorrow with another project; until then, happy stampin'!
Stampin' Up! Supplies Used:
4683c6e3-274d-4452-88aa-9f9d9b2cd922|0|.0|96d5b379-7e1d-4dac-a6ba-1e50db561b04
Tags: Warmth and Cheer, Merriest Wishes, Merry Tags Framelits, Shop online, Shop Stampin' Up online, Stampin' Up, Stampin' Up Card, Stampin' Up Card ideas, Stampin' Up Supplies, Christmas, Perfect Pines, Seasonal Decorative Masks
Cards | Shop Online | Shop Stampin' Up! Online | Stamping
by Joanne James29. August 2016 19:00
We've had a Bank Holiday here in the UK today - not only a long weekend, but the sun has shone all day too! I spent my morning sewing name labels in new school uniform for the James juniors (I have the needle pricks to prove it - ouch!) then a pleasant afternoon outside and a little crafting time too. Today I have a card I made for the current challenge over at Fab Friday, where the challenge is to make a card that uses each of this year's new in-colours:

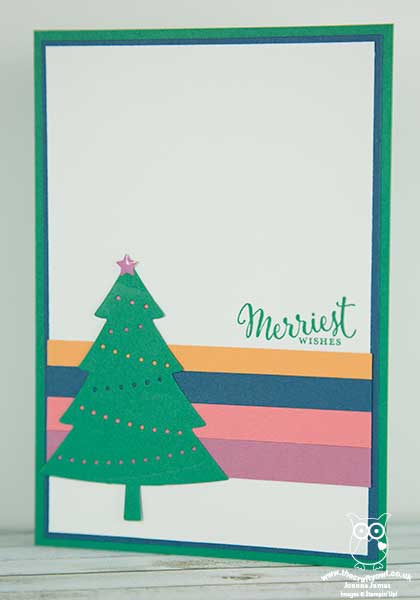
I decided to have a go at an in-colour Christmas card that used all five colours. Take a look at what I came up with:
Here's the low-down on today's card:
Perfect Pines Christmas Tree - I cropped my Christmas tree with the Perfect Pines framelits. This set featured in last year's holiday catalogue and I was thrilled to see it carried forward into the annual catalogue. I love all of this year's in colours, however they aren't designed to be used as a set. So a word of caution - to prevent visual overload, it makes sense to choose one or two colours to focus on and allow the others to have a supporting role. Preserve white space too! I decided that Emerald Envy would be the main colour on my card, with Dapper Denim also providing some border colour and then the three lighter colours used sparingly elsewhere on my card.
Colour Blocked Fairy Lights - The simple appearance of this card belies how tricky it actually was to create. Why, you ask? Well, I had this idea that I would use the framelit to cut out strings of lights on my Christmas tree and place strips of cardstock behind. I wanted to ensure that each light was a single colour and that you couldn't see the joins between the coloured strips through the gaps. After much fussing and fiddling with my layout, I eventually worked out how to achieve the look I was after: I increased the height of each coloured strip by 1mm as I progressed down the tree, starting at 5mm and finishing at 10mm. I also cut away the top two strips so that only one of each of the colours could be seen extending beyond the tree across the card front. So easy when you know how - and yes, you are welcome!
Enamel Star - the only other things I added to my card were my greeting from the new Merriest Wishes stamp set and a Sweet Sugarplum enamel star that I added to the top of my tree. Love these enamel shapes in every colour!
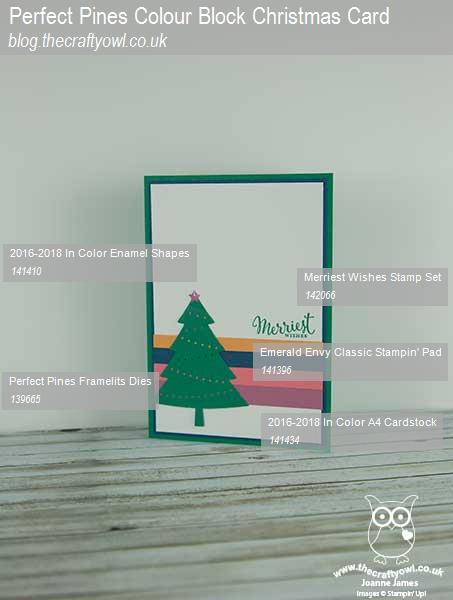
Here is the visual summary of the key products used on today's project for you to pin for easy reference:
You can see all of my 'How To' summaries on my 'How To - Tips and Techniques' Pinterest board in case you've missed any.
Back tomorrow with another project; until then, happy stampin'!
Stampin' Up! Supplies Used: