Meadow Dies Silhouette CCS521

by Joanne James19. September 2023 12:00

It's Tuesday and time for a new challenge over at CAS Colours & Sketches. Have you missed me? I have been rather absent from my blog in recent weeks - with the eldest of the James Juniors having left to begin university life, it hasn't left much time or opportunity for crafting. This week should see normal blog service resume, starting with this post! This week's challenge is a sketch challenge and Rachel has asked that we add three connected shapes and a sentiment:


Feel free to flip or rotate the sketch when making your card. For my card today I did just that - take a look:


Here's the low-down on today's card:

Ordinarily this is the kind of sketch that would lead me to use three uniform shapes and probably a little designer paper too, but coming to my desk fresh for the first time in a couple of weeks, I went in a completely different direction! I decided to rotate the sketch through 90 degrees and use the vertical as a flower/grass stem, which I stencilled using a stencil made using one of the Meadow Dies onto a loose column of ombre colour that I created first using inks and blending brushes. I then added a simple stamped sentiment from the 'Season of Chic' stamp set and a trio of diecut butterflies that I diecut from Basic Black cardstock and popped up on dimensionals:


Before adding my butterflies, I used a dry brush to add a fine splatter of white frost shimmer paint to my ombre panel; it adds a subtle shimmer, albeit one that is difficult to see in the photographs. 

Here is the visual summary of the key products used on today's project for you to pin for easy reference:


You can see all of my 'How To' summaries on my 'How To - Tips and Techniques' Pinterest board in case you've missed any. 

As a reminder, for our colour challenges, you must use all of the stated challenge colours. You may also use neutral colours; however, the challenge colours should be the most noticeable ones featured on your card. We use Stampin' Up! color names for reference, but you are welcome to use any other companies' products as long as you match the challenge colours as closely as possible.

Today's card was inspired by the challenge to create a silhouette over at SUO Challenges and the beautiful ombre night sky above the houses on the left of the Inkspirational inspo photo and I'm also linking up over at Just Add Ink where they are asking us to 'just add wildlife' - I think my butterflies qualify.


Enjoy your day and I'll be back tomorrow with another project. Until then, happy stampin'!


Stampin' Up! Supplies Used:

Table built using Product Table Builder by The Crafty Owl - Independent Stampin' Up! Demonstrator.

Natures Harvest Echinacea and Meadow Dies Watercolour Print for PP612

by Joanne James9. October 2022 08:00

Today it's Sunday and time for this week's new challenge over at The Paper Players! It's the turn of the fabulous Laurie to host this week and she has an interesting colour challenge for us to work with:


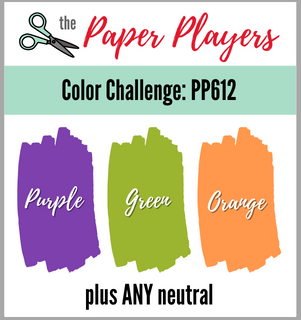
I say interesting because Laurie's colours immediately made me think of Halloween, but since I rarely send Halloween cards and I don't have much in the way of current Halloween product, I was determined to use these colours on anything but a Halloween card! So much so, I started creating and ended up with not one but two cards to share with you today - and neither remotely anything to do with October 31st! Here's the first one using Amy's layout over at Freshly Made Sketches this week - take a look:


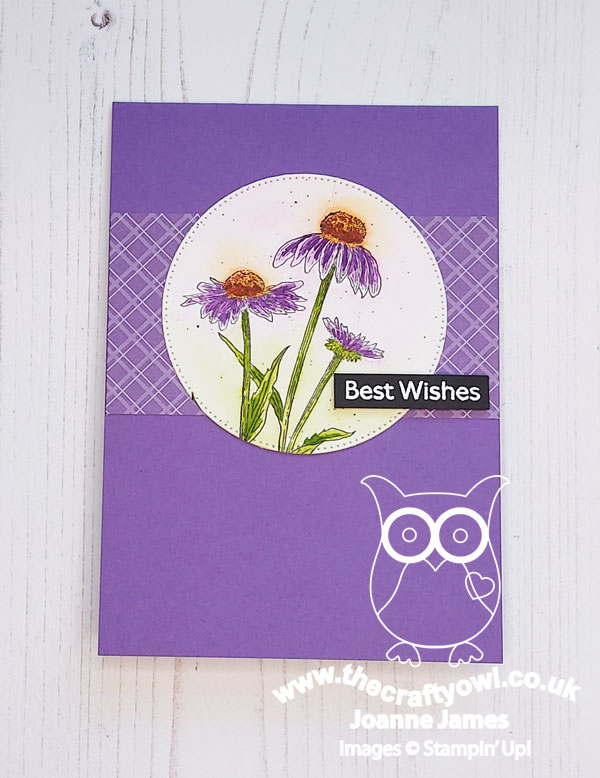
Here's the low-down on my first card:

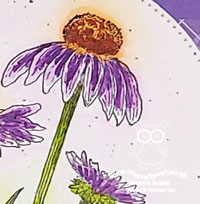
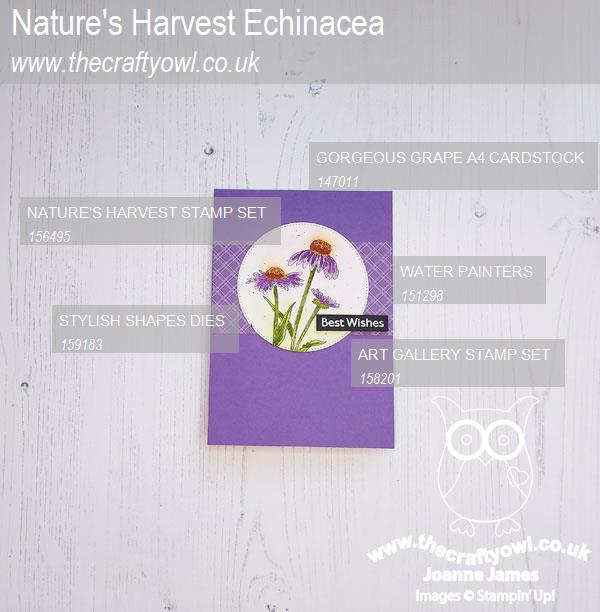
Staying faithful to Amy's sketch, I added a band of Brights designer series paper to my Gorgeous Grape card base and decided to create a nature-inspired watercolour as my focal point. I stamped the echinacea from the 'Nature's Harvest' stamp set in Stazon onto watercolour paper, then loosley watercoloured my image using the challenge colours and my aquapainters. Once I'd painted my image, I added some speckles by flicking my black Stampin' Blends marker across the image before cutting out with the largest circle in my Stylish Shapes Dies:


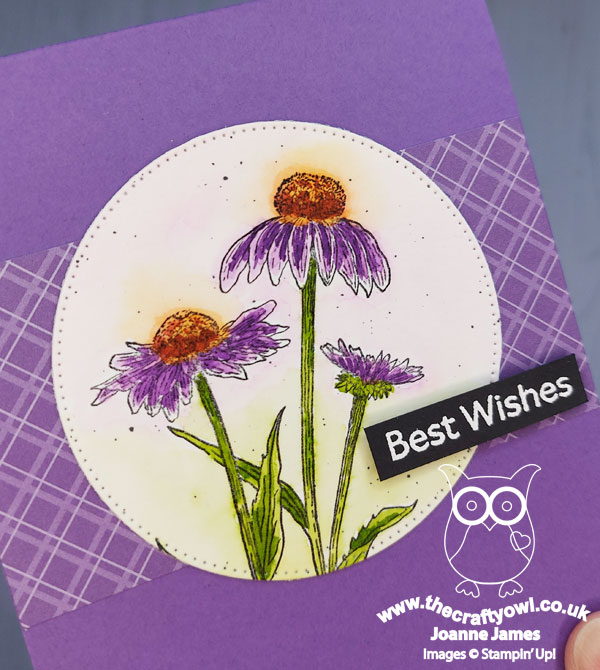
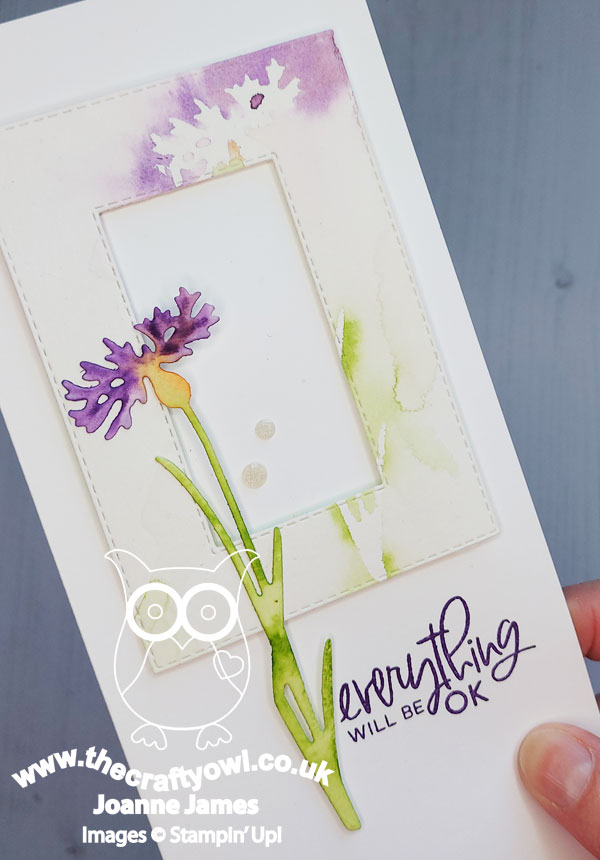
I added a white-on-black sentiment from 'Art Gallery' to complete my card. I liked this card so much, I thought I'd use one of the dies in the co-ordinating set to try out a watercolour print technique that I'd seen on Pinterest. My first attempt was a hot mess, but taking my learns and a different die from the Meadow Dies set I had a second attempt and like this one much better! Here's the card in question:


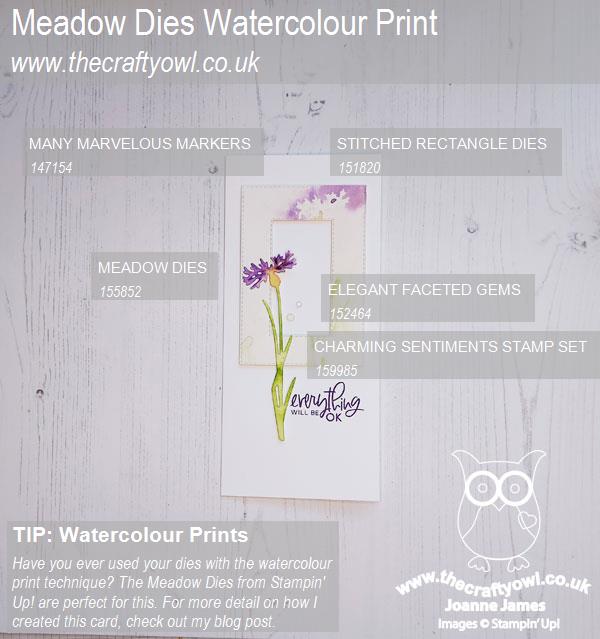
Have you ever tried the watercolour print technique using diecuts? It's actually quite straightforward: diecut your flower from watercolour paper and colour with Stampin' Write markers. Once coloured, place the flower onto a blank piece of watercolour paper and lightly spritz with water. The water 'spreads' the ink from the diecut one the blank piece - you can also 'stamp' this piece with the wet, coloured flower (but I didn't do that here). Allow both pieces to dry then add to your card; I cut a frame out of my spritzed piece and then added my diecut flower offset from the relief image on the frame. I added some clear faceted gems and a sentiment from the 'Charming Sentiments' stamp set that, when paired with the words 'faith over fear' stamped on the inside were the perfect words of encouragement needed for a card to send to a friend battling breast cancer right now:


What do you think? I quite like the effect and will definitely be trying this with other dies in other colours. I am also linking my second card up over at Time Out since the sentiment is perfect for their theme this week.

Here are the visual summary of the key products used on today's projects for you to pin for easy reference:


You can see all of my Product and 'How To' summaries on my 'How To - Tips and Techniques' Pinterest board in case you've missed any. 

So what do these colours say to you - Halloween, or something else completely? Before you reach for your ink and papers, check out what our amazing team has created to inspire you this week:

Here's a quick recap of our challenge rules:
 
1.  Create a new paper project
2.  Upload your creation to your blog with a link back to us and provide a direct link to the post featuring your challenge submission.
3.  Please link your card to no more than four challenges, TOTAL.
4.  Have FUN!

Enjoy your day; I'll be back on Tuesday with another project. Until then, happy stampin'!


Stampin' Up! Supplies Used: 

Table built using Product Table Builder by The Crafty Owl - Independent Stampin' Up! Demonstrator.

Sending Thanks with Quiet Meadow

by Joanne James26. September 2022 11:49

Happy Monday everyone! I managed to spend some quality time in my craft room over the weekend and as a result of trying to overcome my 'crafting hiatus' I've a couple of extra cards to share with you today! The first one uses Karren's layout over at Freshly Made Sketches this week and the fabulously bold Colour Inkspiration colour palette:

   May be an image of scooter and text

I really wanted to make the most of the bright blue and mango of the inspiration photo, so I went with a bold use of colour - take a look:


Here's the low-down on today's card:

I used one of my (retired) stencils to add some tone-on-tone colour to my Starry Sky card base, then added a cluster of Meadow Dies flowers to the right hand side in the challenge colours, having added a light touch of Starry Sky ink to my cornflower and embellished my Mango Melody flowers with some sparkly rhinestones.


For the horizontal element of the sketch, I layered a diecut 'Sending' in silver foil on white with the remainder of the sentiment stamped and heat embossed in silver directly onto the cardbase. I finished the inside of my card and the corner of my envelope with a collage of stamped images in co-ordinating colours from the 'Quiet Meadow' stamp set:


A liberal interpretation of this week's FMS sketch for me, although the shapes are clearly visible - I just love this card! What do you think? Do leave me a comment below, I'd love to hear your thoughts!

Here is the visual summary of the key products used on today's project for you to pin for easy reference:


You can see all of my 'How To' summaries on my 'How To - Tips and Techniques' Pinterest board in case you've missed any. 

Enjoy your day and I'll be back shortly with card number two. Until then, happy stampin'!


Stampin' Up! Supplies Used:

Table built using Product Table Builder by The Crafty Owl - Independent Stampin' Up! Demonstrator.

Quiet Meadow Honeybee Home Card FF104

by Joanne James4. March 2022 09:00

Today I have my card for the new challenge over at Festive Friday:


The challenge that we are celebrating this week is 'World Planting Day' which is on 20th March. Remember the fun thing is that at Festive Friday you do not need to actually celebrate the occasion; your goal is to simply use three or more items from the inspiration list on your project. This week I used flowers, green, brick and bugs/insects and this is what I came up with:

Here's the low-down on today's card:

Quiet Meadow Honeybee - This card is something of a departure from my usual style, as I don't tend to go in for collage-style stamping, but I think the images in both the 'Quiet Meadow' and 'Honeybee Home' stamp sets really lend themselves to this style. I used a Bumblebee coloured cardbase and added some tone-on-tone stamping in the same colour, along with some bees and splatter in black and used a blender brush to add colour to the outer edges. I also stamped a single flower on one circle, and for my main focal point I used my markers to add a buttercup in Bumblebee with a Just Jade stem. I also added a little extra collage-style stamping to the inside of my card: 


Layers and Textures - This card is all about textures and layers. In addition to my stamping, I added layered circles and diecut flower stems to build up my design. The circles were a combination of hive embossed gold vellum, some embossed brick and some (retired) Harvest Meadow designer series paper, along with a few in-colour enamel dots. This give lots of visual interest, despite the limited colour palette. 

A Trinket To Finish - Even though I added stamped bees to my background, I couldn't resist adding a gold bumblebee trinket to my stamped circle focal point:

A sentiment from the 'Honeybee Home' set completes my card. So what do you think? Not my usual style, but I had a lot of fun putting it together and stepping outside my comfort zone for a while. I've had a head cold this week and have definitely found myself being drawn to yellow - I think I've subconsciously been cheering myself up! It's also perfect for the current challenge over at The Alphabet Blog, where they are on the letter 'X is for xanthic' - which apparently means 'relating to the colour yellow' - who knew?! I am a bit of a logophile (that means lover of words if it's not a word you are familiar with) so I am delighted to add this one to my collection!

Here is the visual summary of the key products used on today's project for you to pin for easy reference:


You can see all of my 'How To' summaries on my 'How To - Tips and Techniques' Pinterest board in case you've missed any. 

How does our board inspire you? I can’t wait to see what YOU create! For more inspiration, be sure to visit the rest of the  Festive Friday Challenge Design team:

Ann Schach - out this week
Beth McCullough
Sharon Hashimoto Burkert
Melanie Hungerford
Helen Jennings
Stephanie Lanzalotto
Melva Peters
Jaydee
Diane Evans
Joanne James

Enjoy your day and I'll be back tomorrow with another project. Until then, happy stampin'!


Stampin' Up! Supplies Used:

Table built using Product Table Builder by The Crafty Owl - Independent Stampin' Up! Demonstrator.


Quiet Meadow CAS Bee Trinket Card PP550

by Joanne James18. July 2021 08:00

Today it's Sunday and time for this week's new challenge over at The Paper Players! It's the turn of the fabulous LeAnne to host this week and she has a fun clean and simple challenge for you to work with:


I resisted the urge to go with something punny today and instead used Narelle's sketch over at Freshly Made Sketches as the basis for a cluster of wildflowers to attract my solitary bee - take a look:


Here's the low-down on today's card:

I added a recessed panel featuring a piece embossed with the Bricks and Mortar embossing folder and used this as the backdrop for my trio of wildflower/grass elements courtesy of the Meadow Dies. Two of these I cut out of coloured cardstock and the third I sponged to create a cornflower-inspired bloom to attract my golden bumblebee trinket:

I added a sentiment from the Quiet Meadow stamp set to a banner piece that is included in the Meadow Dies set to complete the outside of my card. I also added a little more stamping to finish the inside:


I hope you like my shiny bee as much as I do! We look forward to seeing your bee creations, but remember this is 'clean and simple' week so ensure your cards have: 

  • minimal layers
  • little to no embellishments
  • lots of clean white space (minimal pattern)

Here is the visual summary of the key products used on today's project for you to pin for easy reference:


You can see all of my Product and 'How To' summaries on my 'How To - Tips and Techniques' Pinterest board in case you've missed any. 

Before you reach for your ink and papers, check out what our amazing team has created to inspire you this week:

Here's a quick recap of our challenge rules:
 
1.  Create a new paper project
2.  Upload your creation to your blog with a link back to us and provide a direct link to the post featuring your challenge submission.
3.  Please link your card to no more than four challenges, TOTAL.
4.  Have FUN!

You can see all of my 'How To' summaries on my 'How To - Tips and Techniques' Pinterest board in case you've missed any. 

Enjoy your day; the weather has been absolutely scorching here in the UK this last few days, so there's unlikely to be much crafting done today as my office becomes a furnace from about 11am onwards! I will definitely be taking it easy and enjoying it whilst it lasts! I'll be back soon with another project. Until then, happy stampin'!


Stampin' Up! Supplies Used: 

Table built using Product Table Builder by The Crafty Owl - Independent Stampin' Up! Demonstrator.

Mini Catalogue

BROWSE THE CATALOGUE

The mini catalogue is now live! Read and download your copy here.

Shop Online

Access my online shop 24 x 7, 365 days of the year:

Current March hostess code:

S9F2XJJW

Shop Online

Join My Team

It's always a great time to join Stampin’ Up! New team members can get £130 worth of products for only £99 + free business supplies + free shipping + all the fun being a part of Stampin’ Up! Stampin' Up! has something for everyone: join my growing team and benefit from my support to enjoy Stampin' Up! however you choose.

If you're interested, call me for a chat to understand how I can help you realise your goals. Alternatively, if you have already decided to sign up and you just can't wait, please click here for the link to the online form where you can sign up and order your starter kit right away! 

Latest Kit!

Stampin Cut and Emboss

The Rock Legend Kit has all you need to make 8 cards with coordinating envelopes. Along with the new Panda Friends Kit, both are available from January 4th for just £14 each - get yours here!

2023-24 Annual Catalogue

BROWSE THE CATALOGUE

Click on the catalogue for a full list of current SU! supplies - if you would like to order any of the items featured, please drop me a line at [email protected] or give me a call on 07773 421446 - I'd be happy to help.

New Online Exclusives

There will be new products available exclusively in the online store from 5 March - check them out here.

About Me

Hi I'm Joanne and live in Northampton and when I'm not looking after my husband and two beautiful children, am an avid crafter with a passion for all things Stampin' Up!

I must confess that I have never been a big rubber stamper - until I discovered Stampin' Up! that is. I love the fact that I can get such great results with co-ordinating stamps, inks, papers and punches - the possibilities are endless! Join me on my stamping journey as I share the things I love and be inspired to create amazing things yourself!

Follow Me

Monthly Newsletter

Box Builder

Click the button above to use Box Buster to create your custom box design using the Envelope Punch Board!

Kits Collection Now Available!

Stampin Cut and Emboss

The new Kits Collection from Stampin' Up! is now available!

Click here to see the current kits available and order yours online today.

I Design For


Stampin' Up Stuff

This is my personal blog and is not endorsed by Stampin’ Up! I hope you find it a plentiful source of ideas and personal inspiration but please don't copy my designs for contest submission or use for classes, publication or sale without express permission.