Biggest Wish Slimline Card Featuring Slim Card Dies

by Joanne James28. February 2022 14:27

Today I'm sharing a second card that I made last week; squeaking this one in for the current challenge over at The Card Concept - check out their inspiration photo:


I love the nautical colours and strong geometrical prints in the inspiration photo and though they would be perfect for a similarly coloured clean and layered card featuring the Slim Card Dies - take a look at what I came up with:


Here's the low-down on today's card:

I diecut the slim card die with the angles lines out of 4 different colours of cardstock, then paper-pieced the negative pieces back into the diecut outline for some fun nautical stripes. 

I didn't have a boat that was the right size for this card (the new Sailboat Builder Punch would have been perfect, but the boats in the 'Sailing Home' set were both too small) but on closer inspection I noticed there were a number of black dogs in the photo too, so thought a black labrador silhouette punched with my now retired Dog Builder Punch would work a treat. I added him to a sentiment stamped with the 'Biggest Wish' stamp set that was stamped and cut out with one of the Painted Labels Dies: 


And that was my card complete! Stampin' Up! even has a new range of slimline envelops the perfect size for my finished card, so I don't have to make my own - bonus!

I have a friend with a black labrador that looks just like this one so I think that's where this card will be headed when their birthday rolls around. The Slim Card Dies are super easy to use and great for paper-piecing; not only that, if you save all of the pieces you can make a number of cards in one go - here's a shot of the other cards I started to make whilst making this one:


One of them still needs a sentiment and they both require additional decoration, but it's good to have the bases already made. 

Here is the visual summary of the key products used on today's project for you to pin for easy reference:


You can see all of my 'How To' summaries on my 'How To - Tips and Techniques' Pinterest board in case you've missed any. 

Enjoy the rest of your day and I'll be back tomorrow with another project and some exciting news for the month of March. Until then, happy stampin'!


Stampin' Up! Supplies Used:

Table built using Product Table Builder by The Crafty Owl - Independent Stampin' Up! Demonstrator.

Puppies, Paw Prints and Shades of Brown For AYSI 218

by Joanne James31. January 2020 12:00

Today I'm sharing my design team card for our new challenge over at As you See It where it's time for the often-dreaded speed challenge:


Yes - create a card in under 10 minutes, this time using shades of brown! I would usually say that brown is quite an uninspiring starting point for me, however I actually had a couple of ideas right off the bat for a change! I worked up one of those and am quite pleased with the results - take a look:


Here's the low-down on today's card:

A Kennel of Dogs - Today's card features a kennel of dogs, brown dogs to be precise, courtesy of some Crumb Cake, Soft Suede and Early Espresso cardstock and my Dog Builder Punch. As an aside, did you know that there are a number of collective nouns for dogs and in addition to the more commonly used 'pack', you can also refer to a group as a 'kennel of dogs'. I much prefer the latter when it concerns domestic pups so decided to go with that as my dogs are certainly not at all wolf-like, which is what always comes to my mind when I think of a pack! I simply punched a whole bunch of dog shapes and then positioned them somewhat randomly on my card to create a pattern, allowing some to overhang the edges before trimming to size.

Puppies and Pawprints - The sentiment and pawprints on the heart come from the 'Happy Tails' stamp set and are perfect if you need one of those tricky cards to send to someone mourning the loss of their four-legged friend. I stamped mine onto Whisper White and used a heart framelit from the retired Sweet and Sassy Framelits set to cut it out and popped it up on dimensionals; the sentiment does just about fit into the straight-edged heart punch from the new heart punch pack in the Spring Mini catalogue, but is a little more snug. Using the punch would save some time too but I knew the sentiment would fit the framelit and I had mine ready to go!

I Feel The Need For Speed - So the key to a speed stamping challenge has to be simplicity, right? My card has very little stamping, so how long did it take to complete? It actually took me 9 minutes and 8 seconds on the first attempt, because the time was taken up arranging my punched dog shapes and glueing them in place with Tombo. Once complete, I liked the card so much I decided to punch a bunch more dog shapes and used the same layout to create another two identical cards, and did both in less total time than it took me to make the first one! If I had used Snail adhesive, I probably could have saved even more time. So I challenge you - if you CASE my card, do let me know how long it takes you to complete - it is an easy one for under 10 minutes once you have the layout! I'm going to make a few more using different colours and using the Cat Punch.

Here is the visual summary of the key products used on today's project for you to pin for easy reference:


You can see all of my 'How To' summaries on my 'How To - Tips and Techniques' Pinterest board in case you've missed any. 

Before you put your creative thinking caps on, why not check out the blogs of the other As You See It team members:

Amy Jasper

Heather Cooper

Jan Clothier

Jane Knudsen

LeAnne Pugliese

Here's a summary of our challenge rules:

  • Create any card, scrapbooking page, 3D project or packaging project that fits the challenge.
  • Please include the challenge graphic and link back to the challenge in your blog post. Turn off word verification so we can leave you lots of lovely comments. Make sure you link the post not the whole blog to the Linky. Use #AYSI218 when uploading to a public gallery.
  • If you’re unsure about ‘the rules’, check the details under the Challenge Guidelines tab on the As You See It Challenge homepage.
  • In a colour challenge, black or other neutral can be used in outlines and sentiments but no other colours should be included. Stampin’ Up colours are used for reference but colours that are a close match are welcome.
  • Don't forget to tell us how long it took to create your speed-stamped creation!

We look forward to seeing your creations in the AYSI gallery.

Enjoy your day and I'll be back tomorrow with another project. Until then, happy stampin'!


Stampin' Up! Supplies Used:

Table built using Product Table Builder by The Crafty Owl - Independent Stampin' Up! Demonstrator.

Sorry For The Loss of Your Furry Friend - One Layer Pet Sympathy Cards

by Joanne James25. February 2019 08:00

The James Juniors are back to school today following the half term break and I am here with a nice early post for you! Today I'm sharing a card that combines a few challenges: the current challenge over at Less Is More where it is one layer with the focus on sentiment and the current CASology challenge. My card also fits the photo inspiration at Fusion:


It's something of a happy accident that I am combining each of these in today's card - it just so happened that I had an idea that works for all three - and I have two cards for you! I decided to create a couple of pet sympathy cards; first up, a dog one:


I also created one for a cat lover too that is exactly the same design, just mirrored:


Here's the low-down on today's cards:

Sorry For Your Loss - I recently spotted this card on Pinterest and loved the clean lines created by the fun punch art idea and monochromatic colour scheme. It inspired me to think about using a similar idea to create a one-layer card using the same 'Sorry For Everything' stamp set - such a great set where you need a sentiment to take centre stage and useful for lots of different circumstances, including the loss of a furry friend. 

Cats And Dogs - I used a retired Sweet and Sassy Framelit heart, along with a punched cat and dog respectively, to create a mask through which I could sponge my heart. By using a different colour to the sentiment, which I stamped in black, it gives the illusion of another layer and whilst I didn't use the punches directly on my card, the silhouette created by the negative space makes my furbabies easily identifiable. 

Crossing The Rainbow Bridge - My colourful heart whilst perfect for the Fusion rainbow photo was actually inspired by a blog post a couple of week's ago by my Paper Players teamie and committed dog lover Ann Schach. As any of you who follow my blog will know, I am relatively new to the idea of pets having never had one as a child. Ann made this card for a friend of hers that was going through a tough time and she mentioned one of the things her friend was having to deal with was the loss of a pet, which she described as having 'crossed over the Rainbow Bridge'. I thought this was a lovely idea and so tried to incorporate the idea of a rainbow by sponging one into my masked heart, with a little purple heart to accent each pet. I really love the effect - what do you think? I also carried the rainbow theme onto the inside of my card with a set of rainbow footprints around my sentiment, that is courtesy of the new 'Happy Tails' stamp set:


A fitting sentiment for this kind of card I think and the rainbow colours are really uplifting. So two cards inspired by others in lots of ways, yet unique to me. Do check out the respective challenges for lots more inspiration.

Here is the visual summary of the key products used on today's project for you to pin for easy reference:


You can see all of my 'How To' summaries on my 'How To - Tips and Techniques' Pinterest board in case you've missed any. 

Enjoy your day and I'll be back tomorrow with another project. Until then, happy stampin'!


Stampin' Up! Supplies Used:

Table built using Product Table Builder by The Crafty Owl - Independent Stampin' Up! Demonstrator.


Happy Tails Card and Treat Box for PP423

by Joanne James6. January 2019 09:00

Woohoo! Today it's Sunday and it's time for the first challenge of the year over at The Paper Players! We have all enjoyed the Christmas break and are back with a fresh new blog header and some snazzy challenge badges courtesy of Nance and two amazing guest designers: Su Mohr and Wanda Cullen. If you missed my introductory post over at The Paper Players earlier this week you can read all about these lovely ladies here. We are thrilled that they are going to be sharing their creative talents with us and you in 2019 - a big Paper Players welcome to both of you! 

For our first challenge of 2019 it's the turn of the fabulous Ann to host this week and she has a fun theme challenge for you to work with:
     

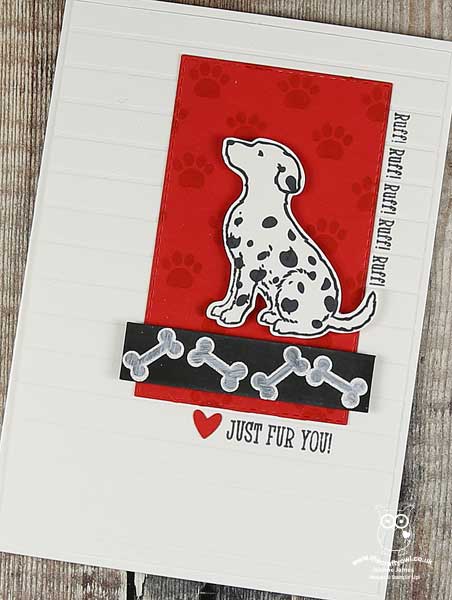
I had so many choices for today's card; in fact, I ended up making not one, not two - but four different cards for this week's theme, and then couldn't decide which one to use! I blogged one of them featuring a sweet little bumble bee yesterday - if you missed it, you can see that card here - and decided today to go with something old and something new with a card and matching treat box that is a tribute to all four-legged friends. First up, here's my card:
 

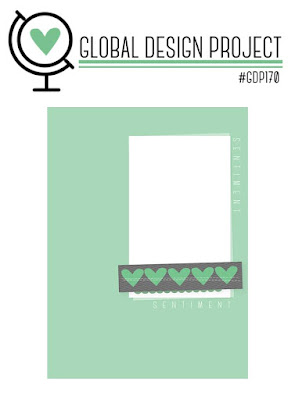
Now I must confess I almost didn't blog this card today, as my fellow teamie LeAnne also used the sketch layout from Global Design Project for her layout this week and used the new 'Nine Lives' stamp set that is the feline equivalent of the 'Happy Tails' set I chose to use and so there is a distinctly similar look and feel to our cards this week as a result. I figured though that whether you are a cat or dog lover, between us we have you covered so I decided to go ahead! You can check out LeAnne's card on the Paper Players blog post and read more about the detail of her card over on her blog WeeInklings which is well worth a follow. 

In the meantime, here's the low-down on today's card:

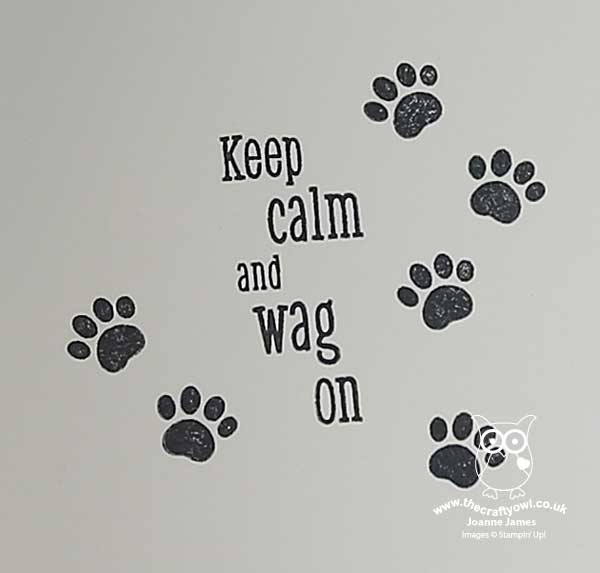
Happy Tails - The 'Happy Tails' bundle is one of my favourite bundles in the new Spring-Summer catalogue. The stamp set has a realistic dog with a collection of fun sentiments and decorative bits and pieces - a kennel, heart, collar and bone and a great selection of sentiments for all kinds of cards for the dog-lovers amongst us. The #GDP170 sketch was perfect to highlight lots of these co-ordinating words and images - and I chose to use this sentiment on the inside of my card too, with a few more pawprints for good measure:
 

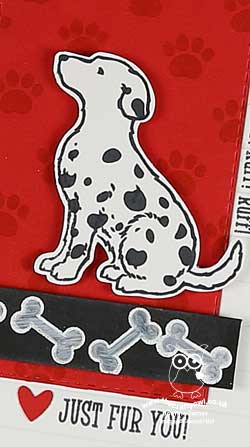
Dalmation Dog - I created a dalmation with my black-on-white spots and added a red background so that he would really stand out. As if the stamp set wasn't great enough, it has a co-ordinating Dog Builder Punch too so that you can punch your puppy dog straight out with ease - no fussy cutting required!

A Kennel Treat Box - The minute I saw the dog builder punch I just knew I would need to create a little dog kennel for him using my retired Home Sweet Home thinlits - the box is the perfect size! I actually made this first and then took the embossed striped panels of my kennel and bright Poppy Parade red roof and incorporated the same texture and colour into my co-ordinating card. The roof of my box opens to hold a few chocolates or maybe even some doggy treats - I added a tag using another sentiment from the Happy Tails set, along with a punched heart, also courtesy of the Dog Builder Punch:
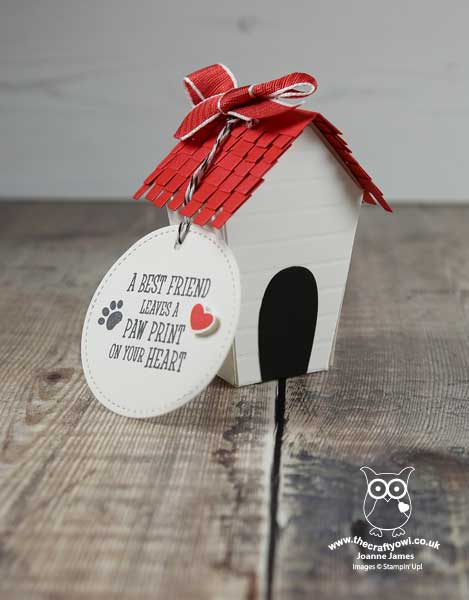
 

I hope you like my pair of projects today - they were fun to make! 

Here is the visual summary of the key products used on today's project for you to pin for easy reference:
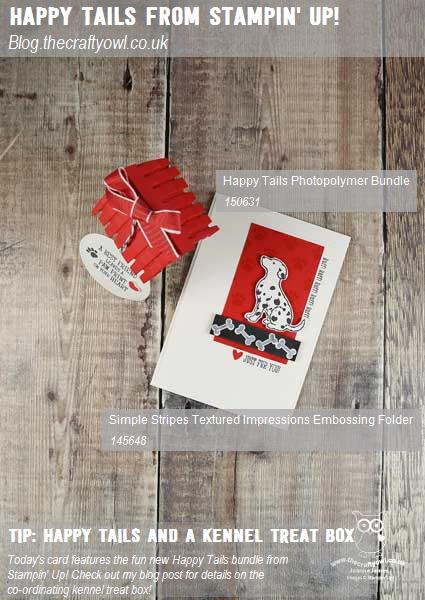
 

You can see all of my Product and 'How To' summaries on my 'How To - Tips and Techniques' Pinterest board in case you've missed any. 

Before you reach for your ink and papers, check out what our amazing team has created to inspire you this week:

Here's a quick recap of our challenge rules:
 
1.  Create a new paper project
2.  Upload your creation to your blog with a link back to us and provide a direct link to the post featuring your challenge submission.
3.  Please link your card to no more than four challenges, TOTAL.
4.  Have FUN!

You can see all of my 'How To' summaries on my 'How To - Tips and Techniques' Pinterest board in case you've missed any. 

Enjoy your day; I'm hoping to get a little more time in my craft room and have some quality family time since our sporting commitments don't ramp up fully until next week. Either way, enjoy your Sunday and I'll be back tomorrow with another project. Until then, happy stampin'!


Stampin' Up! Supplies Used: 

Table built using Product Table Builder by The Crafty Owl - Independent Stampin' Up! Demonstrator.

New Online Exclusives

There are new products available exclusively in the online store from 5 November - check them out here.

Latest Kits!

Stampin Cut and Emboss

The Perpetual Beauty Calendar Kit and Cherry Blossoms Treat Boxes Kit are the latest kits in the online store - get yours here!

Shop Online

Access my online shop 24 x 7, 365 days of the year:

Current December hostess code:

9NKXDTTR

Shop Online

Mini Catalogue

BROWSE THE CATALOGUE

'Tis The Season - the new Stampin' Up! Mini Catalogue is here! For more details and to download your copy click here

Scrapbooking

Stampin' Up! has introduced a new range of 12x12" scrapbooking product and kit - the full range is now available to purchase online. To download a copy of the new digital Scrapbooking Catalogue click here.

2024-25 Annual Catalogue

BROWSE THE CATALOGUE

Click on the image to download your copy of the 2024-25 annual catalogue. For a full list of current SU! supplies, go to my online store. If you would like any help or advice, please drop me a line at joanne@thecraftyowl.co.uk or give me a call on 07773 421446 - I'd be happy to help.

Join My Team

It's always a great time to join Stampin’ Up! New team members can get £130 worth of products for only £99 + free business supplies + free shipping + all the fun being a part of Stampin’ Up! Stampin' Up! has something for everyone: join my growing team and benefit from my support to enjoy Stampin' Up! however you choose.

If you're interested, call me for a chat to understand how I can help you realise your goals. Alternatively, if you have already decided to sign up and you just can't wait, please click here for the link to the online form where you can sign up and order your starter kit right away! 

About Me

Hi I'm Joanne and live in Northampton and when I'm not looking after my husband and two beautiful children, am an avid crafter with a passion for all things Stampin' Up!

I must confess that I have never been a big rubber stamper - until I discovered Stampin' Up! that is. I love the fact that I can get such great results with co-ordinating stamps, inks, papers and punches - the possibilities are endless! Join me on my stamping journey as I share the things I love and be inspired to create amazing things yourself!

Follow Me

Monthly Newsletter

Box Builder

Click the button above to use Box Buster to create your custom box design using the Envelope Punch Board!

Kits Collection Now Available!

Stampin Cut and Emboss

The new Kits Collection from Stampin' Up! is now available!

Click here to see the current kits available and order yours online today.

I Design For


Stampin' Up Stuff

This is my personal blog and is not endorsed by Stampin’ Up! I hope you find it a plentiful source of ideas and personal inspiration but please don't copy my designs for contest submission or use for classes, publication or sale without express permission.

DSP Special Release

Check out 3 popular designer series paper designs in fresh new colourways! Available exclusively in the online store from 3 December - check them out here

Last Chance Products

Last Chance Products will now be updated every other month - check them out here.