Sorry For The Loss of Your Furry Friend - One Layer Pet Sympathy Cards

by Joanne James25. February 2019 08:00

The James Juniors are back to school today following the half term break and I am here with a nice early post for you! Today I'm sharing a card that combines a few challenges: the current challenge over at Less Is More where it is one layer with the focus on sentiment and the current CASology challenge. My card also fits the photo inspiration at Fusion:


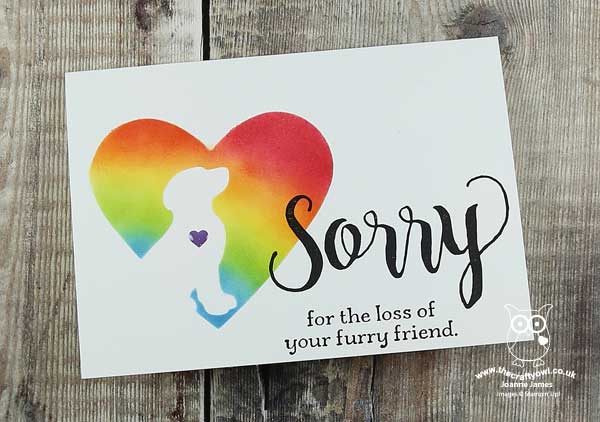
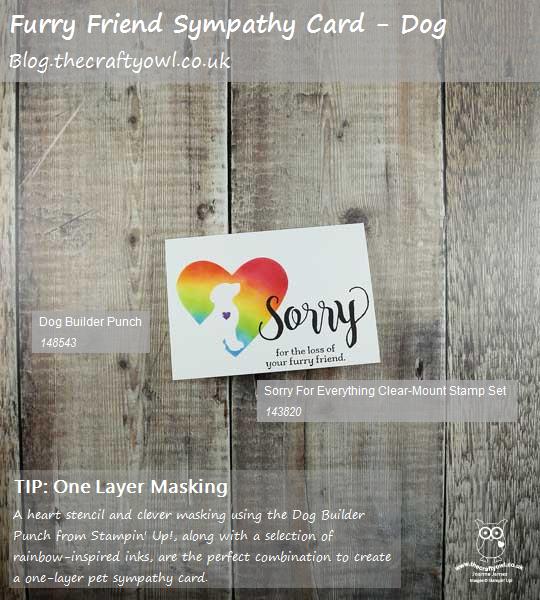
It's something of a happy accident that I am combining each of these in today's card - it just so happened that I had an idea that works for all three - and I have two cards for you! I decided to create a couple of pet sympathy cards; first up, a dog one:
 

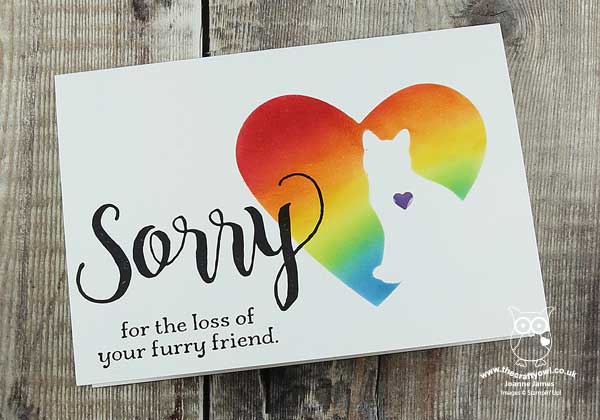
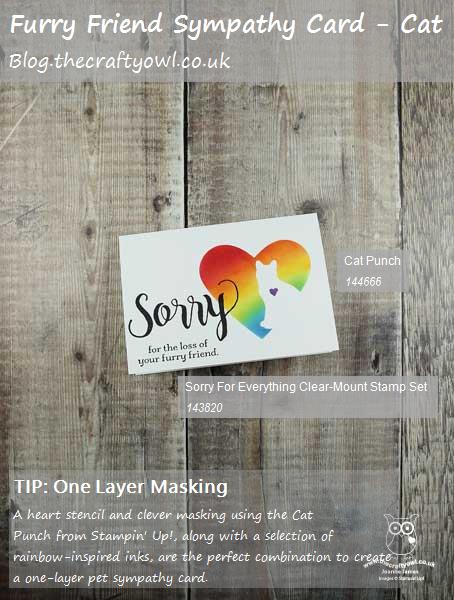
I also created one for a cat lover too that is exactly the same design, just mirrored:
 

Here's the low-down on today's cards:

Sorry For Your Loss - I recently spotted this card on Pinterest and loved the clean lines created by the fun punch art idea and monochromatic colour scheme. It inspired me to think about using a similar idea to create a one-layer card using the same 'Sorry For Everything' stamp set - such a great set where you need a sentiment to take centre stage and useful for lots of different circumstances, including the loss of a furry friend. 

Cats And Dogs - I used a retired Sweet and Sassy Framelit heart, along with a punched cat and dog respectively, to create a mask through which I could sponge my heart. By using a different colour to the sentiment, which I stamped in black, it gives the illusion of another layer and whilst I didn't use the punches directly on my card, the silhouette created by the negative space makes my furbabies easily identifiable. 

Crossing The Rainbow Bridge - My colourful heart whilst perfect for the Fusion rainbow photo was actually inspired by a blog post a couple of week's ago by my Paper Players teamie and committed dog lover Ann Schach. As any of you who follow my blog will know, I am relatively new to the idea of pets having never had one as a child. Ann made this card for a friend of hers that was going through a tough time and she mentioned one of the things her friend was having to deal with was the loss of a pet, which she described as having 'crossed over the Rainbow Bridge'. I thought this was a lovely idea and so tried to incorporate the idea of a rainbow by sponging one into my masked heart, with a little purple heart to accent each pet. I really love the effect - what do you think? I also carried the rainbow theme onto the inside of my card with a set of rainbow footprints around my sentiment, that is courtesy of the new 'Happy Tails' stamp set:
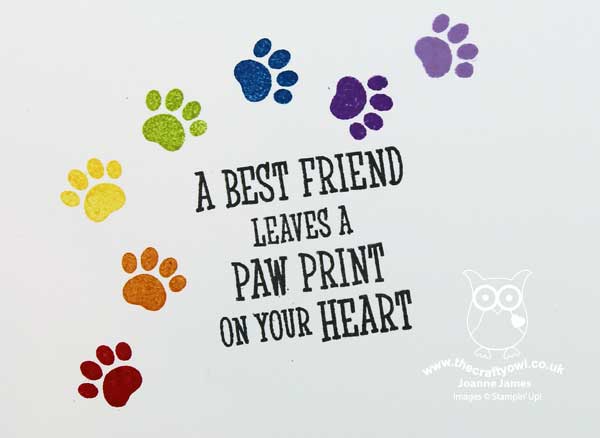
 

A fitting sentiment for this kind of card I think and the rainbow colours are really uplifting. So two cards inspired by others in lots of ways, yet unique to me. Do check out the respective challenges for lots more inspiration.

Here is the visual summary of the key products used on today's project for you to pin for easy reference:


You can see all of my 'How To' summaries on my 'How To - Tips and Techniques' Pinterest board in case you've missed any. 

Enjoy your day and I'll be back tomorrow with another project. Until then, happy stampin'!


Stampin' Up! Supplies Used:

Table built using Product Table Builder by The Crafty Owl - Independent Stampin' Up! Demonstrator.


Sorry For Everything and Hedgehugs - The Perfect Pair

by Joanne James17. September 2018 10:00

This is already my second post today - if you missed my earlier post about the updated clearance rack then you can read all about it here. Now for today's creative post and I'm sharing a card for the current challenge over at CASology where the code word is 'heal':


The cue word can be interpreted in a number of ways; the most obvious one perhaps as 'get well soon', however I decided to go with the theme of forgiveness and healing a relationship rift - take a look:


Here's the low-down on today's card:

I'm Sorry - Ok, so we all make mistakes - no-one is perfect. They aren't intentional otherwise they wouldn't be a mistake, right? The important thing is though, to say sorry. Sometimes we don't even realise the impact our actions have had on the feelings of others until the damage has been done. Apologising is an important part of the cycle of forgiveness that allows a relationship to heal and move forward and the 'Sorry For Everything' stamp set from Stampin' Up! is just perfect for putting it down on paper - this set really does cover everything from get well wishes, to a thinking of you on divorce or relationship breakdown, on the loss of a loved one or pet, job farewell or retirement, a missed birthday or even just a plain old-fashioned 'sorry for that thing I did'. I use it a lot for missed birthdays (yes, i might make a lot of cards but I'm often late at posting!) but like that it offers lots of other options too. 

Embossed Colour - I was chatting with one of my customers recently who was really taken with the new in-colour embossing powders that feature on page 202 of the annual catalogue but had asked me for some ideas on how she could use them - here's a picture of them in case you're wondering what I'm talking about:

In Color 2018–2020 Stampin' Emboss Powder

I don't have these new colours but did have some old coloured embossing powders in my drawer, so thought I'd make a couple of cards to give her a few ideas. I used two different shades of pink to create a two-tone 'sorry', allowing them to mix where they meet, whilst embossing my hedgehog in Early Espresso powder onto Crumb Cake cardstock. You could of course create a similar effect by stamping your images in the respective ink colours and then heat embossing them with clear embossing powder to create a textured shine.

Who Can Resist A Hedgehug? - The front of this clean and simple card is only part of the sentiment - inside I stamped the second part along with another hedgehog:


Isn't this just the perfect pairing of stamp sets - who could resist a hedgehug from this little chap with his floral peace offering?

Here is the visual summary of the key products used on today's project for you to pin for easy reference:


You can see all of my 'How To' summaries on my 'How To - Tips and Techniques' Pinterest board in case you've missed any. 

Enjoy your day. I am off to my craft room - lots to achieve this week! - and I'll be back tomorrow with another project. Until then, happy stampin'!


Stampin' Up! Supplies Used:

Table built using Product Table Builder by The Crafty Owl - Independent Stampin' Up! Demonstrator.

Sorry For Everything And Confessions Of A Cardmaker

by Joanne James14. June 2017 20:00

Wednesday already - where is the week going?! I'm late posting my card today as whilst I had it made, I am behind with photographing and have had a busy day today getting ready for a special birthday in the James household - more on that tomorrow! Today I'm sharing a card that I made for the sketch challenge over at TGIF Challengestake a look:


This is one of those layouts that can be used in so many ways - I decided that it was the perfect sketch for me to send a message - take a look:


Here's the low-down on today's card:

Sorry For... Everything - Today's sketch is perfect for a split sentiment, especially one that has an extra-large element such as the 'sorry' here. So here's the thing: I might be a cardmaker, but I am one of the world's worst at getting cards sent on time. It's not for a shortage of cards - I always have lots! - rather, it's because I never have the 'right' card and like to make something specifically with the recipient in mind. Trouble is, my cards then often arrive late or the special card never gets made and a belated card is in order. So this stamp set was made for me! I love the large 'sorry' greeting and then a whole range of additional sentiments that work on a wide range of cards when an apology or sympathy is required. I stamped my 'Sorry' in Cherry Cobbler, then inked up the second part of the greeting with my Cherry Cobbler and Pacific Point Stampin' Write markers and stamped it onto my Blushing Bride Banner. I also added the 'forgive me?' sentiment to the inside, that you can see above at the start of my post.

Birthday Memories - I chose the bold red and white birthday patterned paper from the Birthday Memories designer series paper pack for the background to my card. This paper is bright and has a busy pattern so is the perfect background for my white sentiment panel. 

Make Framelits Your Friend - I added a little birthday present instead of a bow to finish my card - take a close look at my and you'll see it's not stamped though. Fussy cut? No - I used my Birthday Friends Framelits to crop this adorable gift from a sheet of Birthday Memories designer series paper. I love how a number of the framelits cut out not only the images from the 'Birthday Delivery' stamp set but the painted image from the designer series paper. This is the ultimate in co-ordinating suites!

Here is the visual summary of the key products used on today's project for you to pin for easy reference:


You can see all of my 'How To' summaries on my 'How To - Tips and Techniques' Pinterest board in case you've missed any. 

That's all from me - I'll be back tomorrow with another project. Until then, happy stampin'!


Stampin' Up! Supplies Used:

Table built using Product Table Builder by The Crafty Owl - Independent Stampin' Up! Demonstrator.

Mini Catalogue

BROWSE THE CATALOGUE

The mini catalogue is now live! Read and download your copy here.

Shop Online

Access my online shop 24 x 7, 365 days of the year:

Current April hostess code:

VDKNV7BH

Shop Online

Join My Team

It's always a great time to join Stampin’ Up! New team members can get £130 worth of products for only £99 + free business supplies + free shipping + all the fun being a part of Stampin’ Up! Stampin' Up! has something for everyone: join my growing team and benefit from my support to enjoy Stampin' Up! however you choose.

If you're interested, call me for a chat to understand how I can help you realise your goals. Alternatively, if you have already decided to sign up and you just can't wait, please click here for the link to the online form where you can sign up and order your starter kit right away! 

Latest Kit!

Stampin Cut and Emboss

The Rock Legend Kit has all you need to make 8 cards with coordinating envelopes. Along with the new Panda Friends Kit, both are available from January 4th for just £14 each - get yours here!

2023-24 Annual Catalogue

BROWSE THE CATALOGUE

Click on the catalogue for a full list of current SU! supplies - if you would like to order any of the items featured, please drop me a line at [email protected] or give me a call on 07773 421446 - I'd be happy to help.

New Online Exclusives

There are new products available exclusively in the online store from 5 March - check them out here.

About Me

Hi I'm Joanne and live in Northampton and when I'm not looking after my husband and two beautiful children, am an avid crafter with a passion for all things Stampin' Up!

I must confess that I have never been a big rubber stamper - until I discovered Stampin' Up! that is. I love the fact that I can get such great results with co-ordinating stamps, inks, papers and punches - the possibilities are endless! Join me on my stamping journey as I share the things I love and be inspired to create amazing things yourself!

Follow Me

Monthly Newsletter

Box Builder

Click the button above to use Box Buster to create your custom box design using the Envelope Punch Board!

Kits Collection Now Available!

Stampin Cut and Emboss

The new Kits Collection from Stampin' Up! is now available!

Click here to see the current kits available and order yours online today.

I Design For


Stampin' Up Stuff

This is my personal blog and is not endorsed by Stampin’ Up! I hope you find it a plentiful source of ideas and personal inspiration but please don't copy my designs for contest submission or use for classes, publication or sale without express permission.