Merry Moments Plaid CAS Christmas Card

by Joanne James3. May 2016 13:32

Everyone is back to school and work today so the house is quiet once more. I do love a long weekend, but if we had them all the time I guess we wouldn't appreciate them! Now don't worry, I've not gone mad - it's true, I have made a Christmas card today!! Today's card is for a few challenges and Christmas just seemed a good way to go!


The code word at Addicted to CAS is 'Plaid' which always makes me think of Christmas and the sketch over at CAS(E) This Sketch reminded me of ribbon around a gift and I knew it would be a perfect way to feature designer paper on my card yet still allow for lots of white space to suit the Less Is More challenge this week. So that is how Christmas was where I ended up: 

So here's the low-down on today's card:

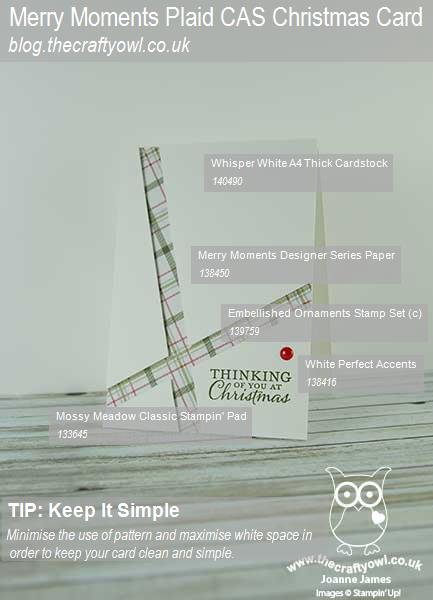
Merry Moments - There are two plaid patterns in the Merry Moments designer series paper collection: one is predominantly Mossy Meadow in colour with a white plaid pattern, the other is the one I used here with a white base and a red, grey and green plaid. I chose this one because although it has more colours in the mix, the white base makes it very light and so it is the perfect base for my CAS card. I aligned the horizontal diagonal of my paper with the open cut space of the sketch, as opposed to the vertical. This creates more cohesion and leads the eye to the sentiment. 

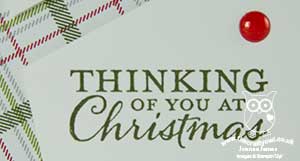
A Christmas Sentiment - I chose to use a sentiment from the Embellished Ornaments stamp set for my card. This is a Christmas set that is on carryover and has two of my favourite festive sentiments. I stamped it in Mossy Meadow and added a Perfect Accent, coloured red with my Sharpie, for extra festive feel.

White Space - The sketch layout I've used today really lends itself to 'white space'. I've talked about what makes a clean and simple card before and how to use 'white space' - you can read more about that here. Clean and simple designs do not always have to contain truly 'white' space, but they rarely use pattern in large quantities.

So Christmas as Summer approaches, yet my card uses products that are available in the annual catalogue all year round, so if being prepared is your thing you might want to join me and make one too!

Here's the visual summary of the key supplies used to make this card for you to save for future reference:


You can see all of my 'How To' summaries on my 'How To - Tips and Techniques' Pinterest board in case you've missed any. 

That's all from me today; a basket of ironing awaits! I'll be back tomorrow with another project; until then, happy stampin'!


Stampin' Up! Supplies Used: 

Table built using Product Table Builder by The Crafty Owl - Independent Stampin' Up! Demonstrator.

Hearth and Home Merry Moments Christmas Shaker Card

by Joanne James20. November 2015 21:10

Today I'm sharing another of the cards from this month's technique class - a Christmas shaker card using the 'Happy Scenes' stamp set and some of the paper from the Merry Moments DSP Stack for wallpaper:

I stamped the scene in Mossy Meadow, sponged in some sky and stamped some snow flakes in Soft Sky, then using my white gel pen I coloured in the snowflakes and the settled snow on the trees - it's amazing what a difference this makes to the finished scene, it adds a subtle yet definite dimension. The shaker is filled with some clear glass glitter and the window itself finished with a Cherry Cobbler bow, made with the Wonderful Wreath framelits. There's one other cute feature of this card - did you see the dado rail? I created it from the edge of a second window, trimming along the crease line and snipping in half. I think it's a nice way to cover the join of the designer series papers, which are incidentally cut from a single sheet and reversed to show both sides.

That's all from me today; back tomorrow with another project. until then, happy stampin'!


Stampin' Up! Supplies Used:

Table built using Product Table Builder by The Crafty Owl - Independent Stampin' Up! Demonstrator.


Tis The Season Christmas Snowmen

by Joanne James12. November 2015 08:05

Today it's time for a new challenge over at Create With Connie and Mary and this week we have a great sketch for you:


I decided that each of the flowers in teh sketch would become snowmen on my card today and dug out my 'Snow Place' stamp set and Merry Moments DSP stack and set to work:


I used the colours of the Merry Moments DSP for the various elements of my card and created a snowy background by embossing my Whisper White layer with the 'Softly Falling' embossing folder. I die cut my little snowmen and their accessories with co-ordinating Snow Friends framelits dies - this makes life so easy, no fussy cutting required! My sentiment is from the 'Peaceful Pines' set - it fitted perfectly in my layered circle.

Do visit the other Design Team members to see how they interpreted this week's sketch; there's lots of inspiration over on their blogs too!

Enjoy your day and I'll be back tomorrow with another project; until then, happy stampin'!


Stampin' Up! Supplies Used:

  • Snow Place Photopolymer Bundle
  • Merry Moments Designer Series Paper Stack
  • Basic Black Archival Stampin’ Pad
  • Whisper White A4 Cardstock
  • Softly Falling Textured Impressions Embossing Folder
  • Peaceful Pines Photopolymer Stamp Set
  • Old Olive Classic Stampin' Pad
  • Old Olive A4 Cardstock
  • Real Red Classic Stampin' Pad
  • Real Red A4 Cardstock
  • Brights Stampin' Write Markers


Vintage Leaves Holly Christmas Card

by Joanne James18. October 2015 10:00

It's Sunday and time for a new challenge over at The Paper Players! This week it is the turn of the multi-talented Nance, who not only produces fabulous cards but also designs all our challenge badges and does so much to keep our challenge blog running smoothly - thank you Nance! This week we have a clean and simple challenge for you:


I considered going with something autumnal for my card today, but in truth I've had this idea for a card in my head for a while and decided that since it fits today's brief it was about time I got it down on paper - and it's a Christmas card! Take a look:

I've been using my Vintage Leaves set a lot this week and I'm not sure whether it is meant to be or not, but the large spiky leaf definitely reminds me of holly, so I decided to use it on a Christmas card. I used Mossy Meadow for my card base and adhered a strip of the gingham patterned paper from the Merry Moments DSP stack down the left hand side. My raised panel is extra thick Whisper White cardstock, out of which I cut the spiky leaf shape using the co-ordinating Leaflets Framelits Dies - another one of the great 15% off bundles when you purchase both items together from the current catalogue - and stamped the leaf in Mossy Meadow directly onto the Mossy Meadow panel below, so that it could be seen through the aperture. I then stamped another leaf on a separate piece of Mossy Meadow and cut this out with the same framelit too, positioning it at an angle over the first one and overhanging the edge of the white panel. My 'Joy' sentiment is from the Holly Jolly Greetings set and stamped in Real Red. To finish, I added a trio of Cherry Cobbler Home For Christmas enamel dots for my berries - I love these, they add the perfect finishing touch to my card. So what do you think - do these leaves work as holly? Either way, I am pleased with the finished result.

Before you reach for your ink and papers, check out what our amazing team has created to inspire you this week:

The Paper Players Design Team
Anne Marie Hile - on leave
 
 
Here's a quick recap of our challenge rules:
 
1.  Create a new paper project
2.  Upload your creation to your blog with a link back to us and provide a direct link to the post featuring your challenge submission.
3.  Please link your card to no more than three challenges, TOTAL.
4.  Have FUN! 
 

I look forward to seeing your CAS creations this week.

I'm having a change of sport today as Rebecca is playing in her first club hockey tournament of the season, so I'm off to cheer her team on and then we'll be home for a late lunch. Fortunately for us this weekend marks the start of our school half-term holiday, so we have a lovely two week break from our routine of homework and early mornings to look forward to, which is especially welcome given how cold and dark it has been this week  - far from jumping out of bed in the morning I am more inclined to snuggle under the duvet and hibernate! Enjoy your Sunday however you are choosing to spend it.

I'll be back tomorrow with another project; until then, happy stampin'!


Stampin' Up! Supplies Used:

Table built using Product Table Builder by The Crafty Owl - Independent Stampin' Up! Demonstrator.


Triple Reindeer Clip Square Christmas Card

by Joanne James2. October 2015 07:50

Happy Friday everyone - there is always something psychologically good about the end of the working week! Today I have a fun Christmas card for you using this week's Retroketches inspiration for my layout:

The minute I saw this sketch I knew it offered the perfect opportunity to use more of the lovely reindeer paper clips on my card - take a look:

I used a 6" square base of Mossy Meadow card stock with mats in Real Red and used a piece of the festive gingham paper from the Merry Moments DSP stack for the feature DSP layer. I adhered three reindeer paper clips to my cardfront as per the sketch and for the sentiment used one from the 'A Little Something' set; this set co-ordinates with and is available as a bundle with the Square Pillow Box Thinlits Dies - the three-part sentiment was the perfect fit. A sliver of retired Old Olive pleated ribbon completes my card. I just love these reindeer paper clips - so versatile and such a fun festive accessory!

That's all from me today; we have a busy weekend with a school open day and a birthday in the house, in addition to the usual weekend chaos of homework and sport. Wish me luck! 

Back tomorrow with another project; until then, happy stampin'!


Stampin' Up! Supplies Used:

Table built using Product Table Builder by The Crafty Owl - Independent Stampin' Up! Demonstrator.


Merry Moments Jolly Reindeer Paper Clip Christmas Card

by Joanne James27. September 2015 10:00

It's Sunday and you know what that means: time for a new challenge over at The Paper Players! This week it's the turn of my talented friend the lovely Claire to host and she has a great sketch challenge for you:


Claire loves layers and this sketch certainly has lots! I decided to go with a showcase of Merry Moments Christmas DSP on mine, although that wasn't where I started out with this card - I saw that button and just knew it was the perfect opportunity to showcase one of my reindeer paper clips! Take a look:


I used two of the Merry Moments DSP patterns along with a Real Red spotted paper (this one is retired but very similar to the pattern in the Brights DSP stack), matted on either Chrry Cobbler or Mossy Meadow. I added a band and scalloped edge in Real Red, but the stars of today's card are most definitely that 'jolly' sentiment cut from red foil (I built this up on 3 layers of cardstock to give added depth) and that oh-so-cute reindeer clip, complete with Cherry Cobbler enamel dot - well, what's a Rudolf without a red nose?!

A no-stamp card that uses layers and embellishment for pattern and interest - perfect for the festive season. As for the reindeer paper clip - how cute!

Before you reach for your ink and papers, check out what our amazing team has created to inspire you this week:

The Paper Players Design Team
Anne Marie Hile - on leave
 
 
Here's a quick recap of our challenge rules:
 
1.  Create a new paper project
2.  Upload your creation to your blog with a link back to us and provide a direct link to the post featuring your challenge submission.
3.  Please link your card to no more than three challenges, TOTAL.
4.  Have FUN! 


I look forward to seeing how you interpret our sketch in your card designs. I'm off for a morning of basketball and hoping to spend a little time tidying up in the garden this afternoon, along with some baking to make use of some of our home grown raspberries - yum! 

Back tomorrow with another project; until then, happy stampin'!


Stampin' Up! Supplies Used:

Table built using Product Table Builder by The Crafty Owl - Independent Stampin' Up! Demonstrator.


Poinsettia Festive Flower Punch Christmas Card

by Joanne James21. September 2015 21:40

I've been busy today with the final preparations for the first of my all day Christmas Stamp-a-Stacks later this week but today's card that I'm going to share is the final one from last month's technique class using the 'Reason For The Season' stamp set:

For this card we used a base of Real Red and decorated the front with a piece of Merry Moments DSP, then cut away a section using a 2" circle punch, so that it would fit around a 3D poinsettia flower made from Real Red card stock and adhered to the inside to the card. We used two layers of petals and a trio of leaves for our flower and wrapped a few loops of fine gold metallic thread behind it. This was a great card to get everyone used to building the 3D flower using the punch, having stamped the patterns onto the petals and leaves beforehand. These flowers also look great on festive packaging and really make the most of this versatile stamp set. This is one of the many great value bundles in the seasonal catalogue - with 15% off when you purchase the bundle, it represents a great saving. If you would like to see this stamp and punch combo in action (and a refresher for the ladies that attended my class!), here's a great video from Stampin' Up! that gives you the lowdown:

I hope you enjoyed that video. Don't forget, if you live in or around Northampton and would like more information on attending any of my classes, you can find full details here or just get in touch to confirm availability. Back tomorrow with another project; until then, happy stampin'!


Stampin' Up! Supplies Used:

Table built using Product Table Builder by The Crafty Owl - Independent Stampin' Up! Demonstrator.


Lots Of Joy Christmas Card

by Joanne James8. August 2015 22:11

I'm here with a quick post featuring the next Christmas card I promised featuring the Lots of Joy stamp set that can be found in the annual catalogue. I used this week's sketch over at The Paper Craft Crew as my starting point for this card:

PCCCS105-159-018-2

Again I combined the stamp set with some of the Merry Moments DSP, this time choosing the lovely plaid pattern that echoes the pattern of the tree:

I used the fun postage stamp-style stamp for two of my three squares down the side, so easily punched out with the 1" square punch, with the final one featuring the second part of my sentiment - I selectively inked the sentiment twice and then banner-cut the other piece and layered it underneath. Lovely traditional Christmas colours on this card and I think the plaid gives it quite a modern feel.

That's all from me today - come back tomorrow when we will have a new challenge over at The Paper Players and the lovely Claire will be the hostess. Until then, happy stampin'!


Stampin' Up! Supplies Used:

Table built using Product Table Builder by The Crafty Owl - Independent Stampin' Up! Demonstrator.


Lots of Joy Bauble Christmas Card

by Joanne James6. August 2015 08:05

Today it's time for a new challenge over at Create With Connie and Mary and this week we have a great sketch challenge for you:

Having placed my pre-order for items from the forthcoming Autumn-Winter seasonal catalogue this week, I am totally in the Christmas groove. My new goodies haven't arrived yet, but luckily for me the annual catalogue now has a Christmas section again, so that's where I went for some supplies for today's card. Here's my card: 


I used the new set 'Lots of Joy' and combined this with the lovely 'Merry Moments' DSP. I took the three diagonal stripes as inspiration for my card rather than literally - this paper has a lovely stripe pattern of varying thicknesses, so I think it works quite well. I stamped my bauble twice, once in Real Red and once in Smoky Slate, then cut the bauble top from the Smoky Slate one and adhered it behind my red bauble, before adding a silver ribbon bow. I stamped my sentiment in Real Red, then decided to paper-piece the little Christmas tree over the top in Old Olive - here's a close up photo so that you can see it in more detail:

This was quite easy to do - I simply stamped the sentiment again on a scrap of green cardstock, snipped out the tree and reversed it before adhering to my card. The pencil-thin stripe in the DSP is Old Olive and this was a great way to bring a little green into my predominantly red and grey coloured card. I hope you like today's card - I have another Christmas card using the same set to share with you tomorrow! Do visit the other Design Team members to see how they used this week's sketch; there's lots of inspiration over on their blogs too!

Enjoy your day and I'll be back tomorrow with another Christmas project; until then, happy stampin'!


Stampin' Up! Supplies Used:

  • Lots Of Joy Wood-Mount Stamp Set
  • Merry Moments Designer Series Paper
  • 1" Circle Punch
  • Silver 1/8" Ribbon
  • Real Red Classic Stampin' Pad
  • Real Red A4 Cardstock
  • Smoky Slate Classic Stampin' Pad
  • Smoky Slate A4 Cardstock
  • Whisper White A4 Cardstock
  • Old Olive A4 Cardstock


Tags: , , , , , , ,

Cards | Shop Online | Stamping

It's Most Definitely Not Beginning To Feel A Lot Like Christmas!

by Joanne James24. July 2015 20:38

So as I type this sat in blisteringly hot temperatures (I'm not complaining - the sun is heavenly!) I can't quite believe that today I'm going to share a Christmas card with you. Yes, that's right - a Christmas card!! Today I've been able to get my first look at the new Autumn-Winter seasonal catalogue that will be available to customers September 1st - and all I can say is, my wish list is long!!! I will be sharing more on that in coming weeks once our pre-order period starts, however right now if you can't wait for your copy, then get in touch with me and lets chat about becoming a demonstrator - I would love you to join the 'ooos' and 'aaahs' that I'm having with my current team members as we drool over the catalogue sneak-peek together!

Meanwhile, you may have noticed that Stampin' Up! has reintroduced a permanent line of Christmas stamps and papers in our annual catalogue too - great news for those of us who like to prepare for Christmas all year round! - and some of the stamps included are some favourites from last Christmas, such as the one that features on today's card: Wondrous Wreath. I made this card at our recent team quarterly training session, which was all about making use of what is already avialable to get a jump start on preparing for the festive season. Here's my card:

This card was designed by Monica Gale and is similar in concept to one I designed last season which you can see here. This one is easier to recreate and uses the Woodgrain embossing folder to create the wooden effect on the door. It also features some other products that can now be found in the annual catalogue that are perfect for festive projects: the Bow Builder Punch, the Merry Moments DSP and my favourite Expressions Natural Elements.

That's all the festive fun I have for today - I'm off to get a cooling glass of Sangria after all that typing! Back tomorrow with another project; until then, happy stampin'!


Stampin' Up! Supplies Used:

Table built using Product Table Builder by The Crafty Owl - Independent Stampin' Up! Demonstrator.

Mini Catalogue

BROWSE THE CATALOGUE

The mini catalogue is now live! Read and download your copy here.

Shop Online

Access my online shop 24 x 7, 365 days of the year:

Current April hostess code:

VDKNV7BH

Shop Online

Join My Team

It's always a great time to join Stampin’ Up! New team members can get £130 worth of products for only £99 + free business supplies + free shipping + all the fun being a part of Stampin’ Up! Stampin' Up! has something for everyone: join my growing team and benefit from my support to enjoy Stampin' Up! however you choose.

If you're interested, call me for a chat to understand how I can help you realise your goals. Alternatively, if you have already decided to sign up and you just can't wait, please click here for the link to the online form where you can sign up and order your starter kit right away! 

Latest Kit!

Stampin Cut and Emboss

The Rock Legend Kit has all you need to make 8 cards with coordinating envelopes. Along with the new Panda Friends Kit, both are available from January 4th for just £14 each - get yours here!

2023-24 Annual Catalogue

BROWSE THE CATALOGUE

Click on the catalogue for a full list of current SU! supplies - if you would like to order any of the items featured, please drop me a line at [email protected] or give me a call on 07773 421446 - I'd be happy to help.

New Online Exclusives

There are new products available exclusively in the online store from 5 March - check them out here.

About Me

Hi I'm Joanne and live in Northampton and when I'm not looking after my husband and two beautiful children, am an avid crafter with a passion for all things Stampin' Up!

I must confess that I have never been a big rubber stamper - until I discovered Stampin' Up! that is. I love the fact that I can get such great results with co-ordinating stamps, inks, papers and punches - the possibilities are endless! Join me on my stamping journey as I share the things I love and be inspired to create amazing things yourself!

Follow Me

Monthly Newsletter

Box Builder

Click the button above to use Box Buster to create your custom box design using the Envelope Punch Board!

Kits Collection Now Available!

Stampin Cut and Emboss

The new Kits Collection from Stampin' Up! is now available!

Click here to see the current kits available and order yours online today.

I Design For


Stampin' Up Stuff

This is my personal blog and is not endorsed by Stampin’ Up! I hope you find it a plentiful source of ideas and personal inspiration but please don't copy my designs for contest submission or use for classes, publication or sale without express permission.