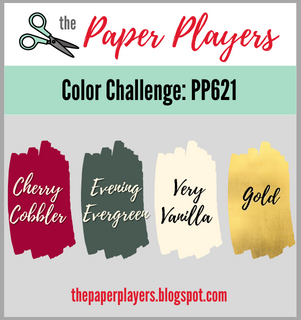
Today it's Sunday and time for this week's new challenge over at The Paper Players! It's the turn of the fabulous Ann to host this week and she has a festive colour challenge for you to work with:
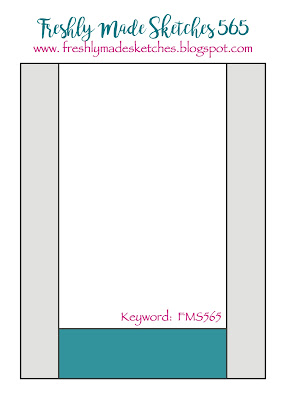
I still had my Lights Aglow designer paper out on my desk having made yesterday's cards, so I grabbed another of the patterns in the set and this week's layout over at Freshly Made Sketches and set to work. This is what I came up with:
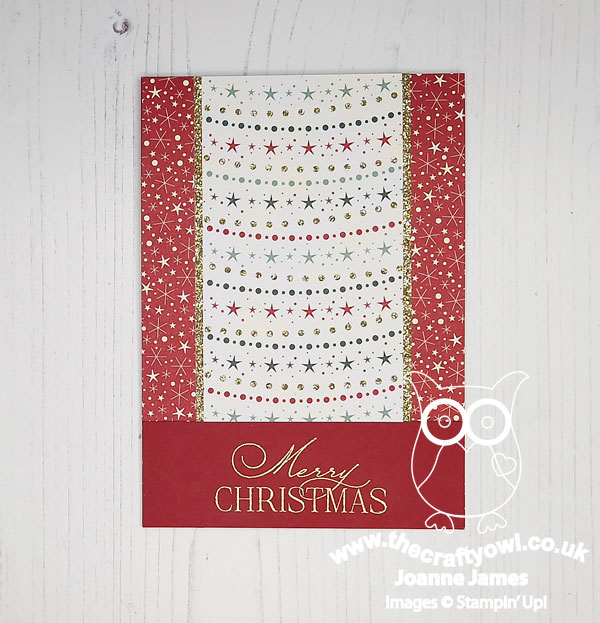
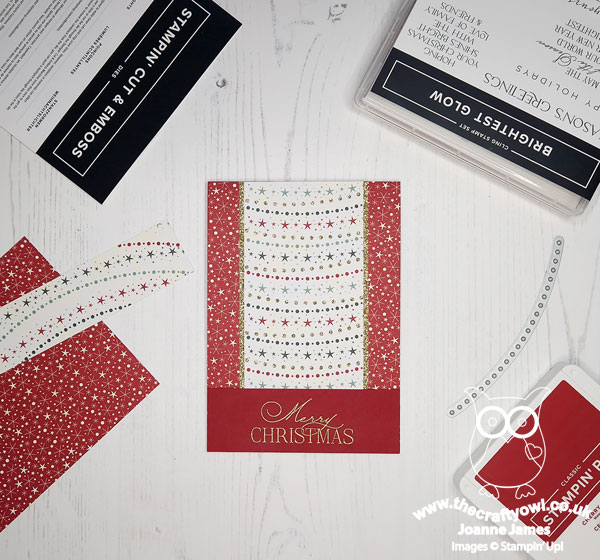
Here's the low-down on today's card:
I used a Cherry Cobbler card base, then adhered a sheet of Lights Aglow designer paper patterned with Very Vanilla stars to my card base. I then added a central panel of gold glimmer paper, and allowing for a thin vertical border, adhered another piece of paper from the pack, strewn with festive garlands, to which I'd added some diecut banners using one of the Twinkling Lights dies so that the gold glimmer paper showed through from below:
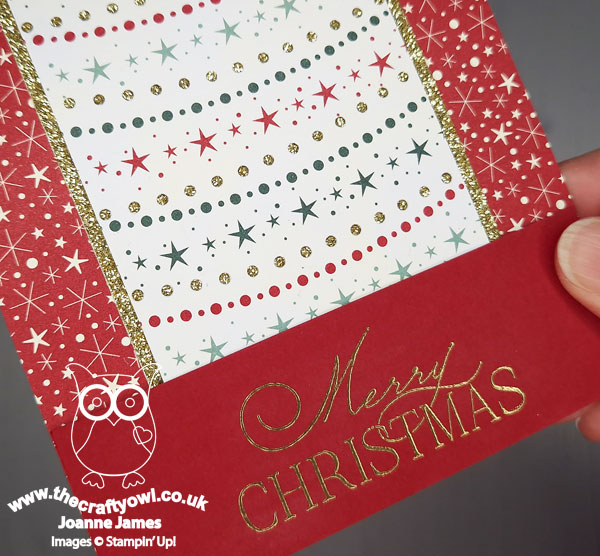
I did cut the piece of DSP that I used for the central section from the centre of the sheet, as I wanted the curves of the garlands to be centred, which is a little frivolous, but I know I will use the remnants on other projects as there is a beautiful gold embossed snowflake design on the reverse too.
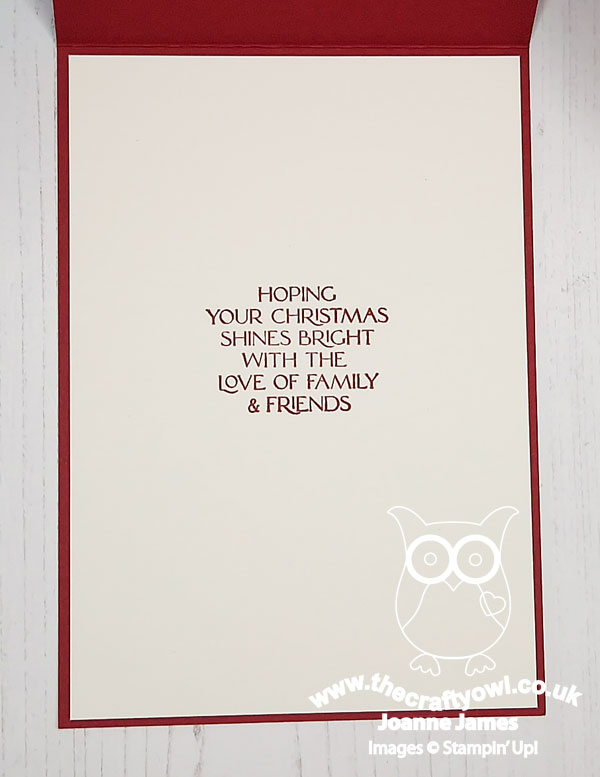
I added a final panel of Cherry Cobbler with a sentiment heat embossed in gold to the bottom of the panel to complete the front of my card. To finish I added an extra sentiment from the 'Brightest Glow' stamp set to the inside of my card:
This is a great card that didn't take too long to create, which was especially good as I have been rather pushed for creative time this week.
Here is the visual summary of the key products used on today's project for you to pin for easy reference:
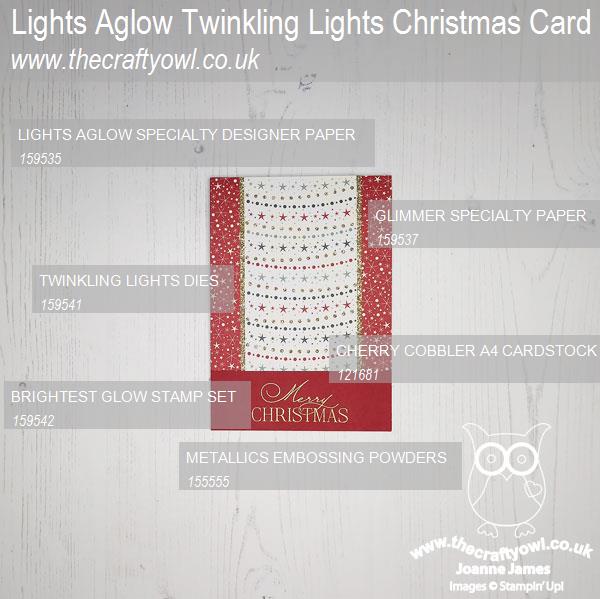
You can see all of my Product and 'How To' summaries on my 'How To - Tips and Techniques' Pinterest board in case you've missed any.
Before you reach for your ink and papers, check out what our amazing team has created to inspire you this week:
The Paper Players Design Team
Here's a quick recap of our challenge rules:
1. Create a new paper project
2. Upload your creation to your blog with a link back to us and provide a direct link to the post featuring your challenge submission.
3. Please link your card to no more than four challenges, TOTAL.
4. Have FUN!
Enjoy your day; today is the day that we will be decorating the James household inside and out for Christmas, so we are all looking forward to that. I am also going to be doing some crafting of a different kind, as I have a festive-themed fancy dress outfit to make for Rebecca to wear this week - a Sixth Form festive tradition, more on that later in the week! I'll be back tomorrow with another project. Until then, happy stampin'!
Stampin' Up! Supplies Used: