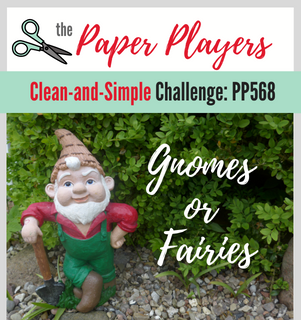
Today it's Sunday and time for this week's new challenge over at The Paper Players! It's the turn of the fabulous Laurie to host this week and she has a fun Clean and Simple challenge for you to work with:
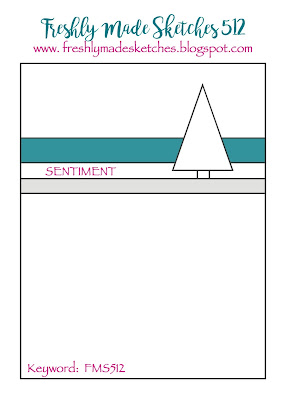

I couldn't resist another crack at Kim's fabulous layout over at Freshly Made Sketches this week and paired with the colours over at Color Dare (I added Cherry Cobbler red as my fourth colour) for today's card - take a look:
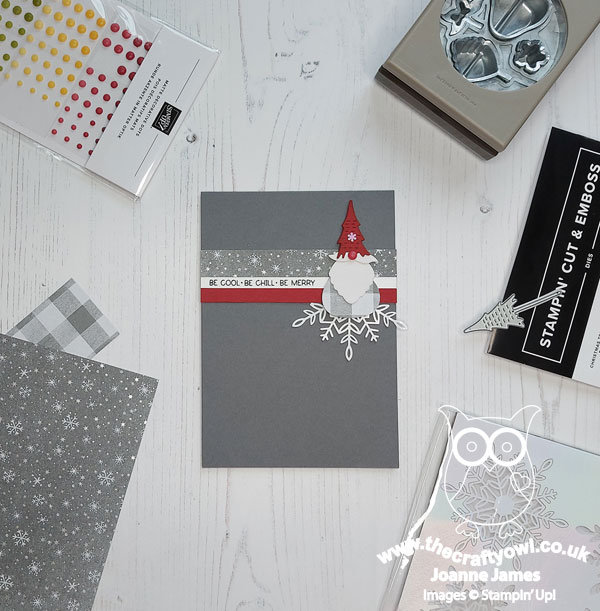
Here's the low-down on today's card:
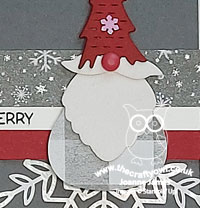
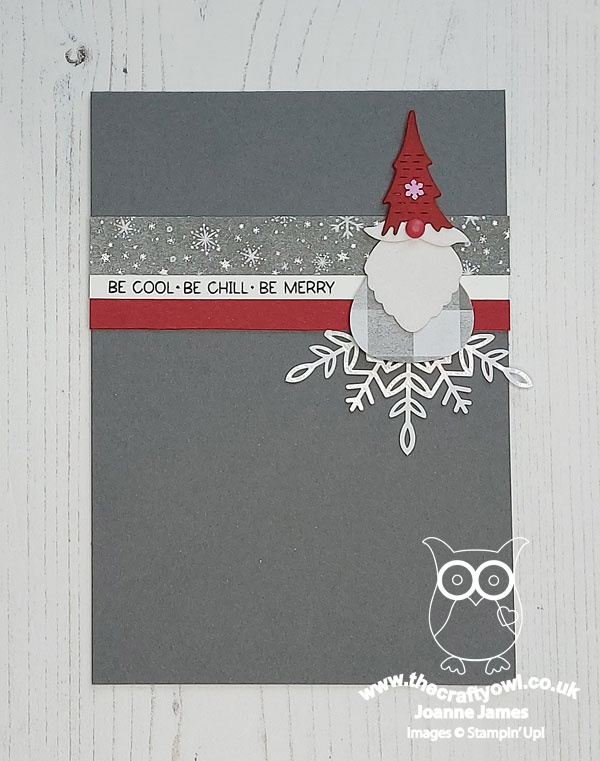
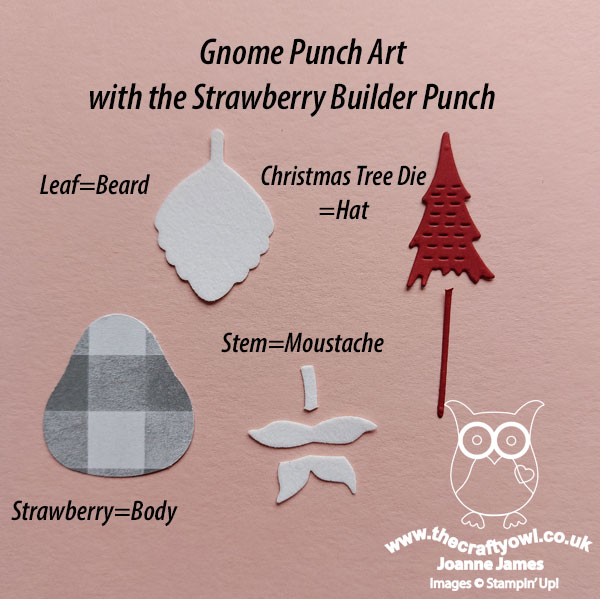
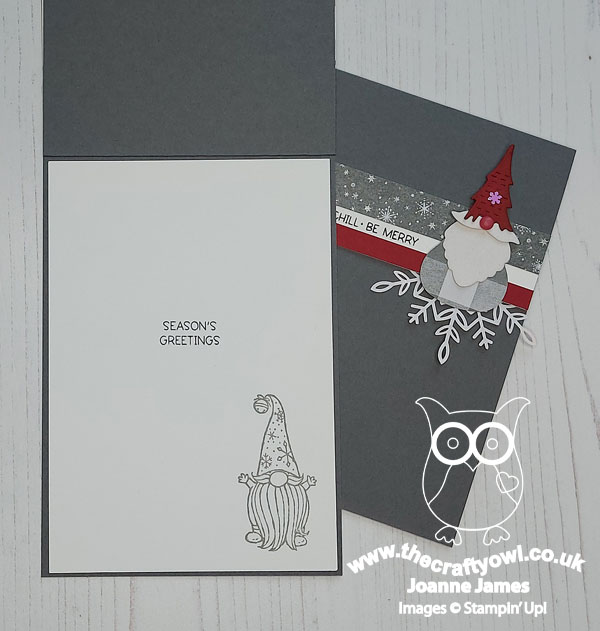
I started out planning today's card with some trepidation; whilst I still have my retired 'Gnome for the Holidays' stamp set, I have no other current gnome stamp sets. I decided though that I would rise to the challenge and embark on trying to create one using some current supplies to fashion some gnome punch art. A quick perusal of Pinterest, I chose a cute cuddly gnome to base my design on, grabbed some current supplies and tools and set to work! I used the largest of the skinny Christmas trees from the Christmas Tree Dies and my Strawberry Builder Punch to make my gnome. I used some offcuts of Peaceful Place designer paper for my gnome body and the top horizontal strip above my sentiment, along with some Snowy White Velvet Paper for his beard and moustache for some subtle texture and a matt dot for his nose. A piece of snowflake behind and a tiny one on his hat, along with a sentiment from 'Penguin Place' complete my clean and simple gnome card:

I created a basic crib sheet so that you can see the main elements of my gnome and how I trimmed them, in case you fancy having a go at making one yourself - feel free to save this for future use:
I based the design of my punch art gnome on one of the ones in the retired 'Gnome For The Holidays' stamp set, which I stamped on the inside of my card for added decoration:
As you can see, I decided I liked this card so much I made another - I think these little gnomes are rather cute, even if I say so myself!
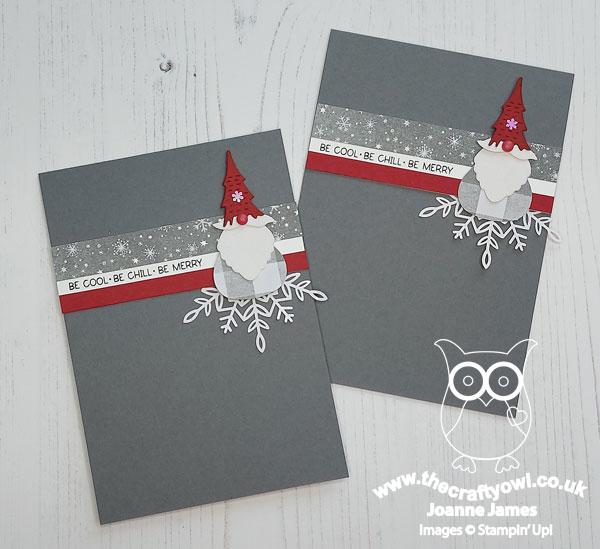
I think I did a pretty good job of meeting the 'clean and simple' brief too - remember in addition to featuring a gnome (or elf, or fairy!) on your card it should also be clean and simple:
- minimal layers
- little/no embellishments
- lots of clean white space (no pattern)
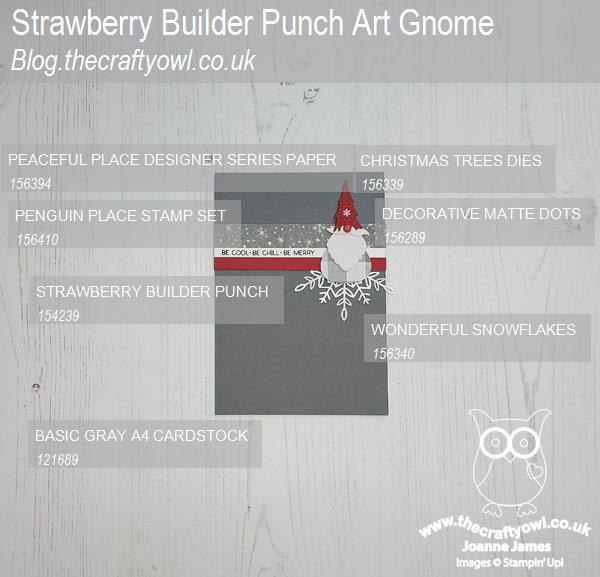
Here is the visual summary of the key products used on today's project for you to pin for easy reference:
You can see all of my Product and 'How To' summaries on my 'How To - Tips and Techniques' Pinterest board in case you've missed any.
Before you reach for your ink and papers, check out what our amazing team has created to inspire you this week:
The Paper Players Design Team
Here's a quick recap of our challenge rules:
1. Create a new paper project
2. Upload your creation to your blog with a link back to us and provide a direct link to the post featuring your challenge submission.
3. Please link your card to no more than four challenges, TOTAL.
4. Have FUN!
You can see all of my 'How To' summaries on my 'How To - Tips and Techniques' Pinterest board in case you've missed any.
Enjoy your day; mine is shaping up to be a rather uneventful one - here's hoping anyway! I'll be back tomorrow with another project. Until then, happy stampin'!
Stampin' Up! Supplies Used:
Edit: This card was a WINNER! Kim chose me as her Queen of Clean for FMS512 - woohoo!