Happy Monday everyone! I have a couple of love-themed cards to share today for the challenges over at CASology, Just Add Ink and Freshly Made Sketches.


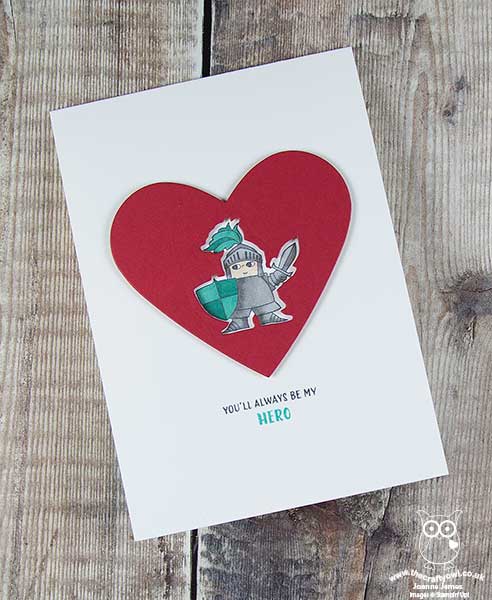
The first one is for CASology and Just Add Ink - when I think 'swoon', I immediately think of a knight in shining armour and the romance that goes with it! Here's mine - take a look:
Here's the low-down on the first of today's cards:
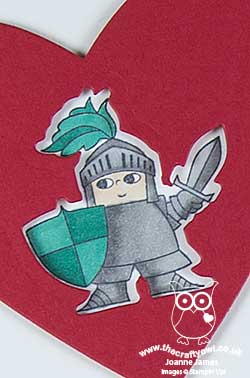
A Magical Knight - I just love the Magical Day stamp set: knights, dragons, mermaids, wizards and a unicorn - what's not to love? I simply stamped my knight in Memento Black onto an extra thick white cardstock base and coloured him in with my Stampin' Blends alcohol markers.
An Inset Diecut - To add interest to my design, I decided to frame him with a Real Red heart cut with my Sweet and Sassy Framelits. I cut my heart out first, then cut the aperture of the knight's outline using the framelit of his outline from the Magical Mates Framelits set - I then popped my heart up on dimensionals around my stamped knight.
An Everyday Hero - My sentiment is from the retired stamp set from last year 'Everyday Hero' - perfect for my card! If you don't have this set, you could always recreate the sentiment using the Labeler Alphabet, which would have been my next best 'go to' - no sentiment is out of reach with this one.
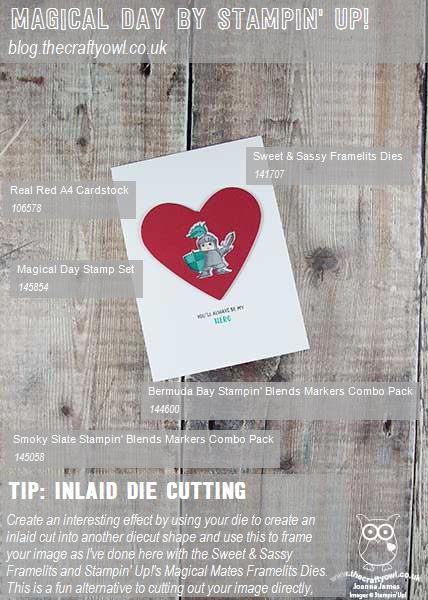
Here is the visual summary of the key products used on today's project for you to pin for easy reference:
You can see all of my 'How To' summaries on my 'How To - Tips and Techniques' Pinterest board in case you've missed any.
Stampin' Up! Supplies Used:
My second card today is for Freshly Made Sketches:
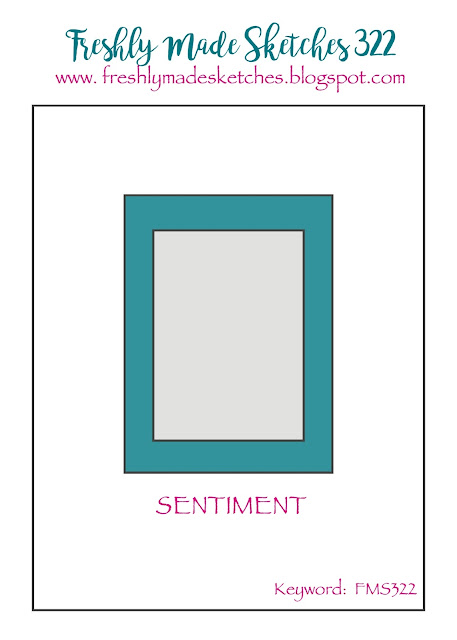
I love a good sketch and I decided this one would be perfect to highlight an annual catalogue set I haven't used in ages - take a look:
Here's the low-down on the second of my cards today:
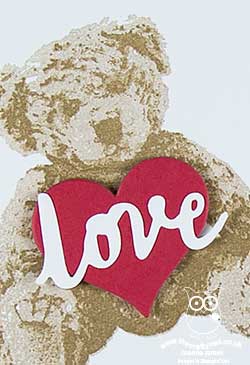
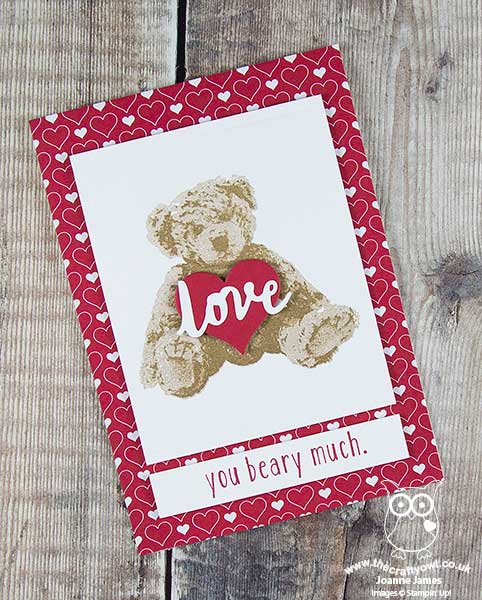
A Baby Bear Valentine - I've only used Baby Bear previously to make new baby cards and whilst I was browsing my catalogue for inspiration remembered he had a sentiment that is perfect for Valentine's Day or simply to send a card full of love too. 'Love you beary much' - both punny and sweet! I stamped my bear in Crumb Cake and Soft Suede for a traditional teddy look.
A Split Sentiment - Whilst my sentiment across the bottom as per the sketch comes from the Baby Bear stamp set, I creatively masked it to omit the word 'Love' as I had other plans for that! I snipped the word 'love' out of the 'lovely' heart diecut in the Lovely Words Thinlits set and mounted it on a Sweet and Sassy red diecut heart for my teddy bear to hold. I'm guessing it could be a cushion or maybe a box of chocolates - here's hoping anyway!
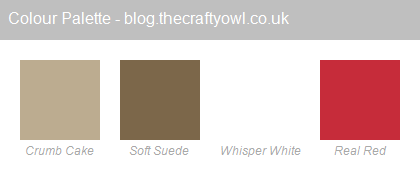
All Heart - With the neutrals of my teddy bear, I wanted some traditional red to add to my 'sending love' card, so I paired my diecut red heart with some retired 'Stacked With Love' retired designer series paper from my stash - only an abundance of red hearts will do! I love this fun colour combination - here it is if you'd like to save it for your future inspiration:
Here is the visual summary of the key products used on today's project for you to pin for easy reference:

You can see all of my 'How To' summaries on my 'How To - Tips and Techniques' Pinterest board in case you've missed any. I'm also linking this card up for my second entry at SUO Challenges - my background definitely has hearts-a-plenty to fit with their theme this week!
Enjoy your day and I'll be back tomorrow with another project. Until then, happy stampin'!
Stampin' Up! Supplies Used: