Happy Monday everyone! I've had a super busy and productive day and am finally getting to today's blog post! Today I've a couple of cards to share with you for a couple of challenges, both featuring the Warm and Toasty stamp set. My first card features this week's Color Throwdown colours:
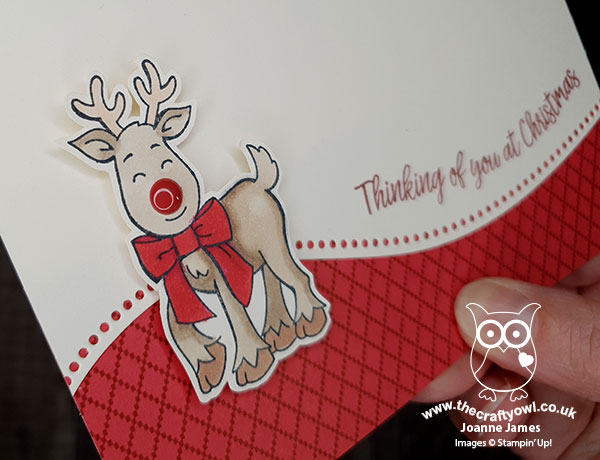
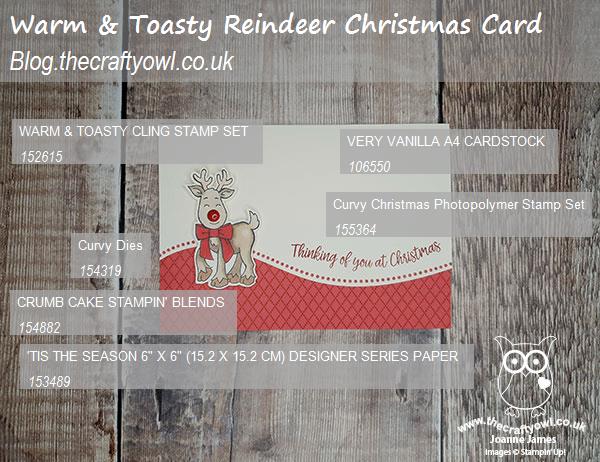
And the first animal to feature is the reindeer, resplendent with his red bow:

I've coloured the reindeer in the challenge colours with my Stampin' Blends and my card also features a couple of sneak peeks: the sentiment is from a new stamp set called 'Curvy Christmas' and is paired with a fabulous die from the Curvy Die set, both of which will be available to customers from the 1st November as a special release - exciting stuff! I couldn't resist adding a large red enamel dot to christen my reindeer Rudolf:
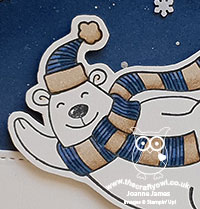
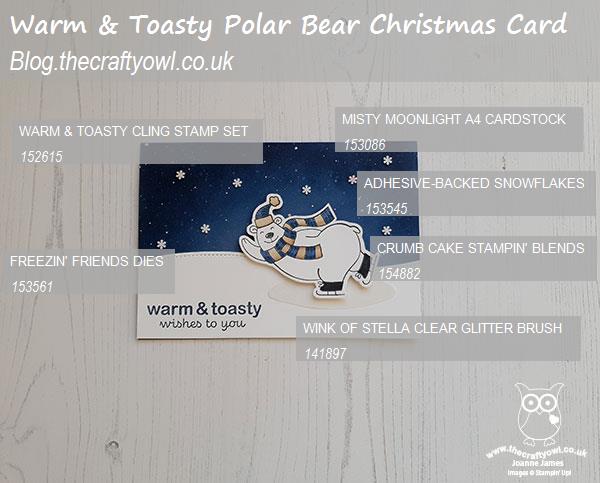
My second card uses the polar bear from the 'Warm and Toasty' stamp set, this time using this week's CAS Colours and Sketches colour palette:
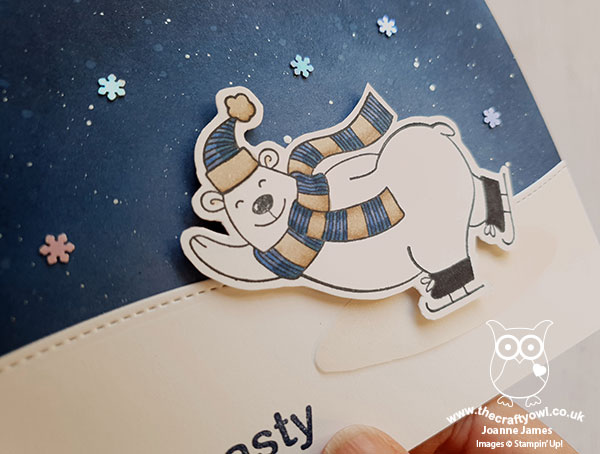
I've seen some great examples of sponging recently, so wanted to have a go at creating a sponged background and decided that the blues would make a great backdrop for my iceskating polar bear:
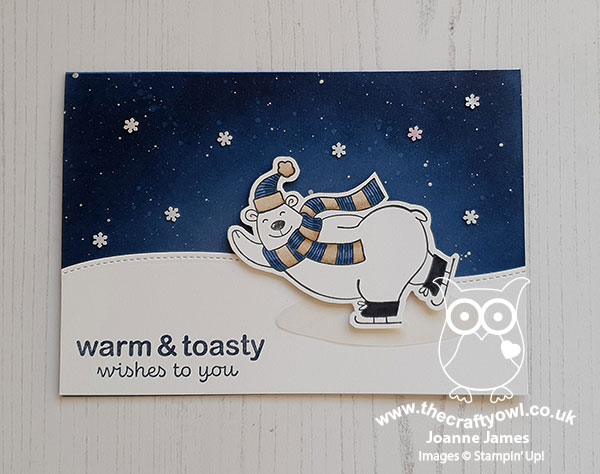
I added a snow drift using my Freezin' Friends Dies and cut an ice rink freehand from vellum and coated it with a liberal dose of clear Wink of Stella for an icy sparkle, before adding my polar bear to the finished scene.
I did a little extra stamping on the inside of this one too:

So what do you think? I think creating sponged backgrounds, whilst messy, is also quite addictive; and to that end, I have another one for you tomorrow!
Here are the visual summaries of the key products used on today's projects for you to pin for easy reference:
And for the second one:
You can see all of my 'How To' summaries on my 'How To - Tips and Techniques' Pinterest board in case you've missed any.
Enjoy your day and I'll be back tomorrow with another project. Until then, happy stampin'!
Stampin' Up! Supplies Used - Card 1:
Stampin' Up! Supplies Used - Card 2: