Awesomely Artistic for The Paper Players

by Joanne James12. July 2015 11:00

Yay it's Sunday and time for a new challenge over at The Paper Players where this week the lovely Jaydee has the following colour challenge for us:

   Paper Craft Crew Card Sketch 152. #stampinup #blogcandy #papercraftcrew

I also used this week's sketch over at The Paper Craft Crew as the basis for today's layout. I've been desperate to ink up my new Awesomely Artistic stamp set and decided that these colours would be perfect for a soft and subtle card. This is what I came up with:

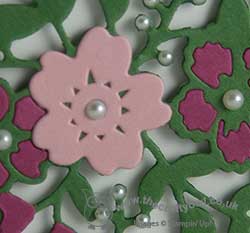
I used Mint Macaron for my card base, added some grunge splatters and then a panel of Smoky Slate and Smoky Slate DSP - I love the script pattern! I then created my feature square, which contains a lot of detail for my normally rather CAS style! I used a piece of Mint Macaron, onto which I stamped the small fern in the stamp set in the same colour ink, stamping a few times without re-inking for added depth. I stamped the floral bloom in Smoky Slate onto Whisper White and used my blender pen to add some colour to the flowers in both Smoky Slate and Mint Macaron, before fussy cutting the whole thing. Yes, you read that correctly - I fussy cut the whole thing! I won't deny it was rather fiddly and took me absolutely ages, but I think it was worth it to make it really stand out. As if that wasn't enough, I then fussy cut a few extra flowers and popped them onto the base bloom with glue dots, as I wanted some height but not too much (hence they aren't that visible in the photograph - they are more obvious in real life). I added a few pearls here and there for a little extra interest. I stamped my sentiment panel in Smoky Slate on Smoky Slate and stamped the word 'Friend' in Versamark and heat embossed in white. I added some mint lace ribbon trim behind it before adhering to my card with dimensionals. Did you spot my Sahara Sand? I have used it sparingly, on the round element tucked behind the flower and the trio of candy dots, so you can be forgiven if you blinked and missed it at first glance! A scattering of a few more pearls, and done!

This card is much fussier than many I design, however I am very pleased with it and I love this stamp set - you will definitely be seeing more of it! Before you reach for your ink and papers, check out what our amazing team has created to inspire you this week:

The Paper Players Design Team
Anne Marie Hile - on leave
 
 
Here's a quick recap of our challenge rules:
 
1.  Create a new paper project
2.  Upload your creation to your blog with a link back to us and provide a direct link to the post featuring your challenge submission.
3.  Please link your card to no more than three challenges, TOTAL.
4.  Have FUN! 

I look forward to seeing how you use these colours when I visit your cards in the gallery this week. I am spending the day with my upline for a team training day today which should be fun; it's always nice to catch up with the wider team. I'm hoping the weather will continue to be warm and that I will be coming home to an evening BBQ (well, hoping!). 

Back tomorrow with another project; until then, happy stampin'!


Stampin' Up! Supplies Used:

Table built using Product Table Builder by The Crafty Owl - Independent Stampin' Up! Demonstrator.

Silhouettes and Script Meets Farmer's Market Anniversary Card

by Joanne James11. July 2015 18:04

I've been busy creating today and just have time for a quick post before I head out this evening for dinner with friends. Today's card uses this week's sketch over at Mojo Monday and showcases some of the the new Farmer's Market DSP so is perfect for linking up with SUO Challenges too where the theme is 'designer papers':

Here is my card - check out how perfectly these two paper designs from the Farmer's Market range co-ordinate with each other:

I used Old Olive for my base with a mat of Hello Honey - a colour I'm not overly fond of it has to be said, yet I think it takes on a lovely hue next to the greens on this card. The pear paper design is definitely the one on show here, yet the gingham across the bottom adds interest without overwhelming. I used a piece of Mossy Meadow for my diagonal, tied with some retired satin ribbon in the same colour then for my focal point I stamped the pear from the 'Silhouettes and Script' hostess set onto Whisper white, inking up with my sponge daubers to give the lovely shading effect then fussy cut one side and cut to other with my circle framelits. To finish I added a 'Congrats' from the same set in black and popped up on dimensionals. I just love the blended colouring on the pear - I'm going to have to do this with the other stamps in the set too!! What a fun alternative take for a wedding or anniversary card!

That's all from me today; I need to go and wash my hair and get ready for my night out! Back tomorrow with a new challenge over at The Paper Players. Until then, happy stampin'!


Stampin' Up! Supplies Used:

Table built using Product Table Builder by The Crafty Owl - Independent Stampin' Up! Demonstrator.


Cherry On Top Donuts Card

by Joanne James9. July 2015 08:00

It's Thursday and time for a new challenge over at Create With Connie and Mary! This week we have a great sketch challenge for you:


This was one of those sketches that the minute I saw it, I knew exactly what I was going to do with those 'flowers' - to me, they looked just like the donuts with a bit taken out that feature on both one of the Cherry on Top DSP stack patterns and the Sprinkles on Top stamp set on page 7 of the annual catalogue. I don't have the latter but am definitely in love with the former, so that's where I was headed for my card this week:

I stayed with the square shape for my card and used a base of Pool Party with mats in Whisper White and Bermuda Bay. I then used another of the patterns from the Cherry on top DSP stack as my top layer and stamped my sentiment from the 'Bravo' stamp set in Watermelon Wonder directly onto the DSP. I then used a long, slim panel of Bermuda Bay, with one corner rounded t echo the shape of the base card, then adhered four little donuts, punched out of the DSP using my 3/4" circle punch, onto the panel using dimensionals. I finished with a double loop of Whisper White baker's twine to complete my card. 

So what do think - is this card sweet to you? Do check out how the other design team members have interpreted this week's sketch as we've all taken a different approach. As for me, I'll be back tomorrow with another project to share. Until then, happy stampin'!


Stampin' Up! Supplies Used:

  • Bravo Photopolymer Stamp Set
  • Cherry On Top Designer Series Paper Stack
  • Whisper White Baker's Twine
  • Watermelon Wonder Classic Stampin' Pad
  • Bermuda Bay A4 Cardstock
  • Pool Party A4 Cardstock
  • Punch Corner Project Life
  • Whisper White A4 Cardstock
  • 3/4" Circle Punch


Tags: , , , , , , ,

Cards | Stamping

This Week's Limited Offer Wednesday Weekly Deals Are Here!

by Joanne James8. July 2015 07:00

It's Wednesday and you know what that means: a new collection of Wednesday Weekly Deals! The same as last week there are more offers than usual, with increased reductions of up to 30% on Weekly Deals this month, although there are specific allocated quantities at the increased offer price; once they're gone, the price will revert to RRP, so don't delay in ordering if there is something on your wish list. Last week a number of items proved very popular and were sold out within a couple of days of the offers being published. As always, a new collection of deals will be announced next Wednesday.

If you want to take advantage of any of the deals on offer, you can support my business by placing your order online by clicking here or using the link to my store on the right hand side of my blog page where it says 'Shop Online' or with me in person. Don't forget to add the new Hostess Code for July YMCTDF6N if your order is under £150 and be sure to make sure that you don't check the 'no contact' box if you'd like to be kept updated with the progress of you order and receive a little thank you in the post from me. 

Here's a summary of this week's one-week only Wednesday deals - click on each item to go to the online store to purchase:

Table built using Product Table Builder by The Crafty Owl - Independent Stampin' Up! Demonstrator.

More great offers this week - the magnetic platform, diagonal scoring plate and gift box punch board are particularly good deals if you don't already have these essential items in your kit. I'll be stocking up on takeout boxes and baker's twine - two things that at this time of year when I'm packing teacher's gifts I get through lots of!

Back later with today's creative post; until then, happy shopping! 

Tags: , , , , , ,

Promotions | Shop Online | Stamping

Doodling with Dots Decorative Mask For A Teacher Thank You Card

by Joanne James7. July 2015 08:00

Today I have a card using the sketch challenge over at Paper Craft Crew and the colours over at Pals Paper Arts as the inspiration for my teacher thank you card:

Paper Craft Crew Card Sketch 151. #stampinup #papercraftcrew   PPA 258 Jul. 2

Now I know I entered a teacher thank you card into last week's challenge over at Pals Paper Arts (if you missed it you can see that card here) but what can I say - I need lots of them! I love the bright colour combination here so took the opportunity to do a little doodling - take a look:

I used Night of Navy for my card base which measures 5 3/4" x 5 3/4" and matted a strip of Cucumber Crush striped envelope paper with a strip of Watermelon Wonder cardstock. For my central panel, I embossed a piece of Whisper White with the large polka dot embossing folder for added texture, although difficult to see in the photograph, and then overlaid this with my circle stencil and used my Watermelon Wonder Stampin' Write Marker to doodle an apple shape. I added my stem and leaves freehand and finished with a navy seam binding ribbon bow, some Cucumber Crush lace trim and a trio of white candy dots. I finished with the thank you sentiment from the 'Tin of Cards' stamp set - this is such a great set, I've used it lots already and haven't even made my tin of cards yet!! - stamped in Night of Navy on Watermelon Wonder, and finished with a juicy green apple punched using my tree builder punch. 

I think the colours of this card really pack a punch and my non-standard card size meant a custom envelope would be the order of the day. What better way to finish than with a co-ordinating envelope made from the gorgeous new Cucumber Crush envelope paper? This lightweight paper makes beautifully crisp envelopes and with the aid of my trusty Envelope Expert from The Crafty Owl it was easy to work out what size paper and punch markings I required (9 1/4" and 4 5/8" respectively, in case you were wondering!)

I hope you like today's card; I'll be back tomorrow with a new set of Wednesday Weekly Deals and another project for you. Until then, happy stampin'!


Stampin' Up! Supplies Used:

Table built using Product Table Builder by The Crafty Owl - Independent Stampin' Up! Demonstrator.


I'm Always There For You In Red, White and Blue

by Joanne James6. July 2015 13:19

Happy Monday everyone! I have had my first of this week's technique card classes this month and spent a pleasant morning catching up with my ladies, who all left very pleased with their cards. I will share these cards in due course once all my classes are complete (I don't want to spoil the surprise for the next group of ladies!). Meanwhile, today I have a card made with this week's sketch over at Freshly Made Sketches:

I'm also linking this card up with the ladies over at Less Is More this week, where the challenge is to use red, white and blue on your card, which I most certainly have - take a look: 

I decided to pair my bright Real Red with the softer tones on Sky Blue for today's card and added some detail to my main panel using some retired 'Back To Black' DSP although the new Everyday Chic paper would work just as well. I coloured both pieces with my retired Soft Sky Blendabilities pens. My sentiment is from the new 'Friendly Wishes' stamp set and I finished my caard with a few pops of Real Red: some cotton ribbon, an Itty Bitty Accents punched flower (or two!) and a retired button from my storecupboard, tied with some white baker's twine.

I really love the way the combination of bright red with the pale blue, and I think the set off the black and white of the DSP and sentiment beautifully. 

That's all from me today; a basket of ironing awaits, although hopefully I'll catch another match at Wimbledon on the TV as I go, so much less of a hardship than usual! Back tomorrow with another card and a new product share! until then, happy stampin'!


Stampin' Up! Supplies Used:

Table built using Product Table Builder by The Crafty Owl - Independent Stampin' Up! Demonstrator.


On Your Bike - Hooray For Adventures!

by Joanne James5. July 2015 11:00

It's Sunday and time for a new challenge over at The Paper Players! This week it is the turn of the lovely Ann to host and she has the following theme challenge for us: 

The great outdoors: now I know our challenge badge this week shows trees, flowers and wildlife, but for me when I thought about what 'the great outdoors' meant to me, it was more about camping, rambling and cycling - so off I went in search of stamp sets to fit the bill. After much fruitless searching, suddenly there it was just staring me in the face - the top sheet in the open pack of Schoolhouse designer series paper on my desk was the perfect feature for my card:

Bicycles! We are a family of cyclists and are fortunate to live near to lots of great cycle paths and countryside that is accessible to cyclists. so often ride out together as a family. I really wanted the paper to take centre stage, so I went on the hunt for a small, suitable sentiment to pair it with and decided upon this one from the Project Life 'Moments Like These' stamp set which was just enough to finish my card. Another great example of where these sets can be used for memory keeping and a lot more besides!

Before you reach for your ink and papers, check out what our amazing team has created to inspire you this week:

The Paper Players Design Team
Anne Marie Hile - on leave
 
 
Here's a quick recap of our challenge rules:
 
1.  Create a new paper project
2.  Upload your creation to your blog with a link back to us and provide a direct link to the post featuring your challenge submission.
3.  Please link your card to no more than three challenges, TOTAL.
4.  Have FUN! 

Your cards can be inspired by any aspect of life outdoors so get your thinking caps on and I look forward to seeing what you make of our theme in the gallery this week. I am hoping that today will be another warm and sunny one, with a BBQ lunch on the menu. Some time in the garden and a restful day is on the cards!

Back tomorrow with another project; until then, happy stampin'!


Stampin' Up! Supplies Used:

Table built using Product Table Builder by The Crafty Owl - Independent Stampin' Up! Demonstrator.


In Colour Work Of Art Thank You Cards

by Joanne James3. July 2015 22:03

A quick post from me today as I've had a full-on busy day: each of the James Juniors has had a birthday party to attend today, followed by a swimming gala, the first for Ben at this venue. Both had great swims with some great personal best timings, so a god day had by all. Today's trio of cards are another entry for the Fab Friday challenge where in colours are the order of the day:

I wanted to create a card that use all five colours and decided to go with a simple design that showed off the fabulous new in-colour lace trim - take a look:

I used a card base of extra thick Whisper White cardstock, matted with an in colour (this one is Cucumber Crush), followed by a Whisper White panel embossed with the Large Dolka Dot Textured Impressions Embossing folder then a random colour pattern of dots using all of the in colours with the spot from the Work of Art stamp set. I finished with a co-ordinating piece of in colour lace trim, tied with a bow of white baker's twine. I wanted to make a couple of cards that were post-friendly and this lace trim is great for a non-bulky trim, however it also makes a beautiful bow - take a look at the Delightful Dijon bow below:

Isn't that just so pretty? I also made a post-friendly version in Watermelon Wonder: 

Since the outside is sentiment-free, I wanted to be sure to include one on the inside:


These are thank you cards destined for some of my customers so a big 'thank you' is definitely appropriate! Do you love this year's new in colours? Which one is your favourite? Do let me know in your comments below.

Back tomorrow with a new challenge over at The Paper Players; until then, happy stampin'! 


Stampin' Up! Supplies Used:

Table built using Product Table Builder by The Crafty Owl - Independent Stampin' Up! Demonstrator.

Flower Fair Greetings Thinlit Thanks Card

by Joanne James2. July 2015 08:05

Good morning everyone! It's Thursday and time for a new challenge at Create with Connie and Mary where we have a great colour challenge for you this week:


I chose to use this week's layout over at CAS(E) This Sketch for my card this week and went for some bold pops of colour against my neutral background:

I used Crumb Cake for my card base, and instead of leaving it completely plain, I stamped the hatched background stamp from 'You've Got This' in Crumb Cake to add a little interest to the main body of the panel. This is such a useful stamp and can be used in so many ways, not just with the flower in the set with it. I then added a layered flower cut with the Flower Fair framelits and finished with a Real Red candy dot (I get through these faster than any other colour!) and my die cut sentiment. Super simple and very easy to recreate and would work in lots of other colourways too. 

Short and sweet from me today - do check out what the rest of the DT have been up to and I look forward to visiting your gallery creations this week. I'll be back tomorrow with another project; until then, happy stampin'!


Stampin' Up! Supplies Used:

  • Greetings Thinlits Dies
  • Flower Fair Framelits Dies
  • You've Got This Stamp Set
  • Crumb Cake A4 Cardstock
  • Real Red A4 Cardstock
  • Lost Lagoon A4 Cardstock
  • Crumb Cake Classic Stampin' Pad
  • Brights Candy Dots


Friendship Is A Sheltering Tree

by Joanne James1. July 2015 09:30

It's Wednesday and today I have a card for this week's challenge over at Less is More. I always follow this great challenge site, although don't always find time to enter as often as I'd like (and even when I do things don't always go to plan - my attempt for last week's stencilling challenge was something of a disaster and ended up in the dustbin!) This week these lovely ladies have a sketch challenge though and never one to turn down a good sketch, this week's attempt was much more successful. Here's the sketch:

And here's my card:


I actually made this card to send to a friend who has been having a tough time of it recently and needed to know that it's ok to 'offload' once in a while - that's what friends are for. I so love this sentiment and it was the perfect message. I stamped the tree in a combination of Crumb Cake and Wild Wasabi with a sprinkle of purple flowers beneath it. I did add a border layer to my image and sentiment panels in Perfect Plum, but I was careful to leave my image uncluttered and as much 'white space' as possible around the panels to retain the clean and simple feel. The sentiment is one long stamp, but I split it here and inked the first word in a different colour, for emphasis and simply to fit it on the panel. I even remembered to add a little envelope decoration too - bonus!

I hope you like today's card; don't forget to check out this week's extended range of Wednesday Weekly Deals and the updated Clearance Rack - find full details on my earlier post here. I will be back tomorrow with my card for this week's new challenge over at create with Connie and Mary. Until then, happy stampin'!


Stampin' Up! Supplies Used:

Table built using Product Table Builder by The Crafty Owl - Independent Stampin' Up! Demonstrator.


Tags: , , , , , ,

Cards | Stamping

New Online Exclusives

There are new products available exclusively in the online store from 5 November - check them out here.

Latest Kits!

Stampin Cut and Emboss

The Layered Landscapes Kit and Nature's Paintings Kit are the latest kits in the online store - get yours here!

Shop Online

Access my online shop 24 x 7, 365 days of the year:

Current November hostess code:

9NKXDTTR

Shop Online

Mini Catalogue

BROWSE THE CATALOGUE

'Tis The Season - the new Stampin' Up! Mini Catalogue is here! For more details and to download your copy click here

Scrapbooking

Stampin' Up! has introduced a new range of 12x12" scrapbooking product and kit - the full range is now available to purchase online. To download a copy of the new digital Scrapbooking Catalogue click here.

2024-25 Annual Catalogue

BROWSE THE CATALOGUE

Click on the image to download your copy of the 2024-25 annual catalogue. For a full list of current SU! supplies, go to my online store. If you would like any help or advice, please drop me a line at joanne@thecraftyowl.co.uk or give me a call on 07773 421446 - I'd be happy to help.

Join My Team

It's always a great time to join Stampin’ Up! New team members can get £130 worth of products for only £99 + free business supplies + free shipping + all the fun being a part of Stampin’ Up! Stampin' Up! has something for everyone: join my growing team and benefit from my support to enjoy Stampin' Up! however you choose.

If you're interested, call me for a chat to understand how I can help you realise your goals. Alternatively, if you have already decided to sign up and you just can't wait, please click here for the link to the online form where you can sign up and order your starter kit right away! 

About Me

Hi I'm Joanne and live in Northampton and when I'm not looking after my husband and two beautiful children, am an avid crafter with a passion for all things Stampin' Up!

I must confess that I have never been a big rubber stamper - until I discovered Stampin' Up! that is. I love the fact that I can get such great results with co-ordinating stamps, inks, papers and punches - the possibilities are endless! Join me on my stamping journey as I share the things I love and be inspired to create amazing things yourself!

Follow Me

Monthly Newsletter

Box Builder

Click the button above to use Box Buster to create your custom box design using the Envelope Punch Board!

Kits Collection Now Available!

Stampin Cut and Emboss

The new Kits Collection from Stampin' Up! is now available!

Click here to see the current kits available and order yours online today.

I Design For


Stampin' Up Stuff

This is my personal blog and is not endorsed by Stampin’ Up! I hope you find it a plentiful source of ideas and personal inspiration but please don't copy my designs for contest submission or use for classes, publication or sale without express permission.