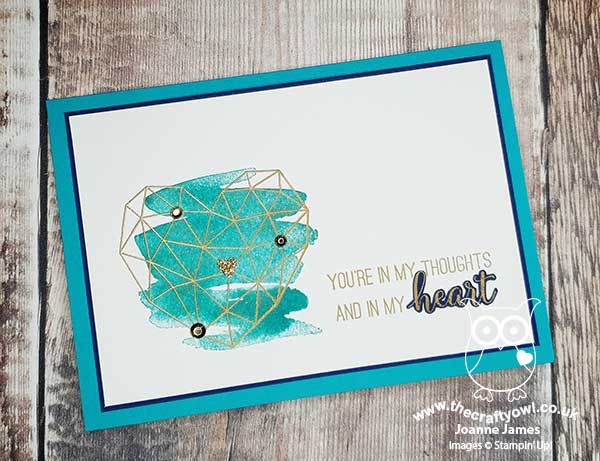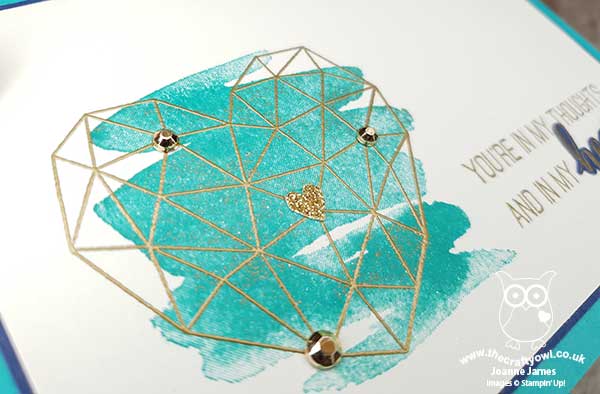
Paper-Pieced Graceful Garden CAS Card

by Joanne James24. April 2019 21:00

I'm not sure how Monday turned into Wednesday, but sometimes that's just how it goes! So a quick share today with my second paper-pieced card that I originally made for our challenge over at The Paper Players this week: clean an simple paper piecing. I am totally 'on the fence' about this card - it didn't look as good as it did in my mind, so I ended up making another one for the challenge, but thought I'd share with you as I'd love to hear what you think. So here is my card:

This card used the retiring Graceful Garden stamp set and features a rose that I more often have coloured rather than paper-pieced, but I wondered what it would look like in some rose-patterned paper. I used one of the beautiful pink rose designs from the Petal Promenade pack for the flower and some Floral Romance paper for the stem. A little background stamped detail, a few artisan pearls and a sentiment finish my card. So what do you think - does it work? I really would welcome your thoughts on this one!

Here is the visual summary of the key products used on today's project for you to pin for easy reference:

You can see all of my 'How To' summaries on my 'How To - Tips and Techniques' Pinterest board in case you've missed any. 

Enjoy your evening and I'll hopefully be back tomorrow with another project. Until then, happy stampin'!


Stampin' Up! Supplies Used:

Table built using Product Table Builder by The Crafty Owl - Independent Stampin' Up! Demonstrator.

The Clearance Rack Has Updated!

by Joanne James23. April 2019 09:00

What a great start to a Tuesday - I logged on this morning to find a surprise update to the Clearance Rack. There are now lots of new items available, some with as much as 60% off. As is always the case, popular items will sell out quickly, so don't spend too long deliberating - get in there quick! There are some great paper bargains, including many designer series papers, accessories, kits, framelits and even a few punches. 

Click here to go the clearance rack in my online store and grab a bargain whilst stocks last! Don't forget to include the current hostess code FRRF6WRW make sure that 'allow your demonstrator to contact you' is ticked in order that you receive your special 'thank you' in the post from me. 

Race you to the shop - first one there gets the bargains! Happy shopping! 

Hand Delivered Teacher Thank You Card For PP438

by Joanne James21. April 2019 09:00


Today it's Easter Sunday and time for this week's new challenge over at The Paper Players! It's the turn of the fabulous Anne-Marie to host this week and she has a clean and simple challenge for you to work with:
       

Remember: this is clean and simple week. What do we mean by 'clean and simple' ? Create a card that has:

  • Minimal layers and embellishments
  • Plenty of open space, also known as 'white space'
  • Is simple and uncluttered

I struggled initially with Anne-Marie's challenge this week; I think not getting into my craft room all week hasn't helped! I had an idea for a card and then once I'd made it I really wasn't sure about it; I'll share that card tomorrow and would love you to come by and take a look and tell me what you think. Meanwhile, after a break and a change of stamp set, along with this week's CAS(E) This Sketch layout and the CAS Colours and Sketches colour palette, I created a second card and felt much happier about the whole thing! So here's that card:


Here's the low-down on today's card:

Paper Piecing - Not to be confused with 'paper piercing', paper piecing is the technique of stamping an image and then stamping either the whole or partial image again on coloured or patterned paper and fussy cutting it to piece it together on the main base image. I used it for both the skirt that my teacher is wearing (Blueberry Bushel in-colour DSP) and the pile of books she is carrying (a mix of Wood Textures DSP and solid colour cardstock). This is a fun way to add pattern to areas of your stamped image and can be used with a wide variety of stamps - those with larger areas suitable for colouring, such as those in the Hand Delivered hostess set, are particularly good. 

Primary Brights - I love this colour combination; the trio of primary colours is very bright and also seemed appropriate for a teacher thankyou card. I added further interest to my books by using a couple of different scraps of Wood Textures DSP for additional subtle detail. 

A Teacher Thank You - The sentiments in the 'Hand Delivered' stamp set suggest that the pile of books is intended to make a graduate congratulations card, yet I think they are perfect for a teacher card too. There is a thank you sentiment in this set, but I opted to use the words from the 'Picked For You' set instead, so that I could use a teacher-specific greeting on my front banner (both of the banner elements come from the Lakeside framelits set) and continued this theme with the wording on the inside too:

This card is sure to brighten someone's teacher's day! Both of the James Juniors have male form tutors this year, but Ben has plenty of female subject teachers who are worthy of a little end-of-year gift, so I think it might be heading to one of those. Both of these stamp sets are so useful for teachers cards, and both are set to retire with the current annual catalogue so if they're on your wishlist make sure you put them in your shopping basket before it's too late.

Here is the visual summary of the key products used on today's project for you to pin for easy reference:
 

You can see all of my Product and 'How To' summaries on my 'How To - Tips and Techniques' Pinterest board in case you've missed any. 

Before you reach for your ink and papers, check out what our amazing team has created to inspire you this week:

Here's a quick recap of our challenge rules:
 
1.  Create a new paper project
2.  Upload your creation to your blog with a link back to us and provide a direct link to the post featuring your challenge submission.
3.  Please link your card to no more than four challenges, TOTAL.
4.  Have FUN!

You can see all of my 'How To' summaries on my 'How To - Tips and Techniques' Pinterest board in case you've missed any. 

Enjoy your day; we will be having an Easter egg hunt, followed by a roast for lunch and then an afternoon in the garden making the most of the wonderfully warm weather we have been blessed with the last couple of days - we need to make the most of it as I'm sure it won't last! Wishing you a pleasant Easter bank holiday weekend however you choose to spend it. I'll be back tomorrow with another project. Until then, happy stampin'!


Stampin' Up! Supplies Used: 

Table built using Product Table Builder by The Crafty Owl - Independent Stampin' Up! Demonstrator.

Under The Mistletoe Plaid Merry Christmas Wishes

by Joanne James19. April 2019 15:00

Hi everyone! I've been recovering from Stampin' Up!'s Onstage event and making the most of the Easter vacation with the James Juniors this week, so crafting time has been non-existent and blogging opportunities even less so! Today though the sun is shining and I am spending a glorious afternoon in the garden, so thought I would take the opportunity to share with you a card that I actually made as a second one that I made for the challenge set by my fellow Paper Players teamie the lovely LeAnne last week to use plaid or check on your card. Here's my card:


 Here's the low-down on today's card:

Christmas Plaid - Ok, so the irony of sharing a Christmas card on Good Friday isn't lost on me! However given that Stampin' Up!'s retiring lists were announced earlier this week (if you missed my post you can read all about it here) this is actually a great time to share this card as it showcases 2 products that are on that list and will be going away for good. The first of these is this fabulous plaid designer series paper that is from the 'Under the Mistletoe' pack. As is always the way, all of the designer series papers in the annual catalogue will be leaving us to make way for the new, so if you have a favourite then now is the time to stock up. If you're the type of person that 'does Christmas' all year round or likes to get ahead and work on Christmas projects during the summer months, then you should seriously consider stocking up on this paper as I can tell you that the new annual catalogue doesn't contain any festive Christmas-themed designer series paper designs, so it will be September before we have the new seasonal range on sale. You have been warned! 

Large Letters - The second retiring item on today's card are those fabulous Large Letter Framelits, which along with the co-ordinating 'Letters For You' stamp set are retiring with this catalogue. I know that the old has to make way for the new, but I will be so sad to see these go! They have been a staple in my craft collection and whilst they might leave the catalogue, they will always have a space in my die collection - they are SO useful! These will most definitely not be going into my retiring products BOGOF sale in July, so if you want a set, you need to order them now! 

A Festive Colour Combination - The paper really does do all the hard work on this card and sets the colours for each of the other elements with a can't-go-wrong festive colour combination. If this is a colour combination that appeals to you, feel free to save the image below for your future inspiration:


Here is the visual summary of the key products used on today's project for you to pin for easy reference:


You can see all of my 'How To' summaries on my 'How To - Tips and Techniques' Pinterest board in case you've missed any. 

Enjoy your day. I'm off for a James family gathering for dinner. I'll be back tomorrow with another project. Until then, happy stampin'!


Stampin' Up! Supplies Used:

Table built using Product Table Builder by The Crafty Owl - Independent Stampin' Up! Demonstrator.

Last Chance - The List of Retiring Products Has Been Announced!

by Joanne James15. April 2019 20:00


It's here - the list of products that will be retiring from this year's annual and Spring-Summer seasonal catalogues has been announced!

You can see and download the full list of items retiring from the current Spring-Summer catalogue by CLICKING HERE.

You can see and download the full list of items retiring from the current Annual catalogue by CLICKING HERE.

It's worth noting that there are some clear mount stamp sets that are included on the annual catalogue retiring list that are included because they are retiring in clear mount. They will still be available in the new annual catalogue, but in a new cling-mount version. Should you order one of these sets and stock of clear-mount sets already be depleted, you will be sent a new cling-mount version ahead of the new catalogue release, The affected stamp sets are as follows:

CARRY-OVER STAMP SETS NOW IN CLING:
Pop of Petals
Label Me Pretty
Special Celebrations
Itty Bitty Greetings
Botanical Bliss
This Little Piggy
Flourishing Phrases
Stitched All Around
Hold on to Hope
Heartland
Peaceful Place
Barn Door
Accented Blooms
Birthday Backgrounds
Perennial Birthday
Dashing Deer
Winter Woods
Kindness & Compassion
Dandelion Wishes
Healing Hugs
Sorry for Everything
Love You to Pieces
Tropical Chic
Bee Thankful
Animal Outing
Little Elephant
Beautiful You
Painted Glass
Little Twinkle
Beautiful Day
Magical Mermaid
First Frost
Rooted in Nature
Country Road
Lilypad Lake
Sea of Textures
Artisan Textures
Gallery Grunge
Bokeh Dots
Crafting Forever

Retiring products are only available WHILE STOCKS LAST, so if you've still items on your wish list from this year's annual or spring-summer seasonal catalogues, you need to check the retiring lists and if they're on it put an order in pronto! Don't forget to add this month's online hostess code: FRRF6WRW

Some of the things I will miss most that feature on this list include:

Table built using Product Table Builder by The Crafty Owl - Independent Stampin' Up! Demonstrator.
 

I will do a further review tomorrow, however if you want to stock up on any of the retiring in-colour items and you haven't already done so, especially re-inkers, I would urge you to do that sooner rather than later as they are always the first things to sell out.

Click on the links below to take you directly to my online shop to purchase any of the 2017-19 in-colour items that are retiring:

Table built using Product Table Builder by The Crafty Owl - Independent Stampin' Up! Demonstrator.

I will be putting in an order this evening at 8.30pm, so if you're a customer who lives local to me and would like to save postage, get your order to me by then and I will add it to mine. Alternatively hop online to get the latest on stock availability. There are no initial discounts on retiring items, however these may be introduced at a later date depending on stock levels. 

I hope to be back tomorrow with a creative post and an update on the retiring list; until then, happy shopping!

Fable Friends Stitched Frame Friendship Card PP437

by Joanne James14. April 2019 09:00

Today it's Sunday and time for this week's new challenge over at The Paper Players! It's the turn of the fabulous Ann to host this week and she has a fresh colour challenge for you to work with:


What a pretty trio of spring colours Ann has for us this week! I knew exactly how I was going to use these colours. As I have been busy at Stampin' Up!'s Onstage event these last few days I needed a straightforward layout and the sketch over at Fab Friday was perfect for what I had in mind (I rotated it through 180 degrees) - take a look:


Here's the low-down on today's card:

Fable Friends - Having resisted it for many months, I eventually caved and purchased the adorable collection of farmyard animals that is the 'Fable Friends' stamp set. I have seen one too many examples of loveliness as far as this set is concerned and decided I 'needed' to add it to my stamp collection. The mama duck and her trio of ducklings seemed just perfect for a spot of colouring with this week's colours.

A Trio of Blends - I used the combo packs of Balmy Blue, Calypso Coral and Daffodil Delight to colour my little duckiest, along with a little Ivory for feather detail and light Smoky Slate to ground them. So super-cute is the little trio of ducklings, I had to repeat them on the inside of my card too. I added a close-up here so that you could see how I had coloured them and to show that you don't have to be a colouring expert to get a good result:


Frame It - I used a simple frame made from two Rectangle Stitched Framelits and a piece of Daffodil Delight cardstock to provide the border outline for my picture, along with some Gingham Gala check to add to the theme. My greeting is from the same set and I stamped it on Balmy Blue to make it stand out from the white space surrounding my image.

I really love this fresh, spring-inspired card - now I just need to decide who to send it to!

Here is the visual summary of the key products used on today's project for you to pin for easy reference:


You can see all of my Product and 'How To' summaries on my 'How To - Tips and Techniques' Pinterest board in case you've missed any. 

Before you reach for your ink and papers, check out what our amazing team has created to inspire you this week:

Here's a quick recap of our challenge rules:
 
1.  Create a new paper project
2.  Upload your creation to your blog with a link back to us and provide a direct link to the post featuring your challenge submission.
3.  Please link your card to no more than four challenges, TOTAL.
4.  Have FUN!

You can see all of my 'How To' summaries on my 'How To - Tips and Techniques' Pinterest board in case you've missed any. 

Enjoy your day; mine will be a quiet one as I feel I need to recover from the last 2 days of Onstage, which were long and hectic, whilst also fun and a great opportunity to catch up with friends. I'll be back tomorrow with another project. Until then, happy stampin'!


Stampin' Up! Supplies Used: 

Table built using Product Table Builder by The Crafty Owl - Independent Stampin' Up! Demonstrator.


#SimpleStamping In-Colour Accented Blooms Cards

by Joanne James12. April 2019 08:00

Today I'm sharing a collection of cards that have been designed for this month's timely #SimpleStamping challenge which is to feature the 2017-19 soon-to-be-retiring in-colours, on a project using nothing more than stamps, ink and paper. I decided to use the Accented Blooms stamp set that I used on this card yesterday, with a clean and simple card that really lets these in-colours shine. 

So first of all, let's take a look at the five in-colours that we've all loved for the last two years and will soon be leaving us:


Clockwise from the left: Fresh Fig, Powder Pink, Berry Burst, Lemon-Lime Twist and Tranquil Tide in the centre. 

Do you have a favourite? Whilst I find these colours a challenge to use together on a project, you will find some great examples of projects that feature these colours in a variety of combinations elsewhere on my blog. I think if pushed I would rate Berry Burst as my favourite, but it's a close call. Each of these colours has something to offer. Here's a close-up of my favourite one:


For today's #SimpleStamping project I simply stamped the main floral image from the 'Accented Blooms' stamp set in my chosen in-colour onto a square of Whisper White cardstock measuring 9cm x 9cm and adhered it to a card base in the same in-colour, then stamped the sentiment in the same colour on a separate piece of Whisper White and cut it out by hand; you could use the Tailored Tag Punch for this for speed, but the shape is great for #SimpleStamping projects as it can be easily fussy-cut by hand too. I then popped this onto a couple of foam dimensionals and added to my project. Voila! It's that easy - I created on in each of the in-colours. Here's a peek:


I haven't yet had time to put the a quick and easy #SimpleStamping videos that demonstrate how easy this card is to put together - when I do you will see all five of these cards. Onstage has got in the way of video production this week so I'll update this post at some point early next week with the necessary demonstration!

The Accented Blooms stamp set is another one that is great for colouring but also works well with a monochromatic design too. For these cards all you need is the stamp set, one or more of the in-colours and the corresponding colour of cardstock, along with a pair of scissors and adhesive, and you are good to go! The Stamparatus will enable you to get a good solid image of the sentiment in particular, but this is by no means an essential tool to create this card.

Here is the visual summary of the key products used on today's project for you to pin for easy reference:


You can see all of my 'How To' summaries on my 'How To - Tips and Techniques' Pinterest board in case you've missed any. 

If you're new to these colours you only have a few more days to guarantee their availability; when the retiring list goes live on Monday 15th April (at 8pm) these will undoubtedly be one of the first things to sell-out - and once they're gone, they're gone! 

If you are a crafter who has been enjoying these colours and can't bare to see them go, make sure you stock up on re-inkers, cardstocks and accessories now to keep you going in the months to come! You can purchase everything you need from my online store via the links below:

Table built using Product Table Builder by The Crafty Owl - Independent Stampin' Up! Demonstrator.

Enjoy your day. I'm travelling to Onstage today with my teamies and looking forward to a CentreStage leadership reception this evening so if you want to see all things new be sure to follow my Facebook page where I will do my best to share the fun and excitement 'real time'. I am organised for once and I will be back here tomorrow with another project, so do pop back for more creative inspirationfacebook. Until then, happy stampin'!


Stampin' Up! Supplies Used:

Table built using Product Table Builder by The Crafty Owl - Independent Stampin' Up! Demonstrator.

Accented Blooms Black And White Thank You Card

by Joanne James11. April 2019 00:00

Today I'm sharing a card for the current Inspire.Create colour challenge which is black and white:

Easier said than done, without the merest hint of colour, however the design team and gallery has lots of great inspiration. I wanted to create something that was not a sympathy card, which is often where these colours take me as a default - this is what I came up with:


 Here's the low-down on today's card:

I used the 'Accented Blooms' stamp set for today's card; would you believe this was one of the first sets I bought when the annual catalogue launched last year and this is the first time I've used it - oops! I thought the image would be great for colouring, so doubly ironic that the first time I use it it's in black and white! I think it works really well though, with the fine detail of the florals and the contrasting white-on-black sentiment. I used my Staparatus to get a good, solid image - it's a boon with this kind of stamp - and I used the Tailored Tag Punch to punch out the sentiment and popped it up for a little extra dimension. Some of my stash of retired Sale-A-Bration Butterfly Gala for my background and a retired clear faceted button and some black baker's twine for a little extra detail finished my card.

Here is the visual summary of the key products used on today's project for you to pin for easy reference:


You can see all of my 'How To' summaries on my 'How To - Tips and Techniques' Pinterest board in case you've missed any. 

Enjoy your day; I am making some last minute plans for my trip to Onstage this weekend with some of my team and getting some household chores done before heading out for some family fun this afternoon. I'll be back tomorrow with another project. Until then, happy stampin'!


Stampin' Up! Supplies Used:

Table built using Product Table Builder by The Crafty Owl - Independent Stampin' Up! Demonstrator.

Stained Glass Vellum Easter and Birthday Cards

by Joanne James10. April 2019 14:00

Today I'm sharing a card using the vibrant colour palette over at TGIF Challenges and the theme challenge over at Less is More


I had struggled for a while to come up with something suitable for the 'shine a light' LIM challenge, especially as I have a distinct lack of light-related stamps, when it occurred to me that I just needed to look at the subject differently. When I think about light shining, one of the first things that comes to mind is the beautiful colours of light streaming through a stained glass window. Paired with the bold colours at TGIF I suddenly had my 'aha' moment - take a look:


An Easter card using the Graceful Glass Designer Vellum and the Painted Glass stamp set! Here's the low-down on today's card:

The Graceful Glass Vellum is one of those 'easily overlooked' products in the annual catalogue, yet has some great patterns and designs that are perfect for colouring with Stampin' Blends. I chose one of sheets made up of vertical floral panels and cut out the strip featuring lilies as I thought this would be perfect for a focal panel on my card. I coloured the reverse of my vellum with both light and dark shades of Stampin' Blends in each of the challenge colours and inset it between a split panel white card front. I stamped my sentiment from the 'Painted Glass' stamp set on the wider front panel and finished it on the inside with the words 'Easter Blessings' from the 'Itty Bitty Greetings' stamp set.

I like this card so much I made another card, this time a birthday card, with another of the strips from the same vellum panel and a combination of Lovely Lipstick, Call Me Clover and Soft Sea Foam Blends:


Here are the visual summaries of the key products used on today's projects for you to pin for easy reference:

Graceful Glass Easter Card:


Graceful Glass Birthday Card:

You can see all of my 'How To' summaries on my 'How To - Tips and Techniques' Pinterest board in case you've missed any. 

Enjoy your day and I'll be back tomorrow with another project. Until then, happy stampin'!


Stampin' Up! Supplies Used:

Table built using Product Table Builder by The Crafty Owl - Independent Stampin' Up! Demonstrator.

#StorageByStampinUp Is Here!

by Joanne James10. April 2019 11:00


I am catching up a little today and want to share here news of Stampin' Up!'s new range of storage solutions that was launched last week. Whether you have an entire room or a small corner in your home for stamping, your creative space should be tailored to you. The new product line, Storage by Stampin’ Up!, provides you with modular storage solutions that let you organise—and customise—your space your way!

Storage by Stampin’ Up! is designed to store and showcase your Stampin’ Pads, Stampin’ Ink Refills, Stampin’ Blends, Stampin’ Write Markers, Watercolor Pencils, and other accessories. Here are some other features and benefits of Storage by Stampin’ Up!:

  • Keeps products organised, tidy, visible, and trackable at all times.
  • Ensures that your Stampin’ Pads, Stampin’ Write Markers, and Stampin’ Blends are stored horizontally, as recommended.
  • Designed to be stylish, durable, compact, stackable, and modular.
  • Blends in naturally with most home decor with its white neutral colour.
  • Stacks vertically and can be arranged to fit practically any flat workspace.
  • Easily assembled and disassembled for rearrangement and/or cleaning.

 The storage range comprises the following elements:

One of the biggest advantages of the range is that because it is modular, you can work out what you need and collect it over time, adding to it as budget allows and your crafting collection grows. The ink pad holder is designed to fit the new-style ink pads, however the old style ink pads can be easily accommodated in the open storage cubes, which also fit half-size wood mount stamp cases - perfect for holding embellishments.

You can download a handy configuration chart worksheet here which is great for helping you determine which storage configuration works best for you.

Storage by Stampin' Up! is available from April 1st and will feature in the forthcoming 2019-20 Annual Catalogue. It is worth noting however, that because Storage by Stampin’ Up! is a brand-new product line, the inventory levels for the initial April 1st launch are based on research of similar products and their existing demand. If the inventory of Storage by Stampin’ Up! products is depleted, we will turn items off until their inventories have been replenished.

I will have some of the new storage on display at my 2019-20 Annual Catalogue Open House Launch Event on 5th June, so do get in touch for more details if you'd like to come along to see it up close.

Please find links below to each of the new storage items currently available in the online store below:

Table built using Product Table Builder by The Crafty Owl - Independent Stampin' Up! Demonstrator.


New Online Exclusives

There are new products available exclusively in the online store from 5 November - check them out here.

Latest Kits!

Stampin Cut and Emboss

The Layered Landscapes Kit and Nature's Paintings Kit are the latest kits in the online store - get yours here!

Shop Online

Access my online shop 24 x 7, 365 days of the year:

Current November hostess code:

9NKXDTTR

Shop Online

Mini Catalogue

BROWSE THE CATALOGUE

'Tis The Season - the new Stampin' Up! Mini Catalogue is here! For more details and to download your copy click here

Scrapbooking

Stampin' Up! has introduced a new range of 12x12" scrapbooking product and kit - the full range is now available to purchase online. To download a copy of the new digital Scrapbooking Catalogue click here.

2024-25 Annual Catalogue

BROWSE THE CATALOGUE

Click on the image to download your copy of the 2024-25 annual catalogue. For a full list of current SU! supplies, go to my online store. If you would like any help or advice, please drop me a line at joanne@thecraftyowl.co.uk or give me a call on 07773 421446 - I'd be happy to help.

Join My Team

It's always a great time to join Stampin’ Up! New team members can get £130 worth of products for only £99 + free business supplies + free shipping + all the fun being a part of Stampin’ Up! Stampin' Up! has something for everyone: join my growing team and benefit from my support to enjoy Stampin' Up! however you choose.

If you're interested, call me for a chat to understand how I can help you realise your goals. Alternatively, if you have already decided to sign up and you just can't wait, please click here for the link to the online form where you can sign up and order your starter kit right away! 

About Me

Hi I'm Joanne and live in Northampton and when I'm not looking after my husband and two beautiful children, am an avid crafter with a passion for all things Stampin' Up!

I must confess that I have never been a big rubber stamper - until I discovered Stampin' Up! that is. I love the fact that I can get such great results with co-ordinating stamps, inks, papers and punches - the possibilities are endless! Join me on my stamping journey as I share the things I love and be inspired to create amazing things yourself!

Follow Me

Monthly Newsletter

Box Builder

Click the button above to use Box Buster to create your custom box design using the Envelope Punch Board!

Kits Collection Now Available!

Stampin Cut and Emboss

The new Kits Collection from Stampin' Up! is now available!

Click here to see the current kits available and order yours online today.

I Design For


Stampin' Up Stuff

This is my personal blog and is not endorsed by Stampin’ Up! I hope you find it a plentiful source of ideas and personal inspiration but please don't copy my designs for contest submission or use for classes, publication or sale without express permission.