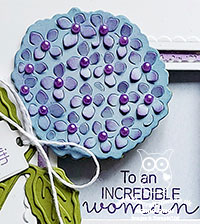
Today it's Sunday and time for this week's new challenge over at The Paper Players! It's my turn to host this week and I have a colour challenge for you to work with:
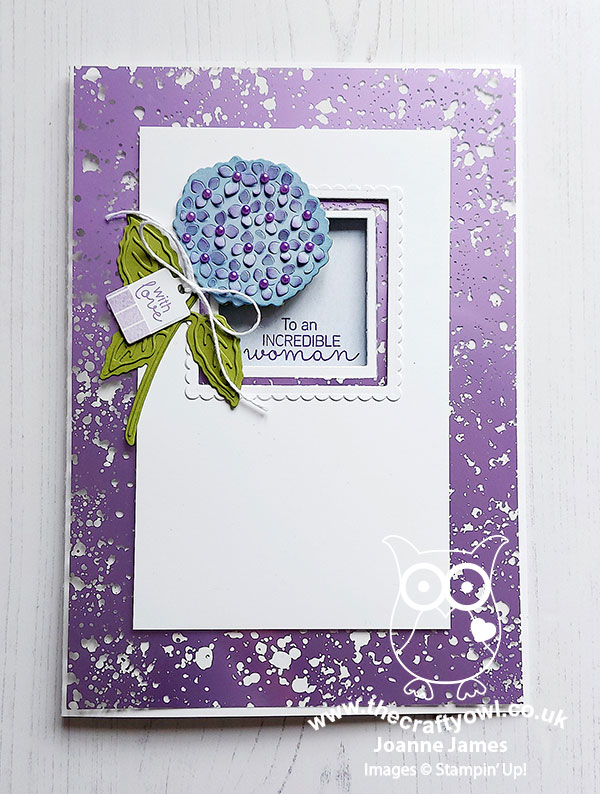
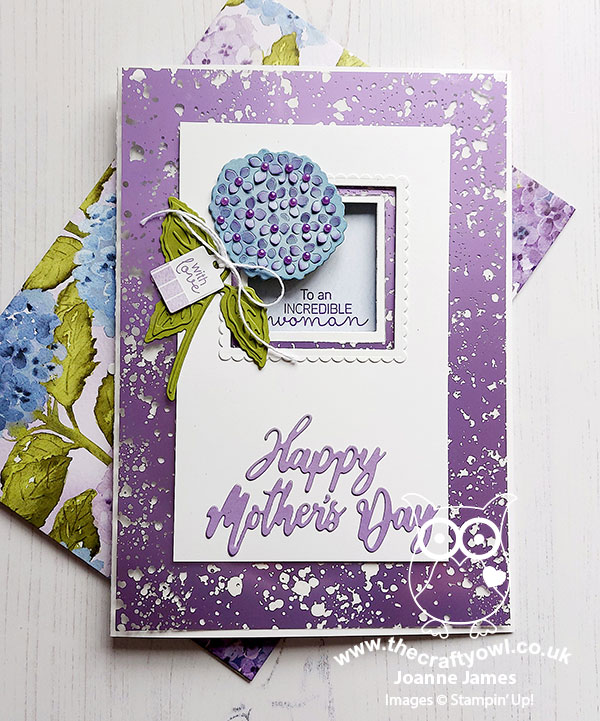
Today is Mothering Sunday or Mother's Day here in the UK and I chose my colour palette this week based on the products I wanted to use on the card that I was going to make for my Mum to celebrate this special day, specifically the Hydrangea Hill Mercury Glass Acetate which I was keen to incorporate into my card. I've lots of photos for you today and two versions of my card too, so get ready! Here's the first and original version of my card:
Here's the low-down on today's card:
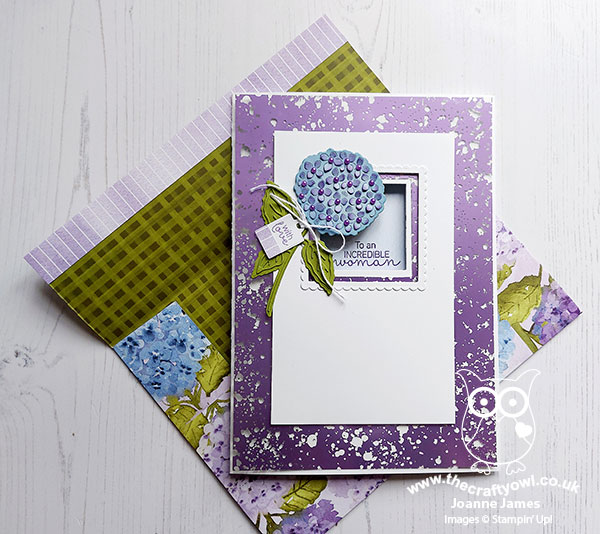
Hydrangea Hill - My Mum is not particularly precious when it comes to flowers or gifts on Mother's Day, but she does appreciate a special card, so her card was the perfect opportunity to showcase the Hydrangea Hill Mercury Glass Acetate in Highland Heather, alongside other elements of the Hydrangea Hill Suite. I love the idea of these coloured foil acetates, but often find them trickier to use in practice. I think they make great frames or backgrounds though, so that's where I started with today's card. Measuring 21cm x 14.9cm (a sheet of folded A4) my card is larger than usual. I created an open window for my stamped sentiment (more on that below) and layered my frame with a scallop-edged border and a beautiful diecut hydrangea. Whilst the card above is my original card, and could actually be used for a special birthday too, I knew my Mum would want to see the words 'Happy Mother's Day' front and centre on her version - ever happy to oblige, I added an additional diecut sentiment in Highland Heather using the Word Wishes Dies to the front of my card:
Layers, Layers - Despite its rather simple appearance, there are lots of layers to my card: the mercury glass acetate and framed sentiment window, along with the layered diecut elements to my flower, cut with the Hydrangea Dies. I also added a twine bow and tag to my floral stem using other elements in the set:
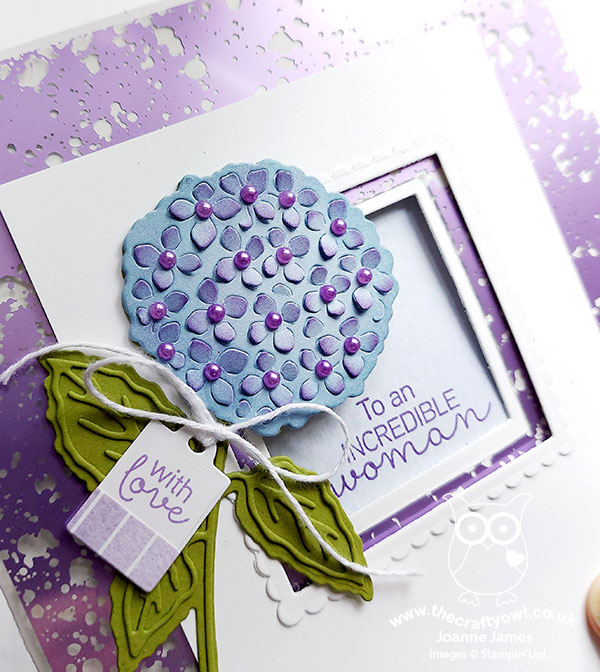
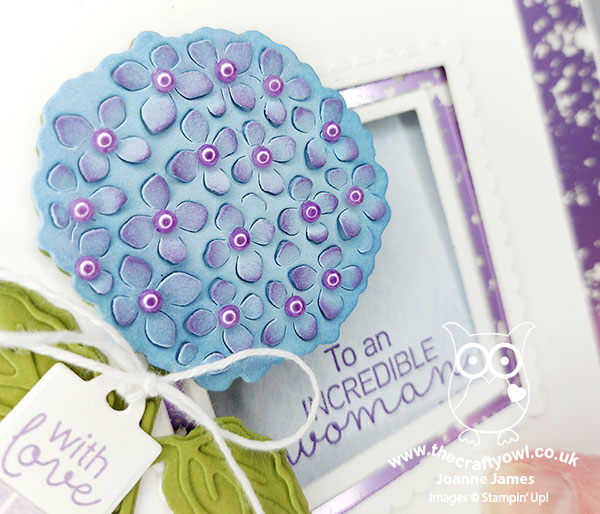
How beautiful is that hydrangea die? I cut it out of Balmy Blue and sponged the edges in the same colour to add depth, then lifted the petal elements and carefully sponged the tips of the petals with Highland Heather to create that two-tone look so often seen with this type of bloom. The suite has some beautiful coordinating pastel pearls, but they were too large for me to decorate the centre of my flowers. Instead, I used my dark Highland Heather Blends marker and coloured some small basic pearl jewels that were just the right size - aren't they so pretty?
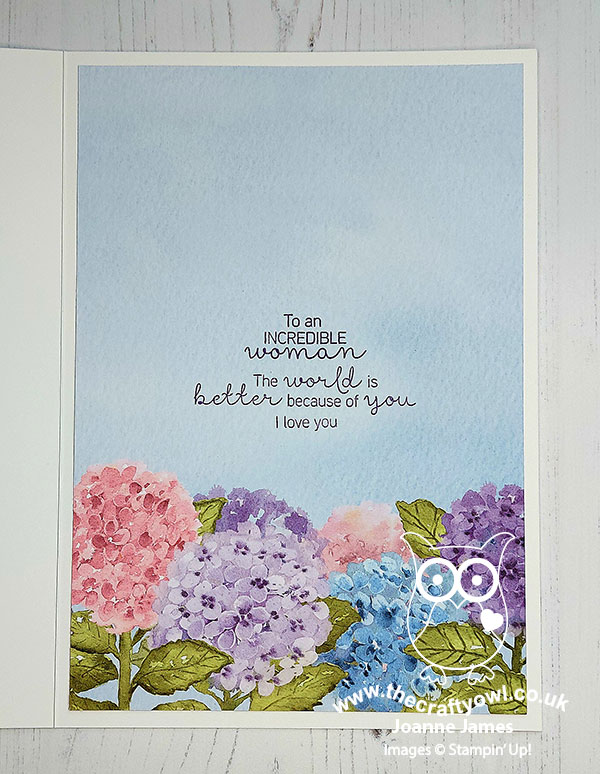
All About The Paper - I couldn't pass up the opportunity to use some of the beautiful Hydrangea Hill papers on my card today. The outside of my card only features the colours of my chosen palette, with a little of the Balmy Blue DSP visible through the window aperture, but the inside of my card also includes a little pink and some Gorgeous Grape on that hydrangea border paper; this paper is so perfect for additional hidden detail on the inside of the card, including my stamped message:
I also made a custom envelope from a whole sheet of 12" x 12" DSP, featuring the hydrangea flower heads and with a Highland Heather striped border on the flap:
This paper is simply too good not to use! I added a simple stitched scalloped rectangle to the front of the envelope to address it:
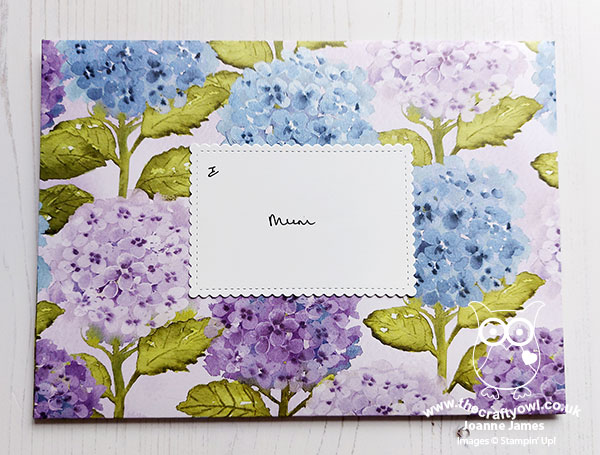
My card is going in the mail, so I packed it in a plain white envelope for mailing; I know my Mum will appreciate the extra pretty detail when she opens it though, so the double envelope is so worth it! I haven't seen my Mum in person for 15 months, due to ongoing restrictions in lockdowns and travel between Wales and England, however with the increasing rate of vaccination here in the UK, we shouldn't have too much longer to wait until we can all meet in safety once more.
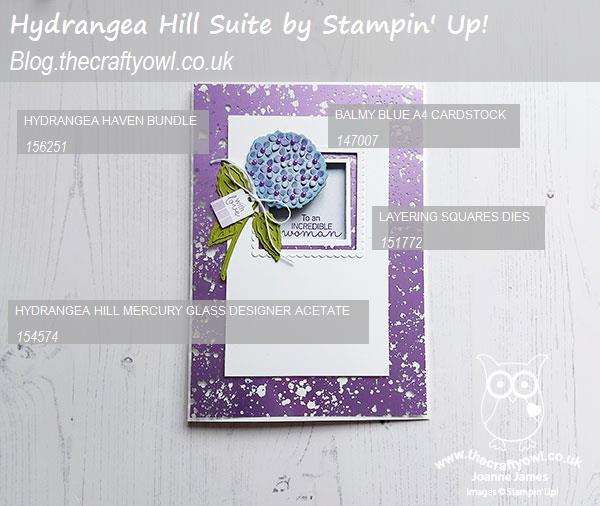
Here is the visual summary of the key products used on today's project for you to pin for easy reference:
You can see all of my Product and 'How To' summaries on my 'How To - Tips and Techniques' Pinterest board in case you've missed any.
Before you reach for your ink and papers, check out what our amazing team has created to inspire you this week:
The Paper Players Design Team
Here's a quick recap of our challenge rules:
1. Create a new paper project
2. Upload your creation to your blog with a link back to us and provide a direct link to the post featuring your challenge submission.
3. Please link your card to no more than four challenges, TOTAL.
4. Have FUN!
You can see all of my 'How To' summaries on my 'How To - Tips and Techniques' Pinterest board in case you've missed any.
I am looking forward to a special lunch cooked for me by my nearest and dearest, along with an afternoon bike ride if the rain holds. This is one of those days of the year that can mean many things to different people, so whether you are with your Mum or your offspring today, or whether you are missing your Mum because of Covid or other reasons, and for those who have perhaps lost a child or for whom motherhood is still to become a longed-for reality, I am thinking of you all and I hope you spend the day in a way that is meaningful to you.
I'll be back tomorrow with another project. Until then, happy stampin'!
Stampin' Up! Supplies Used: