Friendly Silhouettes Happy Day Card

by Joanne James3. May 2021 15:13

Happy Bank Holiday Monday everyone! As is typical it's raining here in the UK so it's a great day for crafting! Today I'm sharing a card that I made using this week's colours over at Color Throwdown for an ombre blended background for another crack at the challenge over at TGIF Challenges this week. I also used the sketch over at Inspired By:


Here's my card that also bids farewell to another retiring stamp set:


Here's the low-down on today's card:

I created an ombre background using all three colours and my blending brushes, then over-stamped this with the floral stem from the 'Friend Like You', adding the flowers to my Pear Pizzazz stems in Calypso Coral and Blushing Bride. I added a pair of black dragonflies in place of the circle on the sketch, although in hindsight I wish I'd masked off a circle to give it more prominence. I added a black diecut for an additional silhouette of meadow flowers over the top and finished with a sentiment from the same set. I adhered the diecut at the base only, allowing the diecut piece to float freely:


So today's card is a final reminder that this evening is the last time you will be able to order those products that are retiring from the annual catalogue as a new one goes live tomorrow. Many items have sold out, but there are still bargains to be had - check them out in the online store here, but you have to be quick!

Here is the visual summary of the key products used on today's project for you to pin for easy reference:


You can see all of my 'How To' summaries on my 'How To - Tips and Techniques' Pinterest board in case you've missed any. 

Enjoy your day; following a quick visit to the garden centre this morning in what felt like arctic winds, it has rained constantly all day. So I've put gardening on hold in favour of crafting! I'll be back tomorrow with another project for this week's new challenge over at CAS Colours & Sketches and of course the launch of the new Stampin' up! annual catalogue - I can't wait!  Until then, happy stampin'!


Stampin' Up! Supplies Used:

Table built using Product Table Builder by The Crafty Owl - Independent Stampin' Up! Demonstrator.

Heartfelt Wishes in Shades of Green

by Joanne James15. March 2021 14:00

Happy Monday everyone - another Monday, another week! This week includes St Patrick's Day, so there are naturally lots of challenges that feature either the colour green, the theme of luck, shamrocks and generally all things Irish around at the moment! So today I'm sharing a card inspired by a few of them:


I was inspired by the sketch and photo over at Inspired By this week, and the lovely ladies over at Just Add Ink are asked us to create with shades of green. At The Card Concept the theme is the 'Luck of the Irish'. Whilst I don't know anyone who celebrates St Patrick's Day card and would appreciate a card, it's always a good opportunity to create a good luck card or something in green - such a soothing colour. I decided to make a clean and simple card that has a play on the word 'luck' that is perfect to send to a friend - take a look:


Here's the low-down on today's card:

Shades of Green - I masked off my Basic White cardstock panel and used my chosen shades of green - Soft Sea Foam, Granny Apple Green, Call Me Clover and Shaded Spruce - with my blending brushes to create a trio of columns of blended ombre greens, deepening in colour towards my sentiment and lucky clover/shamrock at the base. There is something so calming about shades of green used in such a simple way I think - don't you agree? 

Heartfelt Wishes - The sentiment I used on my card today comes from the 'Heartfelt' stamp set and is the perfect play on the word 'luck' to show appreciation for someone's friendship and seemed to fit the theme perfectly, with a card that I could actually send to someone! 

Pierced Blooms Lucky Clover - I created my shamrock or lucky four-leaf clover from a five-petal floral die from the Pierced Blooms Dies. I simply snipped away part of one of the petals to leave me with 4 leaves and a stem:


I finished my clover with a gold faceted gem to add an extra detail to my focal embellishment (from my collection rather than the pot at the end of the rainbow I hasten to add!)


Here is the visual summary of the key products used on today's project for you to pin for easy reference:


You can see all of my 'How To' summaries on my 'How To - Tips and Techniques' Pinterest board in case you've missed any. 

Enjoy your day; I have just received a '911' from one of the James Juniors imploring me to bring a snack at school pickup - clearly lunch was lacking today and I think my growing 13 year old son has hollow legs at the moment! Whatever did we do before Whats App??! So off to sort before I head out on the school run! I'll be back tomorrow with my card for this week's new challenge over at CAS Colours & Sketches. Until then, happy stampin'!


Stampin' Up! Supplies Used:

Table built using Product Table Builder by The Crafty Owl - Independent Stampin' Up! Demonstrator.


Stampin' Up!'s Online Extravaganza Is Here For One Week Only!

by Joanne James20. November 2016 16:00

Stampin' Up!'s Online Extravaganza is here! Starting tonight at 11pm GMT for one week only, 21-28 November, you can save up to 40% on select products. To sweeten the deals, we will be having 24-hour sales on the first and last day of the promotion, featuring special products available for that day only. 

Select items (those marked with an asterisk), including those that will be on the future autumn/winter catalogue retiring list, are available only while supplies last.

The all-important details for the promotion are as follows:
• You must use the bundle item codes provided. Discounts will not be applied if individual item numbers are entered separately. 
• Some bundles are exclusive to Online Extravaganza and will not be available after the promotion ends. 
• There is no minimum purchase required in order to receive the discounted price. 
• Additional products from current catalogues may be purchased on the same order.

Here is the full list of deals this week:

Page 1

Page 2

Page 3

Page 4

You can download a PDF version of the deals list by clicking here.

Don't forget, the first of the 24 hour flash sales begins tonight at 11pm GMT and includes the following items with some great discounts available:


Some great deals there, with the enamel dots and gift bag punch board being two of my favourites - no excuses to not have your Christmas packaging sorted! 

Happy shopping everyone!


Clean and Simple Christmas Joy

by Joanne James20. November 2016 09:00

It's Sunday and time for a new challenge over at The Paper Players! It's the turn of my sweet friend Claire to host this week and she has a fun clean and simple challenge for you to work with:


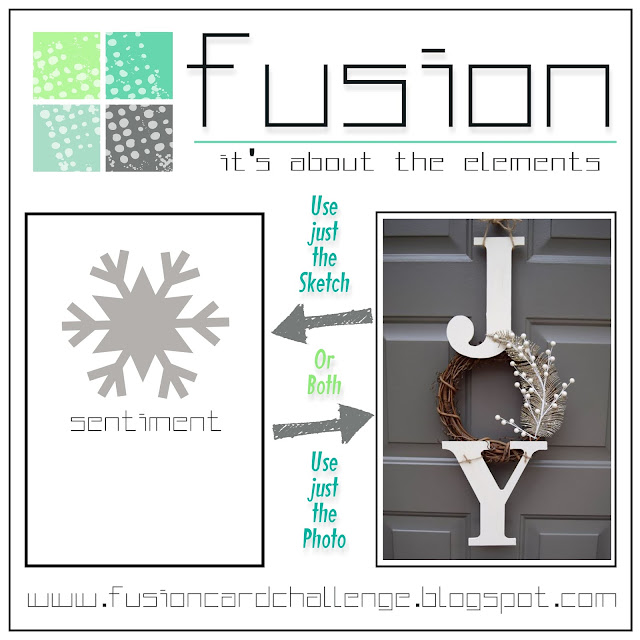
I was inspired by a few other challenges too for my cards today - yes, not one, not two but three cards to share with you! The challenge over at Fusion has a great inspiration photo (you can see it below as the card that I am entering for this challenge is further down the post) that led me to use the 'Joyful Nativity' Christmas set from the annual catalogue and with the Addicted to CAS challenge codeword is ombre and CAS Colours and Sketches calling for monochromatic blues, I dug out my Marina Mist, Dapper Denim and Night of Navy ink pads and set to work.

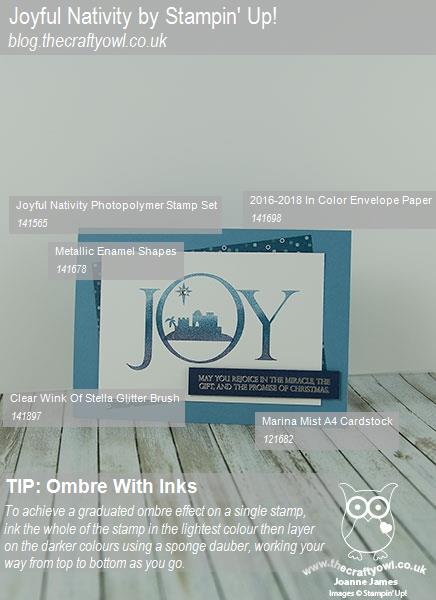
The genre of 'clean and simple' tends to be rather subjective and whilst my general style is definitely 'clean' it tends toward 'clean and layered' rather than 'clean and simple'. So today I decided to take the same basic idea and create both a clean and simple and a clean and layered card to illustrate the difference! So here's my first card, a simple one layer affair stamped on extra thick Whisper White cardstock:


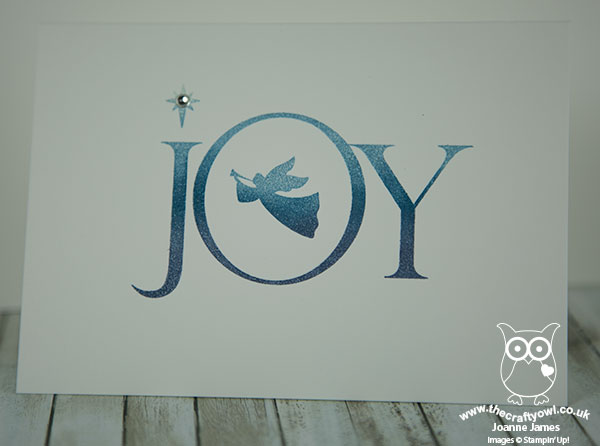
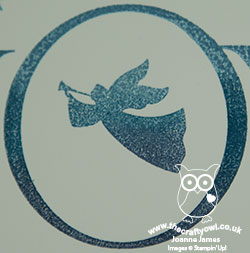
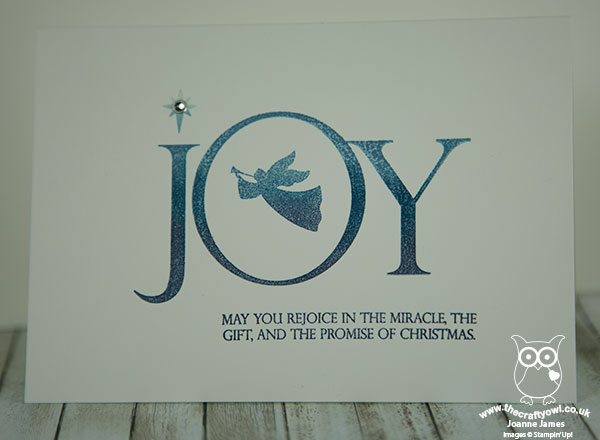
I stamped the angel in the centre of my 'o', brushed the stamped areas with my clear Wink of Stella brush and added a metallic shape to the star to finish my card. Super clean and simple! I also made a second version of this card, this time adding in the secondary sentiment, stamped in Night of Navy:


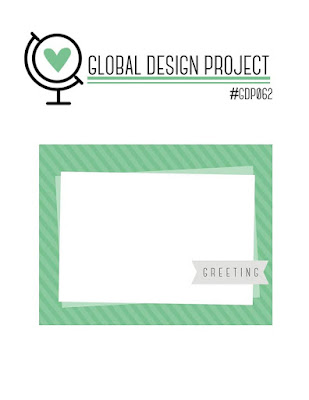
For my final card, I created a clean yet layered card, using this week's sketch over at the Global Design Project:


I used a cardbase of Marina Mist and switched out the angel for the Bethlehem skyline, added a piece of in-colour envelope paper for my background layer and heat embossed my sentiment in silver onto a strip of Night of Navy cardstock:


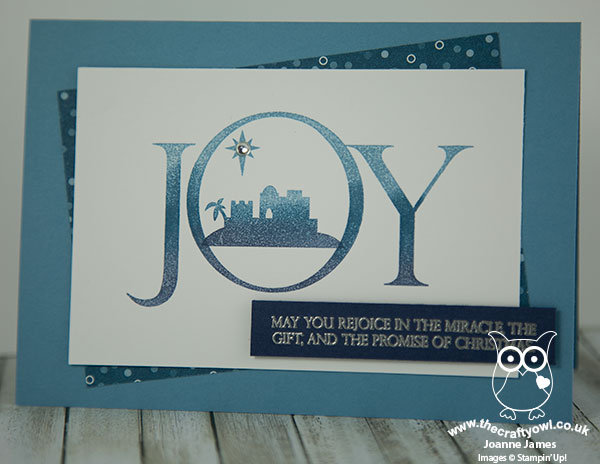
All three of the cards have a beautiful shimmer as a result of the careful brushing with my Clear Wink of Stella which adds a gorgeous subtle sparkle in real life. So which one do you prefer? Do leave me a comment below - I'd love to hear your thoughts!

Here is the visual summary of the key products used on today's project for you to pin for easy reference:


You can see all of my 'How To' summaries on my 'How To - Tips and Techniques' Pinterest board in case you've missed any. 

Before you reach for your ink and papers, check out what our amazing team has created to inspire you this week:

The Paper Players Design Team
 
 
Here's a quick recap of our challenge rules:
 
1.  Create a new paper project
2.  Upload your creation to your blog with a link back to us and provide a direct link to the post featuring your challenge submission.
3.  Please link your card to no more than four challenges, TOTAL.
4.  Have FUN! 


I look forward to seeing your clean and simple cards this week. We are off for our usual Sunday morning of sport assuming the hockey pitch hasn't frozen with the sub-zero temperatures we've been having for the last couple of days, followed by lunch, some baking for a school bake sale this week and then a birthday party to attend for the youngest of the James Juniors, so another full-on Sunday!

Enjoy the rest of your weekend as it will be over all too quickly; I'll be back tomorrow with another project and news of an exciting new promotion for next week only; until then, happy stampin'!


Stampin' Up! Supplies Used:

Table built using Product Table Builder by The Crafty Owl - Independent Stampin' Up! Demonstrator.

Pretty Pines Christmas Home Decor Frame

by Joanne James13. November 2016 09:00

It's Sunday and time for a new challenge over at The Paper Players! It's my turn to host this week and I have a colour challenge for you to work with:


I have another Pretty Pines project for you today, but a 3D project for a change as opposed to a card. I made this home decor frame to showcase these fabulous dies - and adorn my home during the festive season of course! Take a look:


Here's the low-down on today's project:

Pretty Pines - I love these dies and they are perfect to create festive embellishments for cards, gift packaging or a home decor project such as this one. I focused on the pine needles, berries and mistletoe pieces to make my wreath - not a pinecone in sight - as I wanted to stick to my red, green and white colour scheme. Using the Big Shot Precision Base Plate and the die brush also made light work of removing the pieces from the framelits. I added a bow in Real Red stitched edge ribbon as a finishing touch:

A Joyful Christmas and a Wonderful Year - I chose the Joyful Christmas sentiment from the 'Wonderful Year' stamp set as the focal point for my frame. This is the perfect sentiment for this frame, which I am intending to display in my hallway to welcome guests over the festive season.

Ombre, Ombre - I stamped my focal sentiment in Emerald Envy using the ombre stamping pad for added interest. I love the gradation of colour you get with these stamp pads and they really are so easy to use.

Here is the visual summary of the key products used on today's project for you to pin for easy reference:


You can see all of my 'How To' summaries on my 'How To - Tips and Techniques' Pinterest board in case you've missed any. 

Before you reach for your ink and papers, check out what our amazing team has created to inspire you this week:

The Paper Players Design Team
 
 
Here's a quick recap of our challenge rules:
 
1.  Create a new paper project
2.  Upload your creation to your blog with a link back to us and provide a direct link to the post featuring your challenge submission.
3.  Please link your card to no more than four challenges, TOTAL.
4.  Have FUN! 

I look forward to seeing what you create with my colour choices this week. We are doing something a little different in terms of sporting pursuits today: Ben is off for his usual session of basketball, however Rebecca is going to be at the swimming pool bright and early as she is participating in a sponsored swim in aid of For Zachary, a charity set up in memory of a little boy who lived for only 69 days before dying from a rare neonatal lung disease. The swimmers are aiming to cover a distance of 69km in total, one kilometre for each day of young Zachary's life - and Rebecca is aiming to swim just over 3km herself. That will be no mean feat! She is still collecting sponsorship, so if you're reading this and you would like to sponsor her, here is the event's JustGiving page - many thanks and I''l let you know how she gets on.

Enjoy the rest of your weekend as it will be over all too quickly; I'll be back tomorrow with another project; until then, happy stampin'!


Stampin' Up! Supplies Used:

Table built using Product Table Builder by The Crafty Owl - Independent Stampin' Up! Demonstrator.

Aqua Ombre Squares Card

by Joanne James16. April 2014 21:50

Good evening blog readers! I hope you are enjoying weather as glorious as we have had here in the UK the last few days - it feels long overdue and long may it continue. We went out on another bike ride today, just for fun - our bike ride earlier in the week involved our first attempt at geocaching, but since we didn't manage to find a single box the novelty of this wore off rather quickly! It's just so nice to be outdoors. Today's card is one of two entries that I have for this week's CAS(E) This Sketch challenge - I love this week's layout, so many possibilities:

For my first card, I decided to stay with the layout of squares, and created a pattern with an ombre effect:


I used one of the square stamps from the 'You're Lovely' stamp set which is great for a repeat pattern, and stamped each row in a slightly darker shade of aqua blue-green, to give the graduated ombre effect. I used a piece of Core-d'inations card in Coastal Cabana for my base, as this card has a lovely textured finish when unsanded. Because of this texture, it is quite difficult to get an evenly inked stamp on it, so I stamped my sentiment in Versamark and heat embossed with white embossing powder to provide a more even and vibrant finish.

Come back tomorrow to see my alternative and altogether more humorous take on this sketch; until then, happy stampin'!


Stampin' Up! Supplies Used:

Table built using Product Table Builder by The Crafty Owl - Independent Stampin' Up! Demonstrator.


Tags: , , , , , , , ,

Cards | Stamping

Mini Catalogue

BROWSE THE CATALOGUE

The mini catalogue is now live! Read and download your copy here.

Shop Online

Access my online shop 24 x 7, 365 days of the year:

Current April hostess code:

VDKNV7BH

Shop Online

Join My Team

It's always a great time to join Stampin’ Up! New team members can get £130 worth of products for only £99 + free business supplies + free shipping + all the fun being a part of Stampin’ Up! Stampin' Up! has something for everyone: join my growing team and benefit from my support to enjoy Stampin' Up! however you choose.

If you're interested, call me for a chat to understand how I can help you realise your goals. Alternatively, if you have already decided to sign up and you just can't wait, please click here for the link to the online form where you can sign up and order your starter kit right away! 

Latest Kit!

Stampin Cut and Emboss

The Rock Legend Kit has all you need to make 8 cards with coordinating envelopes. Along with the new Panda Friends Kit, both are available from January 4th for just £14 each - get yours here!

2023-24 Annual Catalogue

BROWSE THE CATALOGUE

Click on the catalogue for a full list of current SU! supplies - if you would like to order any of the items featured, please drop me a line at [email protected] or give me a call on 07773 421446 - I'd be happy to help.

New Online Exclusives

There are new products available exclusively in the online store from 5 March - check them out here.

About Me

Hi I'm Joanne and live in Northampton and when I'm not looking after my husband and two beautiful children, am an avid crafter with a passion for all things Stampin' Up!

I must confess that I have never been a big rubber stamper - until I discovered Stampin' Up! that is. I love the fact that I can get such great results with co-ordinating stamps, inks, papers and punches - the possibilities are endless! Join me on my stamping journey as I share the things I love and be inspired to create amazing things yourself!

Follow Me

Monthly Newsletter

Box Builder

Click the button above to use Box Buster to create your custom box design using the Envelope Punch Board!

Kits Collection Now Available!

Stampin Cut and Emboss

The new Kits Collection from Stampin' Up! is now available!

Click here to see the current kits available and order yours online today.

I Design For


Stampin' Up Stuff

This is my personal blog and is not endorsed by Stampin’ Up! I hope you find it a plentiful source of ideas and personal inspiration but please don't copy my designs for contest submission or use for classes, publication or sale without express permission.