by Joanne James17. September 2014 07:00This is the first of a number of blog posts today - so get comfy, lovely readers!
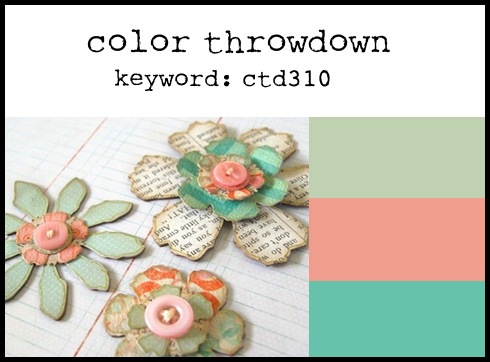
This is a bonus post for you today - following my card being chosen as the 'Featured Stamper' card at The Color Throwdown last week - you can see that card here - I was asked by the lovely Tammy Hershberger to be their Guest Star stamper this week for challenge number 310. So if you are reading my blog for the first time having popped over from CTD - welcome! Here is the colour palette and inspiration photo for this week's challenge:
I took the inspiration for my card from the colours and the photo and decided to go with something floral, featuring buttons and also some typeset designer series paper, albeit as the background for my flowers. Here is my card:
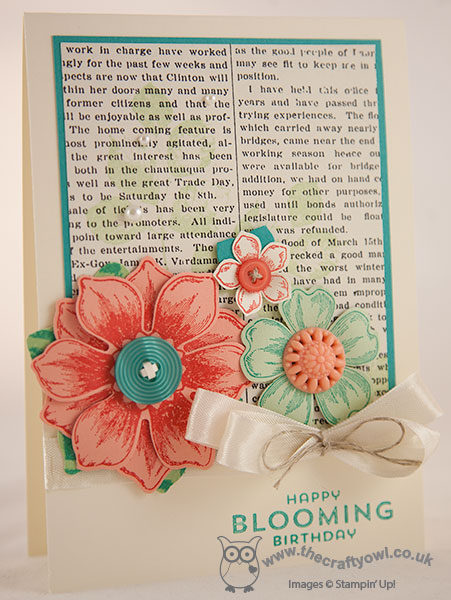
I used the leaves from the 'Kinda Eclectic' stamp set to stamp onto my typeset paper, then stamped a trio of flowers - Beautiful Bunch, Flower Shoppe and Petite Petals - in the challenge colours and created some nicely layered blooms with a variety of button centres to finish them off. I decided to finish off with something of a fussy bow using Vanilla seam binding ribbon tied with linen thread and the birthday sentiment from the Flower Patch stamp set. A bit of a departure from my usual style, and quite a product-heavy card too I'm afraid, but that's not always a bad thing!
Check out The Color Throwdown challenge page to see how the other designers have interpreted this week's challenge.
As for me, I have some work to do then a very important match to attend to this afternoon: my youngest is playing in his first rugby match at school so I'm off to cheer him along and remind him to wear his gumshield!!
Back tomorrow with another project; until then, happy stampin'!
Stampin' Up! Supplies Used:
dc6fd7c9-3a1f-4816-a88f-64139ba44a49|0|.0|96d5b379-7e1d-4dac-a6ba-1e50db561b04
Tags: Beautiful Bunch, Fun Flower Punch, Petite Petals Punch, Petite Petals, Pansy punch, Flower Shop, Typeset, Stampin' Up Supplies, Stampin' Up Card ideas, Stampin' Up Card, Stampin' Up, Shop online, Flower Patch
Cards | Stamping
by Joanne James17. September 2014 05:00It's Wednesday so that means a new collection of Wednesday Weekly Deals! This week's deals are included below - they will be available for one week only, before a new collection of deals is announced.
As always, if you want to take advantage of any of the deals on offer, you can support my business by placing your order online by clicking here or using the link to my store on the right hand side of my blog page where it says 'Shop Online' or with me in person. Don't forget to add the Hostess Code for September (you can find this under the 'Shop Online' section on the right).
Here's a summary of this week's one-week only Wednesday deals - click on each item to go to the online store to purchase:
Some great products on offer this week, including two of my staple store cupboard items for creating great packaging: Tag A Bag Gift Boxes and Kraft Gift Boxes. These boxes are both really sturdy and food-safe and can be used as the are or dressed up to make your gift into something special. With Christmas on the way, there's never been a better time to stock up.
Back with my creative posts later; but for now, happy shopping!
by Joanne James16. September 2014 08:45Apologies firstly for anyone who saw a partial post within the last 10 hours - my blog appears to have published one version of tomorrow's post whilst also saving a draft; not sure what's happened there, but as it wasn't complete anyway it won't have made much sense. Come back tomorrow to see the completed post, with card! I think the moral of the story is don't spend too much time late at night preparing blog posts.
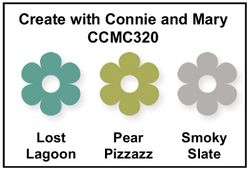
Anyway - today I'm sharing a Christmas card that I made for this week's challenge over at Create with Connie and Mary, where we have been challenged to use the following colour palette:
Whilst today's card took less than 10 minutes to make, I could have made six in the time it took me to decide upon my final design! I started out with my 'All Is Calm' Christmas Designer Series Paper as I knew it featured these colours, but then was overwhelmed by all of the possibilities and options and couldn't decide where to start. Here's my finished card:
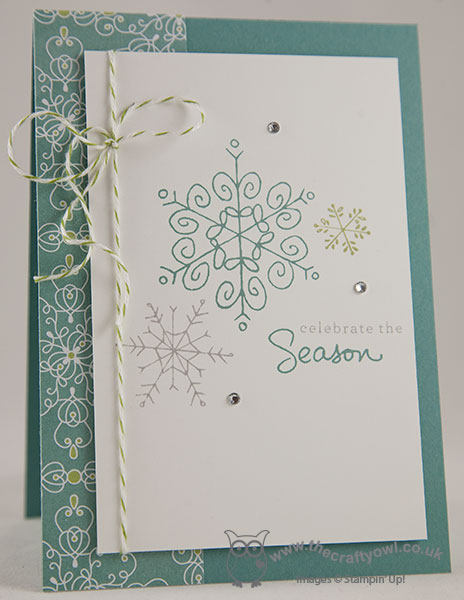
I eventually decided to use the paper you can see on the edge of this card; I had been unsure how I was going to use this pattern as I don't have any of the stamp sets that obviously co-ordinate with it and it's quite a bold pattern. Eventually I thought it would make the perfect background for my Endless Wishes stamp set - SOOO glad SU! put this in the catalogue this year for us Europeans to enjoy too! - so I bordered my Lost Lagoon base card with it, then adhered my stamped top panel using dimensionals after tying a loop of Old Olive baker's twine around it. I know this is a bit of a cheat to the colour palette, but there's so little of it in the twine it could be mistaken for Pear Pizzazz at a distance (or at least that's my story and I'm sticking to it!)
I love the simplicity of this card and think I will actually make a few more of these to add to my stock of Christmas cards. Back tomorrow with a double post for you: my usual Design Team card for Colour Me...! and a special post as the Guest Star Stamper over at The Color Throwdown as I was their Featured Stamper with this card last week! Oh, and not forgetting the new Wednesday Weekly Deals! Until then, happy stampin'!
Stampin' Up! Supplies Used:
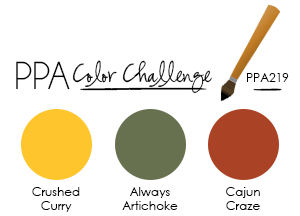
by Joanne James14. September 2014 22:00I know it's still Sunday, but as I went to schedule this post for tomorrow I realised that one of the challenges that it's for closes in the early hours of the morning, so I thought I'd post it early (let's hope this bodes well for the rest of my week!) When I saw the colours over at Pals Paper Arts this week, I thought they would be perfect for another Autumn-inspired card. I also used this week's Mojo Monday layout:
I rotated the sketch through 90 degrees for my card and used the 'thanks' stamp from 'Seasonally Scattered' for my card - take a look:
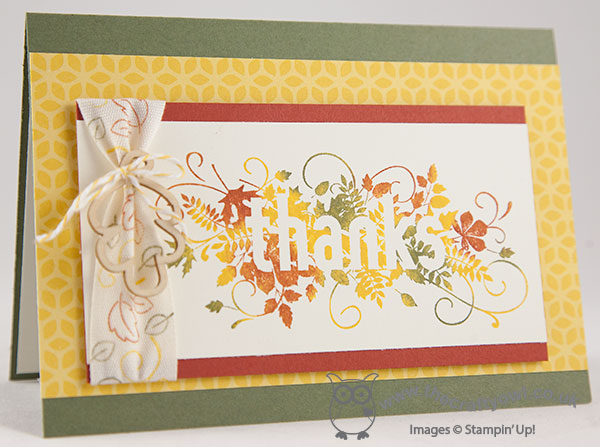
I used Always Artichoke for my base (twice in as many days - that's almost unheard of, yet it goes perfectly with the other colours here) and used a piece of Crushed Curry DSP from the Flowerpot range as my background mat layer. I stamped my main sentiment onto Very Vanilla, having inked the stamp with Crushed Curry and then selectively added Cajun Craze and Always Artichoke with my sponge daubers before stamping to give the graduated finish. I then matted this panel onto a piece of Cajun Craze. I knew I wanted to use one of my favourite Autumn Wooden Elements as the motif on my card, but when it came to choosing a ribbon, I became momentarily unstuck - I wanted something in either Cajun or Artichoke, but had neither. Then I had a light bulb moment - why not make my own ribbon, incorporating all three challenge colours? I used a piece of 7/8" cotton ribbon and stamped leaves and swirls from Gratitude For Days onto it directly - here's a close up of the finished ribbon:
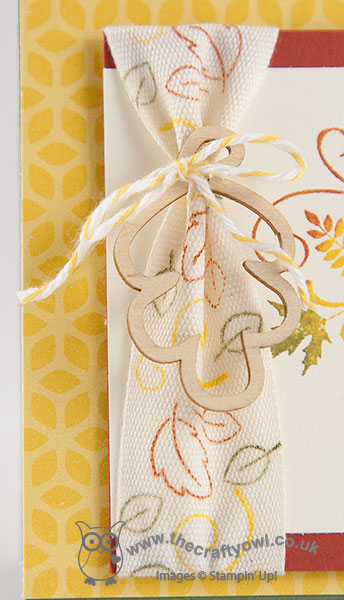
I then used some Crushed Curry baker's twine to attach my wooden leaf embellishment to it. To complete my card, this panel was then adhered to the card base using dimensionals.
I'm really pleased with how this card turned out: I love this stamp and of course my card gave me another reason to use one of my Autumn Wooden Elements! I love them and think they are the perfect embellishment for a fall card. There are also lots in a pot so they last for ages and are great value! I'm also linking this card up with the current challenge over at SUO Challenges where the designers are asking us to use embellishments this week. A big thank you too to the team over at SUO for choosing my monochromatic baby card as one of their 'Top 3 Picks' for the 'clean and simple' challenge (you can see that card here if you missed it).
That's all from me; back tomorrow with another project. until then, happy stampin'!
Stampin' Up! Supplies Used:
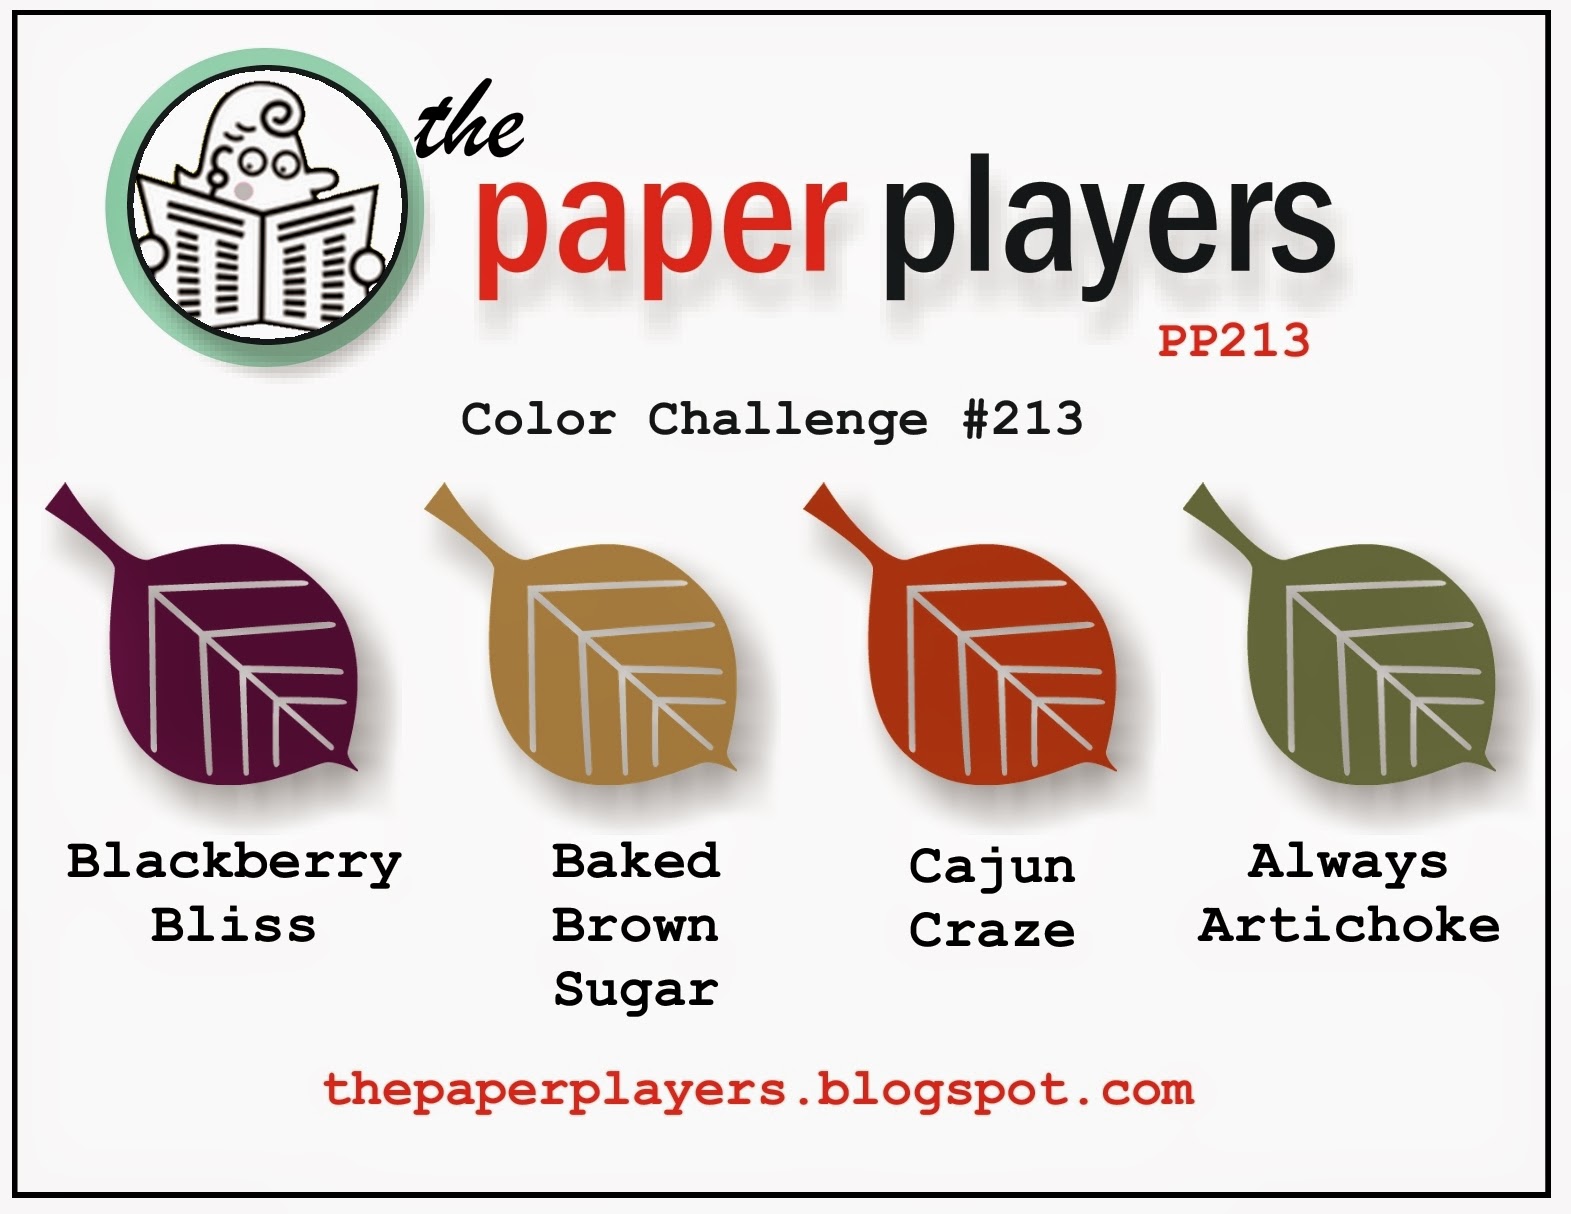
by Joanne James14. September 2014 08:00Today I'm sharing my Design Team card for The Paper Players, where this week Anne Marie has chosen this beautiful Autumnal colour palette for us to work with:
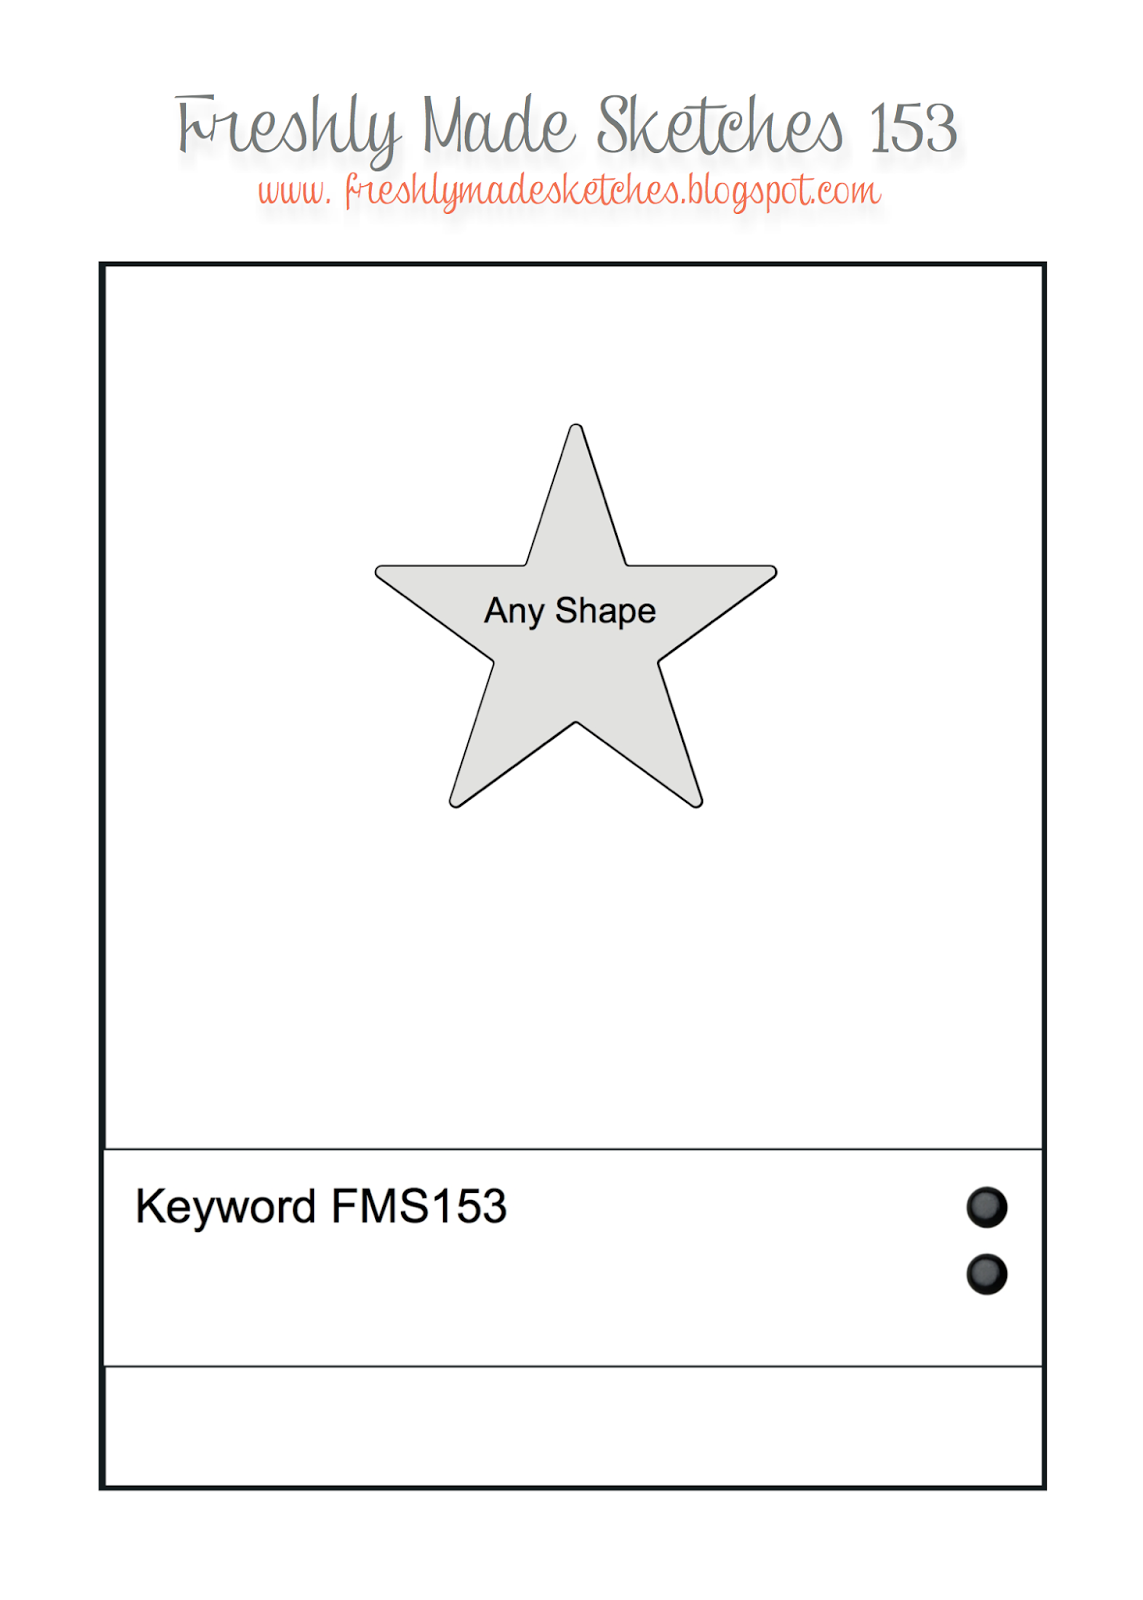
I also used the sketch over at Freshly Made Sketches this week for my layout. As soon as I saw this week's colours, I knew it was time to make an Autumn wreath card using my 'Wondrous Wreath' stamp set, as I've been wanting to do one of these for ages. Here's my card:
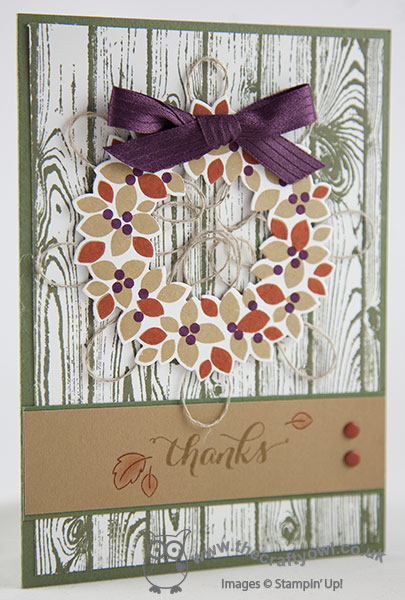
I used Baked Brown Sugar and Cajun Craze for the leaves on my wreath and stamped the berries in Blackberry Bliss. I cut it out using my Big Shot and the co-ordinating framelits and looped some linen thread behind it before adhering it with dimensionals to my Hardwood background, stamped in Always Artichoke (this panel reminds my of a mossy whitewashed shed!). I finished my wreath with a bow in the gorgeous Blackberry Bliss satin ribbon and a sentiment panel stamped with a simple 'thanks' and decorated with a few leaves from my 'Gratitude For Days' stamp set and a couple of candy dots. I love the rustic feel of this card - so fitting for this time of year.
Do pop by the challenge blog and see how the other Paper Players designers have used this week's colour combination - there are some fabulous cards from this talented bunch of designers.
I'm still playing catch up so am looking forward to a reasonably restful day today before the onslaught of another new and action-packed week. Back tomorrow with another project; until then, happy stampin'!
Stampin' Up! Supplies Used:
9fe17a29-10ff-4bb2-8de0-89b884066f38|1|5.0|96d5b379-7e1d-4dac-a6ba-1e50db561b04
Tags: Wondrous Wreath, Hardwood, Big Shot, Magnetic Platform, Another Thank You, Candy Dots, Shop online, Stampin' Up, Stampin' Up Card, Stampin' Up Card ideas, Stampin' Up Supplies, Gratitude For Days
Cards | Stamping
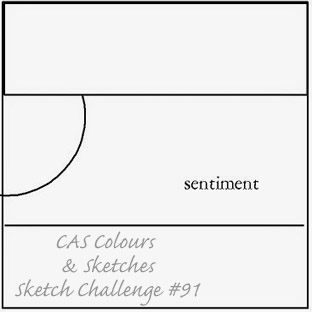
by Joanne James13. September 2014 20:40Back to my blog today after a couple of days absence; I've had a lot on these past few days and it's taken me until today to get back with it! At least now it's the weekend and today has seemed altogether more peaceful. I managed to make a card today with this week's challenge over at Merry Monday in mind; I also used the sketch over at CAS Colours and Sketches for my layout:
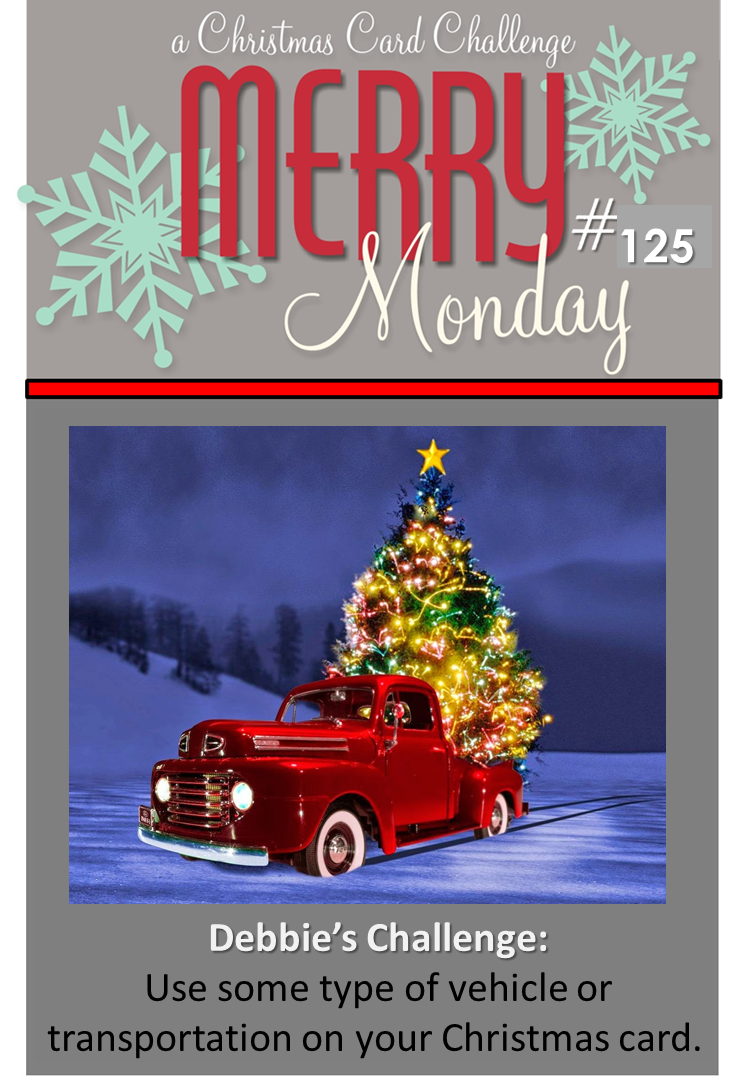
I was so inspired by the gallery cards over at Merry Monday this week - love all those cars and trucks transporting Christmas trees - that I wanted to have a go. Only problem is - I don't have a single car stamp. So I decided to think laterally and decided to use the santa sleigh and reindeer stamp from the 'Holiday Home' set - here is my card:
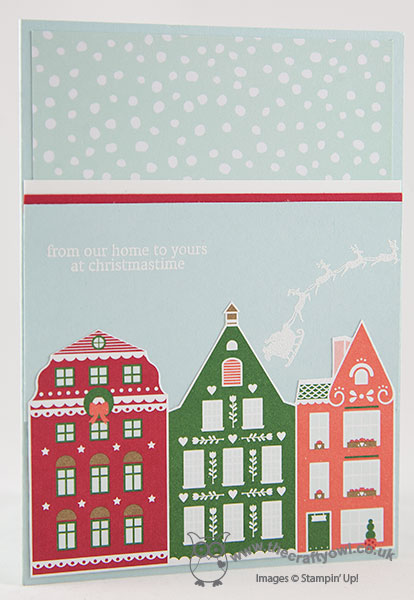
I actually turned the sketch upside down, so that I could use the reindeer and sleigh as the arched element of the design - the 'Holiday Home' stamp set is photopolymer so it's really easy to curve the stamp to look as if it was flying across the roof of the last house. I stamped the sleigh and sentiment in Versamark and heat embossed in Whisper White so that it would really stand out against the Soft Sky central panel. I edged the top of this with two thin stripes of Real Red and Whisper White respectively to add definition then used a piece of the snow pattern from the All is Calm DSP for the top section. For the bottom section, I fussy cut a row of houses from the Nordic Noel DSP - I love the bright colours in this paper and the little houses have such pretty designs.
I hope you like today's card; back tomorrow with my Design Team card for The Paper Players.
Until then, happy stampin'!
Stampin' Up! Supplies Used:
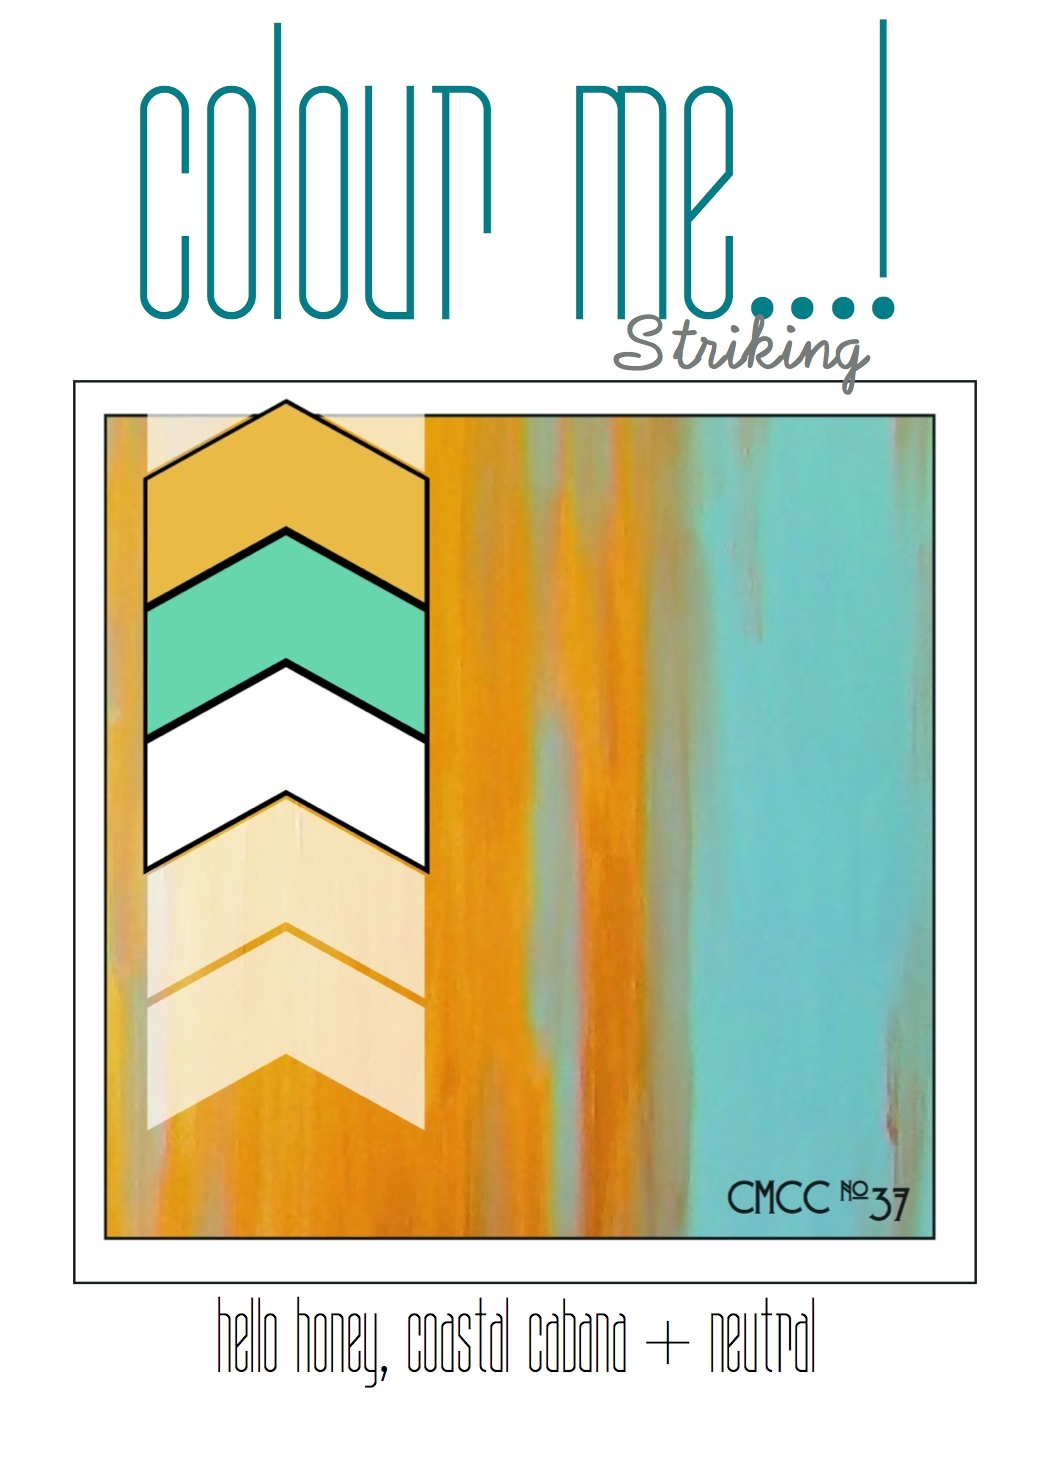
by Joanne James10. September 2014 10:02Here is today's card for this week's challenge over at Colour Me...! where we have a striking colour palette to work with:
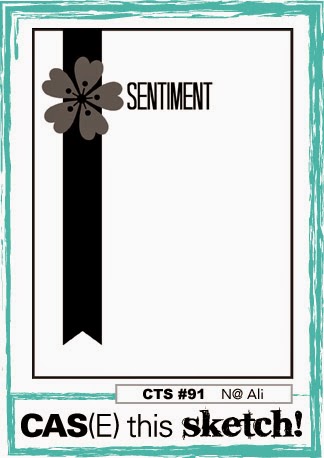
I used this week's layout at CAS(E) This Sketch again for today's card, although interpreted it quite differently to the card I made using this sketch earlier in the week (you can see that card here). I played about with this week's colours for a bit before deciding on the final version of my card - I had lots more layers and DSP galore, but eventually decided that a less fussy layout was in order. Here is my card:
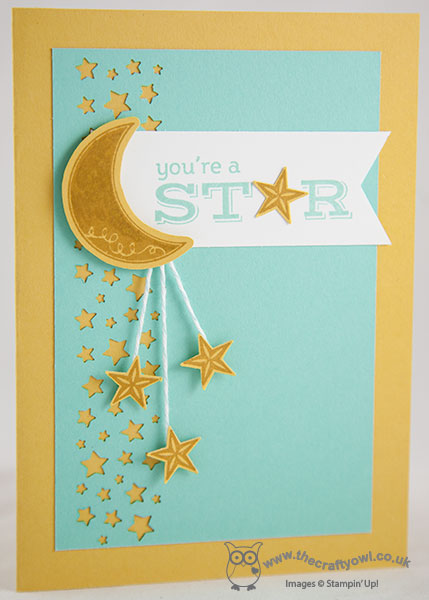
I used Hello Honey for my card base, and matted a piece of Coastal Cabana that I had first punched along the edge with the Confetti Star punch. I can't stop using this punch, the floor of my office is littered with tiny punched stars! I stamped the greeting from Pictogram Punches in Coastal Cabana ink onto a banner of Whisper White and flagged the end with my hexagon punch - so useful for perfectly even banner ends! I then stamped the moon and three stars in Hello Honey onto Hello Honey cardstock and fussy cut the moon and punched out the stars with the co-ordinating punch - easy peasy! I attached the falling stars to the moon using some vintage Pool Party baker's twine (a bit of a cheat, but it added a little more colour than Whisper White twine and against the Coastal Cabana it looks the same colour!) You could achieve the same look by using one of the Coastal Cabana Blendabilities markers to colour some white baker's twine. I attached the shapes to my card using dimensionals for lift, then stamped and punched another yellow star and attached it to the sentiment to tie this in to the rest of my card.
This card is heading for a member of my team who recently achieved a promotion - a fun congratulations card! Why not visit the other Colour Me...! designers and check out their takes on this week's colour combination:
We look forward to seeing your striking creations.
Back tomorrow with another project; until then, happy stampin'!
Stampin' Up! Supplies Used:
by Joanne James10. September 2014 09:35It's Wednesday so that means a new collection of Wednesday Weekly Deals! This week's deals are included below - they will be available for one week only, before a new collection of deals is announced.
As always, if you want to take advantage of any of the deals on offer, you can support my business by placing your order online by clicking here or using the link to my store on the right hand side of my blog page where it says 'Shop Online' or with me in person. Don't forget to add the Hostess Code for September (you can find this under the 'Shop Online' section on the right).
Here's a summary of this week's one-week only Wednesday deals - click on each item to go to the online store to purchase:
This weeks deals:
More great offers this week: the Modern Mosaic TIEF and Mosaic Punch are both great prices and just over £16 if you purchase both. At £8.63 the Banner Punch is a bargain; what's more if you combine it with one of the co-ordinating stamp sets from the annual catalogue, such as Banner Banter (134060 clear, £12.95) this would make a great gift for a crafty friend for just over £20 - a good opportunity to get started with some Christmas shopping perhaps! Plus framelits, ribbon, cardstock and MDS - so much to choose from!
Back shortly with today's creative project; until then, happy shopping!
by Joanne James9. September 2014 12:00Today my blog posts are a little like buses: nothing for ages then three come at once! Well, maybe not for ages, but this post was actually yesterday's scheduled post (apologies to those of you who were waiting for a post only to find it never arrived!) but it didn't publish as there were some server problems at my blog hosting site. All sorted today though, so here is Tuesday's post - soon to be followed by the Wednesday Weekly Deals and Wednesday's actual creative post - this week's Colour Me..! card!
Today I'm sharing another Halloween card, featuring lots of goodies from the current seasonal catalogue. I'm also using this week's colour palette over at CAS Colours and Sketches:
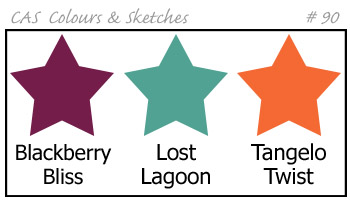
I haven't played along with these ladies for a little while and this week's colours were just perfect for my spooky Halloween card:
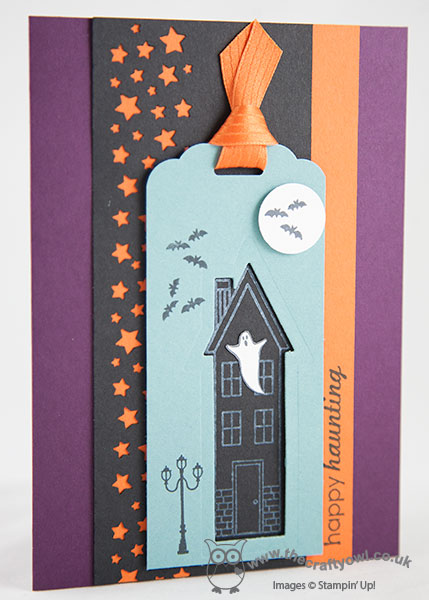
I used a Blackberry Bliss base for my card, to which I adhered a piece of Tangelo Twist, partially overlaid with a section of Basic Black cardstock, which I punched down one side with the Confetti Stars punch to allow the orange to peek through and then alongside this I stamped a house from the 'Holiday Home' photopolymer stamp set in Whisper White Kraft ink. I used the co-ordinating framelit to cut out the same shaped house out of a Lost Lagoon tag, made using the Scalloped Tag Topper Punch, and after decorating, adhered this to my card using dimensionals so that the house could be seen on the layer beneath. I punched a small moon using my 3/4" circle punch and decorated this and my tag with the bat and lamp images from the Holiday Home set. I also stamped a ghost from the same set onto Whisper White, fussy cut him and adhered him so that it looks as if he is floating out of the window of my haunted house.
The Holiday Home set is one of my favourites in the seasonal catalogue - it is so versatile, with options from new home to Christmas, Halloween and tons in between and it comes with lots of little stamps to enable you to make your cards unique, along with matching framelits to make for easiest ever cutting out. What's more, if you buy the bundle you save 15% so all in all lots of great reasons to put this in your Top 5! To finish, I added my sentiment from the 'Ghoulish Greetings' stamp set - perfect for my spooky house - and a piece of Tangelo Twist satin ribbon to my tag.
A fun Halloween-inspired card for this time of year; I think I might use mine as an RSVP to an invitation I received to a Halloween party this year. I often have fun with my kiddies at home at this time of year, but must confess to being quite excited at the prospect of a family Halloween party, with obligatory fancy dress (pictures to follow nearer the time!!)
That's all from me today; back tomorrow with this week's Wednesday Weekly Deals and my Design team card for Colour Me...! Until then, happy stampin'!
Stampin' Up! Supplies Used:
aa93e58b-0a6c-429e-88e8-d3beab734345|0|.0|96d5b379-7e1d-4dac-a6ba-1e50db561b04
Tags: Ghoulish Greetings, Halloween, Confetti Stars Punch, Scalloped Tag Topper Punch, Holiday Home, Homemade Holiday Framelits, Stampin' Up, Stampin' Up Card, Stampin' Up Card ideas, Stampin' Up Supplies, Shop online
Cards | Stamping
by Joanne James8. September 2014 22:22It's the start of the week and I've had such a busy - and productive! - day; I love days like that! I'm late blogging though, so a quick post from me with a card I made today using this week's sketch over at CAS(E) This Sketch:
I've been making Halloween card samples for a party that I'm running this week, where the hostess is mad about all things Halloween! This sketch allowed me to make a really quick and simple card using one of the cute monsters from 'Freaky Friends' and probably the only piece of designer series paper in the Motley Monsters DSP pack that I really wasn't sure about. Here's my card:
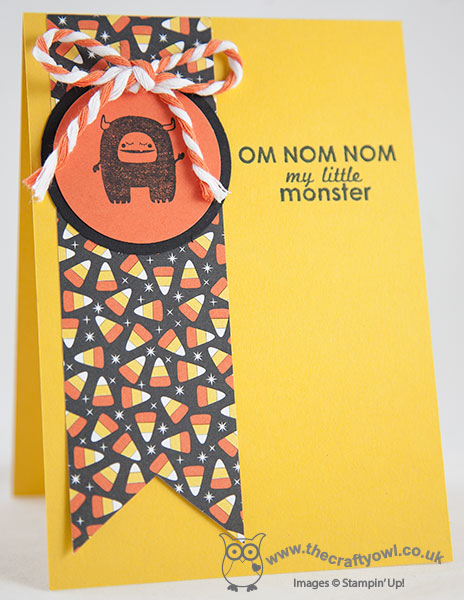
So my American friends tell me the little triangles on this paper are known as 'candy corn', a popular sweet treat at Halloween. We don't have it here in the UK and wasn't sure how to use it on my card, when it came to me - I could pair it with a stamp that I'm never quite sure how to use either - the 'Om Nom Nom' stamp in the 'Ghoulish Greetings' set and one of the cute little monsters from 'Freaky Friends'. So using the DSP as my starting point, I cut a base of co-ordinating Crushed Curry cardstock and added a pennant banner of the DSP. I stamped my monster in Memento Black onto Tangerine Tango cardstock and punched it out with a 1 3/4" circle punch and mounted this on a 2" circle punched out of Basic Black. I added a decorative twine bow using the extra thick twine in the seasonal catalogue (it comes in Old Olive too) and lastly stamped my sentiment, a combination of two stamps from the 'Ghoulish Greetings' set. I was going to go with the 'Om Nom Nom' on its own - I figured this is what the monster would be saying if he was eating all the candy corn, right? - but then I added 'my little monster' as I think I will use it as a funny card for one of the James juniors - either the one who is often my little monster, or the one who never stops eating - I'll leave you to work out which is which!
Back tomorrow with another Halloween card; until then, happy stampin'!
Stampin' Up! Supplies Used: